How to Edit iPhone Videos on Windows 10 with 2 Free Methods
- Things You Need to Know:
- There are many users who want to edit iPhone videos on Windows using Windows Movie Maker, but it's no longer available for download since its discontinuation in January 2017. The Movie Maker provided by some websites nowadays may not be trustworthy, so be cautious not to download questionable freeware. Instead, learn how to edit your iPhone videos on Windows 10 with the free methods introduced in this article.
Editing iPhone videos on Windows involves two main procedures. First, you need to transfer the video from your iPhone to your Windows computer using a USB cable, a cloud service like iCloud, or a third-party app.
Part 1: How to transfer videos from iPhone to Windows
To export any video from your iPhone to PC, you can use the freeware Qiling MobiMover Free, which offers iOS data transfer, file management, and video download capabilities. With MobiMover installed on your PC, you can easily export your iPhone videos to the computer in simple steps.
Step 1. To get started, connect your iPhone to your PC and click "Trust" in the pop-up on your iPhone to allow the computer to access your device. Next, launch Qiling MobiMover and navigate to the "Content Management" section, followed by "Videos", and then select "Movies/TV/Music Video".
Step 2. When transferring files from an iDevice to a computer, the files are initially stored on the desktop. However, users can change the default location by going to "More" > "Setting" and selecting a custom path.
Step 3. Select the videos you want to copy, choose "Transfer to PC", and the selected videos will be instantly transferred. Once finished, check the items in the selected folder.
There are many other things MobiMover can do for you. For example:
- To transfer contacts from one iPhone to another, go to Settings > [your name] > iCloud > iCloud Backup on your old iPhone. Make sure iCloud Backup is turned on and that your old iPhone has backed up to iCloud recently.
- Put music to iPhone from the computer without using iTunes
- Save iPhone text messages to computer for free
- Download videos from websites like YouTube, Vimeo, Facebook, Twitter, and more, to your computer or iPhone/iPad using URL.
MobiMover is a must-have tool for iPhone users that they can't live without. It's definitely worth giving it a try.
Part 2: How to edit iPhone videos on Windows in 2 ways
After transferring your iPhone videos to Windows, you can edit them on PC using one of two methods. You can choose the method that suits your needs, and get started with editing your iPhone videos on your computer.
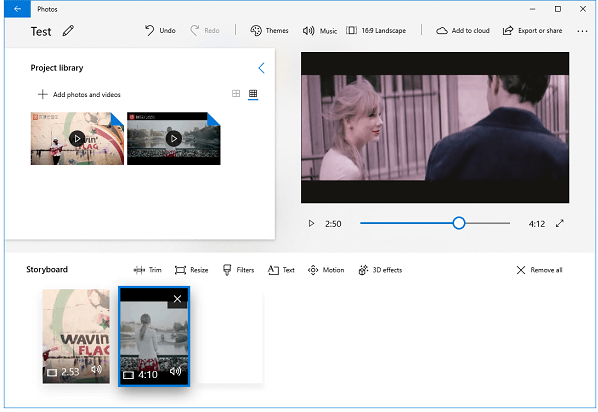
Method 1: Edit iPhone video on PC with Photos App
Note: Windows Movie Maker, a previous video editing software on Windows, has been discontinued. However, there is an alternative available, which is Photos, a video editing software that can be used to create and edit videos.
To edit iPhone videos on Windows 10, use the Photos app to trim, resize, or add filters to your video. You can also use a free software to transfer photos from iPhone to PC and make a video with these pictures via Photos.
Step 1: Open Photos App on your PC.
Step 2: To create a custom video with music, click on the "Create" button, then select "Custom video with music" and choose "Folders" from the dropdown menu. From there, click on "Add a folder" to start the process.
Step 3: Select the folder from Part 1 where you saved the exported iPhone videos, then click "Add this folder to Pictures".
Step 4: Select the folder you just added, choose the video(s) you want to edit and tap on "Create".
Step 5: Then you need to enter the name of your video.
Step 6: To start editing your video, simply drag the desired video into the storyboard, then you can trim, resize, add filters, texts, or other effects to the video as you like.
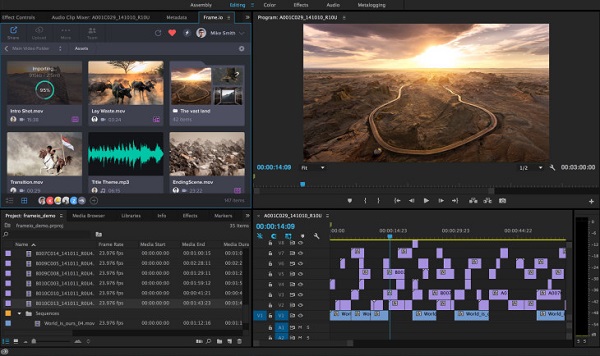
Method 2: Edit iPhone video on Windows with Adobe Premiere
However, if you want to do more complex operations to your iPhone videos, you will need a more professional video editing app like Adobe Premiere, which allows you to do almost everything you want with your iPhone videos. Adobe provides a free trial of the full version of Premiere Pro, enabling you to edit your iPhone videos on Windows for free. You can learn how to use Adobe Premiere by following the official guide at https://helpx.adobe.com/premiere-pro/how-to/edit-videos.html.
- The tools and the workspace panels
- How to import videos and create a new project
- How to trim or rearrange video clips
- How to add titles and graphics and more
Related Articles
- How to Fix iPhone Calendar Not Syncing with Google/Gmail/Outlook
- Touch ID Not Working in iOS 11 iPhone and iPad? Fixed Here!
- Download Synology Data Replicator Alternative for Windows 10/8/7
In this article, you will get how to free download Synology Data Replicator alternative and create a backup with Synology NAS. - Free and Easy DriveImage XML Alternative - Qiling Disk Master
This article introduces you to the best free and easy-to-use DriveImage XML alternative and how to schedule disk backup automatically in Windows 7, 8, 10, and 11.