How to Transfer Videos from iPhone to MacBook Air/Pro
Quick Navigation:
- Method 1. How to Transfer Videos from iPhone to Macbook Air/Pro with Photos
- Method 2. How to Send Videos from iPhone to Mac Using Image Capture
- Method 3. How to Import Videos from iPhone to MacBook Air/Pro via iPhone Transfer Software
- Method 4. How to Import Videos from iPhone to MacBook Air/Pro Using AirDrop
- The Bottom Line
Applies to: MacBook Air, MacBook Pro, iMac, and iMac Pro
Importing photos and videos from your iPhone to your Mac is a crucial task, especially when you want to free up space on your iPhone or create a backup of your cherished memories. This process allows you to transfer your digital content to a more spacious device, giving you more room to capture new moments and experiences.
Transferring videos from your iPhone to your Mac can be done in four easy ways. If you're looking for a hassle-free experience, you can use the Photos app on your Mac to import videos from your iPhone, or use the Image Capture app to transfer videos from your iPhone to your Mac.
Method 1. How to Transfer Videos from iPhone to Macbook Air/Pro with Photos
The built-in Photos app on Mac allows you to manage and import photos and videos, and enables transferring photos from an iPhone to a Mac using a USB cable.
To import videos from iPhone to Mac using Photos:
Step 1. Connect your iPhone to your MacBook.
Step 2. Unlock your iOS device and click "Trust" to trust the computer.
Step 3. To access your iPhone's photos, launch the Photos app on your device and select your iPhone from the left panel. This will allow you to view the photos and videos stored on your iPhone directly from your computer.
Step 4. Wait for Photos to load all the new items from your iPhone.
Step 5. You can choose to import only the selected photos and videos, or you can import all new photos, including videos.
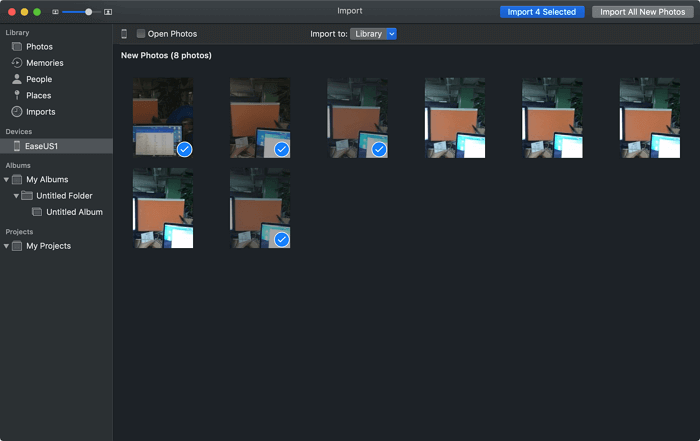
Photos only imports photos and videos from the iPhone camera roll, saving them in the Photo Library folder on the Mac.
Method 2. How to Send Videos from iPhone to Mac Using Image Capture
Image Capture on Mac allows you to transfer photos and videos from a camera or device with a camera, such as an iPhone, iPad, or iPod Touch, to your Mac. To do this, simply connect your device to your Mac using a USB cable.
To transfer videos from your iPhone to your MacBook Air/Pro using Image Capture, connect your iPhone to your MacBook using a USB cable. Open Image Capture on your MacBook, then select your iPhone from the device list.
Step 1. Connect your iOS device to Mac via a USB cable.
Step 2. Make sure your iPhone is unlocked and launch "Image Capture".
Step 3. To use the program, simply wait for it to load the items on your iPhone. This is the initial step to get started with the program.
Step 4. Select the videos you want to share and click "Import", or click "Import All" directly. To import all videos, click the "Import All" button.
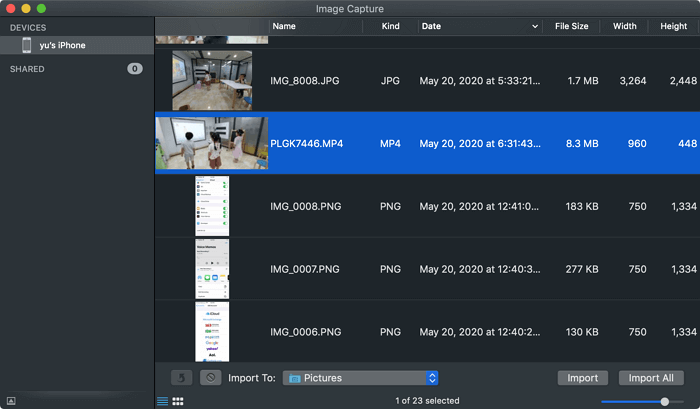
You can change the storage path of the videos by setting the option "Import To".
Method 3. How to Import Videos from iPhone to MacBook Air/Pro via iPhone Transfer Software
Transferring videos from your iPhone to a computer can be done through Photos and Image Capture, but only if they are from the camera roll. If you want to transfer videos like movies, TV shows, or music videos, you'll need a tool like Qiling MobiMover, a free iPhone data transfer software.
With Qiling MobiMover installed on your Mac, you can easily:
- Transfer files between iPhone and Mac
- Transfer data from one iPhone/iPad/iPod to another
- Access and manage iDevice content from computer
Qiling MobiMover has an extra video download feature that allows you to download YouTube videos to your Mac or iPhone/iPad.
To transfer videos from iPhone to Macbook Air/Pro:
Step 1. Connect your iPhone to your Mac, tap "Trust" on your iPhone screen, and then run Qiling MobiMover for Mac on your computer. From there, select "Phone to Mac" and proceed with the next step.
Step 2. To transfer videos, select "Videos" from the available options and click on the default path to choose a custom storage location if needed. Then, click "Transfer" to proceed.
Step 3. Once the transfer process is complete, you can access the videos on your computer.
Method 4. How to Import Videos from iPhone to MacBook Air/Pro Using AirDrop
If you don't have a USB cable available, you can send videos from iPhone to Mac wirelessly via AirDrop.
AirDrop is a file-sharing utility on Apple products including iPhone, iPad, iPod, and Mac, allowing users to share various types of files such as photos, videos, contacts, locations, and websites. This makes it a convenient way to transfer files, like iPhone videos, to a Mac.
To AirDrop a video from iPhone to Mac:
Step 1. Turn on AirDrop and Mac on your iPhone and Mac.
Step 2. To send a video from your iPhone, find and click the video you'd like to send, then tap the "Share" icon at the bottom of the screen and select the method you'd like to use to share the video.
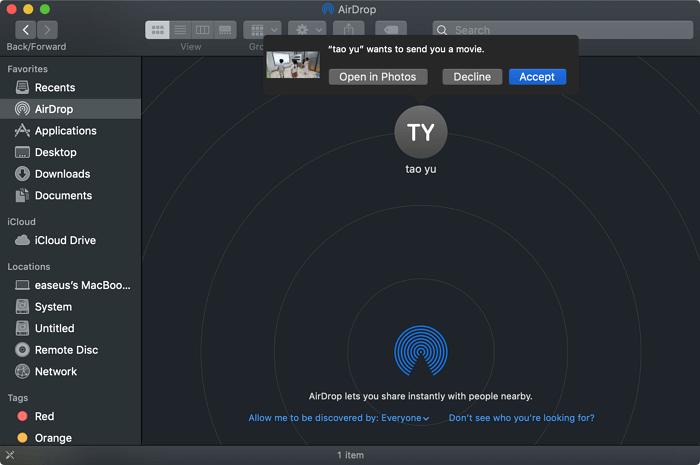
Step 3. Share a file via AirDrop by tapping the "Share" button, selecting "AirDrop" and choosing your Mac's name from the list of available devices.
Step 4. On your Mac, click "Accept" in the window to start receiving the video from your iPhone.
Step 5. Once the transfer is complete, go to the "Downloads" folder to verify that the video file has been successfully transferred.
The Bottom Line
You can transfer videos from your iPhone to your MacBook Air or MacBook Pro using various methods beyond the four ways mentioned earlier. Cloud-based services like iCloud and Dropbox can automatically sync videos from your iPhone to your Mac over Wi-Fi, providing an additional solution to transfer videos between devices.
To import iPhone videos to Mac using iCloud, follow the guide on how to transfer long videos from iPhone to Mac, which provides a step-by-step process for seamless transfer.
Related Articles
- 7 Ways to Transfer MP3 to iPhone from PC or Mac
- Best Zero Fill Hard Drive Utility Free Download for Windows 11,10, 8, 7
Plan to write zeros to hard drive via a powerful zero fill hard drive utility to erase data? This page brings you top free options. - Error Code 4101: Failed to Create File
Solution for Error Code 4101 while making a full/incremental/differential backup to a physic disk or NAS/Share (network drive). - Failed to enable backup service
solution to the the error: “Failed to enable backup service encountered when creating a backup with Qiling Disk Master.