[2022 New] How to Upload Photos to iCloud in 3 Ways
iCloud is a service that allows you to upload and sync various data, including contacts, photos, and messages, across different devices. It's a good option for sharing data between devices or backing up important data like photos. We'll focus on methods to move photos to iCloud from both iPhone and computer in this guide.
Part 1. How to Upload Photos to iCloud on iPhone
There are two different ways to upload photos to iCloud on an iPhone, depending on whether you want to upload all pictures. To upload all photos, go to Settings, then tap on your name, followed by "iCloud" and "Photos". Toggle the switch next to "iCloud Photos" to the right. This will upload all your photos to iCloud.
- You've signed in to the correct iCloud account
- You have a stable internet connection
- You have sufficient iCloud storage
If you want to upload all photos to iCloud:
Step 1. Go to "Settings" > [your name] > "iCloud".
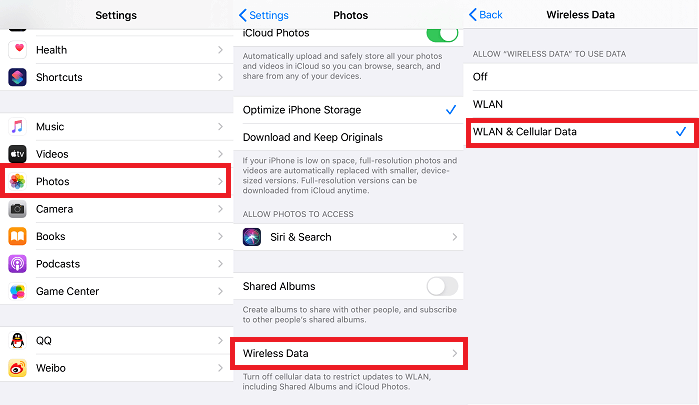
Step 2. To enable iCloud Photos, tap the "Photos" option and select the toggle switch to turn it on, allowing your photos to be synced across all your Apple devices. In earlier iOS versions, you would need to select "iCloud Photo Library" instead.
Step 3. Depending on your need, select either "Optimize iPhone Storage" to free up space by compressing photos and videos, or "Download and Keep Originals" to keep all your photos and videos in their original quality, taking up more storage space on your iPhone.
If you want to upload only selected photos to iCloud:
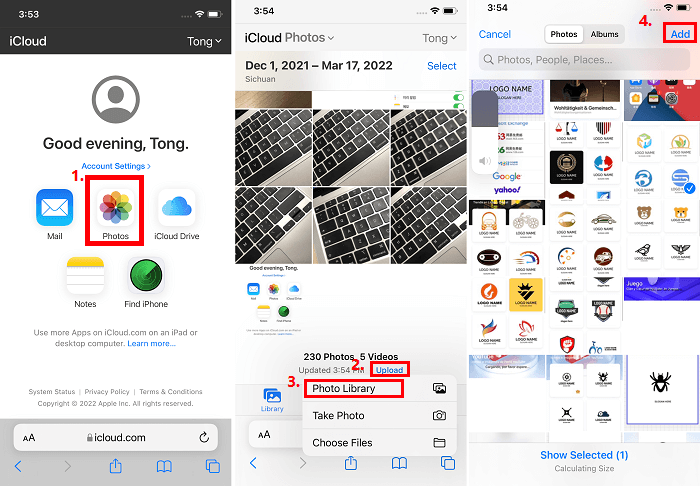
Step 1. Open Safari and go to icloud.com.
Step 2. To access your iCloud account, you need to log in with your Apple ID credentials or use FaceID for a more secure and convenient experience. This allows you to view and manage your account information, access your iCloud storage, and use various iCloud features such as iCloud Drive, iCloud Backup, and more.
Step 3. Select "Photos" from options, tap "Upload", and then "Photo Library."
Step 4. Choose the photo you wish to transfer and hit "Add."
Note: Deleting photos or videos on your mobile device will also remove them from iCloud, as iCloud syncs across devices, so uploading photos to free up storage on your iPhone won't be effective.
Part 2. How to Move Photos to iCloud on a Computer
If your photos are stored on your computer, you can directly upload them to your iCloud on your PC or Mac by selecting the appropriate option based on your computer type.
If you're using a PC:
Step 1. I have had iCloud for Windows installed on my computer.
Step 2.Open the iCloud icon in the taskbar, then right-click and select "Open iCloud Settings."
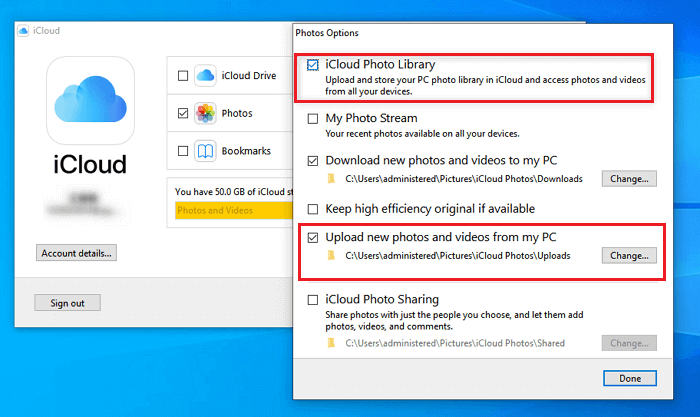
Step 3. To upload photos to iCloud Photo Library, click the "Options" button next to "Photos" and enable the feature. Then, ensure the "Upload new photos and videos from my PC" option is selected and copy the desired photos to the specified folder.
If you're using a Mac:
Step 1. On your Mac, go to "System Preferences."
Step 2. To access iCloud Photos, go to Apple ID, click on iCloud in the sidebar, and then select Photos.
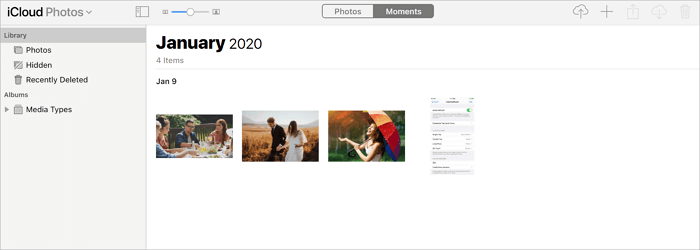
Tips: If you can't find the iCloud control panel on your computer, you can upload photos to iCloud by visiting iCloud.com, signing in, choosing "Photos", clicking "Upload", selecting the photos you want to move, and then clicking "Open" to start the upload process.
Part 3. How to Upload Photos to iCloud Alternative and Clear iPhone Storage
Though iCloud is the top cloud-based backup service, some users prefer a local backup solution for their iPhone data, as they don't like the limitations of the cloud-based backup service, such as limited free storage and the need for a WiFi connection. They would prefer to back up their important data locally, rather than relying on the cloud.
We recommend using Qiling MobiMover, a reliable iPhone transfer software, to back up your photos to your computer. This software allows you to make a fast and offline backup of your photos, which is ideal for transferring a large number of photos at once. Once backed up, you can easily access and print out your photos whenever you need to.
If you're not a fan of iPhone's default image format, you can easily convert HEIC pictures to JPG using this software.
Step 1. Connect your iPhone to a computer running Windows 7 or later, or Mac OS X 10.7 or later. Launch Qiling MobiMover, select "Phone to PC" and click "Next" to proceed.
Step 2. Select the "Pictures" category to copy photos and other supported file types from your iPhone to your computer, making it easier to create a backup.
Step 3. To transfer photos from your iPhone to your computer, click the "Transfer" button. The time it takes to import pictures will depend on the size of the files, so be patient and wait for the process to finish. Once complete, check the selected folder to confirm that the photos have been successfully transferred.
After transferring photos from your iPhone to your computer, you can now delete photos on your iPhone to free up more storage space.
Part 4. Bonus Tip to Download iCloud Photos to PC
After moving photos from iPhone to iCloud, you may need to download them from iCloud to your PC, which is one of the methods to transfer photos from iPhone to PC.
If you have photos in iCloud, you can transfer them to your PC. If you need help, read the guide on how to transfer photos from iCloud to PC for reference.
The Bottom Line
iCloud allows you to transfer photos and videos via an Internet connection, making it easy to move photos from various devices. In addition to knowing how to move photos to iCloud, you can also learn how to access and download photos from iCloud, making it a helpful tool to command.
Related Articles
- How to Transfer Camera Roll to PC | Newly Updated
- How to Transfer Apps from Old iPad to New iPad in 3 Simple Ways
- Solid State Drive Data Recovery: How to Retrieve Your Lost Files
How can you make Solid State Drive data recovery? In this article, we will explore the world of SSD data recovery and guide you on how to retrieve your lost files effectively. - BitLocker Data Recovery: Recover Data from BitLocker Encrypted Drives
Learn how to recover data from a BitLocker encrypted drive with a recovery key, password, or recovery software, and what to do before formatting.