Guide to Migrate OS to SSD for Windows 8.1 with Pictures
The demand for upgrading to an SSD on Windows 8.1/8/10/11 has increased since the introduction of Solid State Drives, offering high performance, faster boot times, and enhanced responsiveness, making the user experience smoother and helping execute multiple tasks with a straightforward upgrade.
Migrating the operating system to an SSD is a slightly more complicated process than simple data transfer from one drive to another. This article provides a step-by-step guide to help users achieve this task.
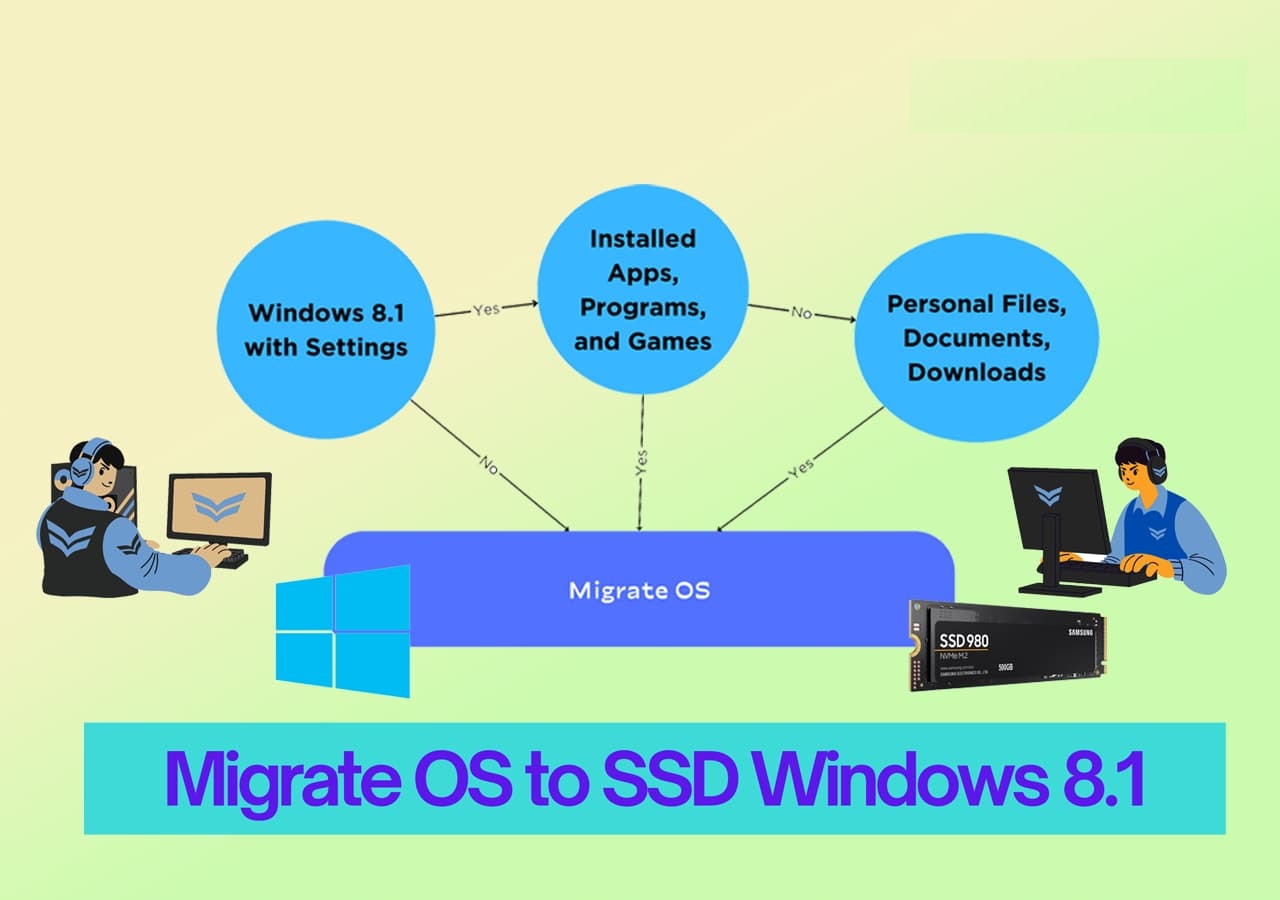
This tutorial guides you through the process of migrating your operating system to a Solid-State Drive (SSD). It covers the necessary steps to ensure a smooth transition, including backing up your data, preparing the SSD, cloning the existing OS to the SSD, and finally, installing the cloned OS on the SSD and removing the old hard drive.
| ⌛Duration: | 20 - 25 minutes |
| 💻Supported Systems: | Windows 8.1/8 |
| ✅Preparations: | Windows PC, SSD, SATA cable, Screwdriver, and migration software. |
| 🧰Recommended Tool: | Qiling Disk Master |
| 🔢Steps: |
Migrating the operating system to a new hard drive in Windows 8.1 involves using a cloning tool, which is the simplest approach. To start the process, you'll need to collect the necessary elements in place, including the new hard drive and a cloning tool, such as Qiling Partition Master. This guide will walk you through the step-by-step process of migrating your operating system to the new hard drive, making it easy to upgrade your system.
#1. Preparing for the OS Migration
Before migrating Windows 8.1 to an SSD, three preparation steps must be followed. These steps are necessary to ensure a smooth migration process. By following these steps, users can prepare their Windows 8.
A. Gathering Necessary Tools and Materials
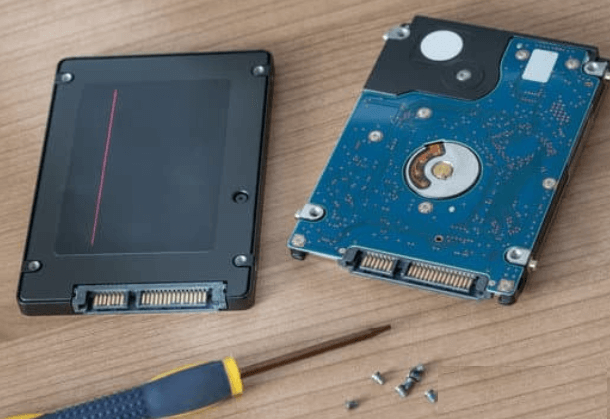
To ensure easy SSD upgradation, gather the necessary tools and materials, such as a screwdriver and SATA cable, and choose a compatible and high-performance SSD from a trusted brand like Samsung or Seagate.
Please note that we do not promote any brand. We want to make sure that you have spent your time and efforts to get everything right.
B. Backing Up Important Data
To avoid data loss when migrating the OS to a new drive, create a backup of all existing data and save it in an external drive.
C. Install and Initialize SSD
If your backup is complete, let's physically remove the old HHD and install the SSD. To install and initialise the SSD, simply replace the old hard drive with the new SSD, reconnect any cables, and boot up your computer. The SSD should automatically be detected and initialised by your operating system.
#1. Install SSD
Note* The steps may differ slightly according to the model of your computer.
Step 1: Turn off the laptop and remove all the cables.
Step 2: Hold the laptop upside down and remove the base cover.
Step 3: You should remove the battery and press and hold the power button for 20 seconds to discharge the device. This will help to prevent any accidental startup and ensure a complete shutdown.
Step 4: Remove the hard drive (HDD) from the computer by unscrewing it from the motherboard. Be careful not to apply excessive force, which could damage the components.
Step 5: Gently remove the hard drive and insert the new SSD.
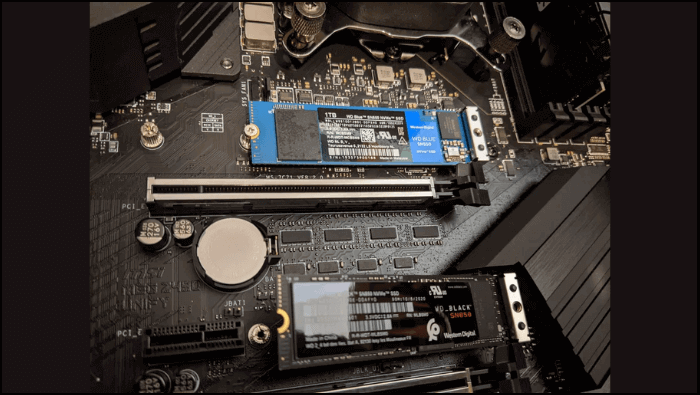
Step 6: Plug the drive directly and screw it on the system board.
Note* If you're using an older laptop, you might need to connect the SSD with a SATA cable.
Step 7: Attach the battery and base panel.
#2. Initialize SSD
Here are the quick steps to initialize the SSD to the same partition style as the OS disk using disk management:
Step 1: Hit the power button to reboot your computer.
Step 2: To open the Disk Management tool in Windows, press the "Win" key and the "X" key at the same time, and select "Disk Management" from the context menu that appears.
Step 3: You will encounter the list of all the connected drives. Navigate the SSD and right-click on it.
Step 4: To initialize the disk, select the "Initialize Disk" option and choose between the Master Boot Record (MBR) or GUID Partition Table (GPT) partition style, then click "OK" to proceed.

Note* You must choose the same style as your OS disk.
Step 5: To create a new partition on the SSD, select the option "New Simple Volume < Format" from the Disk Management console. Assign a drive letter and save the changes.
#2. Migrate OS to SSD with Windows 8.1
To migrate the OS to the new SSD, first, you'll need to back up your important files and data. Next, you'll need to purchase and install the new SSD, and then you'll need to boot from a live USB drive or a bootable CD/DVD.
1. Choosing OS Migration Software
After making all the necessary preparations, the key phase of the migration process is selecting reliable system migration software for Windows 8.1. We recommend downloading and using an easy OS migrating tool, such as Qiling Disk Master Professional.
The OS migration feature allows Windows users to shift the operating system in a few clicks, making it easy for both beginners and experts to migrate the Windows operating system to an SSD without reinstallation.
Other OS migration options on the market can't compete with the effectiveness of this solution. Its ability to seamlessly transfer data, settings, and applications from one operating system to another makes it the go-to choice for those looking to switch.
- Compatibility: The software is compatible with all types of SSDs and HDDs from various manufacturers, making it flexible for OS migration.
- Windows Supports: The cloning tool supports all Windows operating systems, including Windows 11, 10, 8.1, 8, and 7.
- Interface: The interface is easy to use and navigate, making it accessible to those with limited technical expertise.
- File System: This software supports all commonly used file systems and can clone an MBR system disk to a GPT SSD without requiring manual disk-style conversion, making it a convenient and efficient tool for users.
- Optimized SSD Performance: The software optimizes SSD performance by aligning data in 4k blocks during cloning, ensuring the new SSD runs at its best.
2. Initializing OS Migration to SSD with Windows 8.1
To achieve a hassle-When upgrading to an SSD in Windows 8.1, a series of steps must be taken to ensure a seamless transition. This process involves completing the migration, which includes optimizing system settings to get the most out of your new SSD. To achieve this, it's essential to clone your existing OS to the SSD using a reliable cloning software, such as Qiling Disk Master, to ensure that all your files, settings, and applications are transferred correctly. This will help you to quickly and easily get back up and running on your new SSD, minimizing downtime and hassle.
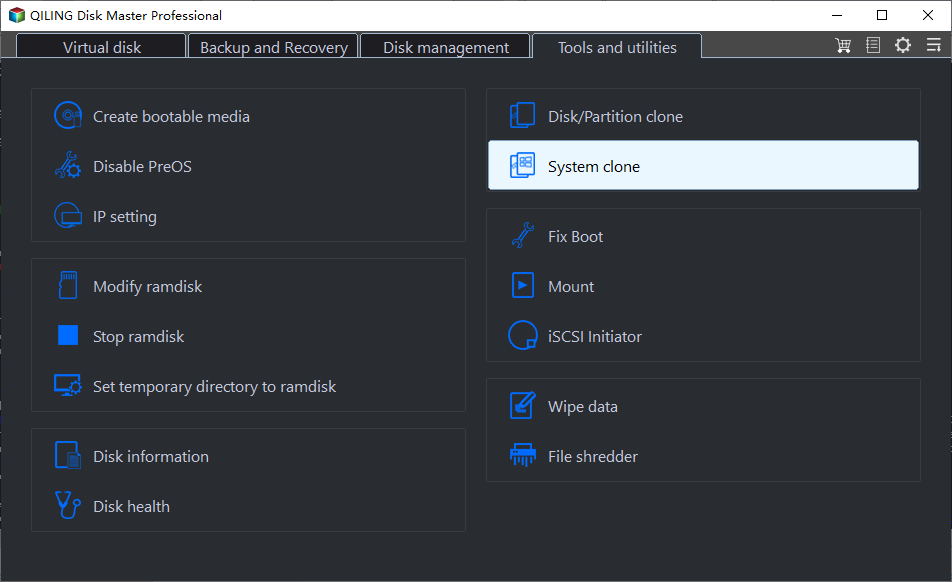
To move forward, download Qiling Disk Master for free and follow the steps provided.
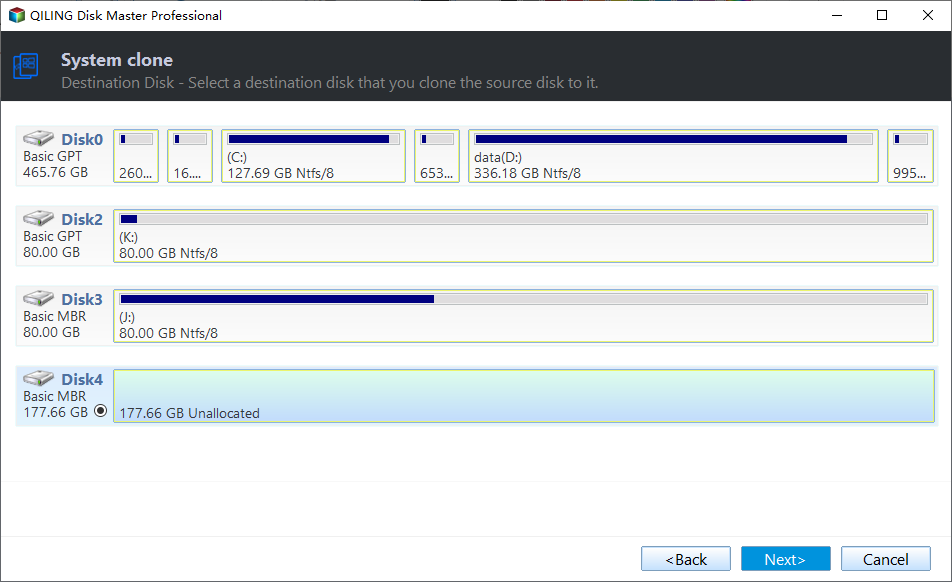
1. Launch Qiling Disk Master, go to the Tools page, click "System Clone" and click "Next" to proceed.
2. To migrate Windows OS to a target SSD, select the desired SSD and click "Next".
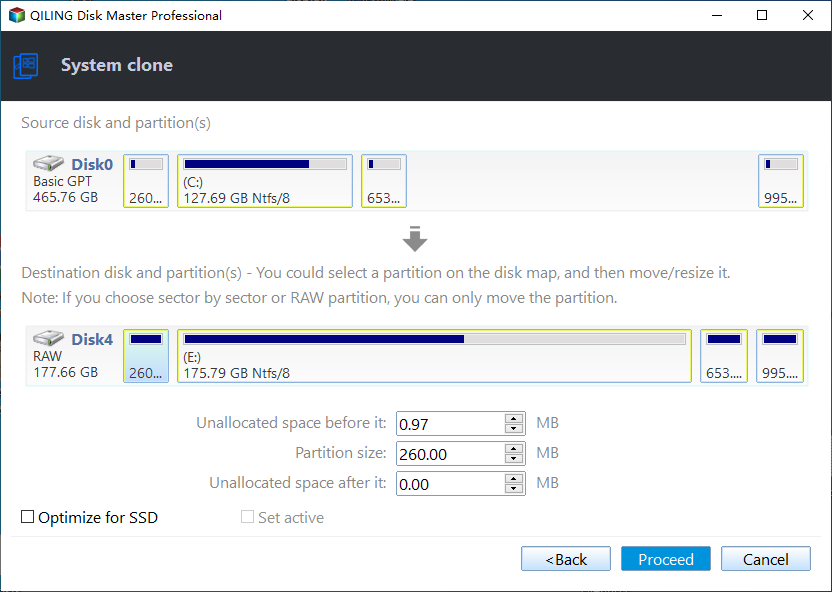
3. Please confirm that you want to execute the operation. Do you want to proceed?
4. Click "Proceed" to start the process of migrating your operating system to the new solid-state drive. This will begin the transfer of your OS, applications, and data to the new drive, replacing the old one.
5. When the process completes, you'll see a confirming message asking if you want to start up your computer from the clone target disk.
To boot from the clone target disk, you need to adjust the order to boot from the clone target disk and click the respective button. This involves changing the boot order in your computer's BIOS settings to prioritize the cloned disk over the original one. The steps may vary slightly depending on your specific computer model and BIOS version, but the general process typically includes accessing the BIOS settings, navigating to the boot order section, and selecting the cloned disk as the primary boot device.
- Reboot Now To boot from a new disk, one needs to reboot their PC and configure the computer to boot the OS from the new disk immediately. This typically involves accessing the computer's BIOS settings and changing the boot order to prioritize the new disk.
- Done means you want to make the changes later.
After cloning your computer's OS to the new SSD, you should be able to successfully run your computer OS from the new SSD. This process is now complete, and you can share this tutorial with your friends online to help them with the same process.
#3. Setting the SSD as the Boot Drive
To change the boot order and set the new SSD as the boot drive, follow these steps: 1) Enter the BIOS settings by pressing the designated key (usually F2, F12, or Del) during boot-up. 2) Navigate to the Boot Order section and change the current boot order to prioritize the SSD as the first boot device. 3) Save the changes and exit the BIOS settings. 4) Reboot the system and ensure the SSD is properly detected and recognized by the system.
Step 1: To access the BIOS settings on your Windows system, simply restart your computer and press the correct key. This key varies depending on your computer manufacturer, but common keys include F1, F2, F12, or Del. Once you've pressed the correct key, you'll be taken to the BIOS settings menu, where you can make any necessary changes.
Pro Tip* The commonly used BIOS keys are Delete, F2, F8, or F10, and if unsure, search the internet using the device's model number or check the manufacturer's website.
Step 2: To navigate the "Boot Order" or "Boot" option in the BIOS interface, use the right/left arrow keys.
Step 3: Press the down key on your keyboard to select the SSD from the list.
Step 4: To prioritize the SSD at the top of the list, you can use the + key to move it up, or the - key to move it down. For example, if the SSD is currently at the bottom of the list, you can press the + key repeatedly until it reaches the top. Alternatively, you can press the - key to move it down and then press + to move it up.
Step 5: To save changes, press the "F10" key on your keyboard or select the "Save and Exit" option from the menu. This will apply the modifications you've made and close the current window.
The system will automatically restart with the changed boot order.
Conclusion
We hope the guide helped you learn the detailed process of migrating OS to SSD for Windows 8.1. To start, prepare each essential element before beginning the migrating process. After a successful OS migration to SSD, you can enjoy many benefits, including enhanced overall performance and responsiveness. Qiling Disk Master, with its advanced Migrate OS feature, is a convenient tool that can assist you in this process and later help with managing partitions and optimizing disk performance.
Feel free to drop your feedback and suggestions in the comment box below. We're eager to hear from you.
FAQs in Migrating OS to SSD in Windows 8.1
To migrate your Windows 8.1/8 OS to a Solid State Drive (SSD), follow these steps: You'll need to create a system image of your current OS, then use the built-in Windows 8.1/8 tool to clone the image onto the SSD. This process will allow you to keep all your files, programs, and settings intact.
1. Should I migrate OS to SSD with Windows 10?
Windows 10 can transfer its operating system to an SSD, but it depends on whether you need improved system performance or more storage, with SSD being ideal for the former and HHD for the latter.
2. Can Windows 8.1 run on an SSD?
Windows 8.1 can run smoothly on an SSD, significantly improving performance and reducing read and write times compared to traditional hard drives.
3. How do I transfer Windows 8.1 to a new hard drive?
You can use a free cloning software like Qiling Disk Master to move Windows 8.1 to a new SSD or hard drive, cloning the OS without uninstalling it, or consider new OS installation and then migrating data and settings.
Related Articles
- How to Check Seagate SSD Temperature on Windows 10/11
- [Fixed] FAT32 Format Option Not Available in Windows
- Move Unallocated Space on Windows Server[Full Steps]
- How to Replace Hard Drive in Dell Laptop [Step-by-Step]
- 2 Ways to Merge Unallocated Space to System Partition in Windows 10
Want to know how to merge unallocated space to system partition Windows 10 when the C drive space is not enough? You will find 2 pragmatic methods from here. - Safely Move Unallocated Space Outside Extended Partition in Windows 11/10/8/7
When you have to move unallocated space outside an extended partition with the purpose of extending or creating a primary partition, the Qiling Disk Master Standard provides the best solution.