How to Move Recovery Partition Windows 10 (Easy & Safe)
Running out of space on your C drive is a common problem, but extending the volume via Disk Management isn't always possible due to a recovery partition in the way. If the Extend Volume option is greyed out because of this, you can use the method provided by Qiling to move the recovery partition on Windows 10, effectively freeing up space on your C drive.
Can I Move Recovery Partition Windows 10
Yes, you can move the recovery partition with an appropriate tool. Typically, the recovery partition is a 450MB partition with no drive letter, created to restore the system to its factory settings in case of a system failure. Due to its purpose, Windows restricts users from formatting or deleting it. To relocate the recovery partition, alternative methods can be explored.
- Notice:
- Removing the recovery partition is not recommended as it will make Windows RE and factory reset inaccessible.
How to Move Recovery Partition Windows 10
To change the location of the recovery partition, you'll need to use a partition manager or disk management tool, such as Disk Management in Windows or GParted in Linux. This will allow you to move the recovery partition to a new location, freeing up space for the system partition to be extended. Be careful when using these tools, as incorrect operations can result in data loss or other issues.
#1. Qiling Disk Master
Since Windows doesn't allow you to move partitions or extend volume with non-adjacent unallocated space, you'll need a professional disk and partition manager tool to move partitions in the disk, such as Qiling Disk Master Professional, which is user-friendly and easy to use.
This tool enables you to move partitions to any location on your drive, effectively allowing you to relocate unallocated space to a target partition that needs additional space. To achieve this, follow these steps below.
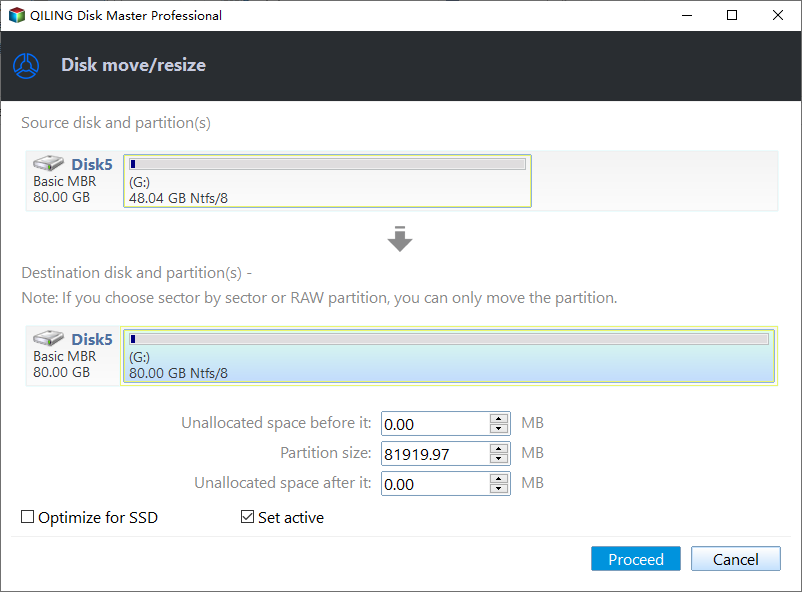
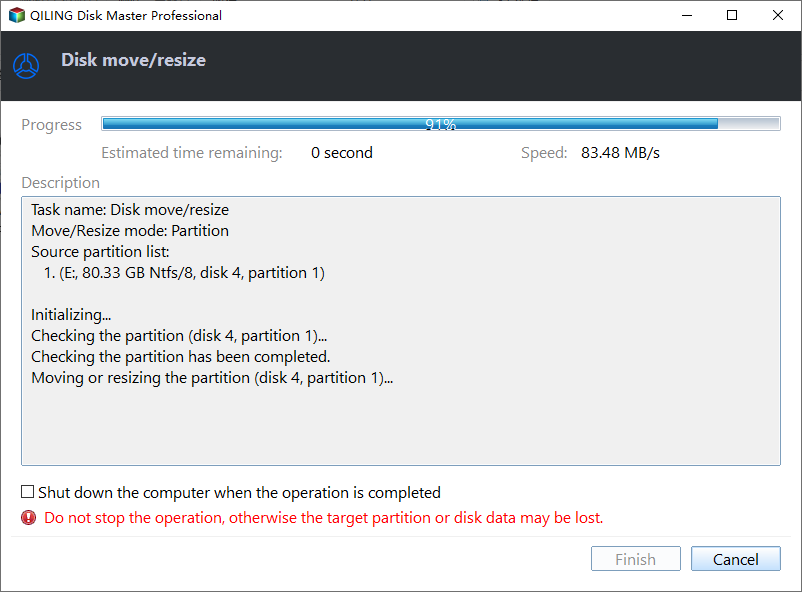
Step 1: Locate and select the target drive/partition
Launch Qiling Disk Master, go to Partition Manager, select the target drive/partition, right-click and choose "Resize/Move" to adjust its size.

Step 2: Resize or move the partition
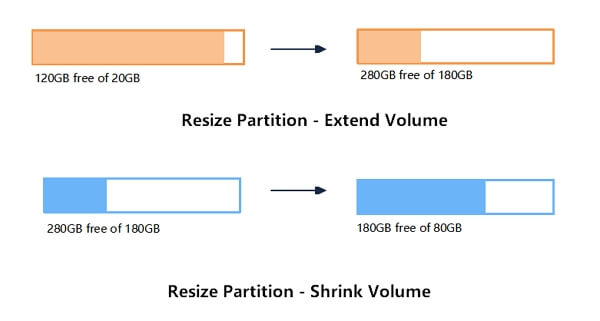
1. To shrink the partition, simply drag one of its ends to free up unallocated space. Once done,
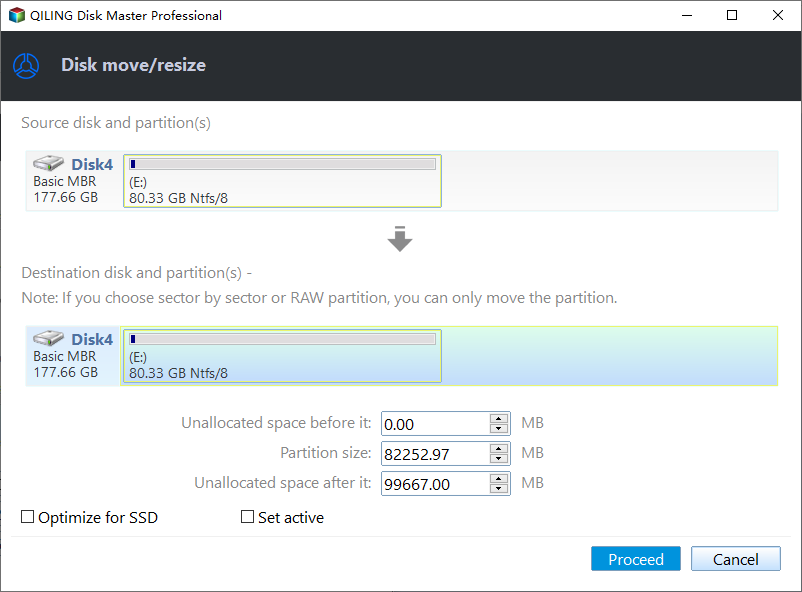
2. To extend the partition, ensure there is unallocated space available. If not, create some by deleting a partition. Then, drag the partition boundary into the unallocated space.
3. To move a partition, you need to have unallocated space next to the target partition. If there's no unallocated space, free up some space first to make room for the move.
Right-To adjust the position of a target partition, click on it, select "Resize/Move" from the options, and then drag the partition left or right to move it to the desired location.
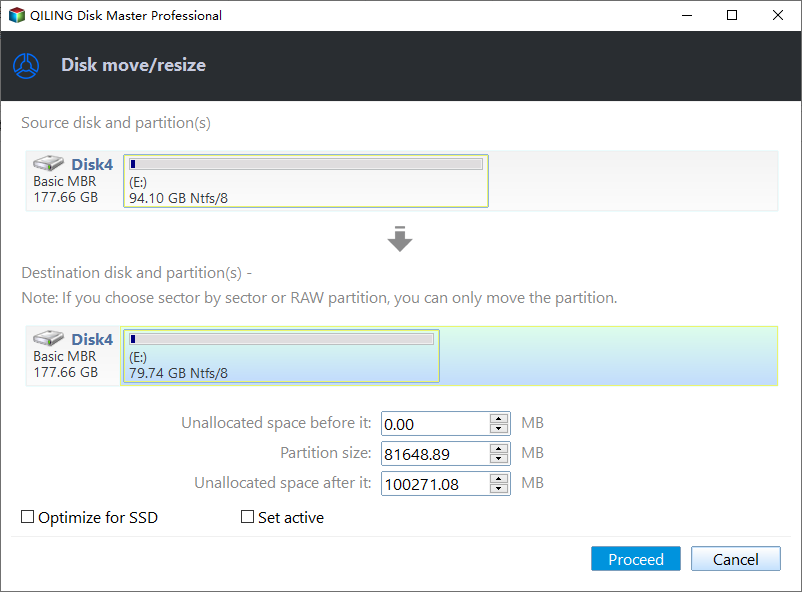
Step 3: Confirm the result and apply changes
At this step, you will see the new disk partition information & diagram.
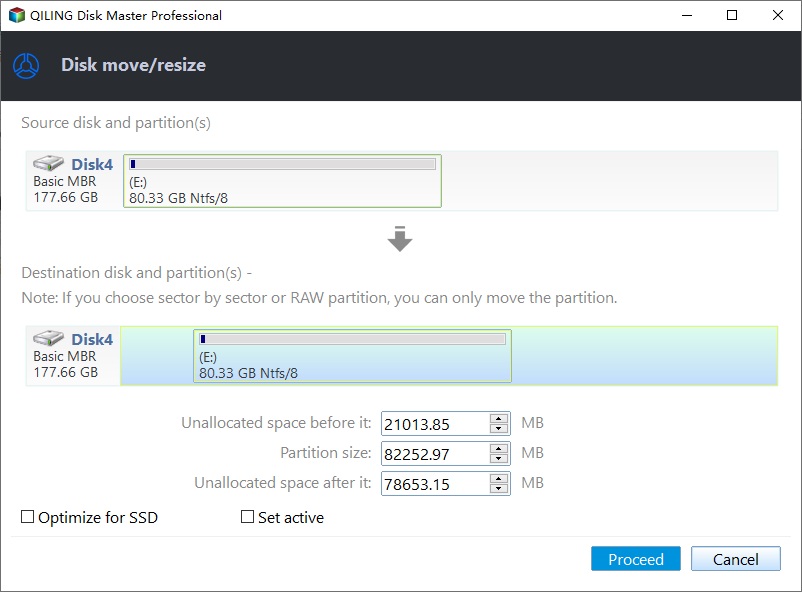
To save changes, click the "Proceed" button.
Qiling Disk Master makes it easy to move unallocated space to the C drive or relocate a recovery partition to the end of the disk. In addition to moving partitions, the software offers more features to help you adjust partition space. For more information, you can visit the following page.

To resize a partition in Windows 11/10, you can use a built-in tool called Disk Management or third-party software like Qiling Partition Master or MiniTool Partition Wizard. These tools allow you to shrink or extend a volume, but not move it to a different location on the disk.
If you need to resize a partition in Windows 11/10, this page is a helpful resource. It provides comprehensive information on how to shrink a large volume, extend a small volume, or create a new volume, making it a useful guide for managing your disk space.
#2. Command Prompt
If you don't like third-While it's possible to move the healthy recovery partition using party software or specific command lines in Diskpart, the process can be complex and time-consuming for beginners. Incorrect commands may also lead to potential data loss, making it a risky endeavor for those unfamiliar with the process.
- Tip
- Create a backup of the system partition by cloning it before attempting to remove a user account that has administrator privileges. This will ensure that your system and all data are safe in case something goes wrong.
Step 1. To open the Command Prompt as an administrator, press the Windows key + S to open the Start menu, type "cmd" in the search bar, and select "Run as administrator" from the search results. This will open the Command Prompt with administrator privileges.
Step 2. First, you should disable the recovery partition for further operation by entering:
reagentc /disable
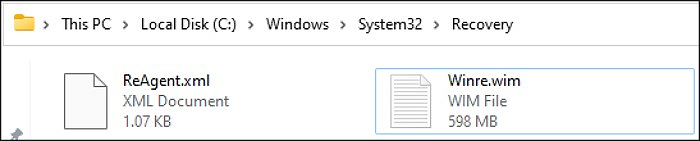
The recovery partition will be stored in "Winre.wim" located in C:\Windows\System32\Recovery.
Step 3. Now, input the following command lines and hit "Enter" after each to remove the recovery partition:
diskpart
list disk
select disk X (Replace "X" with the target disk number)
list partition
select partition Y (Replace "Y" with the recovery partition number)
delete partition override
Keep the Command Prompt window open and proceed to the next step.
Step 4. To remove the recovery partition, search for and open Disk Management in the Start menu search box, and you will no longer see the recovery partition.
Step 5. To extend the system partition, right-click on it and choose "Extend Volume…".
Step 6. Reduce the resized size by 1024 MB to leave space for reactivating the recovery partition.

Step 7. Create a new simple volume using the unallocated space for restoring the recovery partition, and do not assign a drive letter to it.

Step 8. Now, go back to diskpart and enter the following command lines:
list partition
select partition Z (Replace "Z" with the 1024 MB partition number)
The commands from here differ on an MBR disk and a GPT disk. A * in the Gpt column of the "list disk" command line indicates a GPT disk, while a blank indicates an MBR disk.
For GPT disk:
set id=de94bba4-06d1-4d40-a16a-bfd50179d6ac
gpt attributes=0x8000000000000001
exit
To hide and mark the recovery partition as required, you can use the following commands in the Command Prompt as an administrator: `diskpart`, `list disk`, `select disk 0`, `list partition`, `select partition 1`, `delete partition override`, `create partition primary size=4096`, `format quick`, `assign letter=p`, `attrib +h +r +s "p:\System Reserved"`, and `exit`. These commands will allow Windows to identify and hide the recovery partition and mark it as a required partition.
For MBR disk:
set id=27
exit
This command will tell Windows it is the recovery partition.
Step 9. Now, input the following commands to enable the Windows recovery partition:
reagentc /enable
This operation deletes the recovery partition and restores it after expanding the system partition. If you find it hard to follow and worry about losing your data, navigate back to the easier method 1.
If your iPhone is stuck on the Apple logo, don't panic! This common issue can be caused by a software glitch, a faulty charger, or even a problem with the phone's battery.
Conclusion
If you're looking to move the recovery partition on Windows 10, there are two useful methods to consider. Both allow you to successfully extend the system partition, but keep in mind that using Command Prompt can be complex and high-risk, making it less suitable for everyone. However, the article provides guidance on how to complete the task using these methods, giving you the flexibility to choose the one that works best for your needs.
To make it easier to expand the C drive space by moving the recovery partition, using Qiling Disk Master is a better option as it allows for a more straightforward process with just a few simple steps. You can download it now and complete the task.
Move Recovery Partition Windows 10 FAQs
If you're experiencing issues with your Windows 10 system, you might need to move the recovery partition to a different drive. This process, also known as relocating the recovery partition, can be done using the built-in Windows tools.
1. Is it possible to move the recovery partition on Windows 10?
You can use a professional partition manager like Qiling Disk Master to move the recovery partition on Windows 10 with ease.
2. Is it safe to delete the recovery partition?
Deleting the recovery partition will not harm your computer, but you won't be able to use the built-in Windows recovery feature or reset your computer to its factory settings if something goes wrong.
3. Why are there 3 recovery partitions?
If there's not enough space for the recovery partition, Windows will automatically create an extra recovery partition, typically after Windows updates or repairs.
Related Articles
- Format FS=NTFS Diskpart Has Encountered an Error
- How to Low Level Format SSD on Windows
- How to Upgrade Steam Deck SSD [Easiest Way]
- How to Perform Xbox One SSD Upgrade [Full Guide]
- How to Move Unallocated Space to the C drive in Windows 10, 8, and 7 (3 Different Ways)
This article provides you 3 ways to move unallocated space to C drive in Windows 11, 10, 8, and 7 to extend system partition space to keep Windows running smoothly. - Solved: My C Drive Is Full Without Reason in Windows 11, 10, 8, 7
Sometimes, you may find your C drive is full without reason. Here we will explain this issue and share 7 effective methods to help resolve it in Windows 11,10,8, 7.