Partition a Hard Drive in Windows 7 Without Formatting
Windows 7 Ultimate can create a new partition without formatting the whole hard drive if the existing volume has enough movable free space.
This guide explains Disk Management steps and what to do when Windows cannot shrink enough space.
PAGE CONTENT
- What This Problem Means
- Before You Start
- Use Windows Built-in Tools First
- Use the Qiling Product Workflow
- Check the Result
- FAQs
What This Problem Means
Partitioning without formatting usually means shrinking an existing partition, then creating a new volume from unallocated space.
- Shrinking does not normally delete files.
- Unmovable files can limit shrink size.
- MBR disks can have only four primary partitions.
- A backup is still required before resizing.
- Important
- Do not interrupt a resize operation while data is being moved.
Before You Start
Run Disk Cleanup, empty Recycle Bin, back up files, and check disk errors.
- Confirm the exact disk, partition, USB drive, SD card, or Windows installation you are changing.
- Copy irreplaceable files to another drive if the device is still readable.
- Check whether BitLocker, Secure Boot, UEFI/Legacy mode, or a vendor recovery partition is involved.
- Avoid formatting, deleting, wiping, or running DiskPart clean until you know whether data must be recovered first.
Use Windows Built-in Tools First
Windows 7 Disk Management can create a new partition without formatting the entire hard drive. The process has two separate jobs: first shrink an existing partition to make unallocated space, then create a new partition from that unallocated space.
Function 1: Shrink an Existing Partition
Step 1. Click Start, right-click Computer, choose Manage, and open Disk Management.
Step 2. Find the partition that has enough free space, such as C: or D:. Confirm the drive letter, capacity, and file system before continuing.
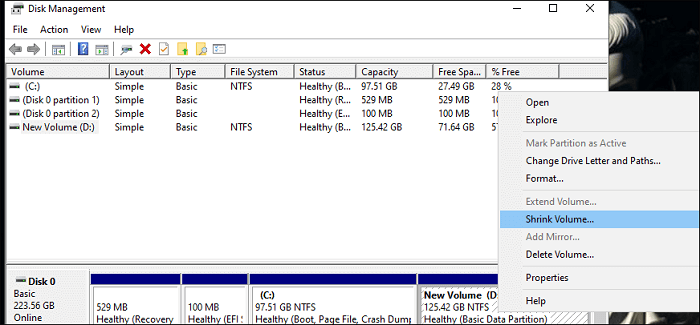
Step 3. Right-click that partition and choose Shrink Volume. Windows will query available shrink space.
Step 4. Enter the amount of space to shrink in MB. For example, enter 51200 if you want to create about 50 GB of unallocated space.
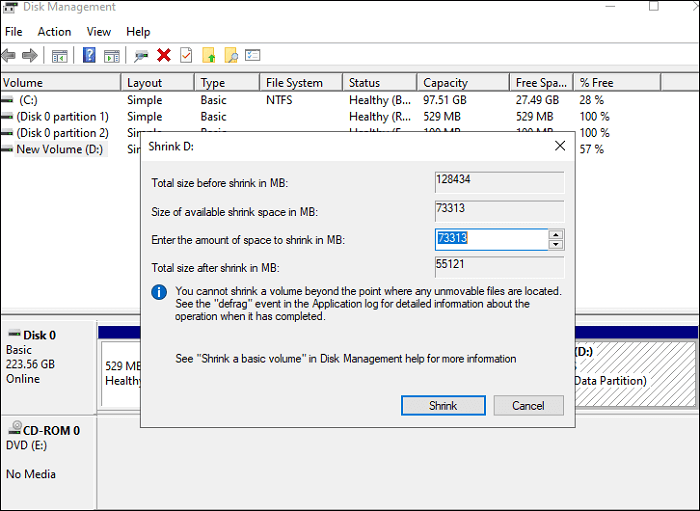
Step 5. Click Shrink and wait until Disk Management shows a black Unallocated block next to the original partition.
Function 2: Create a New Partition from Unallocated Space
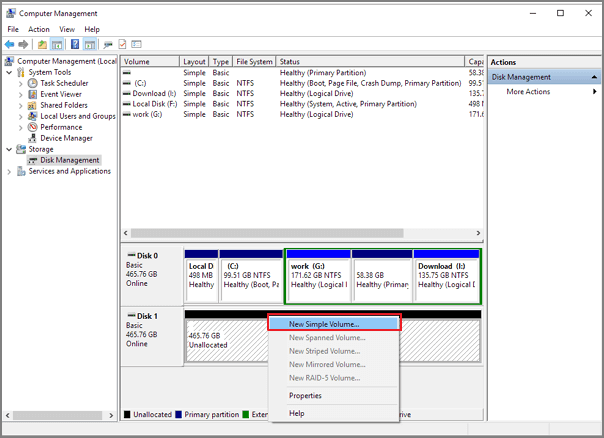
Step 1. Right-click the new Unallocated space and choose New Simple Volume.
Step 2. In the wizard, enter the new partition size. Use the full size if you want one new partition, or use a smaller size if you plan to create more partitions later.
Step 3. Assign a drive letter that is not already in use.
Step 4. Choose NTFS for a normal Windows data partition, enter a clear volume label, and select quick format.
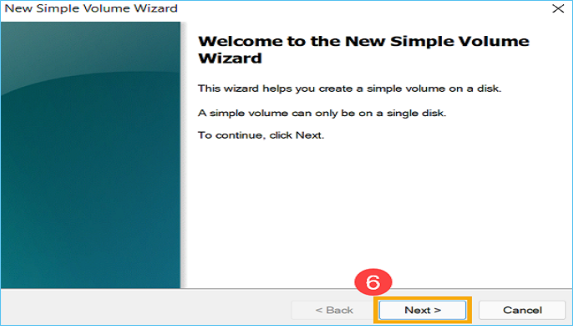
Step 5. Click Finish. Open File Explorer and confirm that the new drive letter appears and can store files.
What If Disk Management Cannot Shrink Enough Space?
If Windows 7 allows only a very small shrink size, unmovable files such as pagefile, hibernation file, restore points, or MFT records may be near the end of the partition. Run Disk Cleanup, temporarily disable hibernation, and try again. If the limit remains, use a partition manager with a preview workflow.
Detailed Qiling Disk Master Workflow
Use Qiling Disk Master when Windows 7 Disk Management cannot shrink enough space, the layout is difficult to understand, or you want to preview every pending change before execution. The workflow below keeps the two jobs separate: shrink the original partition first, then create a new partition from the unallocated space.
Function 1: Check the Disk Layout
Step 1. Open Qiling Disk Master and locate the hard drive you want to repartition.
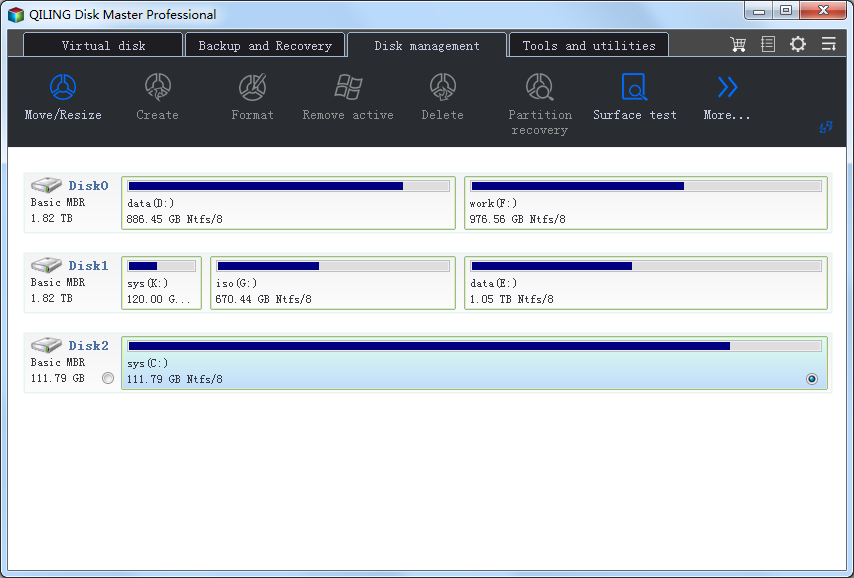
Step 2. Check the existing partitions, drive letters, file systems, and free space. Do not select EFI, System Reserved, OEM, or Recovery partitions unless you know exactly why they must be changed.
Step 3. If this is an MBR disk and it already has four primary partitions, decide whether to use an extended partition or convert the disk to GPT on compatible hardware.
Function 2: Shrink the Existing Partition
Step 1. Select the partition that has enough free space.
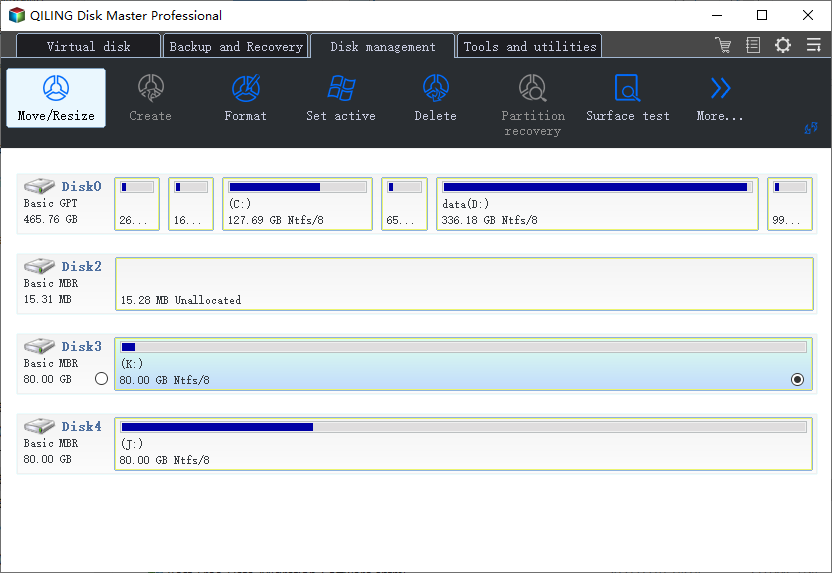
Step 2. Choose the resize or move option.
Step 3. Drag the right border inward or enter the exact amount of space you want to release. Leave enough free space inside the original partition for Windows updates, programs, and temporary files.
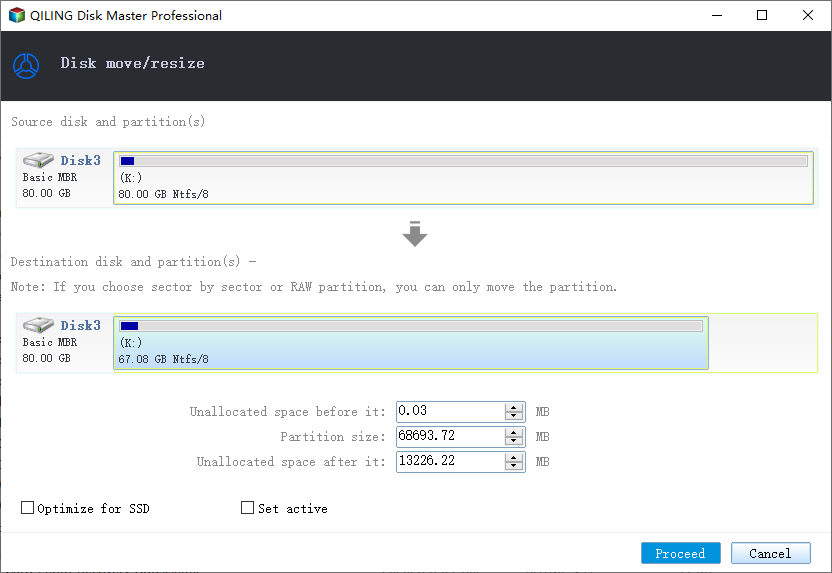
Step 4. Confirm that the preview shows the original partition becoming smaller and new unallocated space appearing beside it.
Step 5. Do not click Proceed yet if you still need to create the new partition in the same operation. Continue to Function 3 first.
Function 3: Create the New Partition
Step 1. Select the new unallocated space in the preview layout.
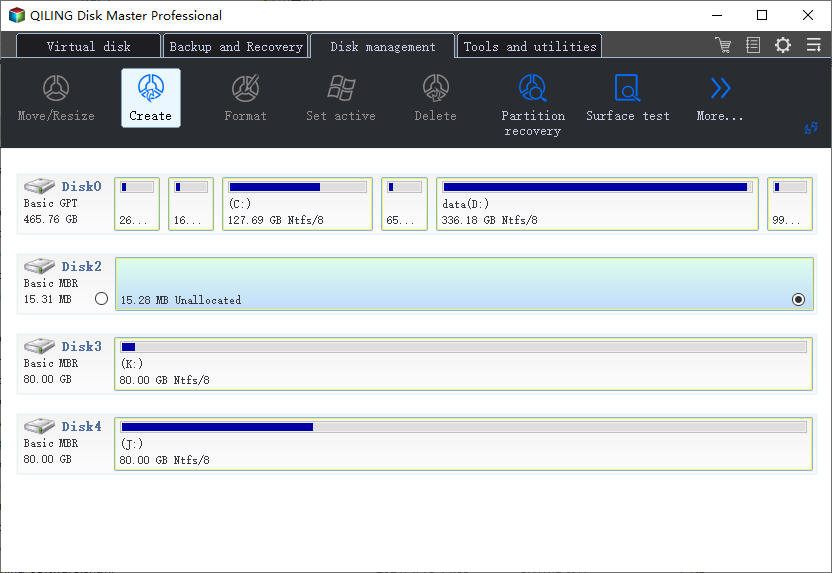
Step 2. Choose the create partition option.
Step 3. Set the partition size. Use the full unallocated space for one new drive, or reserve some space if you plan to create another partition.
Step 4. Choose a drive letter, file system, and volume label. For most Windows 7 data partitions, choose NTFS.
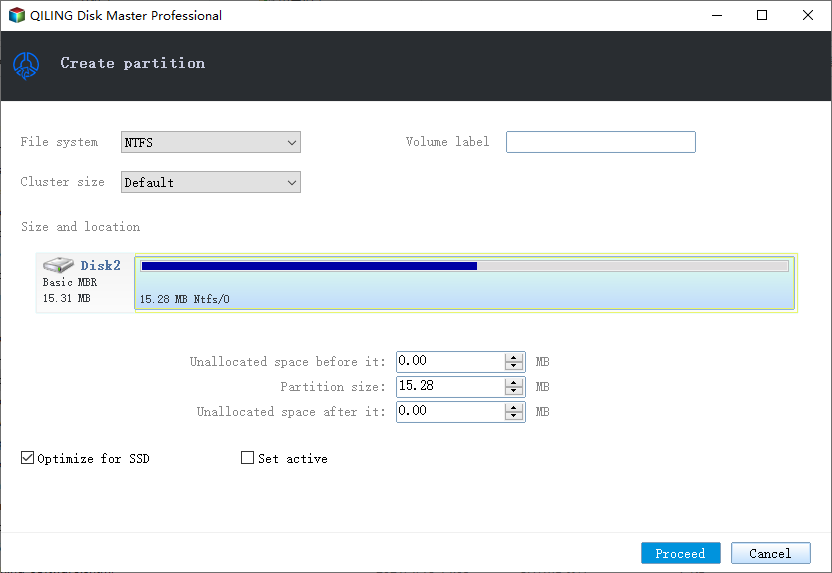
Step 5. Confirm that the pending operation list now includes both actions: shrinking the original partition and creating the new partition.
Function 4: Preview and Execute
Step 1. Review the final disk layout. Make sure the original partition, new partition, and any system or recovery partitions are in the expected positions.
Step 2. Click Proceed to execute the pending operations.
Step 3. Keep the computer powered on. Do not close the program, disconnect the disk, or force restart while data is being moved.
Step 4. Restart if prompted. Then open Disk Management and File Explorer to verify the new drive letter, partition size, and file access.
Check the Result
Copy test files to the new partition, restart Windows, and confirm both partitions are accessible.
- Restart Windows and confirm the drive, partition, backup task, or cloned disk appears as expected.
- Open several files instead of only checking that a drive letter exists.
- Keep one recent backup on an external drive before making another high-risk change.
- If the same error returns, check hardware health, cable quality, firmware, and Event Viewer before repeating the same operation.
FAQs
Can I partition without losing data?
Yes, if shrinking completes normally, but back up first.
Why can Windows shrink only a little?
Pagefile, hibernation file, restore points, or MFT records may be unmovable.
Can I create more than four partitions?
On MBR, use an extended partition or convert to GPT on compatible systems.
Conclusion
Windows 7 can partition a drive without full formatting. For blocked shrink operations, preview the resize in Qiling Disk Master before clicking Proceed.
Related Articles
- Best Free Partition Manager Software of 2026
- How to Clone HDD to SSD in Windows 10/11/7
- Windows System Backup and Restore Tutorials
- Windows Data Recovery Tutorials
Products
Articles & Tutorials
- Data Recovery
- Data Backup
- File Recovery
- File Backup
- System Backup and Restore
- Disk and Partition Clone
- Technical articles
- Mobile articles
- Disk Master Help
- Windows Data Recovery Tutorials
- Windows Secure Delete Tutorials
- Windows Partition Management Tutorials
- Windows File Backup and Restore Tutorials
- Windows System Backup and Restore Tutorials
- Windows Disk Backup and Restore Tutorials
- Windows Clone Tutorials