DBAN Not Booting from USB: Diagnose the Media and Wipe Safely
When DBAN does not start from a USB drive, the ISO may have been copied rather than written as bootable media, the firmware may be using an incompatible boot mode, or the target hardware may not be supported. Diagnose booting before touching the data disk.
Confirm Media and Firmware
Step 1. Verify the DBAN image came from its official source and the USB writer reported success. Dragging the ISO file onto an ordinary USB does not make the stick bootable. Recreate the USB with a trusted ISO writer if needed; writing the image erases the selected USB.
Step 2. Use the PC's one-time boot menu and identify the USB entry by label. If the USB has both UEFI and legacy entries, select the one the tool supports. Older DBAN images may not work on a UEFI-only PC or with Secure Boot enabled. Record original firmware settings before changing anything; do not weaken boot security casually.
Step 3. Try the USB on a compatible spare PC without selecting a wipe target. If it starts there, check the original PC's USB port, firmware settings, and storage controller visibility. If the drive is not detected in DBAN, do not assume the data has been erased.
Choose a Method for the Media Type
DBAN-style overwriting is intended for magnetic HDDs. It is not the right guarantee for SSDs, whose controller may remap flash cells. For an SSD, use its supported sanitize or cryptographic-erase mechanism and follow the current media-sanitization policy. A USB enclosure may also hide device-level commands.
Before wiping any HDD, copy files to be retained, open sample files from the backup, and record the exact model and serial number of the target. Disconnect unrelated disks to reduce selection errors. If a drive is mechanically failing, software erasure may not complete; a disposal policy may call for controlled destruction.
Use Qiling Wipe Data on a Supported HDD
This is an irreversible operation. The selected disk or partition and all files on it will be overwritten. Use a working Windows PC or tested Qiling bootable environment, and keep all other disks disconnected when possible.
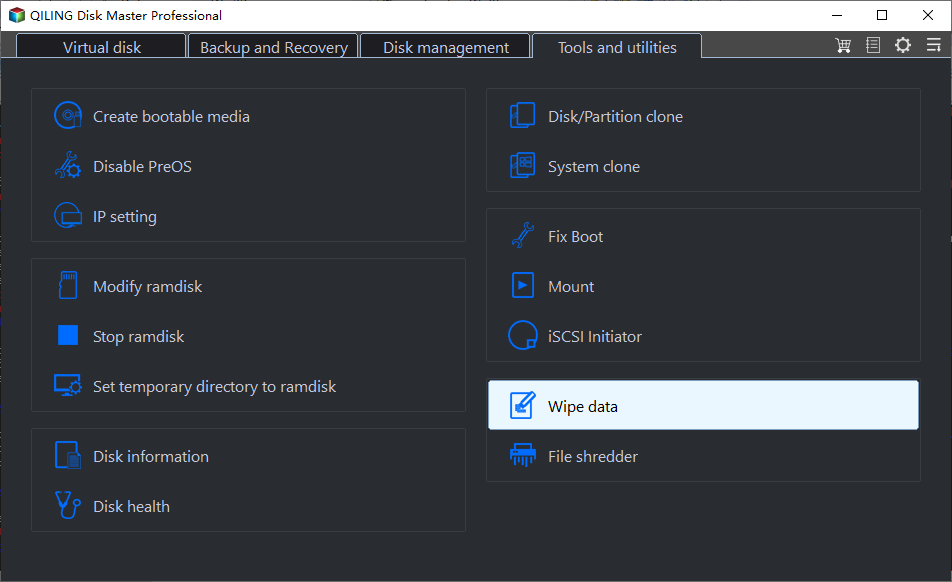
Step 1. Open Qiling Disk Master and select Tools and utilities > Wipe data. Confirm the physical target disk's model, serial number, and capacity against your written record.
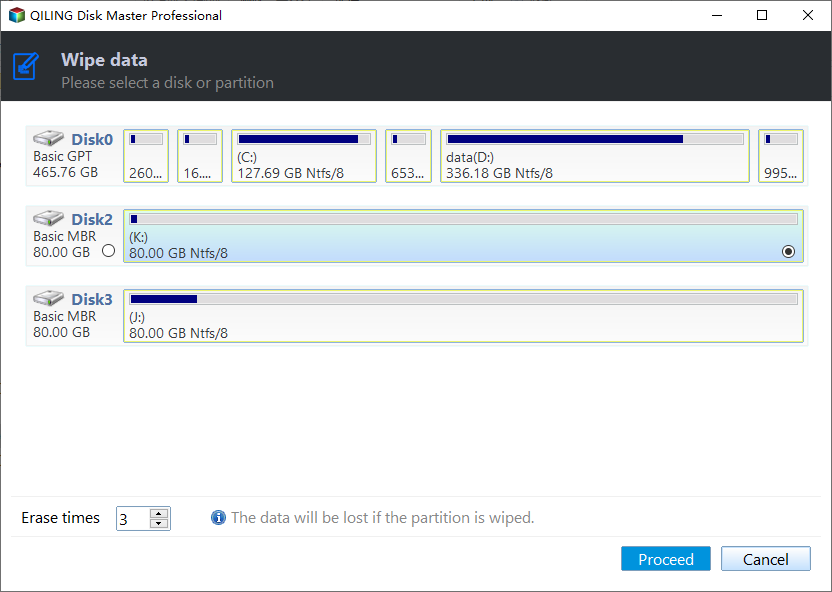
Step 2. Select the intended HDD or partition. Set Erase times according to the approved policy; a pass count alone is not proof of DoD or NIST compliance. Recheck that the Windows boot disk and backup disk are not selected.
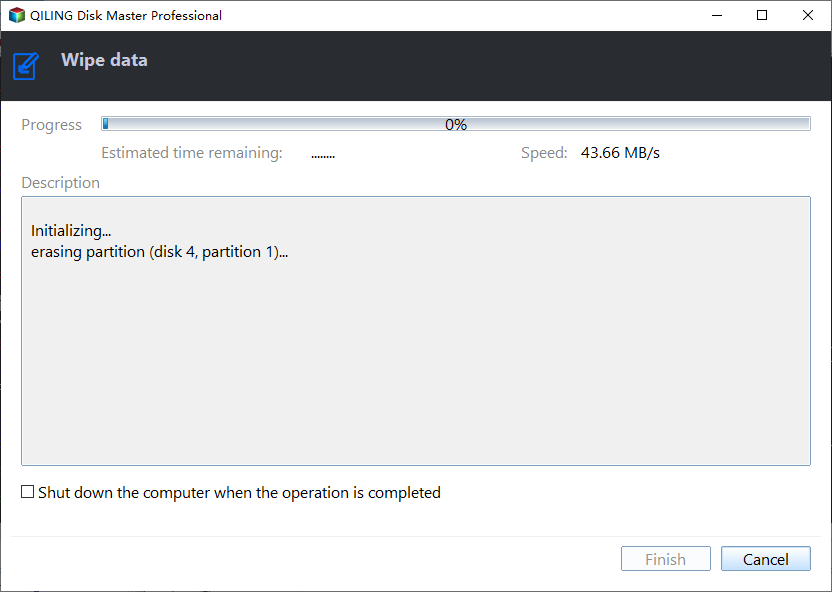
Step 3. Click Proceed, read the data-loss warning, and confirm only if the target matches the recorded serial number. Do not interrupt or unplug the disk. Wait for a completed status, then document the method and verification result.
If You Continue with DBAN
Once a compatible DBAN USB boots, select interactive mode, identify the target HDD by model and capacity, choose the approved method, and confirm the selected disk before starting. Do not use a blind automatic-wipe mode on a PC with multiple disks. Review the completion report; a failed or skipped drive is not sanitized. For a modern UEFI-only machine or an SSD, choose a supported alternative rather than repeatedly disabling security protections.
Conclusion
Repair the boot-media problem first, then wipe only a verified target with a media-appropriate method and a documented completion check.
Related Articles
- DoD Disk Wipe Explained
Understand HDD overwrite and SSD limits. - Securely Erase an SSD
Use a flash-appropriate sanitization method.
Products
Articles & Tutorials
- Data Recovery
- Data Backup
- File Recovery
- File Backup
- System Backup and Restore
- Disk and Partition Clone
- Technical articles
- Mobile articles
- Disk Master Help
- Windows Data Recovery Tutorials
- Windows Secure Delete Tutorials
- Windows Partition Management Tutorials
- Windows File Backup and Restore Tutorials
- Windows System Backup and Restore Tutorials
- Windows Disk Backup and Restore Tutorials
- Windows Clone Tutorials