Disk Cleanup Stuck on Windows Update Cleanup
Windows Update Cleanup can take a long time because Windows is removing old component store files.
Sometimes it appears stuck even though TrustedInstaller is still working.
PAGE CONTENT
- What This Problem Means
- Before You Start
- Use Windows Built-in Tools First
- Use the Qiling Product Workflow
- Check the Result
- FAQs
What This Problem Means
Windows Update Cleanup removes superseded update files from WinSxS. Repeated interruption can leave update components inconsistent.
- Large cumulative updates can make cleanup slow.
- Low free space slows temporary processing.
- Damaged update cache can cause hangs.
- A system backup is useful before deleting system components.
- 顦?/i> Important
- Do not force power off during active cleanup unless the PC is completely frozen.
Before You Start
Save work, connect AC power, and make a system backup if the PC is important.
- Confirm the exact disk, partition, USB drive, SD card, or Windows installation you are changing.
- Copy irreplaceable files to another drive if the device is still readable.
- Check whether BitLocker, Secure Boot, UEFI/Legacy mode, or a vendor recovery partition is involved.
- Avoid formatting, deleting, wiping, or running DiskPart clean until you know whether data must be recovered first.
Use Windows Built-in Tools First
Use built-in checks to reset cleanup safely.
Step 1. Check Task Manager for TiWorker.exe or TrustedInstaller.exe activity.
Step 2. Wait longer if disk or CPU activity continues.
Step 3. Restart once if the cleanup window is frozen but Windows responds.
Step 4. Run Windows Update Troubleshooter and restart.
Step 5. Run DISM /Online /Cleanup-Image /RestoreHealth and sfc /scannow if cleanup still fails.
Detailed Qiling Backup Workflow
Use Qiling Backup before repair, reset, cleanup, partition changes, or repeated file synchronization. A separate backup keeps the original data safe if Windows tools fail or the wrong folder is changed.
Step 1. Connect a USB drive, external hard drive, or network location with enough free space. Do not store the backup on the same partition you are protecting.
Step 2. Open Qiling Backup. Choose File Backup for documents, photos, game saves, and project folders. Choose System Backup before Windows repair or recovery work.
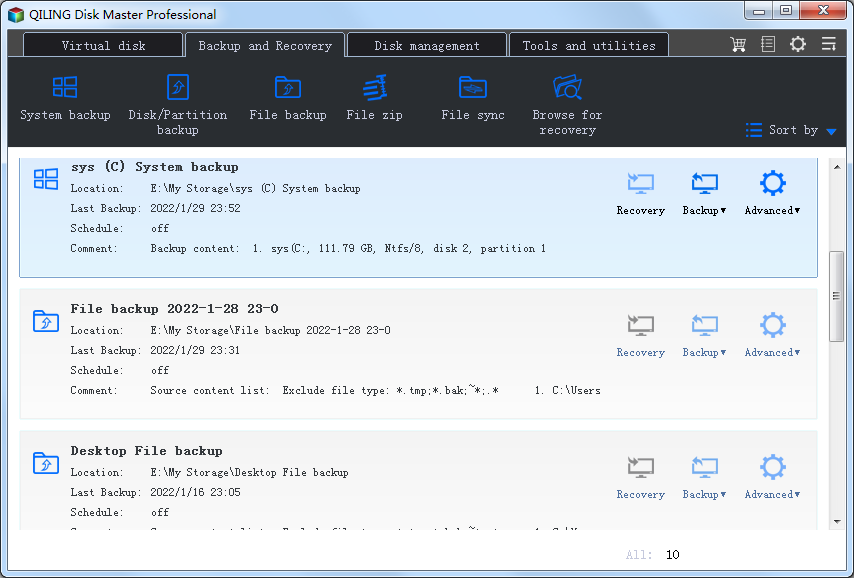
Step 3. Add the source folders or system partitions. Include hidden app data folders when the article topic involves games, user profiles, or application settings.
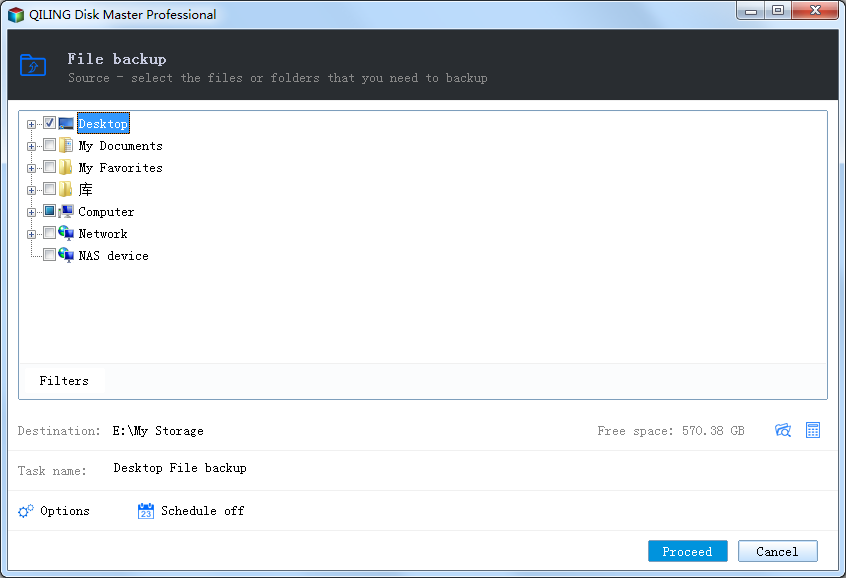
Step 4. Choose the destination. If it is a USB drive, keep it connected until the task completes. If it is a network path, test access first.
Step 5. Set a schedule only when this will be a repeat backup or sync task. For one-time repair preparation, run it manually.
Step 6. Click Proceed. When the task finishes, open several files from the destination to confirm the backup is usable.
Check the Result
Restart and check Storage settings to confirm free space. Avoid running multiple cleanup tools at the same time.
- Restart Windows and confirm the drive, partition, backup task, or cloned disk appears as expected.
- Open several files instead of only checking that a drive letter exists.
- Keep one recent backup on an external drive before making another high-risk change.
- If the same error returns, check hardware health, cable quality, firmware, and Event Viewer before repeating the same operation.
FAQs
How long can cleanup take?
It can take minutes to over an hour on slower HDDs or after large updates.
Is it safe to cancel?
Canceling from the interface is safer than forcing shutdown.
Can I delete WinSxS manually?
No. Use Disk Cleanup, Storage Sense, DISM, or Windows Update reset steps.
Conclusion
Windows Update Cleanup often looks stuck while working. Check activity, wait when appropriate, repair update components if needed, and back up before deeper cleanup.
Related Articles
- Best Free Partition Manager Software of 2026
- How to Clone HDD to SSD in Windows 10/11/7
- Windows System Backup and Restore Tutorials
- Windows Data Recovery Tutorials
Products
Articles & Tutorials
- Data Recovery
- Data Backup
- File Recovery
- File Backup
- System Backup and Restore
- Disk and Partition Clone
- Technical articles
- Mobile articles
- Disk Master Help
- Windows Data Recovery Tutorials
- Windows Secure Delete Tutorials
- Windows Partition Management Tutorials
- Windows File Backup and Restore Tutorials
- Windows System Backup and Restore Tutorials
- Windows Disk Backup and Restore Tutorials
- Windows Clone Tutorials