How to Format USB Drive for PC and Mac Compatibility
Windows and Mac operating systems work based on files and folders, but their file systems differ, making it challenging to use a flash or USB drive on both devices. This is because Windows and Mac systems have distinct file systems, which complicates formatting a drive for use on both platforms.
You are expected to format a USB flash drive for Mac and PC compatibility under ideal conditions. That is indeed a tough task, but not an impossible one.
What Format of Flash Drive Works on Both Mac and PC
To format a USB drive for use on both PC and Mac, we first need to identify the file systems that are compatible with each operating system. Once we have this information, we can determine which file system is compatible with both platforms, allowing us to proceed with the formatting process.
| File Systems | Windows | Mac |
|---|---|---|
| FAT | Yes | Yes |
| FAT32 | Yes | Yes |
| NTFS | Yes | No |
| ReFS | Yes | No |
| exFAT | Yes | Yes |
| APFS | No | Yes |
| Mac OS extended | No | Yes |
The table shows that FAT and exFAT are the two file systems that offer complete compatibility with both Mac and Windows, allowing for reading and writing. A comparison between FAT32 and exFAT can be found in the following content, highlighting their differences.
The issue of an item being unable to be copied due to it being too large for the volume's format can be resolved by converting the item to a compatible format or by increasing the volume's format capacity. This can be achieved by using a file converter or by expanding the volume's format through disk management.
How to Format USB Flash Drive on Windows 10
If you're looking to format a USB drive for use with a PC or Mac, Windows offers several options. You can either use the built-in formatting tool or opt for a third-party software, depending on your personal preference.
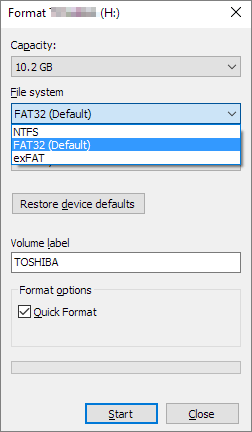
1. Using the File Explorer Option
Step 1. Go to the File Explorer and then locate your flash drive. Insert it into your PC if it hasn't been inserted as yet.
Step 2. Right-click on the flash drive and choose "Properties".
Step 3. Choose the option for "Format".
Step 4. The file system should be set to either exFAT or FAT32 from the drop-down list.
Step 5. Click on "Start"when you are done.
Wait till the flash drive is formatted. It may take a while, based on the size of your drive.
2. Using Disk Management Utility
Formatting a flash drive using the Disk Management utility can be a bit complex but is a reliable solution to format your drive.
Step 1. Open the Windows Search and look for Create and Format Hard Disk Partitions.
Step 2. Right-click on the flash drive and click on "Format".
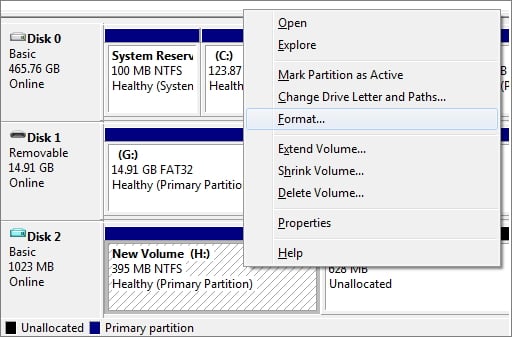
Step 3. The file system can be chosen as either FAT32 or exFAT from the file system dropdown, and a label can be added to the drive.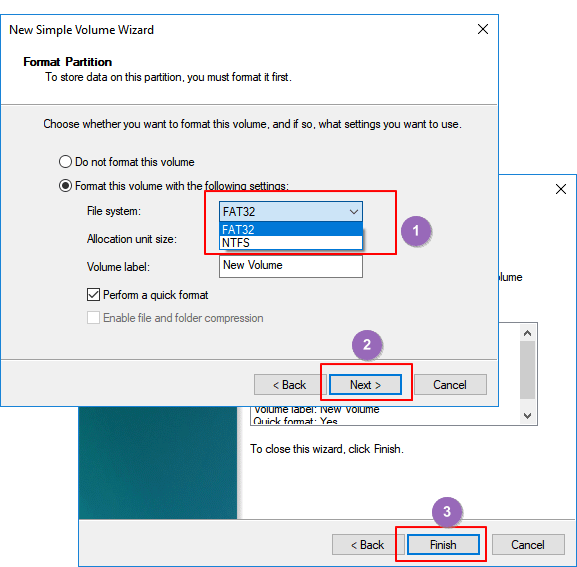
Step 4. Click on "OK" and wait till the drive is formatted.
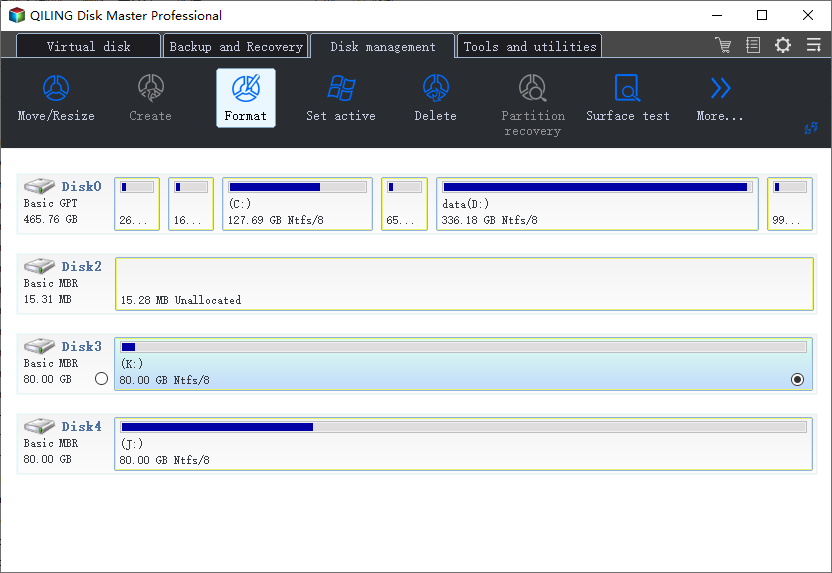
3. Using a Partition Management Tool – Qiling Partition Master
Qiling Partition Master is a tool that allows for formatting a USB drive to be compatible with both PC and Mac, offering a high degree of versatility.
Qiling Windows 10 disk management software offers both free and professional functionality, supporting a wide range of file systems, including NTFS, EXT3, EXT2, FAT32, FAT16, FAT12, and ReFS, but not exFAT.
The partition management tool offered by the software provides a complete partition management solution without any risk of data loss, making it a reliable option for both beginners and experts alike.
Here is how you can use Qiling Partition Master to format USB drive.
Step 1. Select the USB drive to format.
To format a USB drive, connect it to your computer and download the Qiling partition software. Once launched, select the USB drive you want to format and choose the "Format" option from the software. This will erase all data on the drive and prepare it for new files.
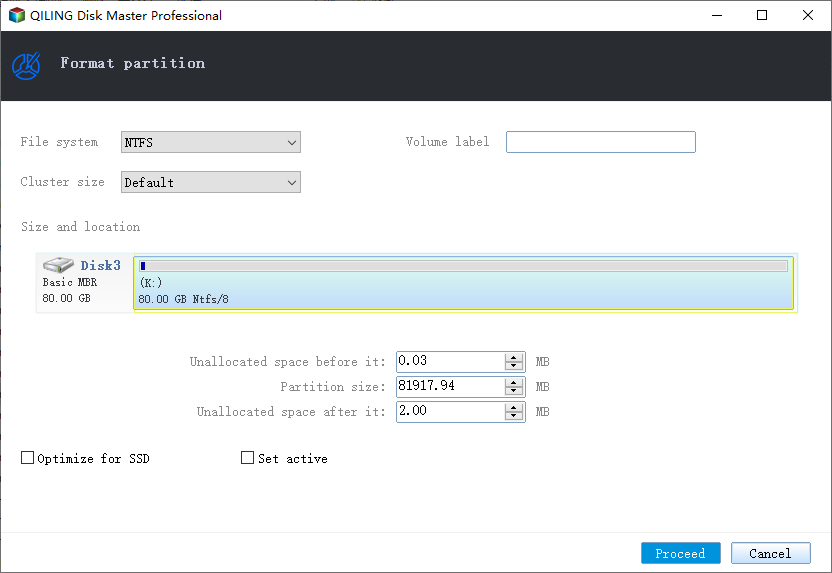
Step 2. Set the drive letter and file system on USB.
Assign a new partition label, file system (NTFS, FAT32, EXT2, EXT3, EXT4, exFAT), and cluster size to the selected partition, and click "Proceed".
Step 3. Check "OK" to format the USB drive.
If you see a Warning window, click "OK" to proceed with the data deletion or other changes. If you have important data on the device, back up that data before clicking "OK" to avoid losing it.
How to Format USB Flash Drive on Mac with Disk Utility
If you are on Mac, you can use the built-in Disk Utility to format the USB flash drive on Mac. The steps involved in the task would include:
Step 1. To format a USB drive on a Mac, insert the drive you want to format into the computer. The Mac should automatically detect the drive and display it on the desktop, at which point you can proceed with the formatting process.
Step 2. Launch the Disk Utility by searching for it in your computer and clicking on it to open it.
Step 3. Pick your drive from the left list.
Step 4. Click the "Erase" option from the top menu.
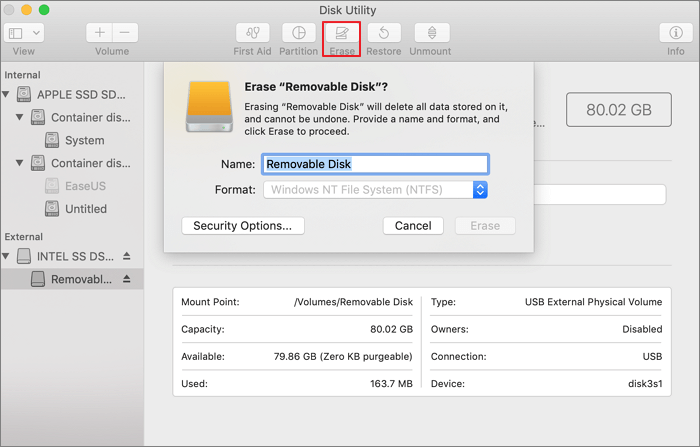
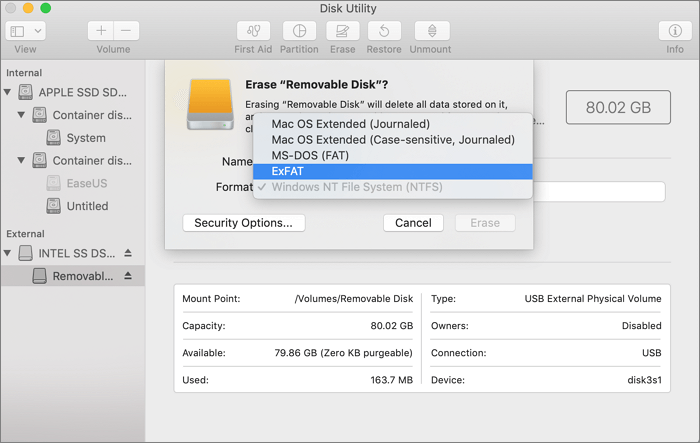
Step 5. Enter the name for the disk and pick the file system that you want to use.
Step 6. The user should select the option for Erase, and their USB drive will be formatted.
FAT32 vs Exfat: What Is the Difference Between the Two File Systems
FAT32 is a legacy file system that originated with Windows 95, replacing the older FAT16 system used in MS-DOS and Windows 3. It has since become the de facto standard for many computer systems, offering high compatibility across Mac and Windows platforms, especially with most flash drives available today.
When using a FAT32 file system, the main limitation is that it can only support file sizes up to 4GB, making it unsuitable for internal drives but suitable for flash drives and USB drives.
The exFAT or Extended FAT file systems was introduced in 2006 with Windows XP and were planned as a great means of overcoming the limitations on the FAT32 system. The file system is optimized for flash drives and works great for both internal and flash drives. The key differences between ExFAT and FAT32 can be summarised as follows.
| Comparison | FAT32 | exFAT |
|---|---|---|
| Introduced In | With Windows 95 | In 2006 with Windows XP |
| Compatibility with Flash Drives | Easy to use quicker | Best meant for flash drive |
| Windows Compatibility | Works with all Windows versions | Works with all Mac versions |
| Special Configuration | Not needed | Mac device needs additional software |
| Size Limit | Max file size limited to 4GB | No size limit |
The exFAT file system is a more suitable choice than FAT32 due to its wider range of advantages, including support for larger file sizes, faster data transfer rates, and improved security features.
Final Words
Formatting a USB drive to be compatible with both Mac and Windows can be straightforward. One effective method is using a third-party utility, such as Qiling Partition Master, which offers a simple solution for making a USB drive accessible on both PC and Mac.
The tool offers a simple interface, is easy to use, and has high-end functionality, providing a full-fledged disk management capability.
Related Articles
- Complete Guide - How to Combine Two SSD Drives
- Complete Guide to Migrate Windows 11 to a New Hard Drive or SSD
- 3 Powerful Ways to Convert GPT to MBR in Windows 11 [2022 Guide]
- Use SD Card Repair Tool to Fix Corrupted SD Card
- [Explained]: Is It Safe to Delete Temp Files on Windows 10?
Deleting temp files in Windows 10 is generally safe, and you can do so without risks. You can find more information and learn how to delete temp files from the provided post. - A Powerful PC Junk Cleaner for Windows 10 And 11
How to make the computer run faster? An excellent PC junk cleaner for Windows 10 can help you, which can remove all kinds of junk files to free up more space and improve computer performance.