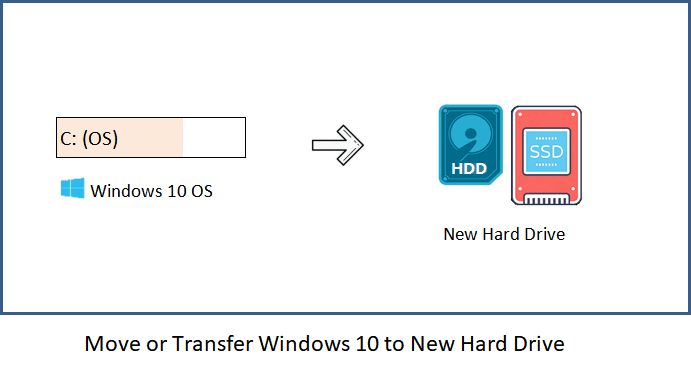
How to Move/Transfer Windows 11/10 to New Hard Drive (HDD/SSD) | 2022 Full Guide
Migrating Windows OS to another drive can be a daunting task for many users, but with the right solutions, it can be easy and fast, even for those with limited technical expertise. Fortunately, there are professional Windows 10 migration tools available that can help transfer Windows 10 to a new hard drive, whether it's a traditional HDD or a faster SSD, making the process straightforward and efficient.
This guide provides a step-by-step process to easily transfer Windows 11/10 or other Windows OS to a new HDD/SSD. Follow these simple steps to move your operating system to the new storage device with minimal hassle.
For an efficient solution, you can always trust the reliable OS migration feature in Qiling manager software, as shown below. Learn how to do this on your own.
Also work to: Move everything from C to D drive, move program files x86to another drive, move OS with installed apps to a new disk.
Preparations: Make Everything Ready for Moving Windows 11/10
Before transferring Windows 11/10 OS, it's essential to prepare the necessary steps in advance to ensure a smooth transfer. This includes backing up all important files and data to an external drive or cloud storage, uninstalling any unnecessary programs, and updating the operating system to the latest version.
1. Prepare a New Hard Drive - HDD/SSD
To ensure your computer can detect a new hard drive before migrating to Windows 10, you should connect or install the new hard drive, allowing your computer to detect it correctly. This will help prevent any issues during the migration process.
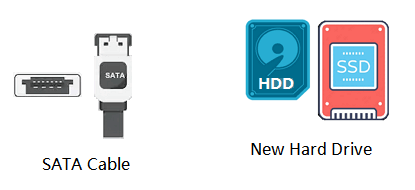
Step 1. Prepare a new HDD/SSD and a SATA cable.
Note The new hard drive/SSD must have more free space than the system C drive used space on the source disk.
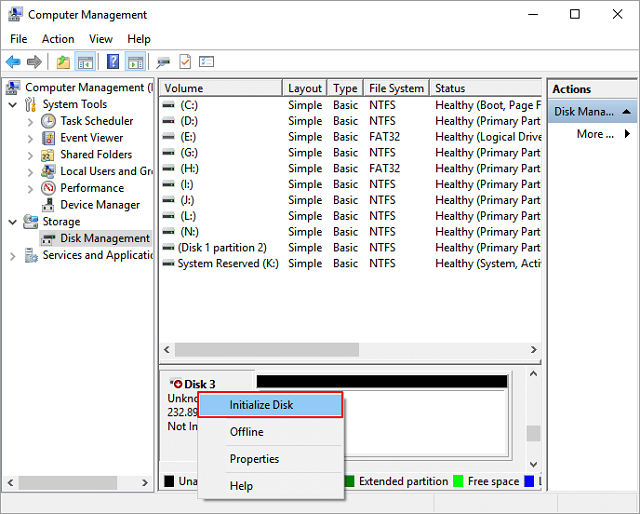
Step 2. Connect the new SSD/HDD to PC and initialize the disk.
To connect the SSD/HDD to your PC, attach it via SATA and power cables. Next, locate the new disk in Disk Management, right-click it, and select "Initialize Disk".
- Notice:
- If the destination disk has partitions and data on it, back up your data and delete all partitions before proceeding.
2. Download A Reliable Windows 11/10 Migration Tool
Here are two tools you can use to migrate your OS to another new disk:
| Qiling OS Migration Tool - Solution 1 | Windows System Image Tool - Solution 2 |
|---|---|
|
|
Qiling Suggestion: To safely migrate or move your Windows OS to another hard drive, Qiling partition manager software - Partition Master is the best option.
- Qiling Partition Master -
Your Smart Windows 11 Update Disk Manager
- MBR to GPT Converter, Make Disk Ready for Windows 11.
- Migrate Windows 11 to New SSD in 1-Click.
- Handy to Extend orCombine Partitions in Windows 11.
- Clone and Upgrade Disks without Data Loss.
Solution 1. How to Transfer Windows 11/10 to a New Hard Drive Via OS Migration Tool
Duration: 25 minutes - 1 hour or so.
Support: Migrating an OS from one Windows version to another, such as from Windows 11 to Windows 10, or from a smaller to a larger hard drive or solid state drive, can be done on various Windows platforms including Windows 11, 10, 8, 7, XP, and Vista, as well as Windows servers. This process can be performed in either direction, from a smaller to a larger drive, or vice versa, depending on the specific needs and requirements of the user.
To move Windows 11/10 to another new hard drive or SSD, you can follow these steps to transfer everything from the C drive to another disk without losing any data or needing to reinstall Windows and programs.
#Phrase 1. Transfer Windows 11/10 to a New Hard Drive (HDD/SSD)
Note:When migrating your operating system to an SSD or HDD, be aware that the process will delete and remove existing partitions and data on the target disk if there's not enough unallocated space available. To avoid losing important data, back up any saved files to an external hard drive before proceeding.
Step 1. Select "System clone" from the tools page.
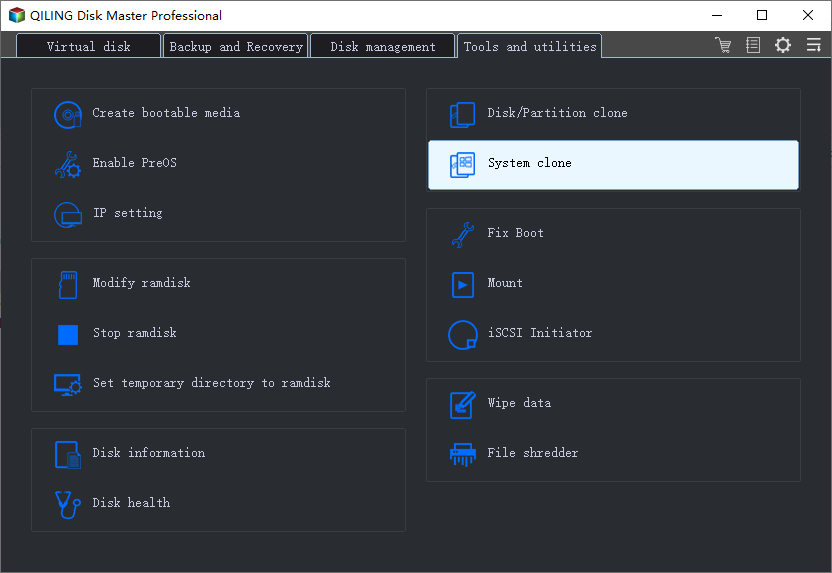
Step 2. The system partition will be selected automatically, and then click "Next" to proceed.
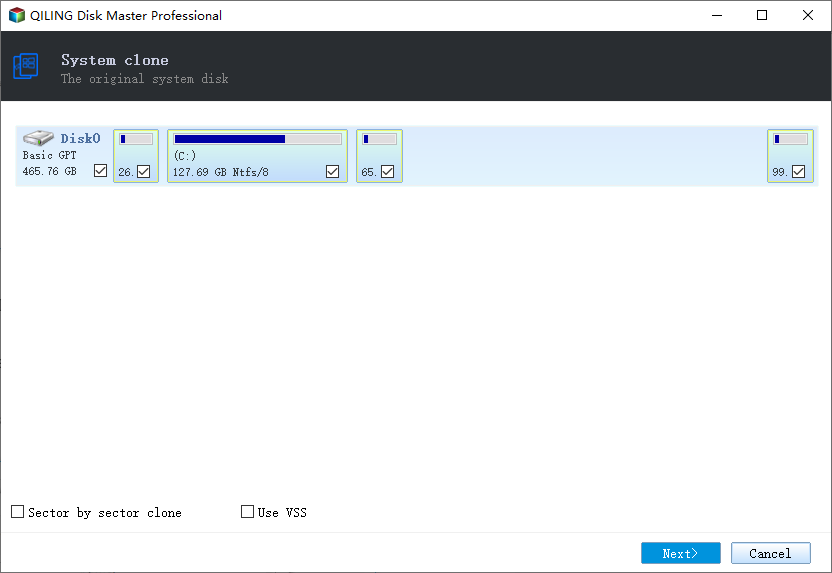
Step 3. Select the SSD or HDD as the destination disk and click "Next".

Step 4. Preview the layout of your target disk, and customize it as needed. Once satisfied, click "Proceed" to initiate the OS migration to the new disk.

Step 5. Please confirm the deletion of data and partitions on the target disk by clicking "OK" after acknowledging the warning message. This will erase all data and partitions on the target disk, so ensure you have backed up any important data beforehand. If you haven't backed up your data yet, do so now.
After the OS migration process is complete, you can proceed to set Windows 11/10 to boot from the new disk.
#Phrase 2. Set Up Windows 11/10 to Boot from New Hard Drive
After migrating to a new OS, you need to set up your computer to boot from the new hard drive, or it will continue to boot from the old system disk.
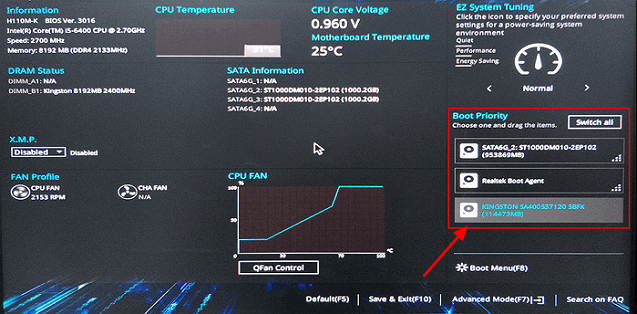
Here are the steps to set the OS to boot from the new disk by changing its boot priority from BIOS in one paragraph: To set the OS to boot from the new disk, access the BIOS settings by pressing the designated key (usually F2, F12, or Del) during boot-up, navigate to the Boot Priority or Boot Order section, and adjust the settings to prioritize the new disk as the first boot device. Save the changes and exit the BIOS settings, then restart the computer to test the new boot order.
Step 1. Restart PC and press F2/F12/Del to enter BIOS.
Step 2. Set the computer to boot from the newly installed hard drive in the Boot settings.
Step 3. Save changes, exit BIOS, restart PC.
After replacing the old hard drive with a new one, you can log in to your Windows 11/10 account and use the operating system on the new drive without any issues.
If you need to re-partition an old hard drive or make full use of the space on both new and old hard drives, Qiling Partition Master's features can help, allowing you to partition Windows 10 effectively.
Solution 2. Transfer Windows 10 To Another HDD/SSD With Windows System Image Tool
Duration: 30 minutes - 1 and half an hour or so.
Support: OS migration on Windows 10, small disk to big SSD/HDD only.
Limites: A new disk must have a larger capacity than the original system disk to ensure sufficient space for the operating system and all installed applications.
For experienced Windows users, running the Windows system image tool for Windows 10 migration may be a viable option, although it's not a convenient solution for the average user.
If you insist on doing so, follow the step-by-step operations in the below 3 phrases:
#Phrase 1. Create Windows 10 System Image to An External Hard Drive
Step 1. Connect an empty external hard drive to your PC.
Step 2.To access the Control Panel, type "Control Panel" in the Search box, select it to open it, and then click on "Backup and Restore (Windows 7)".
Step 3.To create a system image of Windows 10 on an external USB drive, click "Create a system image", select the external USB drive as the destination to save the Windows 10 system image, and then click "Next" to proceed.
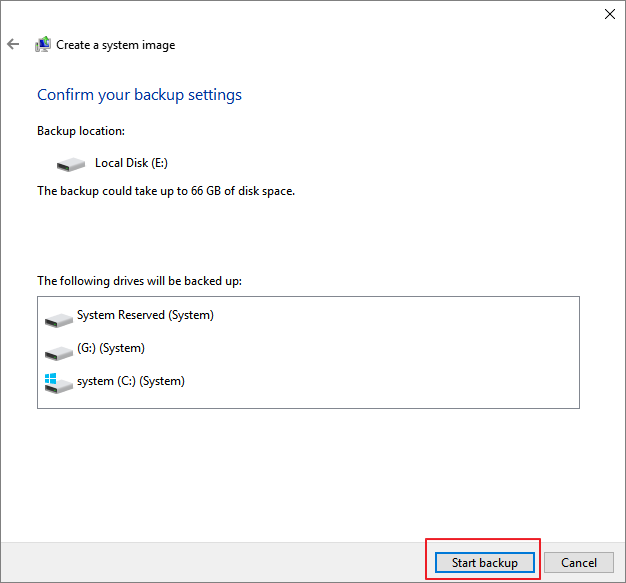
Step 4.The System and System Reserved partitions will be selected by default, click "Next" to continue.
Step 5.To start the backup process, click the "Start backup" button, which will initiate the creation of a system image of the current state of your computer and save it to the connected USB drive.
#Phrase 2. Create Windows Media Creation Tool
Step 1. Connect an empty USB flash drive (min 8GB) to PC.
Step 2. Download Windows 10 installation media and run it as an administrator.
Step 3. Select "Create installation media for another PC" and then click "Next" on the "What do you want to do?" interface.
Step 4. To choose the language, edition, and architecture for Windows 10, navigate to the Microsoft website and select the desired language, edition (such as Home, Pro, or Enterprise), and architecture (64-bit or 32-bit) from the drop-down menus. You can also specify the product key if you have one.
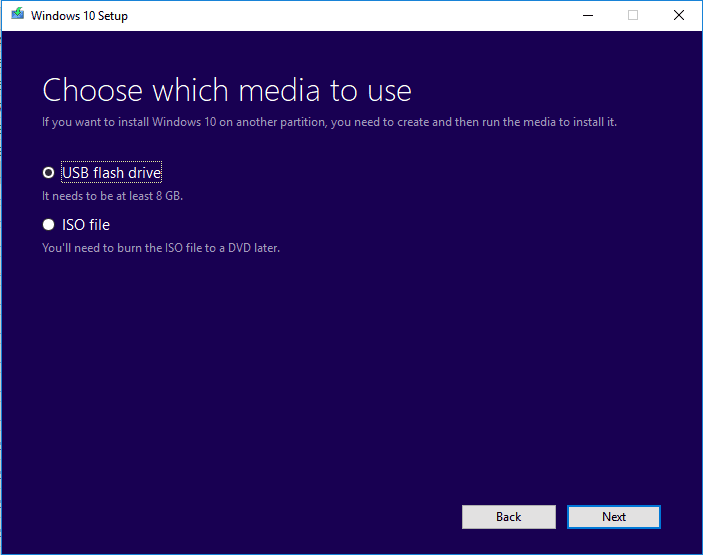
Step 5. Select USB flash drive to use:
#Phrase 3. Restore and Move Windows 10 System Image to Another New Disk
Step 1. Connect both the Windows 10 installation media and Windows image backup disk to your PC and reboot it.
Step 2. Press F1/F2/Del to enter BIOS and set the installation media as the boot drive.
Step 3. To reboot a PC from Windows Installation Media, click on "Repair your computer" from the "Install Now" window.
Step 4. To resolve the issue, go to the Advanced options, click on "Troubleshoot", and from there, select "System Image Recovery".
Step 5. To restore your Windows 10 system, select the "Select a system image" option to bring up your Windows 10 system image disk and select it. Then, click "Next" to proceed.
Step 6. Click "Exclude disks..." to exclude the original system disk, leaving the new HDD/SSD only, then click "OK" to confirm.
Step 7. Click "Next" to begin the recovery process and wait for the recovery process to finish.
Once you've restored the Windows 10 image to the new disk, Windows 10 will restart and boot up.
If Windows 10 doesn't boot up, you can set the new disk as the boot drive, and you'll be able to run Windows 10 on the new disk without any issues.
Conclusion
Migrating Windows 10 to a new hard drive or SSD can be done in three parts. You can transfer your operating system to a new drive without losing any data or experiencing boot issues by following a full guide. This process involves migrating your OS to a new hard drive or SSD, which can be achieved by using built-in tools or third-party software.
- To begin, prepare a new hard drive or SSD by initializing the disk and downloading a reliable operating system (OS) migration tool. This will ensure a smooth transition to your new drive.
- To migrate Windows 10 to a new hard drive or SSD, you can use an OS migration tool. This process is relatively straightforward and allows you to transfer your operating system and all its associated files to a new drive, effectively replacing your old hard drive with a newer one. The tool will guide you through the process, ensuring a smooth transition with minimal disruption to your system.
- Part 3. Move Windows 10 via System Image Tool.
For Windows beginners, we recommend using Qiling Partition Master to move Windows 10 to a new HDD/SSD with ease.
If you have more questions about migrating Windows 10 or transferring Windows OS to an HDD/SSD, check the Further Readings below for satisfying answers.
Further Readings - FAQs about Windows 11/10 OS Migration to HDD/SSD
Here, we collect some related questions that are frequently asked in the Windows forum. If you are having the same questions, check and find answers here.
1. How do I move Windows 11/10 to a new SSD?
To move Windows 10 to a new SSD, follow these steps: First, back up all your important files and data to an external drive or cloud storage. Next, shut down your computer and disconnect all peripherals except the power cord.
- 1. Connect a new SSD to your PC via a SATA cable, and initialize it with the same partition style as your operating system disk.
- 2. Download, install and run Qiling Partition Master on your PC.
- 3. Go to the Settings app, click on Update & Security, then on the left side click on Recovery, and select Migrate OS to HDD/SSD, and choose the new SSD as the target disk to move Windows 10.
- 4. Confirm and execute the operation.
- 5. To upgrade the computer's storage, insert a new SSD, restart the computer, and then enter the BIOS settings to set the computer to boot from the new SSD. This process allows the computer to recognize and utilize the new storage device, effectively replacing the old one.
2. How do I transfer Windows 11/10 to a USB flash drive?
To transfer Windows 10 to a USB drive, you can use the built-in tool in Windows 10 called "Media Creation Tool". This tool allows you to create a bootable USB drive with Windows 10 installed, which you can then use to install Windows on a new computer or use as a portable OS. To do this, you'll need a USB drive with at least 8GB of free space, and you'll need to download the Media Creation Tool from Microsoft's website.
- 1. Prepare an empty USB flash drive or external USB drive (external hard drive) with a bigger space than your system drive.
- 2. To migrate your system, download and run a reliable system migration software such as Qiling Backup.ckup, which can help with the process.
- 3. To create a Windows portable USB using Qiling Backup, select System Clone and choose the option to create a Windows portable USB.
Once the process is complete, you can take the USB to any computer and boot your own Windows 10 OS on the new computer. For detailed steps, refer to the "Transfer Windows 10 to a USB flash drive" guide.
3. How do I fresh install Windows OS, like Windows 11/10, to SSD?
You can install Windows 10 to an SSD in two ways. One is to migrate or transfer Windows 10 to the SSD using the Migrate OS feature in Qiling Partition Master, as recommended on this page.
To fresh install Windows 10 on an SSD, you can follow these steps: first, back up any important files and data; next, purchase a Windows 10 license or use a valid product key; then, download the Windows 10 media creation tool and create a bootable USB drive; after that, boot from the USB drive and follow the on-screen instructions to install Windows 10 on the SSD; finally, activate Windows 10 with the product key and complete the setup process.
- 1. Download the media creation tool from Microsoft.
- 2. Run the downloaded tool, selecting "Create installation media for another PC" and clicking "Next" to proceed.
- 3. Select "Language, Edition, and Architecture for Windows 10" and then click "Next".
- 4. Choose the USB Flash drive.
- 5. Insert the USB drive into PC and click "Next".
- After selecting the drive, the tool will begin downloading Windows 10, which will take a few minutes to complete.
- 6. Connect the USB drive to your Windows 7/8 computer and open Explorer. Click on the "Setup" file to run the installation process.
- 7. When you get to the Ready to Install dialog, click "Change" what to keep and choose "Nothing", then click "Next".
Follow the on-To complete the Windows 10 installation process, follow these brief steps: insert the installation media, restart your computer, and follow the on-screen instructions. If you prefer a detailed guide, you can refer to the page on transferring or installing Windows OS to an SSD, which has all the detailed steps you need.
4. How to move installed programs to another drive windows 7?
To move installed programs and apps to another drive in Windows 7, you can either use the built-in "Move" option in the Control Panel or use a third-party tool like Revo Uninstaller to relocate programs and their associated files to a different drive. Alternatively, you can also use the built-in "Programs and Features" feature in the Control Panel to uninstall programs and then reinstall them on the new drive, but this method may not relocate all associated files.
- 1. To transfer programs and program data to another drive, use PC Transfer software to move the files to the desired location.
- 2. To manually copy and move installed program files like .exe to another drive, you can simply copy and paste the files from the original drive to the new drive. This can be done by navigating to the file location on the original drive, selecting the desired files (usually in the Program Files or Program Files (x86) folder), and then copying them to the new drive using the copy function in File Explorer.
For more detailed steps, you can follow the guide on how to transfer installed programs to a new hard drive, which provides a step-by-step process to help you relocate your installed programs to the new drive. This process typically involves backing up your data, disconnecting the old drive, and reconnecting the new drive, and then reinstalling your programs from the new drive.
Related Articles
- Running [Bootrec /fixboot] Returned Error 'Access is denied' - FIX 2022
- How to Move Space from D Drive to C Drive Windows 11/10/8/7
- FIX: Missing Operating System (Operating System Not Found) for Windows 10/8/7/XP/Vista
- [Fixed] 'Current Read-Only State Yes' on USB Flash Drive/SD Card
- How to Unpartition Hard Drive on Windows 10 And 11
How to unpartition hard drive on Windows 10, 8, 7, as well as Windows 11? You can delete all partition on the hard drive to merge partitions back into a single unallocated space. - Solved: Lenovo Laptop Running Slow Windows 10
If your Lenovo laptop running slow, you need to read this article for why Lenovo laptop running slow on Windows 11/10/8/7 and how to speed up Lenovo laptop.