Change a USB Drive from FAT32 to NTFS Without Formatting
Windows can convert a healthy FAT or FAT32 volume to NTFS while retaining files, but the operation is one-way and not a substitute for a backup. First decide whether NTFS is appropriate for the devices that will read the USB drive.
Check Compatibility and Drive Health
FAT32 works with many cameras, consoles, and firmware tools but cannot store a single file larger than 4 GB. NTFS supports large files and Windows permissions, but some non-Windows devices cannot read it. In File Explorer, right-click the USB volume, choose Properties, and confirm it actually says FAT32. Record the drive letter, label, model, and free space.
Copy important files to another physical disk and open sample copies. If the USB reports errors, disconnects, or is write-protected, fix the underlying problem or replace the device before conversion. Do not use an in-place conversion on the only copy of valuable files.
Convert with the Windows Command
Step 1. Close applications using the USB drive and open Command Prompt as administrator. Verify its current letter again in File Explorer; Windows can reassign removable drives.
Step 2. Run convert E: /fs:ntfs, replacing E: with the confirmed USB letter. If Windows asks for the current volume label, type it exactly as shown in Properties.
Step 3. Let the conversion finish. Do not unplug the drive or shut down the PC. If it cannot lock the volume, follow the on-screen choice to close open handles or schedule conversion only when appropriate; do not force it while files are being written.
Step 4. Reopen Properties and confirm NTFS. Browse several folders, open representative files, and safely eject/reconnect the USB to ensure they remain readable. Keep the backup until that check passes.
When Conversion Is Not Suitable
Windows' built-in convert goes from FAT/FAT32 to NTFS, not back to FAT32. It may refuse a damaged or incompatible volume. For exFAT, or when you need to return to FAT32, use a backup, format, and restore workflow instead. Formatting erases the selected volume.
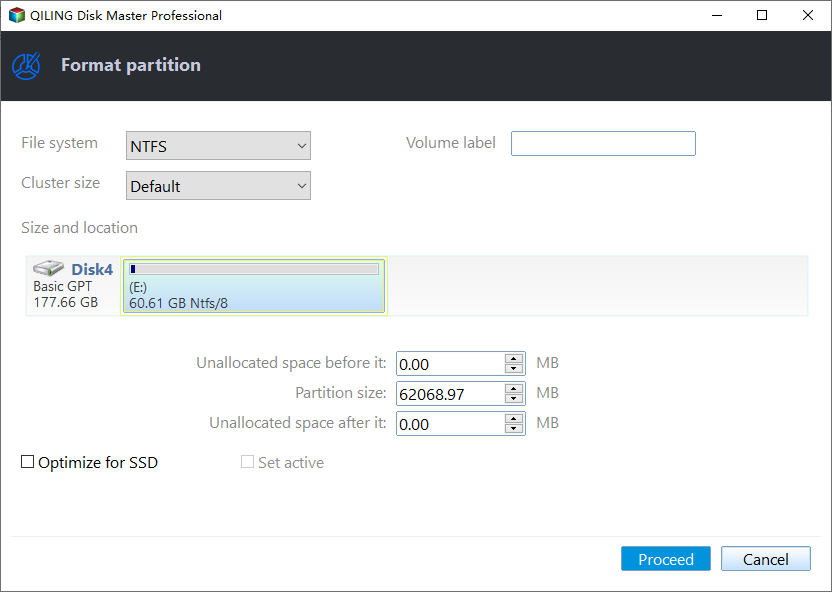
Qiling Disk Master's File backup can protect the data before a format: select USB folders in the source tree, choose a different physical disk as destination, click Proceed, and verify the image. In Disk management, select the verified USB data partition, choose Format, set NTFS, click Proceed, confirm the data-loss warning, then restore and open sample files.
Common Questions
Will conversion make the USB faster?
Not necessarily. USB port, controller, and flash quality dominate many workloads; file-system overhead varies with file sizes.
Can I convert a bootable recovery USB?
Do not alter a bootable USB without confirming the boot environment supports NTFS. Recreate official boot media if you need a different file system.
Conclusion
Use Windows Convert only for a healthy FAT32 volume that should become NTFS, and keep a verified backup because interruption or device failure can still lose data.
Related Articles
- NTFS vs exFAT vs FAT32
Choose the right file system for each device. - Change Cluster Size Without Formatting?
Know which file-system changes require a format.
Products
Articles & Tutorials
- Data Recovery
- Data Backup
- File Recovery
- File Backup
- System Backup and Restore
- Disk and Partition Clone
- Technical articles
- Mobile articles
- Disk Master Help
- Windows Data Recovery Tutorials
- Windows Secure Delete Tutorials
- Windows Partition Management Tutorials
- Windows File Backup and Restore Tutorials
- Windows System Backup and Restore Tutorials
- Windows Disk Backup and Restore Tutorials
- Windows Clone Tutorials