How Do I Format My SD Card in Windows?
Formatting prepares an SD card for a file system, but it removes access to existing files. Copy everything you need to another drive first. If the card contains missing photos, recover them before formatting; formatting is not a recovery step.
Before you format
Identify the card by its capacity and drive letter in File Explorer and Disk Management. Remove other USB drives so the target is unmistakable. SDHC cards generally use FAT32 and SDXC cards generally use exFAT, but a camera, console, or recorder may require a specific format or may provide its own formatting menu. Check that device's manual. Windows' NTFS option is suitable only when the receiving device supports it.
The SD Association recommends its SD Memory Card Formatter for SD-family cards because it follows the card specification. For a card that belongs to a camera, formatting it in the camera after making a backup is also sensible. Do not treat repeated formatting failures as something software can always repair; the card may be worn out or locked.
Format the SD card in Windows
Step 1. Insert the card through a compatible reader. Open File Explorer, select This PC, and confirm the removable drive's capacity and letter. Copy its files elsewhere and close any programs using it.
Step 2. Right-click the card and select Format. Choose the file system required by your device, enter a short volume label if useful, and leave allocation unit size at the default unless the device maker specifies otherwise.
Step 3. Choose Start, read the deletion warning, and confirm only after rechecking the drive letter. When Windows reports completion, safely eject and reinsert the card; copy a test file and open it. If the card is for a camera, let the camera initialize it before important use.
Format the Card with Qiling Disk Master
Use this route when you need to inspect the partition layout before formatting. It still deletes data from the selected partition.
Step 1. Open Disk management in Qiling Disk Master. Find the removable disk by capacity and select only the SD card's data partition. Verify the disk number; the screenshots show example disks, not your card.
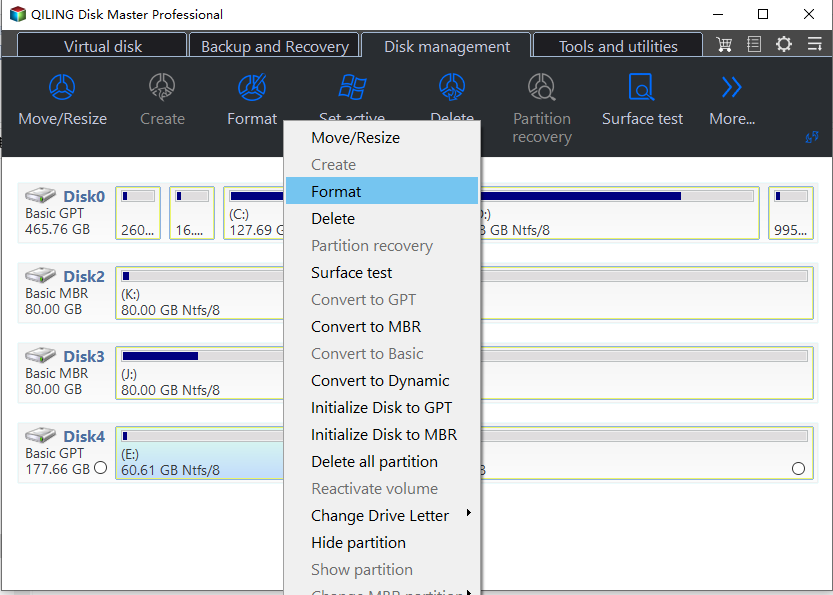
Step 2. Choose Format from the toolbar or right-click menu. In the format dialog, set the file system required by the destination device and, if desired, a volume label. Do not change partitions on the computer's boot disk.
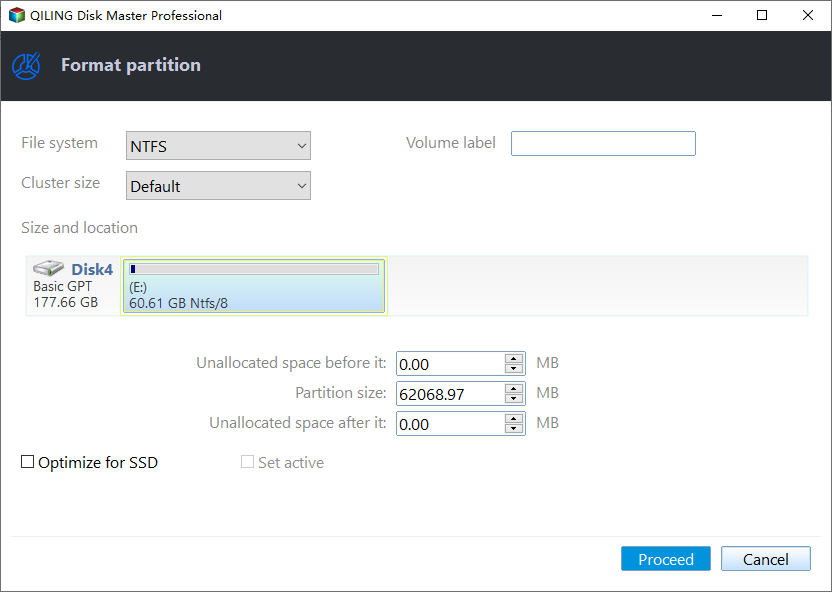
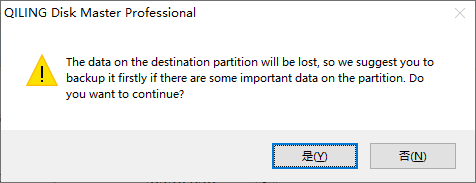
Step 3. Click Proceed, read and accept the data-loss warning for the identified SD card, and wait for the operation to finish without unplugging the reader. Then verify the new file system in Windows and test a copy.
What if Windows cannot format it?
Check the adapter's physical lock switch and try another reader. In Disk Management, confirm the card has a usable capacity. If the capacity is zero or the card disconnects under light use, replace it. A read-only card may be failing; do not erase its only copy of important files. If the format succeeds but a device rejects the card, review that device's capacity and file-system requirements rather than repeatedly changing formats.
Conclusion
Back up, identify the exact removable disk, use a device-compatible file system, and verify the card after formatting. Do not continue relying on a card that repeatedly fails.
Related Articles
- Check SD Card Health in Windows
Check a suspect card before deciding whether to reuse it. - Force Format an SD Card
Review write protection and format errors before trying another format.
Products
Articles & Tutorials
- Data Recovery
- Data Backup
- File Recovery
- File Backup
- System Backup and Restore
- Disk and Partition Clone
- Technical articles
- Mobile articles
- Disk Master Help
- Windows Data Recovery Tutorials
- Windows Secure Delete Tutorials
- Windows Partition Management Tutorials
- Windows File Backup and Restore Tutorials
- Windows System Backup and Restore Tutorials
- Windows Disk Backup and Restore Tutorials
- Windows Clone Tutorials