How to Partition A Hard Drive in Windows 11/10 [Create & Format Hard Disk]
This article focuses on a step-Here's a one-paragraph, step-by-step tutorial on partitioning a hard drive on Windows 11 and 10:
| Workable Solutions | Step-by-step Troubleshooting |
|---|---|
| Is It A Good Idea to Partition Your Hard Drive? |
See the pros...Full steps See the cons...Full steps |
| How to Partition Hard Drive Windows |
Create and format hard drive with Disk Management...Full steps Use all-in-one free disk manager...Full steps |
| How to Partition Hard Drive Mac | Run Disk Utility...Full steps |
Is It a Good Idea to Partition Your Hard Drive?
When considering partitioning a hard drive, weigh the pros and cons. On one hand, partitioning allows for better organization and management of sensitive data, making it easier to keep certain files separate from others. This can be particularly useful for users who need to keep their personal and work files separate. On the other hand, partitioning can also lead to clutter and confusion if not done properly, especially if multiple partitions are created without a clear plan. Additionally, partitioning may require additional maintenance and troubleshooting efforts, such as ensuring that each partition has its own operating system and software installed. Ultimately, the decision to partition a hard drive depends on individual needs and preferences.
Partitioning a hard drive can be a useful way to organize your computer's files and resources, but it can also lead to data fragmentation and decreased overall performance.
The Advantages of Partitioning A Hard Disk:
- Partitioning your hard drive can help protect your operating system and files from corruption or loss by separating them from other data.
- Partitioning a hard disk can make it easier to back up data, as you can choose to copy only the partition with important files.
The Cons for Hard Disk Partition:
Partitioning a hard drive can both improve and decrease its performance, as it requires the hard drive to work harder to access partitioned data, potentially leading to a decrease in overall system performance. Additionally, improper partitioning can result in accidental deletion of essential files or damage to the operating system.
Partitioning a hard drive can be a useful way to organize your files and improve your computer's performance, but it's not without its drawbacks. On one hand, partitioning can help you free up space on your main drive, improve loading times, and make it easier to back up your files. On the other hand, it can also lead to data loss, make it harder to manage your files, and even cause system crashes if not done properly.
How to Partition A Hard Drive in Windows 11/10?
Making a new volume is a straightforward process that can be accomplished with two easy methods, both of which allow you to create a new volume without losing any data. Whether you're a beginner or a tech-savvy user, these methods provide a hassle-free way to create a new volume.
- Notice:
- If you choose to use disk management, it's a good idea to back up all data on the targeted partition, even though creating or making partitions typically can't cause data loss.
Method 1. Create Partition in Windows 11/10 with Disk Management
Step 1. Right-click the Windows icon, then select Disk Management from the menu.
To open disk management, press Windows + R to open the Run box and type diskmgmt.msc. This will launch Disk Management.
If your partition doesn't have the unallocated space, please follow step 2 to shrink volume first. Otherwise, please go to step 3 and continue.
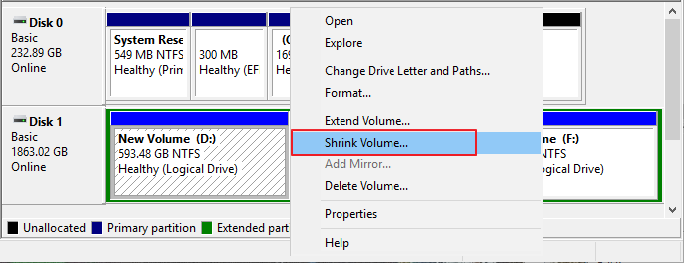
Step 2. Shrink Volume to Create Unallocated Space.
Right-click the disk volume and choose "Shrink Volume."
To shrink a drive, open the Settings app, click on System, then Storage, then Manage. On the Manage window, select the drive you want to shrink and click on the Shrink button. In the Shrink window, enter the amount of space to shrink in MB and click Shrink.
Then you can check the unallocated space next to the hard disk partition.
Step 3. Right-click the unallocated space and select New Simple Volume.
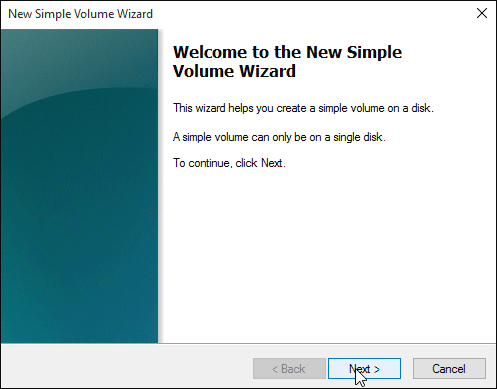
Follow the guide of New Simple Volume Wizard:
- Enter simple volume size in MB > Click Next
- To assign a drive letter, select a drive letter from the list and click "Next".
- This volume was successfully formatted with the specified settings. The file system, allocation unit size, and volume label were set as requested.
Advanced Option: Formatting Hard Drive with Disk Management
If the existing partitions have no room to make unallocated space, formatting a partition is an option. However, formatting a system partition is not allowed, but it can be done on a data partition without an installed OS.
How to Format A Hard Drive Partition:
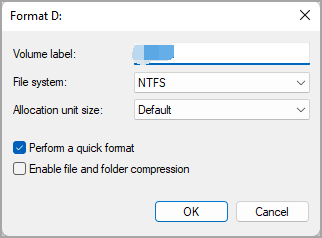
- Right-click the partition you want to format and select format.
- Check the default settings of volume label, file system, and allocation unit size, then click OK.
Method 2. Partition Hard Drive by Qiling Partition Master
Qiling Partition Master is a free partition manager that helps partition hard drives, offering a user-friendly interface and step-by-step guides, making it suitable for beginners, and compatible with all Windows operating system versions.
Step 1. Check for free space
To divide a disk partition into multiple ones, ensure there's enough free space to allocate.
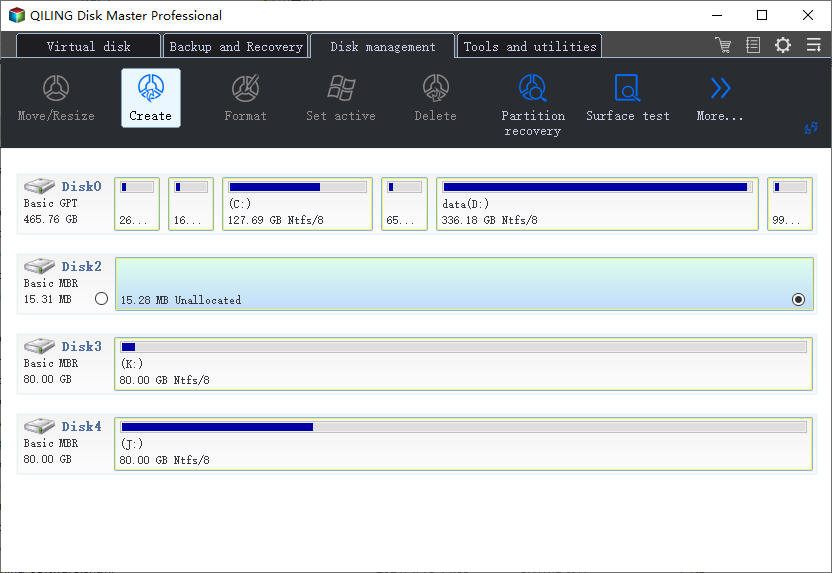
Step 2. Shrink a disk partition to create unallocated space
Start by clicking on the "Resize/Move" feature, then select a partition with ample free space and click on it to initiate the resizing process.

To free up space, drag the partition to the right or left, allowing you to shrink its size, as indicated by the red arrow, and create ample unallocated space. The "Partition size" area will display the amount of space that has been decreased. Click "Proceed" to confirm.

After shrinking a disk, go back to the main window, and you should see unallocated space appearing under the same disk where the shrinked one was, indicating the freed up space.
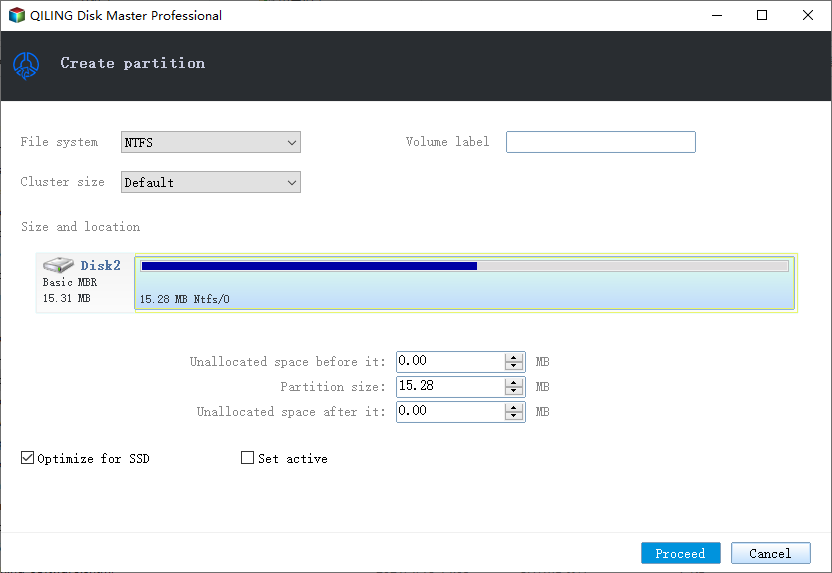
Step 3. Create a new partition on unallocated space
The final step is to create a usable partition drive from the unallocated space. To do this, click on the unallocated space and select "Create" from the options. This will allow you to turn the unallocated space into a drive with a recognized file system.
To customize the partition information, select a drive letter, partition label, and file system (such as NTFS, FAT32, or EXT2/3/4) from the Advanced Settings. Click "Proceed" to confirm your choices.
The app creates a partition on the unallocated space, and the process can be repeated to create multiple partitions on a hard drive.
How to Partition A Hard Drive on Mac?
Partitioning a hard drive on a Mac is a straightforward process that can be accomplished using Disk Utility. To create a partition, simply follow the easy steps provided by Disk Utility to divide your hard drive into separate sections, allowing you to organize and manage your files in a more efficient and organized manner.
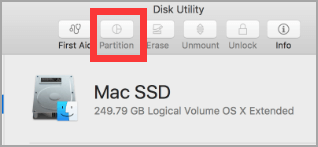
Step 1. To open Disk Utility, go to Finder, select "Go" from the top menu, then choose "Utilities", and double-click on the Disk Utility icon.
Step 2.To partition the drive, click on the "Partition" button from the top toolbar and then click on the "+" icon.
Step 3.After the installation process, you will see the Partition screen where you can set the partition information.
Step 4. When it's finished, click the Apply button.
Final Thoughts
Partitioning a hard drive can improve computer performance by organizing files and protecting data from corruption or deletion, and can be learned with online resources.
Related Articles
- 2022 Top 3 USB Format Tools For Mac Are Here to Help
- SSD System Reserved: How to Remove System Reserved Partition
- 12 Ways to Fix Low Disk Space Error on Windows 11/10/8/7 [2022 New]
- How to Format BitLocker Drive/USB/SD Card With or Without Password
- Best Free GParted Windows Alternative Tool
Gparted Windows alternative tool - Qiling Partition Master makes everything simple and easy for you to manage Windows partition and space. 3 simple steps fix all complex partition management problems with this tool. - Hard Drive Keeps Losing Disk Space
If you're experiencing a mysterious loss of disk space on your system C drive, despite not installing new programs or saving new files there, it's likely due to hidden space-hoggers. Read on to discover the possible culprits behind the missing space.