Unhide the Recovery Partition on an HP Desktop
HP desktops often include a hidden recovery partition for factory recovery files or Windows Recovery Environment tools.
This guide explains when to unhide it, how to inspect it safely, and why you should not edit or store files there.
PAGE CONTENT
- What This Problem Means
- Before You Start
- Use Windows Built-in Tools First
- Use the Qiling Product Workflow
- Check the Result
- FAQs
What This Problem Means
Unhiding usually means assigning a drive letter or changing attributes. It does not repair a broken recovery image by itself.
- Recovery partitions may be required for Reset this PC.
- Assigning a drive letter exposes files that should not be edited.
- Low free space in recovery partitions is normal.
- Deleting it can break recovery options.
- 顦?/i> Important
- Do not format, clean, or resize an HP recovery partition before creating a full system backup.
Before You Start
Create recovery media or a system image first, then identify whether the partition is WinRE or OEM recovery.
- Confirm the exact disk, partition, USB drive, SD card, or Windows installation you are changing.
- Copy irreplaceable files to another drive if the device is still readable.
- Check whether BitLocker, Secure Boot, UEFI/Legacy mode, or a vendor recovery partition is involved.
- Avoid formatting, deleting, wiping, or running DiskPart clean until you know whether data must be recovered first.
Use Windows Built-in Tools First
Windows does not provide a normal Explorer view for a protected recovery partition. You can temporarily assign a drive letter when you need to inspect the partition, but do not treat it as ordinary storage.
Step 1. Press Win + R, type diskmgmt.msc, and press Enter. In Disk Management, identify the HP Recovery or OEM partition by its label, size, and position. Do not select the EFI, System Reserved, or Windows partition.
Step 2. Open an administrator Command Prompt and run reagentc /info. Check the Windows RE location so you know whether the partition is currently used by Windows recovery.
Step 3. In the same administrator window, run diskpart, then list disk and list volume. Select the volume only after matching its size and label, for example: select volume X.
Step 4. Assign a temporary unused letter with assign letter=R. Replace R with an available letter on your computer. Do not use clean, format, or delete partition.
Step 5. Inspect the partition in File Explorer without changing or storing files. When finished, return to DiskPart, select the same volume, and run remove letter=R to hide it again.
Detailed Qiling Disk Master Workflow
Qiling Disk Master provides a graphical way to assign or remove a drive letter. Use it only when you have identified the correct HP recovery partition and do not need to resize, format, delete, or convert it.
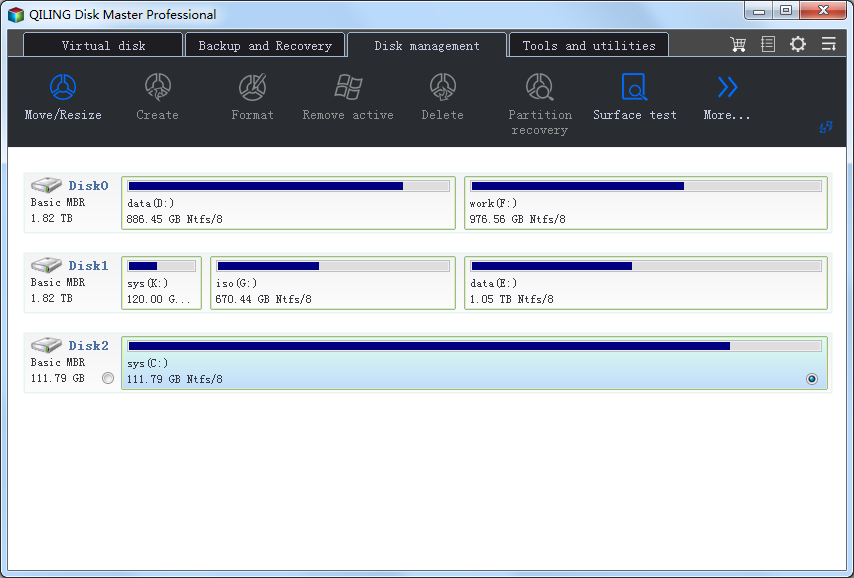
Step 1. Open Qiling Disk Master and locate the HP Recovery or OEM partition. Compare its capacity, label, file system, and position with Disk Management before selecting it.
Step 2. Select the recovery partition, click More, and choose Change Drive Letter. The drive-letter assignment is applied from this dialog.
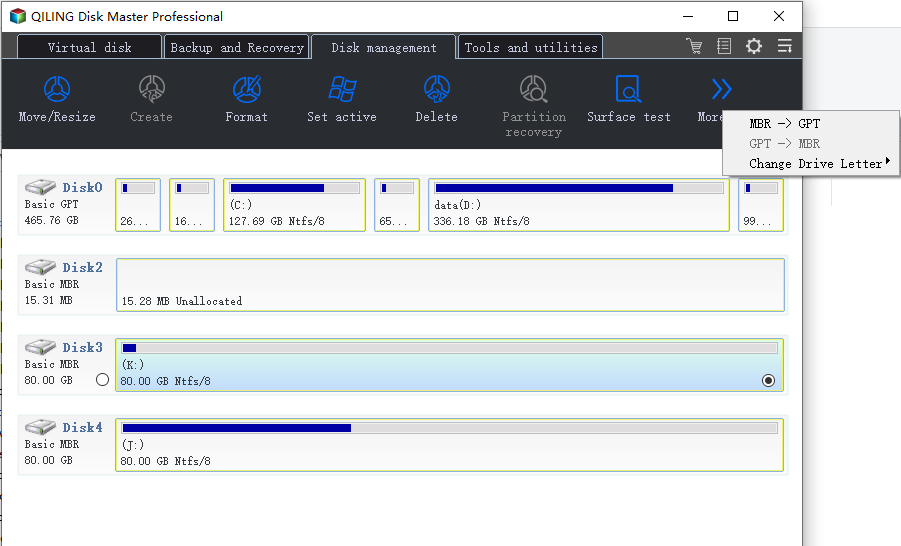
Step 3. In the Change Drive Letter window, choose Add, select an unused letter such as R:, and click OK. Confirm that the selected partition is the HP Recovery or OEM partition before accepting the change.
Step 4. Open File Explorer and inspect the newly visible partition without editing, deleting, or storing files. A drive letter only makes the partition accessible; it does not repair a damaged recovery image.
Step 5. After the inspection, select the same partition in Qiling Disk Master, click More, choose Change Drive Letter, select the temporary letter, and click Remove. Confirm the removal if Windows displays a warning.
Step 6. Run reagentc /info again and confirm that Windows RE still points to the expected recovery location. Leave the recovery partition without a drive letter unless you need to inspect it again.
Check the Result
Run reagentc /info again and test Advanced startup to confirm recovery options still open.
- Restart Windows and confirm the drive, partition, backup task, or cloned disk appears as expected.
- Open several files instead of only checking that a drive letter exists.
- Keep one recent backup on an external drive before making another high-risk change.
- If the same error returns, check hardware health, cable quality, firmware, and Event Viewer before repeating the same operation.
FAQs
Can I unhide the HP recovery partition?
Yes temporarily, but it is safer to leave it hidden unless troubleshooting.
Can I use it for storage?
No. It is reserved for recovery tools and usually too small.
Is it safe to delete it?
Only after recovery media and a full backup, and only if it is not the active WinRE partition.
Conclusion
You can unhide an HP recovery partition for inspection, but treat it as protected. Back up first and hide it again afterward.
Related Articles
- Best Free Partition Manager Software of 2026
- How to Clone HDD to SSD in Windows 10/11/7
- Windows System Backup and Restore Tutorials
- Windows Data Recovery Tutorials
Products
Articles & Tutorials
- Data Recovery
- Data Backup
- File Recovery
- File Backup
- System Backup and Restore
- Disk and Partition Clone
- Technical articles
- Mobile articles
- Disk Master Help
- Windows Data Recovery Tutorials
- Windows Secure Delete Tutorials
- Windows Partition Management Tutorials
- Windows File Backup and Restore Tutorials
- Windows System Backup and Restore Tutorials
- Windows Disk Backup and Restore Tutorials
- Windows Clone Tutorials