ISO Image Software for Windows: Create Bootable Media Correctly
An ISO is a container commonly used for optical-disc or boot-media contents. It is not the same as a backup image of your personal files or a clone of an installed Windows disk. Choose the tool according to what you need to boot or restore.
Choose the Correct Image Type
For a Windows installation or repair USB, use Microsoft's current installation-media or recovery instructions and an official image. For Qiling's own recovery environment, use its Create bootable media function to export a Qiling ISO. For disaster recovery of your PC's files and partitions, create a system or disk backup image as a separate task. Renaming a backup file to .iso does not make it bootable.
Keep the ISO on a healthy drive and check its size after export. If you downloaded a Windows installer, obtain it from the publisher's official site and verify authenticity. An ISO file is not directly bootable just because it appears on a USB stick; the USB must be prepared by an appropriate media-creation tool.
Different ISO utilities serve different jobs. Rufus focuses on writing bootable USB media; PowerISO and UltraISO offer broader disc-image editing and burning features; ImgBurn is mainly for optical-disc imaging; Qiling creates its own recovery-environment ISO. Check the official download, supported Windows version, license, and whether the tool can make the specific medium you need. None of these tools turns an ordinary file backup into an installed Windows system.
Export a Qiling Bootable ISO
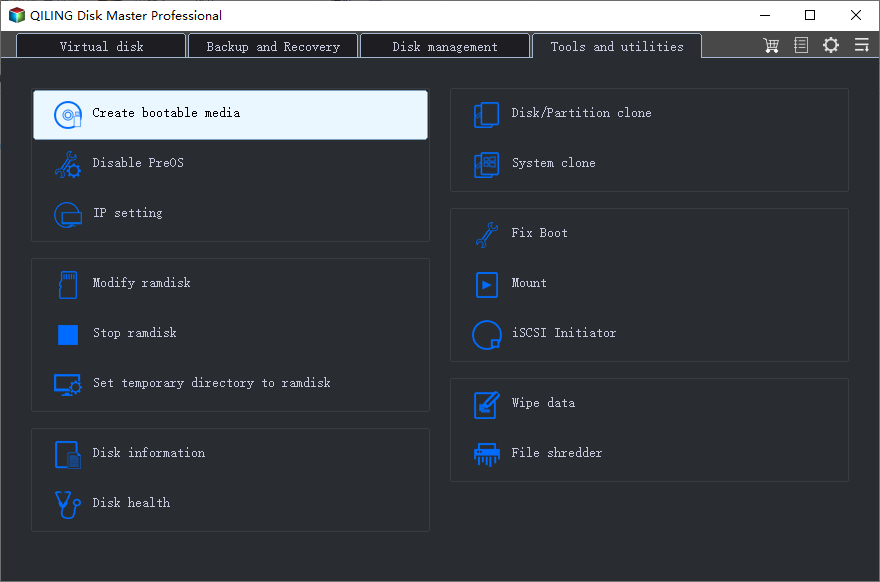
Step 1. Open Qiling Disk Master on a working Windows PC. Select Tools and utilities > Create bootable media. Have storage ready for the exported ISO and any drivers the target PC may require.
Step 2. In the media wizard, choose the option to export an ISO file rather than writing directly to USB. Select an output path with sufficient free space.
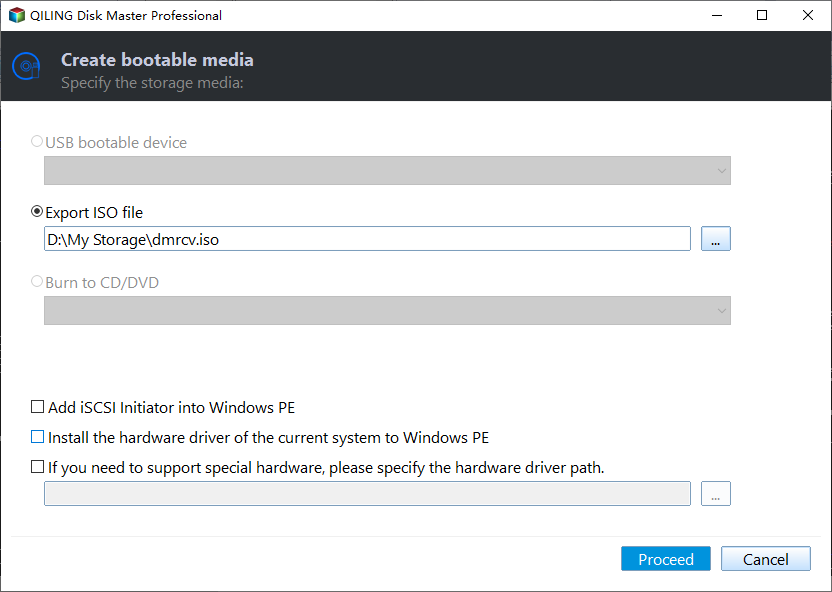
Step 3. If the target computer needs a storage or network driver not included in the recovery environment, add the vendor-supplied driver only after verifying its source and architecture. Do not load unrelated drivers.
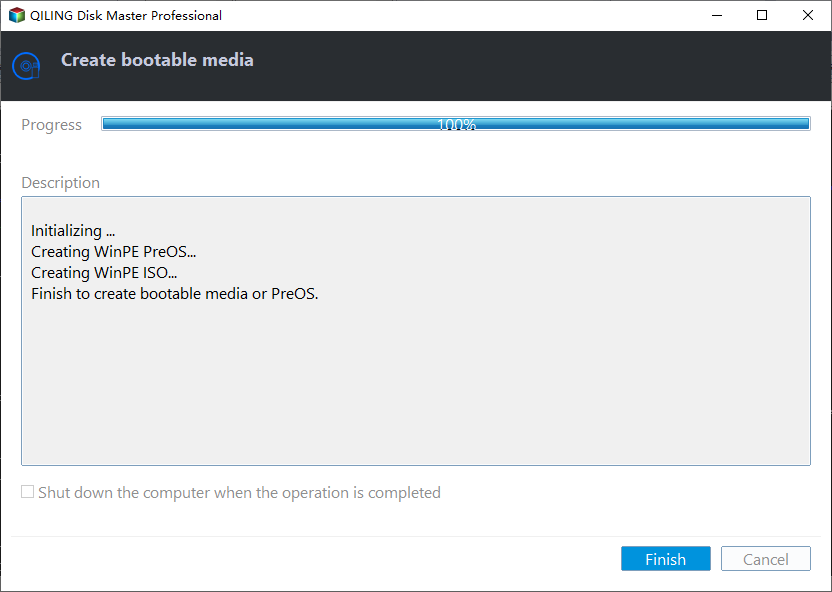
Step 4. Click Proceed to export the ISO, wait for completion, and confirm the file exists at the selected path. Record the tool version and date so you can regenerate it if hardware changes.
Write and Test the Media
Use a trusted boot-media writer to write the ISO to a disposable USB drive; this erases that USB. Check its capacity and physical label before starting. Boot the target computer from the USB through its one-time boot menu and verify that the Qiling environment can see the internal disk, external backup disk, keyboard, and network if needed. Testing the menu is not a restore and should not change your data.
If firmware is UEFI-only, select a UEFI-compatible boot entry. If Secure Boot blocks the medium, consult the vendor's supported procedure; avoid turning off security settings without understanding and recording the original configuration. Keep a separate copy of the backup image because the bootable ISO alone contains no personal backup.
Common ISO Mistakes
Mounting an ISO in Windows only opens its contents in the running system. Copying its files to an unprepared USB may not create boot code. A Windows installation ISO does not contain your old applications or files, and a Qiling boot ISO is not a Windows installer. Pick the right image, then test it before the day you need recovery.
Conclusion
Treat bootable ISO, installation media, and disk backup as separate deliverables, and verify both the media and the backup before relying on them.
Related Articles
- File Backup in Windows
Create a data backup separately from boot media. - Burn an ISO to USB in Windows 10
Prepare USB media and check boot behavior.
Products
Articles & Tutorials
- Data Recovery
- Data Backup
- File Recovery
- File Backup
- System Backup and Restore
- Disk and Partition Clone
- Technical articles
- Mobile articles
- Disk Master Help
- Windows Data Recovery Tutorials
- Windows Secure Delete Tutorials
- Windows Partition Management Tutorials
- Windows File Backup and Restore Tutorials
- Windows System Backup and Restore Tutorials
- Windows Disk Backup and Restore Tutorials
- Windows Clone Tutorials