Create a New Partition on a GPT Disk with DiskPart in Windows 10
A GPT disk can contain multiple data partitions. DiskPart works when the disk has unallocated space, or when an existing NTFS data volume can be shrunk first. The crucial step is identifying the right disk and volume before issuing commands.
Before You Start
Back up important files and keep the computer on reliable power. Open Disk Management and note the disk number, capacity, free space, and the drive letter of the data volume you intend to shrink. Do not select the EFI System Partition, Microsoft Reserved partition, Recovery partition, or a disk you have not identified. If BitLocker is enabled, save the recovery key before changing partitions.
Create the Partition with DiskPart
Step 1. Search for Command Prompt, choose Run as administrator, type diskpart, and press Enter. Type list disk. Compare the displayed sizes with Disk Management; then type select disk N, replacing N with the verified disk number. Type detail disk and stop if the model or existing volumes do not match.
Step 2. Type list volume. If this disk already has enough unallocated space, skip to Step 3. Otherwise select the existing NTFS data volume with select volume X and confirm with detail volume. Type shrink querymax to check the available shrink amount, then shrink desired=10240 to free about 10 GB. Replace 10240 with the required size in MB; leave adequate free space in the original volume. Do not shrink an EFI or Recovery volume.
Step 3. Type select disk N again, using the disk number checked in Step 1, and confirm with detail disk. Type create partition primary size=10240 to create a 10 GB partition in the unallocated area on that disk. If you want to use all remaining unallocated space, omit size=10240. Type list partition and detail partition to verify the newly selected partition before formatting it.
Step 4. Type format fs=ntfs quick label=Data. Formatting erases any content on the selected partition, so do not run this command unless Step 3 created and selected the intended new partition. Type assign letter=E if E is unused, or type assign to let Windows choose a letter. Finish with exit.
Step 5. Open File Explorer and Disk Management. Check the new partition's capacity, NTFS format, and drive letter. If shrink reports insufficient space, do not force the command; check for immovable files and use a verified backup before considering another method.
Create It with Qiling Partition Master Instead
Step 1. Back up the disk and open Qiling Partition Master. If there is no unallocated space, select the existing data partition and choose Move/Resize. Drag its right edge left or enter a smaller size, confirm the change, and click Proceed. Wait for the shrink to finish; do not interrupt it.
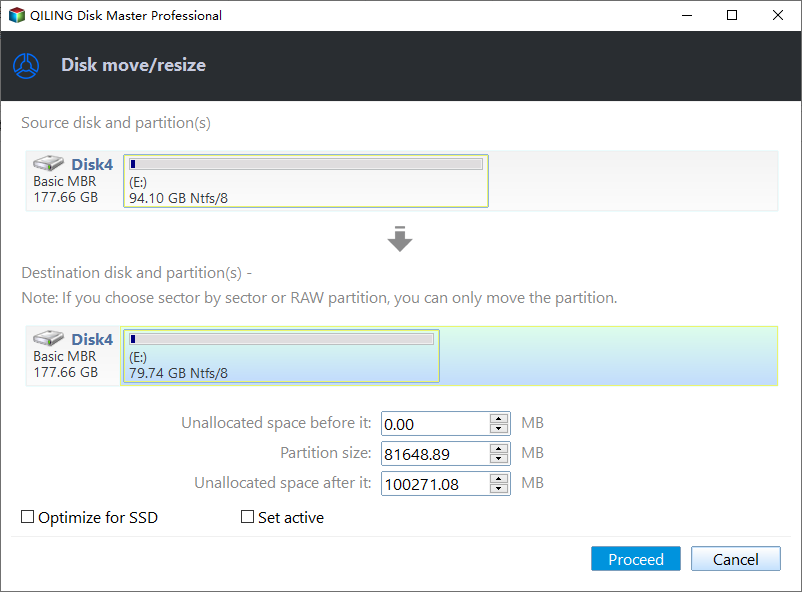
Step 2. Select the resulting unallocated space and choose Create. Set the partition size, NTFS file system, label, and available drive letter; confirm the settings.
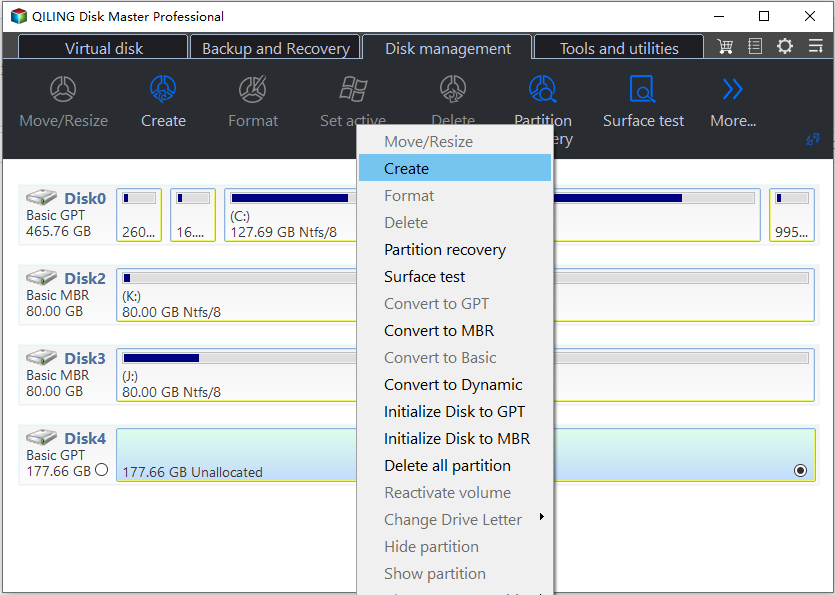
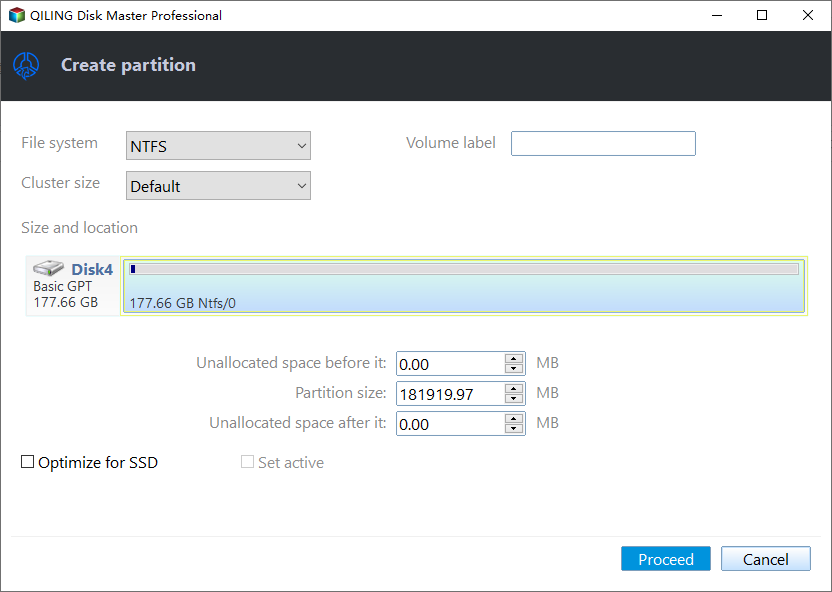
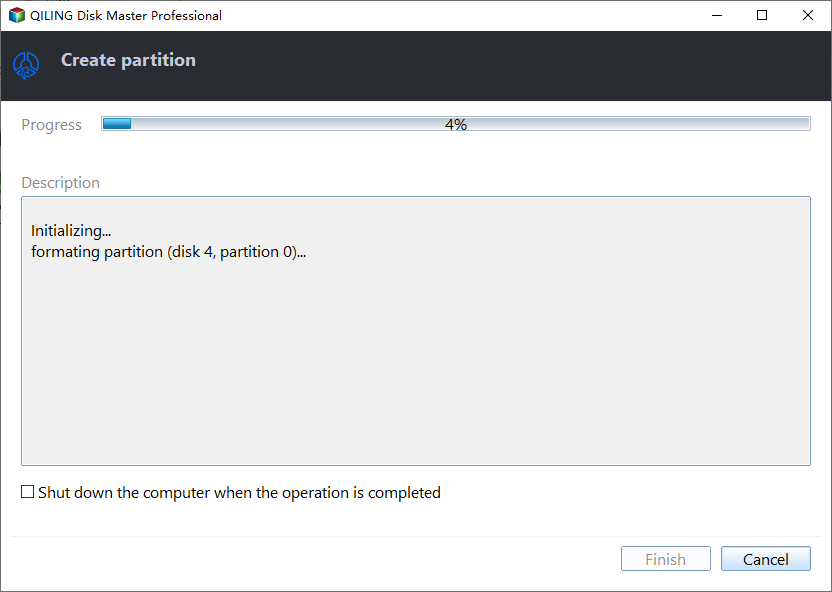
Step 3. Click Proceed to create the partition. Wait for completion, then check the new drive in Disk Management and File Explorer.
Conclusion
DiskPart can create a GPT data partition once the target disk and free space are verified. Use the graphical workflow when you prefer to review the layout visually, but back up first in either case.
Related Articles
- Create a GPT Partition in Windows 10
Another guide to GPT partition creation and common DiskPart errors. - Partition a Drive Without Formatting the Existing Volume
How to make room for a new partition while keeping the original data volume.
Products
Articles & Tutorials
- Data Recovery
- Data Backup
- File Recovery
- File Backup
- System Backup and Restore
- Disk and Partition Clone
- Technical articles
- Mobile articles
- Disk Master Help
- Windows Data Recovery Tutorials
- Windows Secure Delete Tutorials
- Windows Partition Management Tutorials
- Windows File Backup and Restore Tutorials
- Windows System Backup and Restore Tutorials
- Windows Disk Backup and Restore Tutorials
- Windows Clone Tutorials