How to Partition Hard Drive (including C drive) in Windows 11/10 Without Formatting
To partition a hard drive on Windows 10 without formatting, you can use the built-in Disk Management tool. To access it, press the Windows key + R, type "diskmgmt.msc," and press Enter. In the Disk Management window, right-click on the C drive and select "Shrink Volume" to create free space. Then, right-click on the unallocated space and select "New Simple Volume" to create a new partition. Follow the prompts to assign a drive letter and file system. This will allow you to create a new partition without formatting the existing data.

Partitioning or managing a hard drive or disk is a necessary operation for Windows users, especially those with a new computer or disk. This can be a challenge for inexperienced users, but there are three methods to partition a hard drive in Windows 10: using the Disk Management tool, Diskpart in Windows 10/8/7, or a professional free partition software.
How to Partition C Drive in Windows 11/10 Without Formatting
Have you received the message "You need to format the disk before you can use it"?
The most common reason behind formatting messages:
- The hard drive is full.
The Extend Volume option in Disk Management is grayed out and Diskpart commands are not working as expected, making it impossible to expand the volume using these tools. This is because there is no unallocated space on the hard drive, which is a prerequisite for using these tools to extend the volume.
Without the help of third-To partition C drive in Windows 11/10 without formatting, you can use Qiling Partition Master, a professional software that allows you to expand the C partition without losing data, as well as perform more complex hard drive management tasks such as merging partitions, resizing partitions, converting FAT to NTFS, dynamic to basic, or MBR to GPT.
How to Partition C Drive Without Formatting - Extend C Drive
Step 1. Shrink partition to free up space to extend partition.
If the hard drive has enough unallocated space to extend the target partition, you can proceed with extending the partition. However, if the available unallocated space is insufficient, you will need to free up space by deleting or resizing other partitions before attempting to extend the target partition.
- Click on a partition next to the target partition and select "Resize/Move" to free up space for the target partition.
- Drag the partition ends to free up space, leaving enough unallocated space behind the target partition, and then click "Proceed".

Step 2. Extend target partition.
Click on the target partition and select "Resize/Move".

To extend a partition, drag the target partition handle into the unallocated space. This will expand the partition to fill the newly available space.
Step 3. Keep all changes.
Click the "Proceed" to keep all changes.
How to Partition Hard Drive in Windows 10
If your HDD or SSD still have enough space, you can consider allocating it using Disk Management, Diskpart, or third-party software. However, these methods also have limitations, so it's essential to read and understand the options carefully to choose the best solution.
How to Partition Hard Drive in Windows 10 Using Disk Management
To partition a new or existing hard drive, you can use Windows' built-in Disk Management tool, which was first introduced in Windows XP as a replacement for the fdisk command. This utility allows you to manage your hard drive partitions.
If your hard drive only has a single C partition, you can use Disk Management to shrink the C drive and create new simple volumes on the unallocated space. This process applies to Windows 10, as well as Windows 8 and Windows 7, and can be achieved by following the guidelines provided.
Limitation: The volume size is displayed in megabytes (MB), which can be a tedious step for users to deal with.
1. Enter into the Windows 10 Disk Management interface.
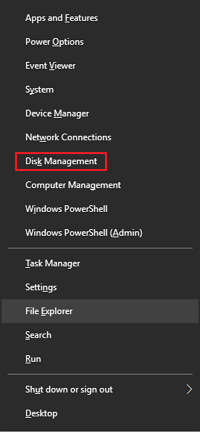
To access the Disk Management tool in Windows, you can either use the search box and type "Disk management" to find the "Create and format hard disk partitions" option, or use the Power User menu by pressing the Windows key + X and selecting "Disk management" from the menu.
2. To create unallocated space on a hard drive, right-click the hard drive and select "Shrink Volume". This will free up space on the drive, which can then be used for other purposes.
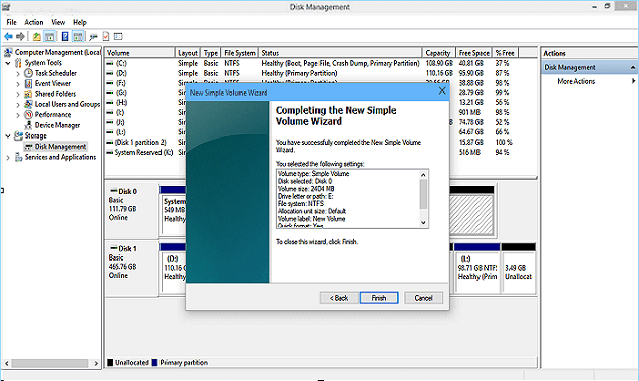
3. Right-click on the unallocated space, select "New Simple Volume", click "Next" and specify volume size.
4. Create a new partition in Windows 10 by assigning a drive letter or path, then formatting the partition into the default file system NTFS, and finally clicking "Finish".
If your PC is well-If your computer has multiple drives, but the C drive is running out of space, you can use Disk Management to delete partitions on other drives and extend the C drive. This will free up space on the C drive by consolidating the space from the other drives.
- Tip
-
- Deleting a partition will result in the permanent loss of any data stored on that partition, so it's essential to back up all important files and data before proceeding with the deletion.
- The built-in feature to extend the C drive only works if there is unallocated space immediately following the C drive. If there is no unallocated space behind the C drive, the "Extend Volume" option will be grayed out.
How to Allocate disk space on Windows 10 with CMD
Another tool to partition a hard drive in Windows 10 is Diskpart, which can be accessed through the CMD to allocate hard drive space, including extending the hard drive, deleting a partition, formatting a disk, and more.
Limitation: The high-level design tool is intended for users who are familiar with its functionality. If you're new to the tool, you may want to explore alternative methods for achieving your design goals. The tool is designed to provide a streamlined experience for users who have a good understanding of its features and capabilities.
To extend a partition, first list all disks, then select the disk you want to modify. Next, list the partitions on that disk and select the partition you want to extend.

How to Do Disk Partition in Windows 11/10 with a Free Partition Manager
Qiling Partition Master allows you to create, resize, move, and merge partitions on a hard drive, either a new one or one you're currently using.
This software does not have the disadvantages of the previous two parts due to its simplicity and flexibility in allocating space.
If your computer has unallocated space on the disk, you can create new partitions directly. If it only has one C partition, you can adjust the C drive and then create a new partition on the free space.
Step 1. Check for free space
To divide a disk partition into multiple ones, ensure there is enough free space to allocate.
Step 2. Shrink a disk partition to create unallocated space
To resize a partition with a lot of free space, start by clicking on it and selecting the "Resize/Move" feature. This will allow you to adjust the partition's size.
To make room for more unallocated space, drag either end of the partition to the right or left, reducing its size as indicated by the red arrow, and then click "Proceed".
To finalize the disk shrink, check the warning message and click "OK" to confirm the changes. Then, go back to the main window and look for unallocated space under the same disk where the shrink occurred. This should now be visible.
Step 3. Create a new partition on unallocated space
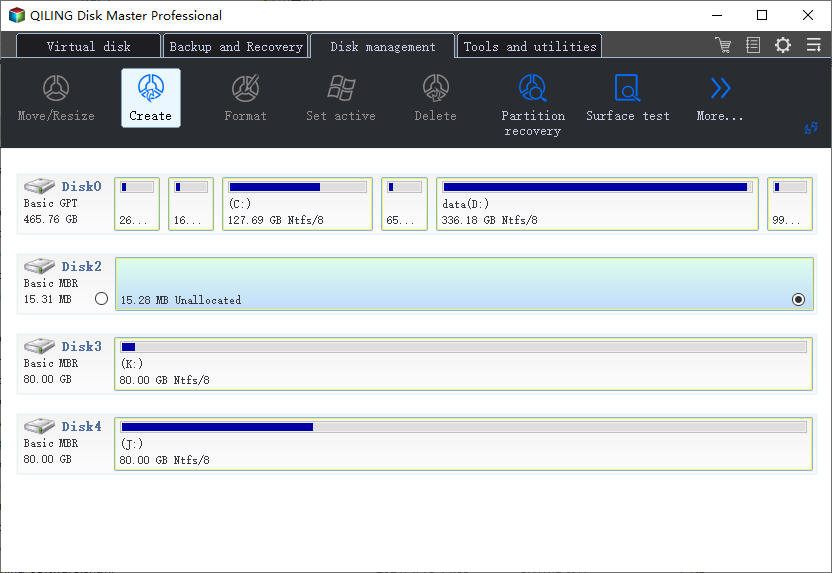
To turn the unallocated space into a usable partition drive with a recognized file system, click on the unallocated space and choose "Create".
In the Advanced Settings, you can customize the partition information by selecting a drive letter, partition label, file system (such as NTFS, FAT32, EXT2/3/4, or exFAT), and configuring other settings.
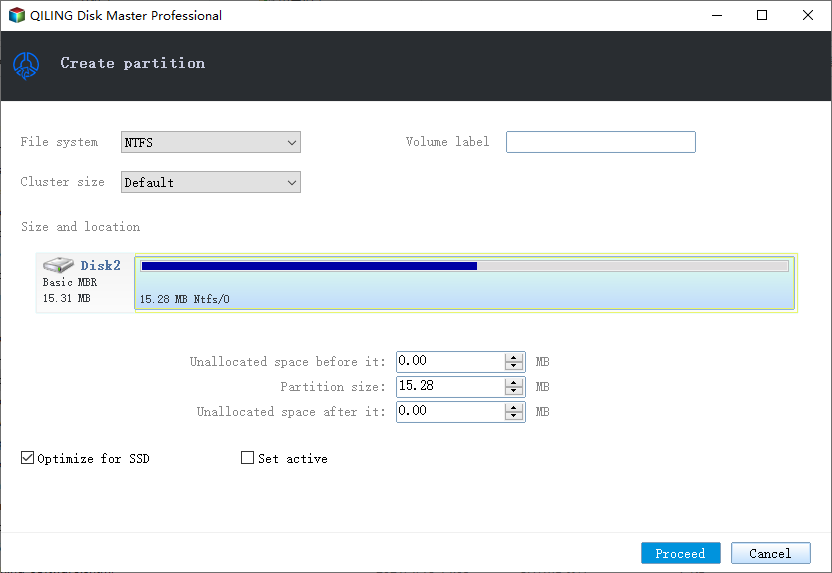
To create a partition on unallocated space, select the unallocated space from the list, click "New" to create a new partition, choose the partition size, file system, and label, then click "Proceed" to confirm the partition creation. This process can be repeated to create multiple partitions on the hard drive.
Related Articles
- M.2 vs. SSD, Which Is Better? Check Your Answer Here
- Windows 11 End of Support Date Confirmed and What to Do With That [2022 Guide]
- Top Partition Magic Freeware/Best Partition Software
- How to Remove, Delete or Format GPT Disk Partition
- How Can I Check M.2 SSD Temperature Like an Expert in Windows 11/10
If you're concerned about your M.2 SSD's health, you can check its temperature in Windows 11/10. To do this, you'll need to follow essential techniques to monitor your SSD's temperature like a pro, which are outlined in this comprehensive article. - How to Check NVMe Temperature in Windows 10/11 [100% Working Solutions]
To check the NVMe temperature in Windows 10/11, you can use either the built-in Task Manager or a third-party software. To do this using Task Manager, open it by pressing Ctrl + Shift + Esc, click on the “Performance” tab, and then click on the “NVMe” tab.