How to Remove Hard Drive from Computer [Full Guide]
| Workable Solutions | Step-by-step Troubleshooting |
|---|---|
| Remove Your Hard Drive from PC/laptop | Step 1: Back up your data; Step 2: Turn off your computer and pull all the cables; Step 3: Open the computer case...Full steps |
| Re-install A Hard Drive | Step 1: Take a new hard drive and plug in the cables or connectors; Step 2: Please make sure that you have plug-in...Full steps |
| Copy Everything from Hard Drive Before Recycling | Step 1. Right-click the partition you want to copy, and choose Clone; Step 2. Choose your the target partition and click...Full steps |
Introduction
In today's digital age, computers have become an indispensable part of our daily lives, storing our personal data and memories. However, their lifespan is limited, and they are prone to malfunctioning or becoming outdated, rendering them useless over time.
When you need to remove your hard drive, whether it's for upgrading to a new computer, replacing the primary hard drive, or recovering data after a hardware failure, you can do so by following a few simple steps. First, shut down your computer completely to prevent any accidental data loss or corruption.
Removing a hard drive from a computer is a relatively easy task that can be performed by anyone with little help. However, it's essential to follow a few safety steps to ensure the process is done correctly.
To safely remove a hard drive from a PC or laptop, follow these five simple steps. First, shut down the computer to prevent any accidental data loss or damage.
Why Might You Need to Remove Your Hard Drive?
A computer's hard drive contains crucial information, storing everything from files to applications, making it a vital component of the computer. Before removing or replacing a hard drive, it's essential to understand the reasons why, as it holds all the data on the computer.
- Recycling
Before recycling your computer, it's essential to remove the hard drive to prevent sensitive data from being accessed. This can be done by using various recovery tools that can retrieve old data from the hard drive. By taking this step, you can ensure that your personal information is completely erased and doesn't fall into the wrong hands.
- Upgrade
Mechanical hard drives can become outdated and lose performance over time due to wear and tear, making replacement the only viable option to improve their speed and functionality.
- Storage
If you've reached the storage capacity of your complete setup and can't store any more data, a new disk drive is required. In this case, you'll need to remove the existing hard drive to replace it with a new one.
- Vibration
If your hard drive is vibrating excessively and making unusual noises, it's likely failing and may lead to data loss, so it's best to remove it right away.
- Hard Drive Failure
If your laptop/computer's hard drive fails and its warranty has expired, you'll need to replace the hard drive with a new one, which you can do yourself.
- Upgraded with SSDs
With the advancement of technology, solid-state drives (SSDs) have become a viable alternative to traditional hard drives. Upgrading to an SSD can significantly enhance the performance of your PC, enabling it to start up quickly and run applications smoothly.
How to Remove Your Hard Drive from PC/laptop?
To safely remove a hard drive from a PC, follow these steps. First, turn off the computer and unplug it from the power source. Next, locate the hard drive, which is usually found on the motherboard or in a dedicated bay.
Step 1: Back up your data.
To avoid losing data, you should back up the existing data to an external hard drive before replacing the hard drive. This precaution will prevent any potential loss of information during the replacement process.
To quickly back up all your data, use a third-party disk clone software like Qiling Partition Master, which efficiently copies data and ensures all items are safely backed up.
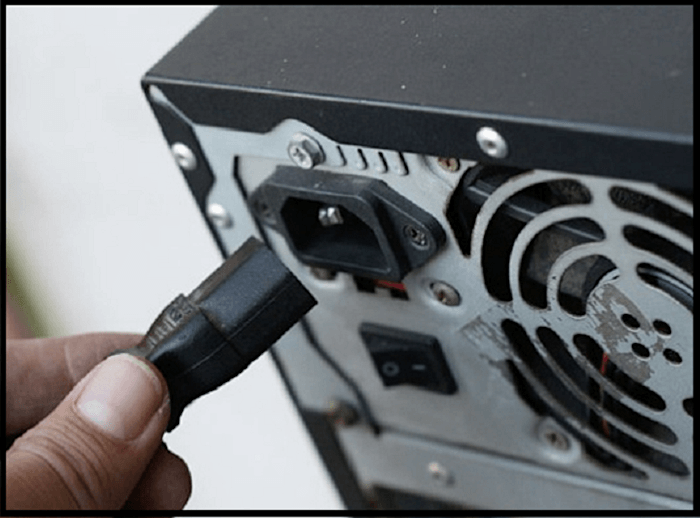
Step 2: Turn off your computer and pull all the cables.
Before working on your computer, ensure it is completely powered off and unplugged from the power source and any other cables, including the monitor, to prevent any potential electrical hazards or damage to the components. This will also make the process of accessing the internal components safer and more manageable.
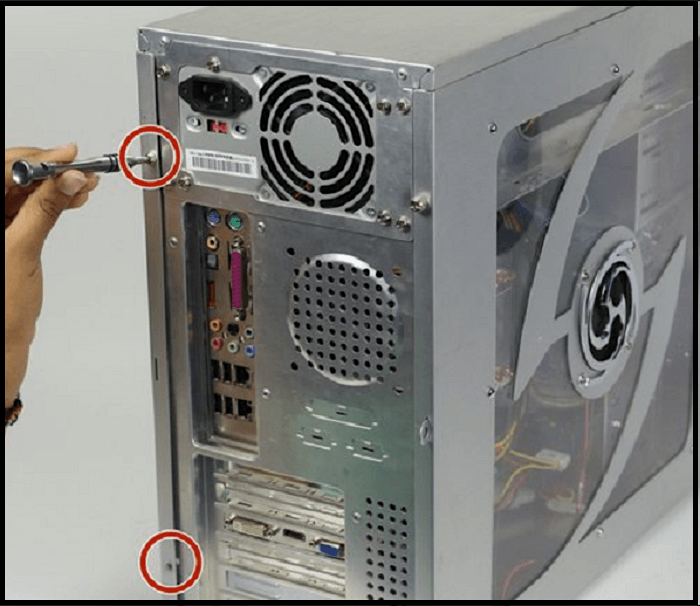
Step 3: Open the computer case.
To access the hard drive, remove the two screws on the lift side cover of the case using a screwdriver, then slide the cover off and take it out.
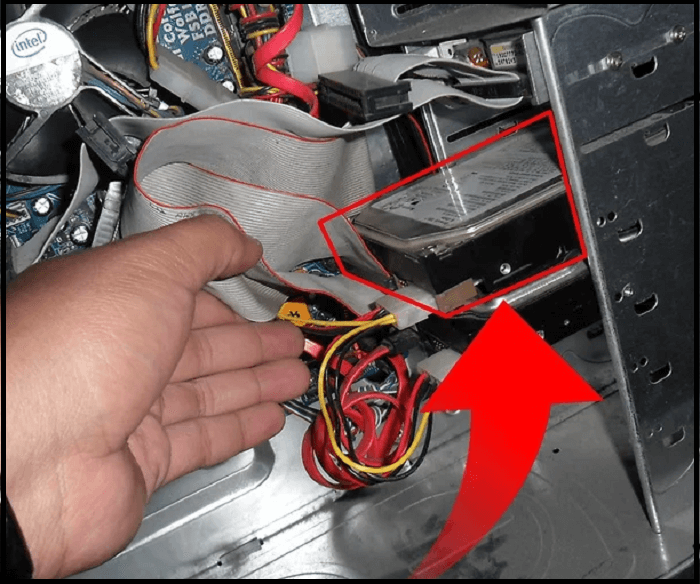
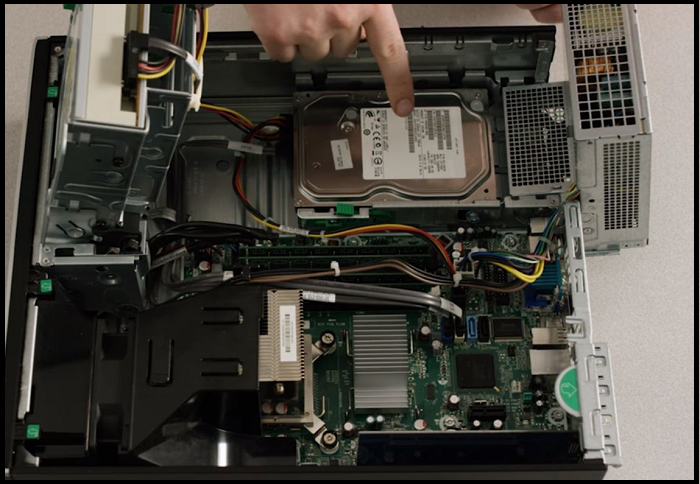
Step 4: Locate the hard drive.
To locate the hard drive, start by removing any visible obstructions, such as cables or the CD/DVD drive, to access the hard drive. It is usually a rectangular metal box located near the front of the case, at the bottom, or underneath the CD/DVD drive. Be cautious and avoid pulling out random components to ensure you identify the hard drive correctly. Once located, proceed with the next step.
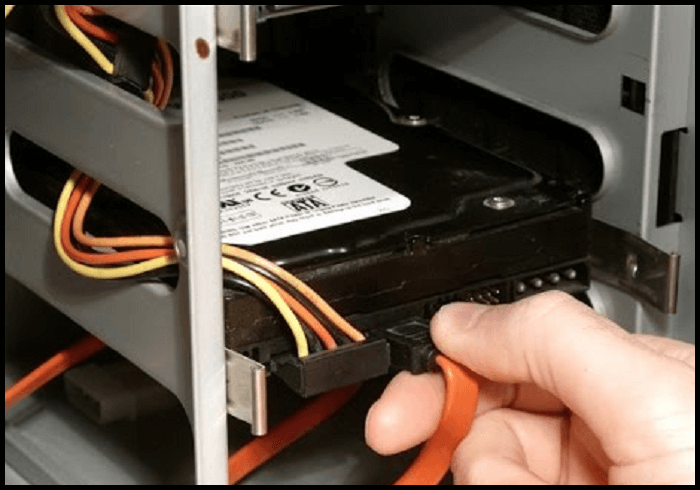
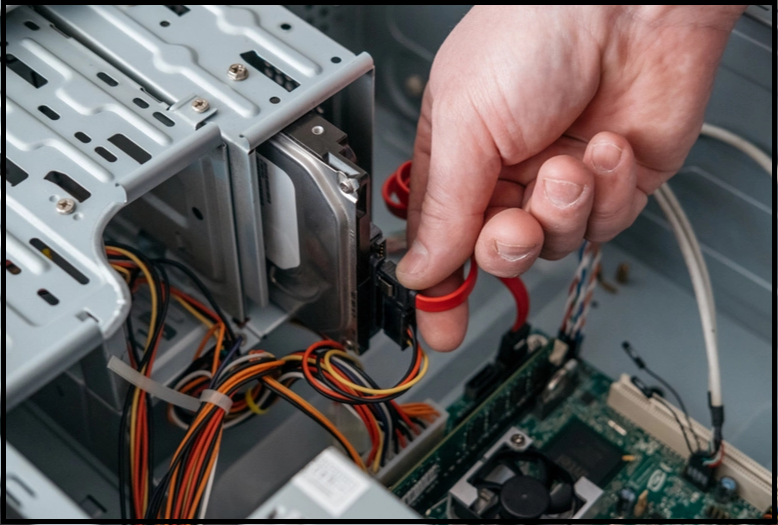
Step 5: Pull out the hard drive.
To remove the hard drive, you'll need to disconnect the SATA cable and unscrew all the screws holding it in place. Carefully lift the drive out with both hands, and you're done.
How to Re-install A Hard Drive
After removing the old hard drive, it's time to install the new one. Be careful when plugging connections to prevent static damage to your drive and other components. To install a hard drive, follow these steps: follow the steps below.
Step 1: To set up a new hard drive, start by taking it out of its packaging and locating the cables or connectors that need to be plugged in. These typically include the power cable, which connects to a power source, and a SATA or other type of data cable, which connects to the motherboard or a specific port on the computer.
Step 2: The new drive should be securely mounted and screwed in place, following the same steps as when it was removed, to ensure a proper fit and prevent any damage.
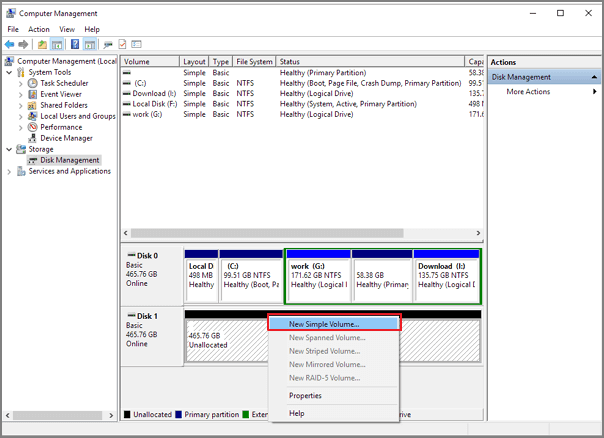
Step 3: After replacing your old hard drive, turn on the computer to boot up. Then, go to the Control Panel and navigate to the "Administrative Tools > Computer Management" section.
Choose the "Disk Management" section in Windows. Ensure that the operating system has recognized the capacity of the new hard drive. Then, you can extend the partition by creating a new simple volume.
Extra Tip: How to Copy Everything from Hard Drive Before Recycling
If you're planning to buy a new laptop/PC or remove a hard drive, it's essential to back up your important data first. The best way to do this is by using Cloud Storage, which provides a secure way to save your crucial data. Alternatively, you can also use third-party disk clone software to clone your hard drive storage, offering a superficial yet secure method to preserve your data.
We recommend using Qiling Partition Master, a cloning software available in both free and paid versions, to clone and upgrade disks without losing data. This software offers incredible advantages, and its paid version unlocks all its features.
Step 1. Select the source disk.
To clone a disk or partition, select "Disk/partition clone" in the "Tools and utilities" page, and then choose the disk you want to copy or clone.
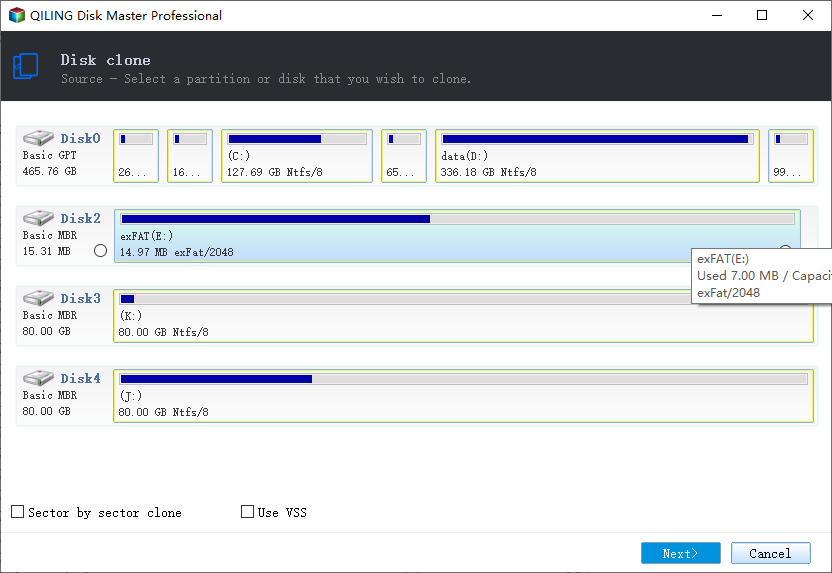
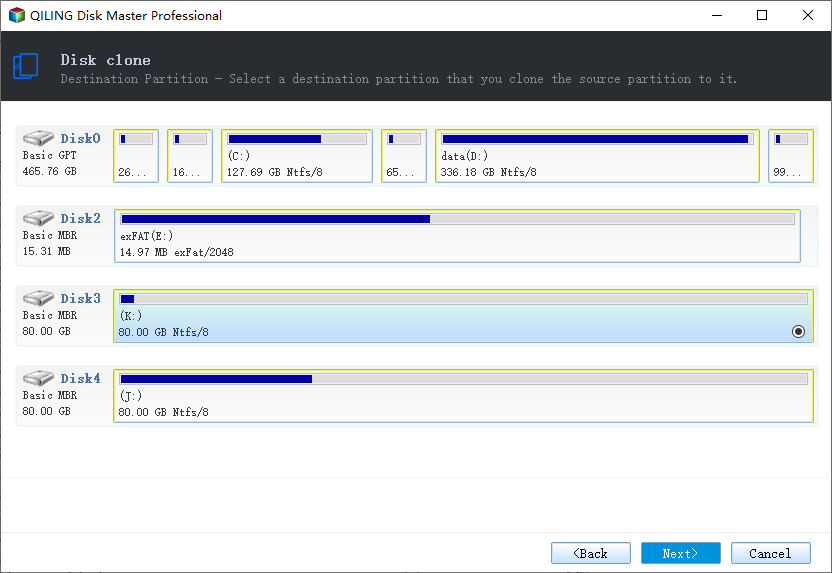
Step 2. Select the target disk.
Select the desired hard drive or solid-state drive as your destination and click "Next" to proceed.
Step 3. Execute the operation.
To customize your disk layout, you can choose from three options: "Autofit the disk", "Clone as the source", or "Edit disk layout". If you want to leave more space for the C drive, select the last option.
Click "Proceed" to start cloning process.

Step 4. View the disk layout.
To wipe out all data on the target disk, open the Disk Wipe program, select the target disk, and click "OK" when the program warns it will erase all data on the target disk. If you have valuable data on the target disk, back it up in advance to avoid losing it.
Conclusion
A hard drive is responsible for storing a significant amount of data. Removing it from a PC or laptop and erasing the stored data can resolve security concerns, ensuring that personal information remains protected and doesn't fall into the wrong hands.
Before removing a hard drive from your PC, it's essential to back up your data to prevent losing important and private files. If you're upgrading to a new hard drive, you can clone your personal information to the new drive, ensuring a smooth transition. This precautionary measure will safeguard your valuable data and prevent any potential loss.
Removing a hard drive from a PC, especially a laptop, requires minimal technical skills and is a relatively straightforward process. To ensure safety, it's crucial to follow proper precautions. By following the steps outlined, you can successfully remove the hard drive from a computer or laptop, taking care to handle the delicate components with care.
Related Articles
- How to Repair MBR on Windows Server (Two Quick Ways)
- Partition Wizard Software (Full Version) Free Download for Windows Servers in 2022
- exFAT VS NTFS: What Are the Differences Between Them
- Windows 11/10 Search Not Working 2022? Fix It Now!
- Top 3 Best Free System Clone Software Free Download for Windows [2024 Reviews]
If you're looking for reliable and free system clone software to clone the Windows operating system and transfer to a new disk in a few simple steps, this page collects 3 top free system clone software you can download to accomplish system migration operations on your own. - How to Free Up Disk Space on Windows 8 [100% Works]
Want to free up disk space on Windows 8/9/10? Here are the best and most efficient fixes to fix your disk space problems quickly and effectively without running it.