Windows 11/10 Search Not Working 2022? Fix It Now!
Windows 11/10 search not working? Here are the effective and quick solutions.
| Workable Solutions | Step-by-step Troubleshooting |
|---|---|
| Fix 1. Check if Windows 10 Search is running | Press Windows + R keys to open the Run window. Type services.msc and press enter...Full steps |
| Fix 2. Restart Windows 10 Search service | End and restart the SearchUI to fix the problem. Press Ctrl+Alt+Delete keys, and select "Task Manager"...Full steps |
| Fix 3. Restart your computer | A computer reboot can be useful to fix the search bar not working due to memory and disk-cache...Full steps |
| Fix 4. Rebuild Windows 10 Search index | Rebuilding the search index can be helpful. Right-click the "Start" button click on "Control Panel"...Full steps |
| More useful solutions | Fix Windows 10 searching not working issue by using the Troubleshooter, SFC scan, and DISM tools...Full steps |
Q: If the Windows 11/10 search bar is not working correctly and keeps searching without finding anything, try the following troubleshooting steps: Check for updates, restart the Windows Search service, reset the Windows Search service, and if the issue persists, reset Windows 10 to its default settings. Additionally, you can try running the System File Checker tool, DISM, and the Windows Update Troubleshooter to resolve any underlying issues.
A user is experiencing issues with Windows 10 search functionality on their 64-bit system, where the search bar continuously searches but fails to display any results, even though they're running on an SSD, which should provide faster performance.
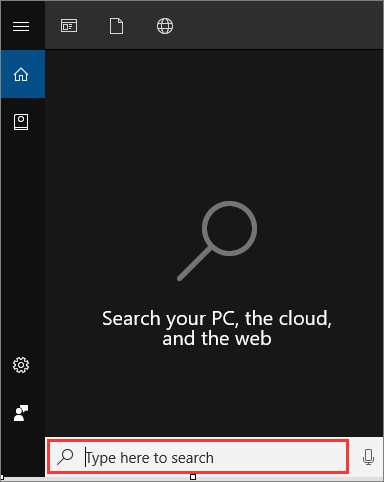
Users can experience issues with the Windows 10 search bar, such as it not working, not allowing typing or searching, which can be frustrating, especially given its utility in finding files and internet content.
If you're experiencing issues with Windows 11/10 searching not working, - there are several fixes you can try to resolve the problem and get search working properly again in Windows 10.
Why Is Windows 11/10 Search Bar Not working
Windows 10 search not working can be caused by various issues. Common reasons include problems with the search index, corrupted system files, or issues with the Windows Search service. Additionally, malware or viruses can also interfere with search functionality. Other possible causes include incorrect search settings, outdated Windows updates, or conflicts with third-party applications.
- Search feature not starting on Windows 10
- Simple software or other problem on Windows 10
- The search system itself was interrupted
- Some wrong with the search index
- Windows 10 system file corruptions
- System update has some issues
To resolve the issue of search not working on Windows 10, try the following solutions in order: restart your computer, check for Windows updates, reset Windows search, disable and re-enable search, and if none of these work, consider reinstalling Windows.
1. Check if Windows 11/10 Search Service Is Running
Check if the search service is running. If not, start it. If it's running, check the search service logs for any errors.
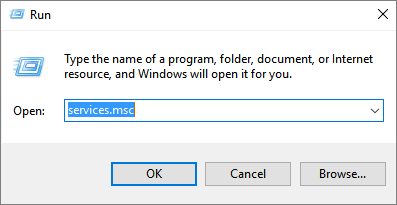
Step 1. To open the Services window, press Windows + R keys to open the Run window, then type "services.msc" and press enter.
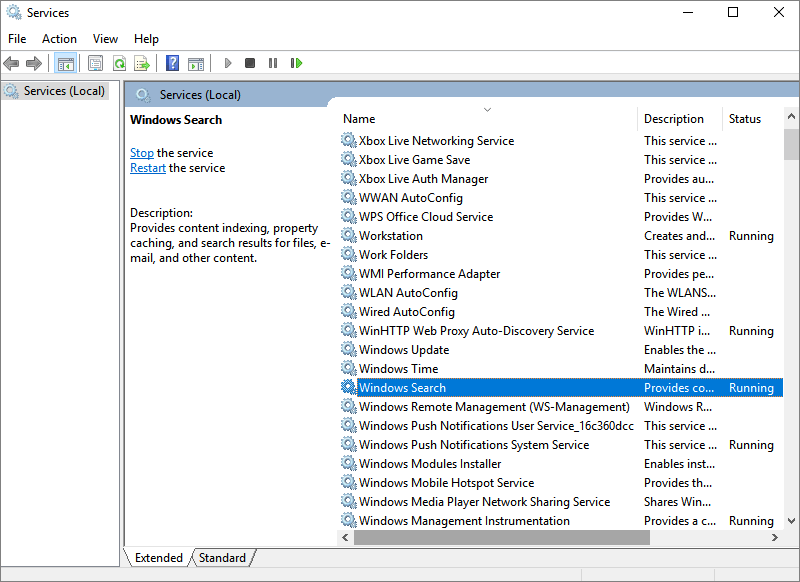
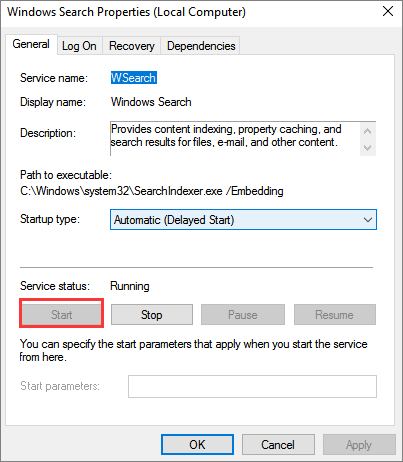
Step 2. To access the Windows Search service properties, first locate the service in the list, then right-click on it and select the "Properties" option from the context menu.
Step 3. To enable Windows search, go to Start > Settings > Apps > Default apps, then click on "File explorer" and select "Options" from the dropdown menu. In the File Explorer Options window, click on the "View" tab, then select the "Show recently used files in Quick access" option. Next, click on the "Start" tab, then check the box next to "Show recently used items in Quick access" and click "OK" to save the changes.
2. Restart Windows 11/10 Search
To resolve Windows 10 searching not working issue, try ending and restarting the SearchUI process, which will automatically restart the next time you search.
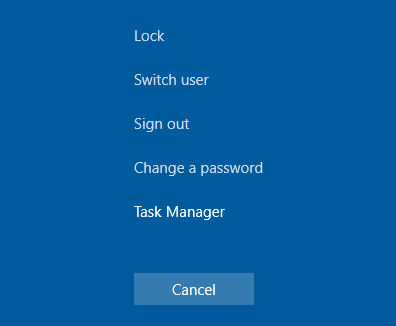
Step 1. Press Ctrl+Alt+Delete keys, and select "Task Manager".
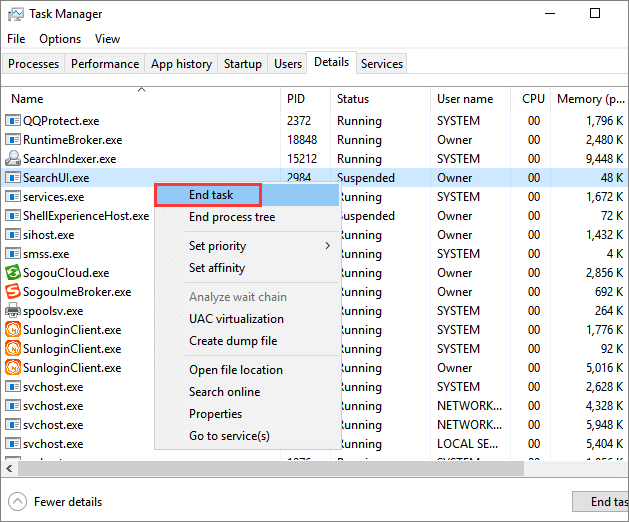
Step 2. Select the "Details" tab in the Task Manager window.
Step 3. To stop the SearchUI.exe process, scroll down in the Name column, locate SearchUI.exe, right-click on it, and select "End task".
Step 4. Confirm ending SearchUI.exe when a pop-up occurs.
If this solution doesn't fix your problem, try restarting your computer.
3. Restart Your Windows 11/10 Computer
If the search bar isn't working due to memory and disk-cache issues, a simple reboot of your computer can often resolve the problem. Rebooting can help clear out any glitches that may be affecting the search bar's functionality.
4. Rebuild Windows 11/10 Search Index
If search or device restart doesn't work, we suggest you rebuild the search index. To do this, go to Settings, then select System, and then Storage. Next, find and select the "Indexer" or "Search index" option, and then select "Rebuild" or "Recreate" from the menu.
Step 1. Right-click the Start button click on "Control Panel".
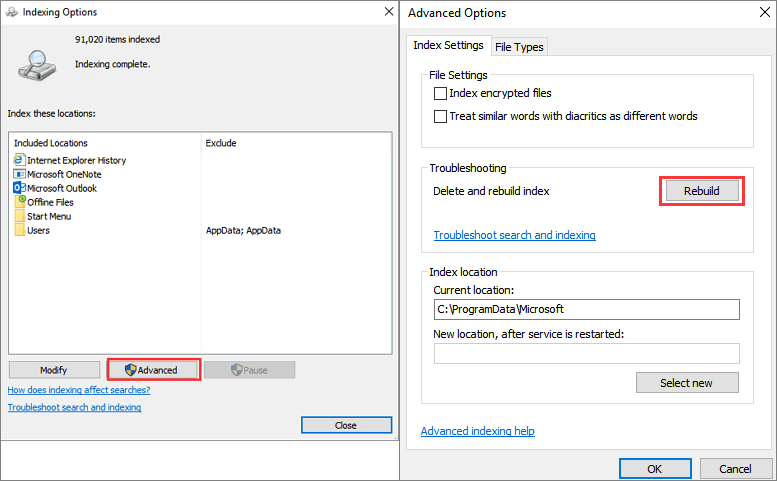
Step 2. From all Control Panel items, select "Indexing Options".

Step 3. To rebuild the search index, click the "Advanced" button and select "Rebuild". This will initiate the process of deleting and then rebuilding the search index.
5. Fix Windows 11/10 Search Not Working Using the Troubleshooter
If search index rebuilding doesn't resolve the search issue on Windows 10, you can utilize the built-in troubleshooter to identify and resolve the most common problems.
Step 1. To launch the Troubleshooter, click the "Start" button and choose "Settings", then click "Update & Security".
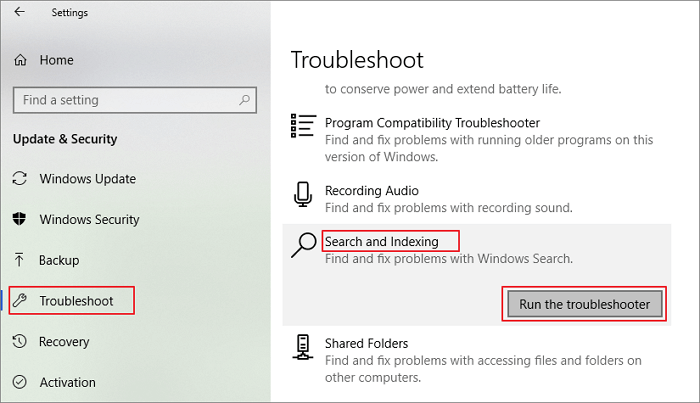
Step 2. To resolve the issue, go to the left panel and select "Troubleshoot". Scroll down to find the "Search and Indexing" option and click on it. Then, run the troubleshooter.
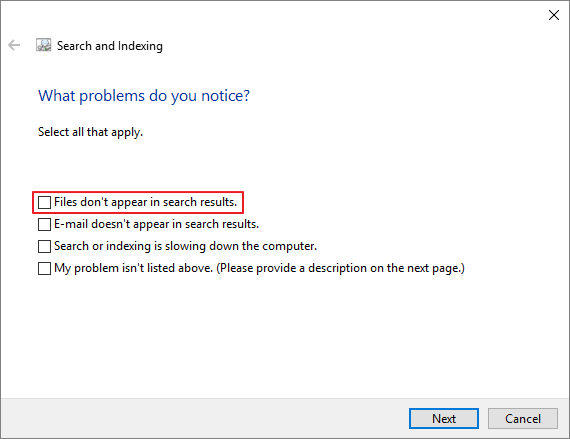
Step 3. The troubleshooter will ask you to choose a problem you're having. Select your problems and click "Next" to check the issue.
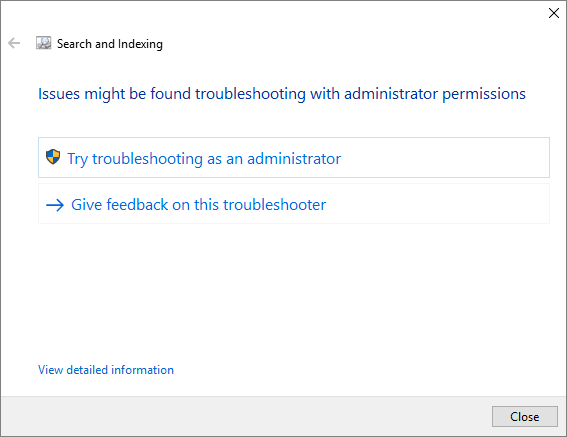
Step 4. Run as administrator to fix the problem.
6. Use SFC and DISM Tools to Fix Windows 11/10 Search Not Working
To fix the search not working issue on Windows 10, use the built-in SFC and DISM tools to scan and repair corrupted system files, which may be causing the problem.
How to Run the SFC Scanner
Step 1. Right-click the "Start" button and select "Command Prompt (Admin)".
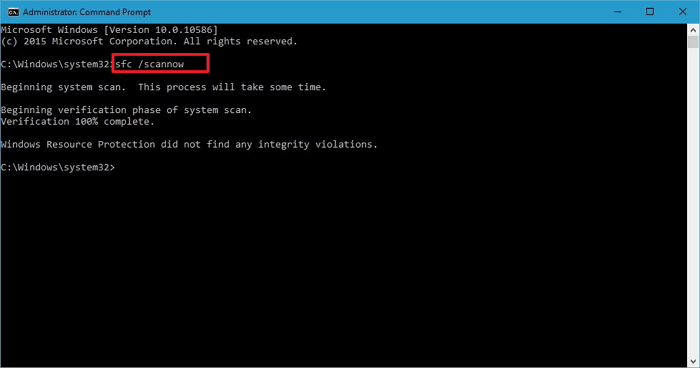
Step 2. To run a full system scan, you can type `sfc /scannow` and press Enter in the Command Prompt. This command will scan all protected system files and replace any that are found to be corrupted or missing.
How to Run DISM Tool
If the SFC scanner doesn't fix the corrupted Windows system file, continue using the DISM tool to troubleshoot and repair the issue.
Step 1. To open the Command Prompt, press the Windows key + R to open the Run dialog, then type "cmd" and press Enter. This will open the Command Prompt window.
Step 2. Type the following command and hit "Enter".
Dism /Online /Cleanup-Image /RestoreHealth
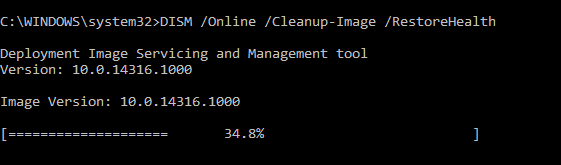
Step 3. Wait for the process to complete. Then, restart your computer and check if the search bar works correctly.
7. Check and Install Windows Updates
Some Windows updates may cause problems with Windows 10 search, but Microsoft often releases updates to fix these issues, so updating Windows may resolve the problem.
Step 1. Press Windows + I to open Windows Settings.
Step 2. Click on the "Update & Security" tab and select the "Check for updates" option under the Windows Update section.
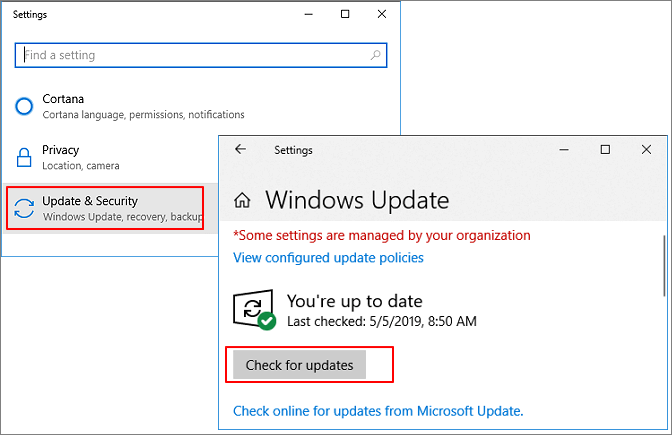
Step 3. If there's a new Windows update, click "Install Now" and follow the instructions to upgrade to the latest Windows 10 version.
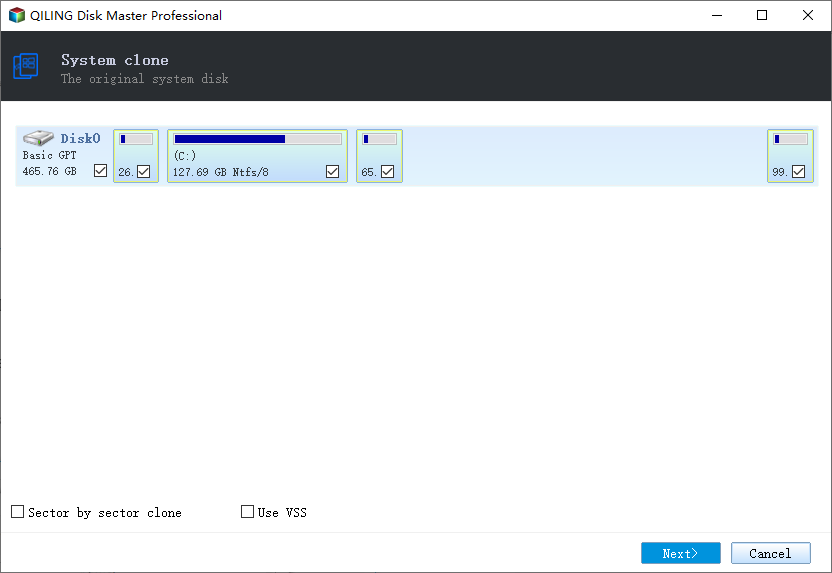
8. Upgrade the System Disk from HDD to SSD
To fix Windows 10 search not working issue, you can try upgrading your system disk from HDD to SSD, which will improve the overall performance of your system and reduce the likelihood of problems. This can be done by migrating your OS directly from HDD to SSD using an advanced Windows 10 disk management tool, eliminating the need to redownload Windows 10.
Qiling Partition Master allows users to transfer Windows 10 and the boot partition from one hard drive to another in a few simple steps, making it easy and safe to complete an in-place upgrade.
Qiling Partition Master
- Resize/move partitions, create, format, delete, and merge partitions, including moving space from D drive to C drive in the Pro version.
- To clone an entire disk to another, even if the target partition is smaller than the source, you can use the `dd` command in Linux. The syntax is `dd if=/dev/sdx of=/dev/sdy bs=64K`, where `/dev/sdx` is the source disk and `/dev/sdy` is the target disk.
- To convert a partition type, you can use the built-in Windows utility called Diskpart. Here's how to do it in one paragraph:
To migrate your OS to an SSD without losing any data, you can use a free partition manager to guide you through the process. First, download and install this partition manager, and then follow its steps to ensure a smooth transition.
Note: If you're migrating your operating system to an SSD or HDD, be aware that it will erase all existing partitions and data on the target disk if there's not enough unallocated space available. To avoid losing important data, back up any relevant information to an external hard drive beforehand.

Step 1.To migrate the operating system, go to the tools page and select "Migrate OS". Then, choose the SSD or HDD as the destination disk and click "Next".
Step 2. Be sure to back up your important data before proceeding, as the process will delete data and partitions on the target disk. Click "OK" after acknowledging the warning message.

Step 3. Preview the layout of your target disk, and customize it if needed, before proceeding. Click "Proceed" to continue.

Step 4. Click "OK" after checking the warning message, then the process starts to migrate your OS to a new disk.
The Bottom Line
Here are the effective fixes to solve Windows 10 searching not working: If the search bar is not responding, try restarting the Windows Search service, running the Windows Search Troubleshooter, or resetting Windows Search. If search results don't appear as expected, try rebuilding the search index, checking for corrupted system files, or running a System File Checker scan. If none of these solutions work, try updating Windows or reinstalling Windows Search. If you're still having issues, consider resetting Windows 10 to its default settings or seeking further assistance from Microsoft support.
You can restart the search service, rebuild the search index, repair corrupted system files, check for Windows 10 updates, and so on. Hope this tutorial is helpful.
Related Articles
- Troubleshooting: M.2 SSD Not Showing Up in Windows 11
- Solved 2022: Unable to Recover Your PC. The System is Too Small
- How to Delete EFI Partition in Windows 11| What Is EFI Partition Windows 11
- Qiling Partition Master 6.0 Key Generator + Key Crack 2022
- Effectively Fix "We Couldn't Update the System Reserved Partition" Error
"We couldn't update the system reserved partition" appears when you upgrade to Windows 10 from Windows 7/8? Here you can fix it within 5 simple steps. - 2 Free Ways to Create Partition Windows 10 without Losing Data
How to create partition Windows 10? You'll learn 2 ways to get it done when there're not enough partitions on your disk.