How to Transfer Windows Server 2022/2019/2016 to HDD/SSD
How do I Move Windows Server to HDD or SSD
The demand for transferring Windows Server 2022/2019/2016 to HDD/SSD is on the rise. Long-term use of Windows Server can cause it to run slowly, but transferring it to a new HDD or SSD can significantly enhance the computer's OS booting and operating performance, making it run more smoothly and efficiently.
If you've recently acquired a new PC and want to set it up with the same Windows Server operating system, you'll need to transfer the OS to the new device using an external HDD/SSD. This process can also help you prepare for potential boot issues that may arise during the transition.
| Workable Solutions | Step-by-step Troubleshooting |
|---|---|
| Prerequisite: Purchase a New HDD/SSD | The first is to purchase a new HDD/SSD, and the next is to prepare it...Full steps |
| Tutorial: Migrate or Transfer Windows Server | Step 1. To migrate the operating system, select "Migrate OS" from the top menu, then choose the SSD or HDD as the destination disk.Full steps |
| Follow-up: Make Windows Server OS Bootable | Restart your PC with the new HDD/SSD inserted in your computer and press DEL, F1, or F2...Full steps |
A typical Windows user may think to copy and paste the Windows Server system and data to a new HDD/SSD, but this method won't work as the system won't be bootable using this process. Instead, the user should consider using a more suitable method for transferring the system and data to a new disk.
To migrate Windows Server 2022/2019/2016 to a new HDD/SSD, you'll need reliable software to ensure a smooth transfer. By following this tutorial guide carefully, you can successfully move your Windows Server 2022/2019/2016 or older Server system versions to a new hard drive or SSD.
Prerequisite: Purchase a New HDD/SSD and Get It Ready
Before transferring Windows Server, purchase a new HDD/SSD and prepare it for the migration process.
Purchase a New HDD/SSD
When buying a data storage drive, the first decision is whether to opt for a solid-state drive (SSD) or a hard disk drive (HDD). SSDs, which use flash memory, outperform HDDs in terms of speed, power consumption, and lifespan, but are typically more expensive and have less storage capacity. On the other hand, HDDs offer more storage space at a lower cost, making them a good choice for those who need to store a large amount of data. Ultimately, the choice between an SSD and an HDD depends on your specific needs and budget.
Internal drives, such as HDDs and SSDs, typically connect via SATA, while external drives, regardless of type, use USB. HDDs have a physical storage limit of 18TB per drive, whereas consumer-grade SSDs max out at 5-8TB. However, SSDs excel in data transfer efficiency and speed, with higher RPMs for quick read/write operations.
Both HDDs and SSDs are sufficient for transferring Windows Server 2022/2019/2016, so you can make your choice based on what suits you best.
Get New HDD/SSD Ready
To get your new HDD/SSD ready, first connect it to your computer using a USB cable or a SATA cable, depending on the type of drive you have. Once connected, open the Disk Management utility on your computer (usually found in the Control Panel or by typing 'diskmgmt.msc' in the Run dialog box).
- Turn off your computer, insert the HDD/SSD through the SATA and power cable, and then restart the computer.
- To run Disk Management, press the "Windows + R" keys and type "diskmgmt.msc", then click OK or press Enter.
- Locate and right-click the HDD or SSD and click "Initialize Disk." Should the disk be listed as offline, right-click it and select online.
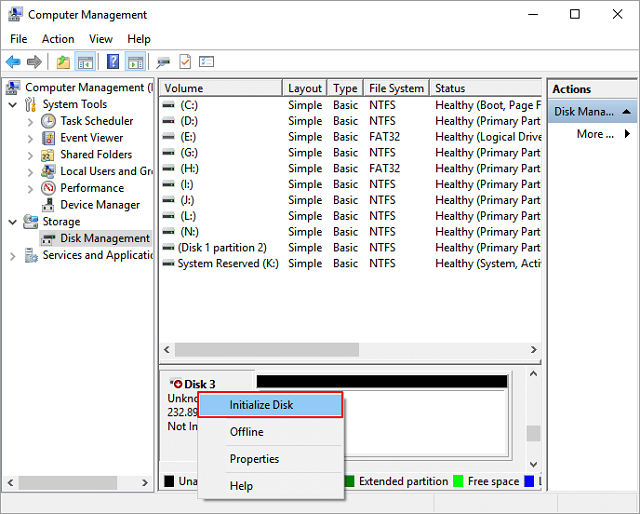
- In the Initialize Disk dialogue, select the disk to initialize and click OK to proceed, or adjust the partition style by converting it to MBR or GPT.
The process of initializing the HDD/SSD involves several steps. The system starts by identifying the storage device and its type.
Tutorial: Migrate or Transfer Windows Server 2022/2019/2016 to HDD/SSD
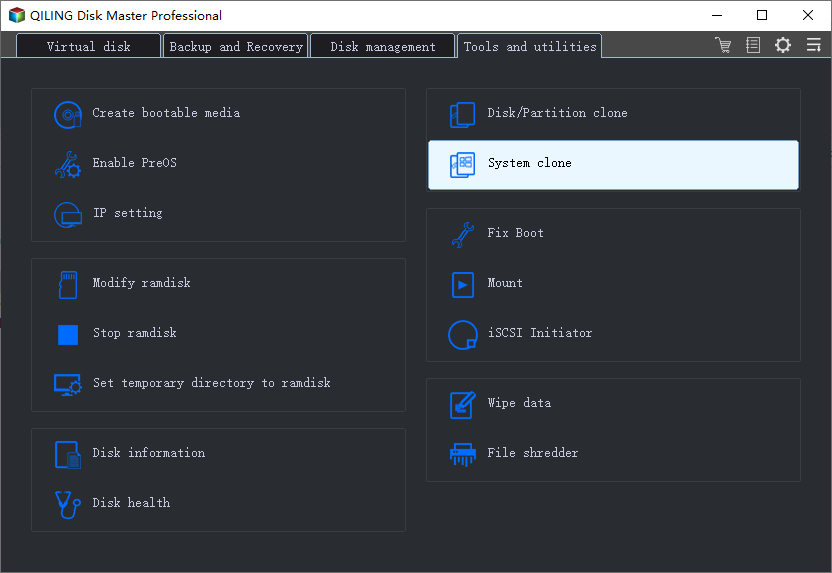
To migrate or transfer Windows Server to a new HDD/SSD, a third-party tool is required for effective management. The Qiling Partition Master Enterprise Edition is a suitable option, offering essential features that cater to users' disk management needs.
Qiling Partition Master Enterprise
Your trustworthy Windows Server disk manager.
- Extend System drive, combine/split partitions.
- Clone disk, migrate OS to HDD/SSD.
- Convert MBR to GPT, GPT to MBR, no data loss.
- 1-click adjust disk layout, create volumes at one time.
You can use this tool's Migrate OS feature to transfer your Windows Server operating system to a new disk without reinstalling Windows Server, making it easy to upgrade to a new disk with just a few clicks. Additionally, it can clone your entire disk and replace an outdated or damaged disk with a new one in a simple process.
The Qiling Partition Master Enterprise Edition is compatible with various Windows Server versions, including Windows Server 2022, 2019, 2016, 2012 (R2), 2011, 2008 (R2), and 2003. It's recommended for Windows Server users to download and install this software for a smooth migration to a new HDD/SSD.
Note: Migrating the operating system to an SSD or HDD will delete and remove existing partitions and data on the target disk if there's not enough unallocated space, so it's essential to back up important data to an external hard drive beforehand.
Step 1.Select "Migrate OS" from the top menu, then choose the SSD or HDD as the destination disk and click "Next".
Step 2. The system partition will be selected automatically, and then click "Next".
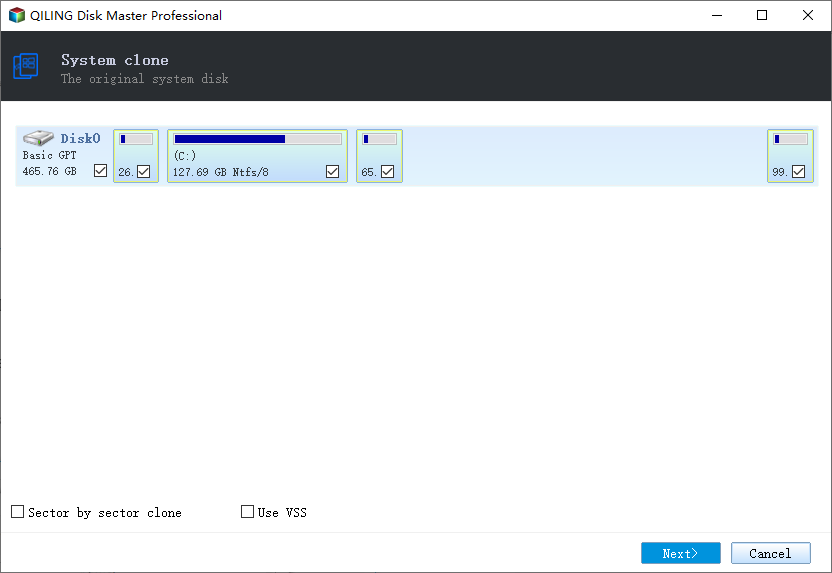
Step 3. Select the SSD or HDD as the destination disk and click "Next".

Step 4. Preview the layout of your target disk, then customize the layout as desired. Finally, click "Proceed" to initiate the OS migration to the new disk.

Step 5. Click "OK" after check warning message. The data and partitions on the target disk will be deleted. Make sure that you've backed up important data in advance. If not, do it now.
Follow-up: Make Windows Server OS Bootable in New Disk
To finalize the Windows Server migration process, ensure the new HDD/SSD with the transferred OS is set as the boot drive in BIOS settings, allowing your computer to boot from the new drive.
- The process starts by restarting the PC with the new HDD/SSD inserted and pressing DEL, F1, or F2 (varies by manufacturer) to enter the BIOS setup.
- To display the boot sequence, click on the "Boot" option located at the top bar of the setup menu.

- To set the boot order, use the key combination provided by your system to enter the BIOS settings, then navigate to the Boot Order or Boot Priority section and select the desired sequence for your operating system, such as UEFI or Legacy, and save the changes. This will determine the order in which your device boots for an operating system.
- To set your order to boot from the new disk drive first, you can enter your BIOS settings by pressing a key such as F2 or Del, depending on your computer model, as soon as your computer starts. Look for the boot order option and select the new disk drive as the first boot device.
- Press F10 to save the BIOS changes.
- Click Yes in the confirmation prompt to confirm your changes.
When you start the computer with the new boot sequence, the BIOS will boot from the new hard disk drive or SSD and proceed to the next device on the boot order.
Conclusion
Transferring Windows Server 2022/2019/2016 to a new HDD/SSD involves several essential steps. To ensure a smooth migration, it's recommended to use a reliable server migrating software like Qiling Partition Master Enterprise Edition. Additionally, users should initialize their new drive and set it to boot from BIOS after transferring the Windows OS. This guide aims to provide a helpful resource for users embarking on this task.
Related Articles
- Top 7 Best Partition Recovery Software for Windows 11/10/8/7 in 2022
- Free Partition Manager for Windows 7/Windows 10 64 Bit
- Fixes for (External) Hard Drive Shows Wrong Capacity
- 8 Fixes for There Is Not Enough Memory Or Disk Space to Run Word Error
- How to Partition C Drive without Formatting in Windows 10/8/7?
Learn how to partition C drive in Windows 11/10/8/7 using Windows snap-in Disk Management and Qiling Disk Master without formatting C drive and losing data. - How to Remove Bad Sectors from Hard Disk Permanently
Don't know how to remove bad sector from hard disk permanently? Refer to this article to get the best solution of this problem on Windows 11, 10, 8, 7.