Windows 11 26H2 Setup Error 0x8007000D: Install Files Damaged
Quick Navigation:
- What 0x8007000D Points At
- Test the Media Before the Disk
- Rule Out Memory and the Port
- Protect the Disk and Keep a Way Back
- Frequently Asked Questions
Windows 11 26H2 setup reaches the first progress screen, stops, and reports 0x8007000D with a note that the installation files are damaged. The code means the installer read data from the media and the data failed its own validation, so the file it unpacked does not match the file that was written. The target disk has not been touched at that point, and no partition has been created. That detail decides the order of the repair: the stick and the machine come first, the disk comes later. This guide shows how to test each one without wasting an install attempt.
What 0x8007000D Points At
0x8007000D is the Windows status for invalid data. In a setup log it means a file was read successfully but its content did not match the expected checksum or structure. The installer stops before it writes the image, because it cannot trust the payload it is holding.
Three things produce that result. The image file on the media is incomplete or corrupt, the write to the USB drive failed partway so the file looks present but is truncated, or the data was altered after it left the drive, by failing memory or by a faulty cable or port.
26H2 makes the second case more likely than earlier releases. The install image is large, and a stick written by a tool that splits the file to fit a FAT32 volume can end up with a split that the setup loader cannot rejoin. The same download written by another tool works, which is why the error looks random.
Test the Media Before the Disk
Watch where the progress bar stops. A failure in the first few percent, before the license terms, is a media problem by definition, because setup has not yet asked the disk for anything. A failure after the partition screen belongs to the disk and is a different investigation.
Rewrite the stick from a fresh download and use a different USB port. Prefer a rear port on a desktop, remove hubs and extension cables, and use a stick of at least 16 GB from a known brand; a cheap controller that overheats during a long write produces exactly this code.
If the machine has an optical drive, burn the same image to a disc and try that. A DVD removes the USB controller and the FAT32 split from the chain, so a setup that proceeds from the disc proves the stick or its write was the problem.
Rebuilding the installer is a step outside this software. Microsoft supplies the media creation tool for that job, and it is a Microsoft product, not part of Qiling Disk Master. Use it on a working PC, then verify that the stick boots to the setup screen on that same PC before carrying it to the target machine.
Rule Out Memory and the Port
If a rewritten stick fails the same way, the corruption is happening after the read. Setup decompresses the image into memory, and a module that returns a wrong bit turns a valid file into invalid data. A memory test that runs overnight is the cheapest way to settle that question.
Check the port as well. A USB 3 port whose driver is missing in the setup environment can fall back to a slower mode and drop a packet, and the installer reports invalid data rather than a device error. Moving the stick to a USB 2 port on the same machine is a two-minute test.
Firmware settings deserve a look before a third attempt. A storage mode that setup cannot drive, or a security setting that blocks the media, usually produces a different error, but a machine with both problems shows only 0x8007000D until the first one is fixed.
Protect the Disk and Keep a Way Back
Qiling Disk Master covers three separate jobs before setup is allowed to rewrite the partition table: imaging the disk that will receive 26H2, checking the file system of the volume that holds the current system, and building a rescue stick. They are independent operations rather than one wizard, and they stay in this order because the image has to be captured before the check changes anything on that volume. A machine that has failed setup twice is exactly the machine that needs that image.
Operation 1: Image the Target Disk
This operation creates the way back, so it comes first, while the current system still boots and the partition table is unchanged.
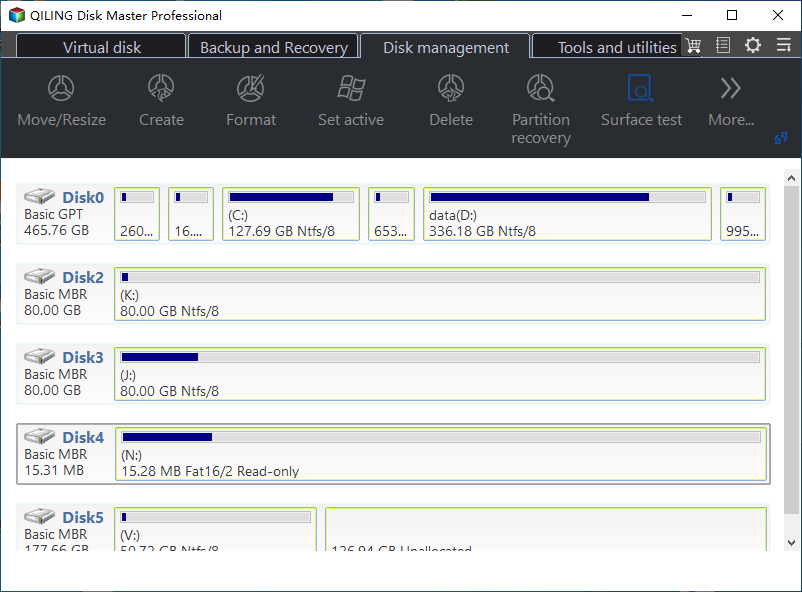
Step 1. Read the disk map. Open the Disk Management tab and note which disk carries the current system, whether it is GPT or MBR, and how much unallocated space sits at its front. Setup needs that space for its own partitions, and the map is the only place you can see it before the installer rewrites it.
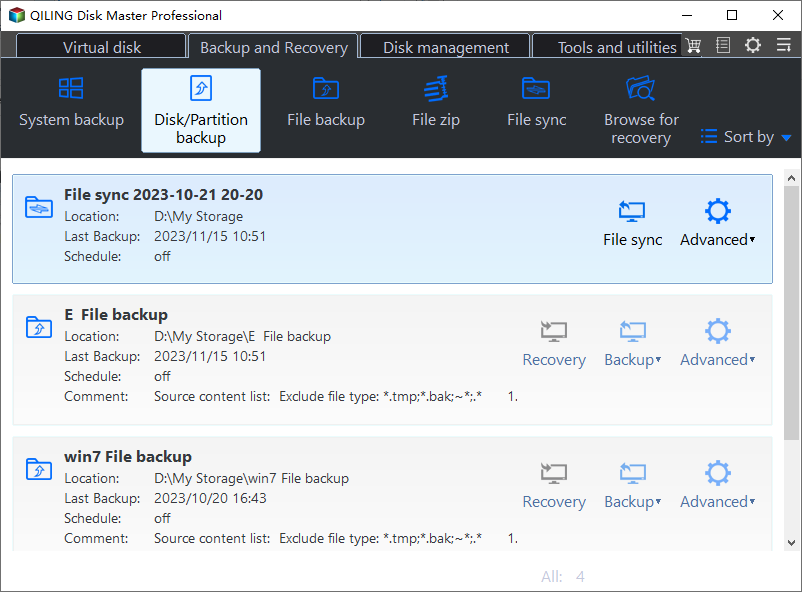
Step 2. Back up the whole target disk. On the Backup and Recovery tab, open Disk/Partition Backup and tick the whole disk that will receive 26H2. Check the task in the preview, click Proceed, and wait for the progress window to report that the image is finished. A setup that stops halfway can leave the partition table rewritten, and this image is the quickest route back to the current system.
Operation 2: Check the File System
This operation is separate from the backup and changes nothing unless it finds an error. Run it only after Operation 1 has finished, so the image still records the volume as it is now.
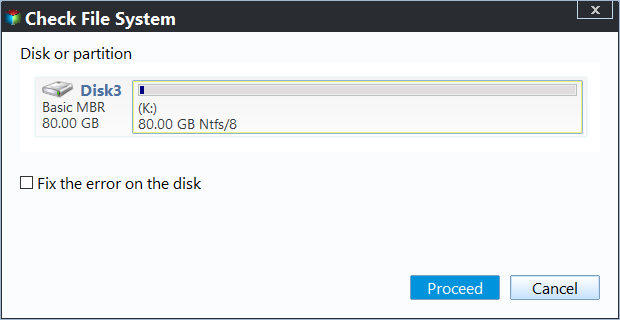
Step 1. Run the check on the system volume. Right-click the volume that holds the current system and start the file system check with the repair option enabled. A clean result means the disk is ready for setup, and any error it repairs is one setup would have hit later in the process. If the check cannot finish, restore the image from Operation 1 instead of installing over a damaged volume.
Operation 3: Create Rescue Media
This operation produces a bootable stick that can restore the image when setup leaves the machine without a boot entry. It needs a spare USB device, and it cannot be the install stick described in Part 2.
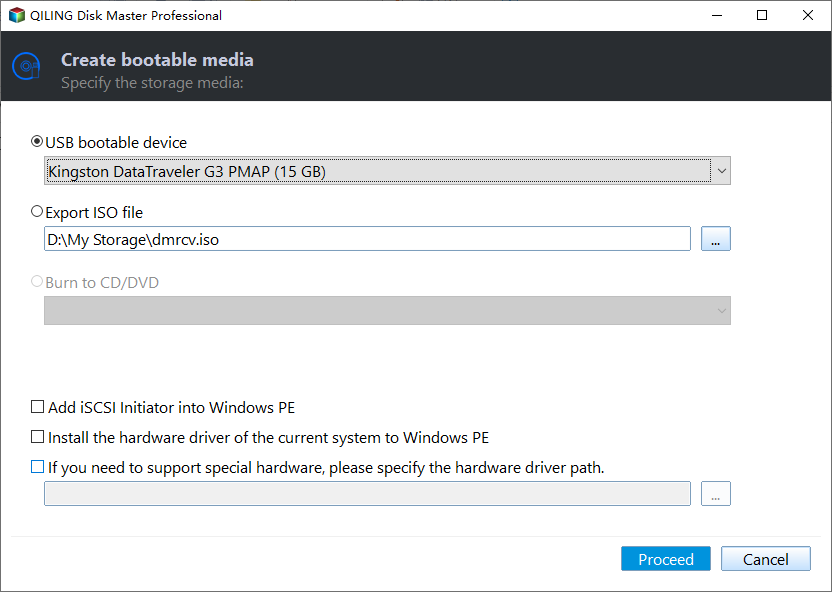
Step 1. Build the rescue stick. Open Tools and utilities, click Create bootable media, and select a spare USB device that is not the install stick. Confirm the capacity in the preview, click Proceed, and wait for the tool to report that the media is ready. Keep that stick together with the image from Operation 1.
Frequently Asked Questions
Does 0x8007000D mean my SSD is failing?
Rarely. The error arrives before setup writes to the disk, so the media and the machine are the first suspects. A disk fault usually appears later, during partitioning or formatting.
Will the failed setup have deleted my files?
Not at this stage. Setup stops before it touches the partition table, so the existing system still boots unless a previous attempt got further than this one.
Can I use the same USB stick again?
Yes, after a full rewrite. Format it first and write the image in one pass, because a stick that already holds a partial write can keep the old broken file and fail again.
Related Articles
- Windows 11 26H2 Setup Cannot Create a Partition 0x80070017
- Windows 11 26H2 Setup Cannot Find the SSD: Intel VMD
- How to Create a UEFI Bootable USB Drive
- Hard Drive Not Detected During Windows Installation
- Windows 11 26H2 Upgrade Failed With 0x800F0922
Products
Articles & Tutorials
- Data Recovery
- Data Backup
- File Recovery
- File Backup
- System Backup and Restore
- Disk and Partition Clone
- Technical articles
- Mobile articles
- Disk Master Help
- Windows Data Recovery Tutorials
- Windows Secure Delete Tutorials
- Windows Partition Management Tutorials
- Windows File Backup and Restore Tutorials
- Windows System Backup and Restore Tutorials
- Windows Disk Backup and Restore Tutorials
- Windows Clone Tutorials