Windows Setup Error 0x800701B1: USB Media Disconnected
Quick Navigation:
- What 0x800701B1 Says About the Media
- Move the Stick and Rewrite It
- Check the Target Disk Before Retrying
- Protect the Target Disk With Qiling Disk Master
- Frequently Asked Questions
Windows setup copies files for a while, then stops with 0x800701B1 and a message that the specified device does not exist. The target disk is usually fine. The device that vanished is the USB stick the installer was reading from, and setup cannot continue because the source of its own files has gone. Front-panel ports, unpowered hubs, and a controller that overheats during a long read are the usual reasons. This guide shows how to keep the media connected and how to protect the target disk before the next attempt.
What 0x800701B1 Says About the Media
0x800701B1 is the Windows status for a device that does not exist at the moment of the request. During setup it means the installer asked the USB device for the next block of data and the device was no longer present on the bus. Setup cannot read ahead, so it stops and rolls back the partial copy it has already made.
The message points at the media, not at the disk being installed to. A target disk that drops offline produces a different code at a different stage. Here the installer's own source disappeared, which is why the fixes concern ports, cables, and the stick rather than partitioning or drive letters. The two failures look similar in the log and are fixed in completely different places.
That distinction matters because the obvious response, replacing the target drive, solves nothing. Check the install stick first, then look at the machine's USB controller and its power delivery, and only then consider the disk itself as a suspect. Replace the stick only after the port, the cable, and a fresh rewrite have all been ruled out, because the media is rarely the only variable in a long copy.
Move the Stick and Rewrite It
Use a rear USB 2.0 port on a desktop. Rear ports sit on the board and deliver a stable current, while front ports run through an internal cable and a header that can brown out during a long read. On a laptop, use a port on the body rather than one on a dock or a hub. The same rule applies to a port on a monitor or a keyboard.
Remove hubs, extension cables, and card readers from the chain, and plug the stick in directly. A hub that works for a mouse can still drop a storage device once the read becomes continuous, and the failure then appears minutes into the copy rather than at the start. Remove one link at a time so that you know which one actually mattered.
Rewrite the stick from a fresh download and let the write finish without interruption. A stick whose controller overheats during a long write produces a file that looks complete but fails later, and a rewrite on a different port is the quickest way to rule that out. If a second stick behaves the same way, suspect the machine rather than the media.
Check the Target Disk Before Retrying
Setup may already have written a partial image or created the system partitions before it lost the media. Boot the current system if it still starts and confirm that the volumes are intact; if it does not start, attach the disk to another machine and read it there before doing anything else. Reading the volumes from another machine avoids writing to a disk that may still be half organized.
A partial write can leave a volume that mounts but reports errors. Run a file system check with repair enabled on each affected volume, and read the result before retrying, because a second attempt on a half-written partition usually fails at a later stage and looks like a different problem. The repair log names the volume, which helps when more than one was touched.
If the disk shows unreadable sectors, or the check cannot finish at all, replace it before the next install. Setup is a heavy write workload, and a drive that is already marginal tends to fail during it rather than during ordinary daily use. A surface check on the suspect drive settles the question in a few hours and costs nothing but time.
Protect the Target Disk With Qiling Disk Master
Qiling Disk Master covers the three jobs that make the next attempt safe: imaging the disk that will receive Windows, checking the volumes setup may have touched, and building a rescue device for the case where the machine stops booting. They are three separate tools, not one wizard. The image comes first because a repair changes the volume, and the rescue media comes last because it should be built once the disk is known to be sound.
Operation 1: Back Up the Target Disk
This operation protects the layout that a failed setup may have partly overwritten. It reads the disk without changing it, so it is safe to run before any repair.
Step 1. Select the whole target disk and a destination on another drive. On the Backup and Recovery tab, open Disk/Partition Backup, tick the whole target disk, and choose a destination on another physical drive.
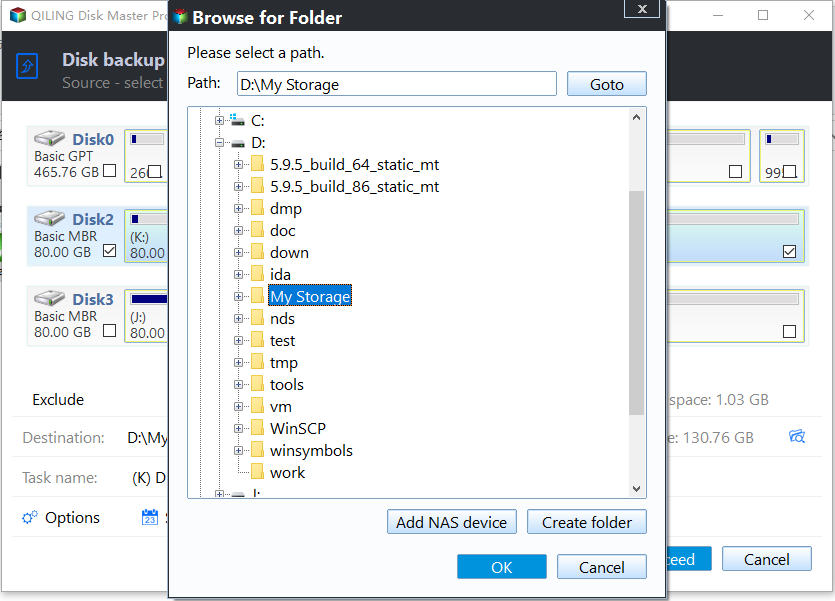
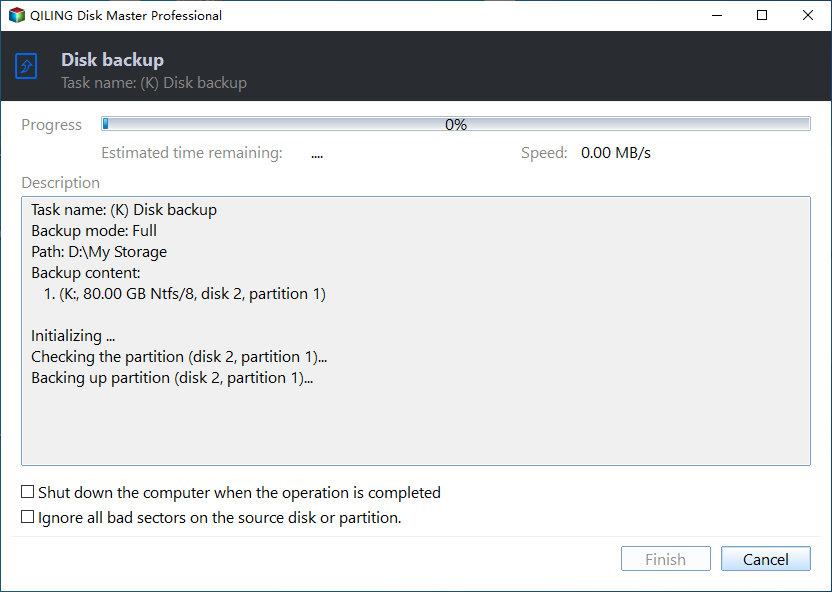
Step 2. Preview the task, click Proceed, and verify the image. Review the task in the preview, wait for the finished message, then open the image and read a folder from it. This image is what a partial setup cannot take away from you; without it, a half-written volume has no route back to the layout you started with.
Operation 2: Check the Target Volumes
This check can repair, so it changes the volume when it finds an error. Run it only after Operation 1 is finished and the image has been read back.
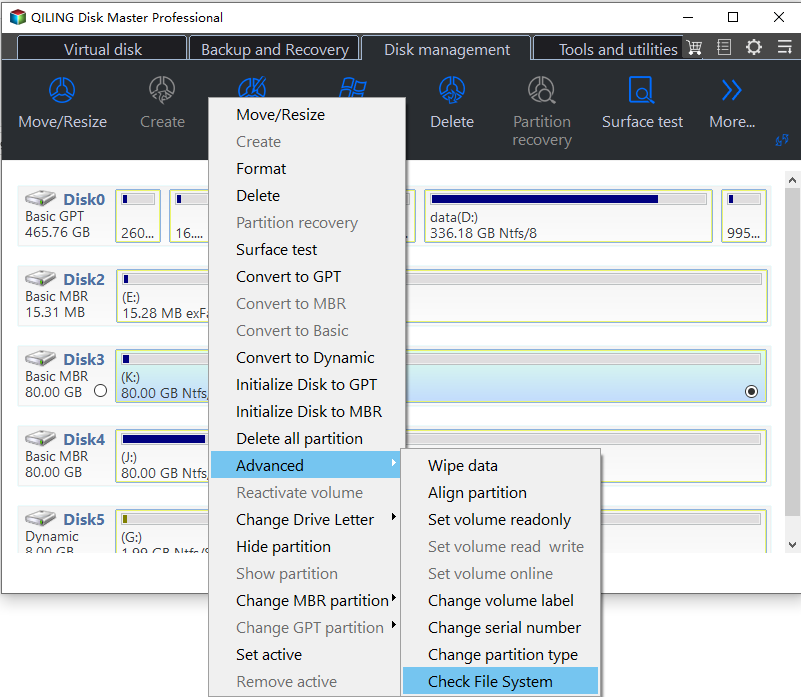
Step 1. Open Check File System from the volume menu. Right-click the volume that setup touched, point to Advanced, and choose Check File System. Opening the entry shows the dialog but changes nothing yet, so repeat it for each volume that setup may have written to.
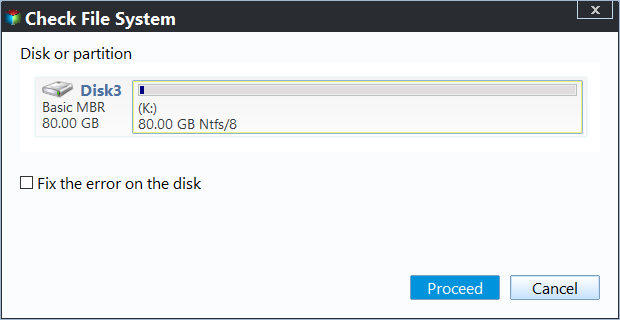
Step 2. Tick Fix the error on the disk and click Proceed. The dialog names the disk and the file system, so match them with the volume you selected. Tick the repair box, because a half-written volume is the case it is meant for, then click Proceed and wait for the result. A clean run means the failed copy left no damage; a repaired error explains why the next attempt would have failed even with a good stick.
Step 3. Note which volumes were repaired. Write down the volumes that reported errors and whether the log names a bad cluster or only an index problem. A volume that needed repair should be read from the fresh image before setup is allowed to write to it again.
Operation 3: Create Rescue Media
Build this device only after the disk is known to be sound, because it carries the tool you boot when the machine cannot start on its own.
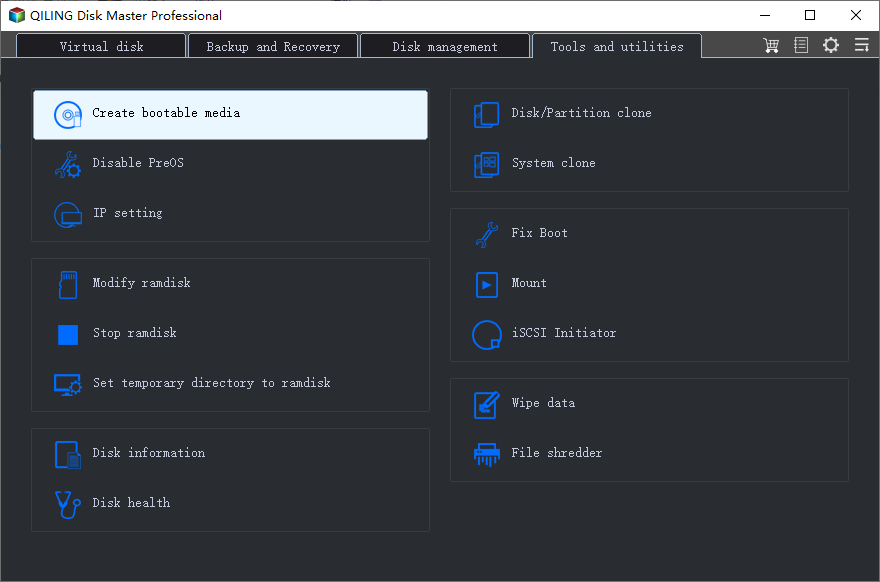
Step 1. Open Create bootable media. Go to Tools and utilities and choose Create bootable media. This only opens the wizard; nothing is written to a device until you confirm the media type and click Proceed.
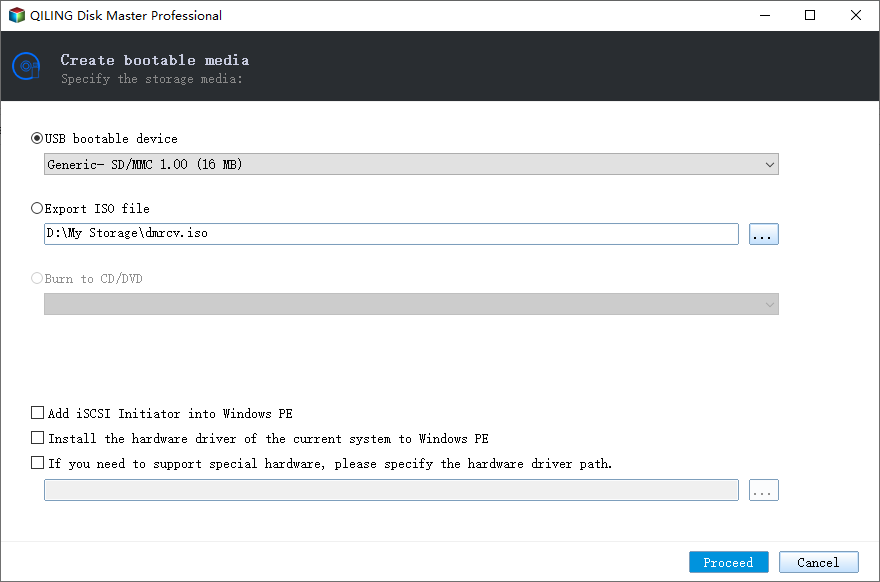
Step 2. Choose USB bootable device and the spare USB drive. The wizard asks for the storage media first. Keep USB bootable device selected, pick the spare stick that is not the install media from the drop-down list, and leave Export ISO file and Burn to CD/DVD unselected. The extra boxes below are only needed for hardware that Windows PE cannot see.
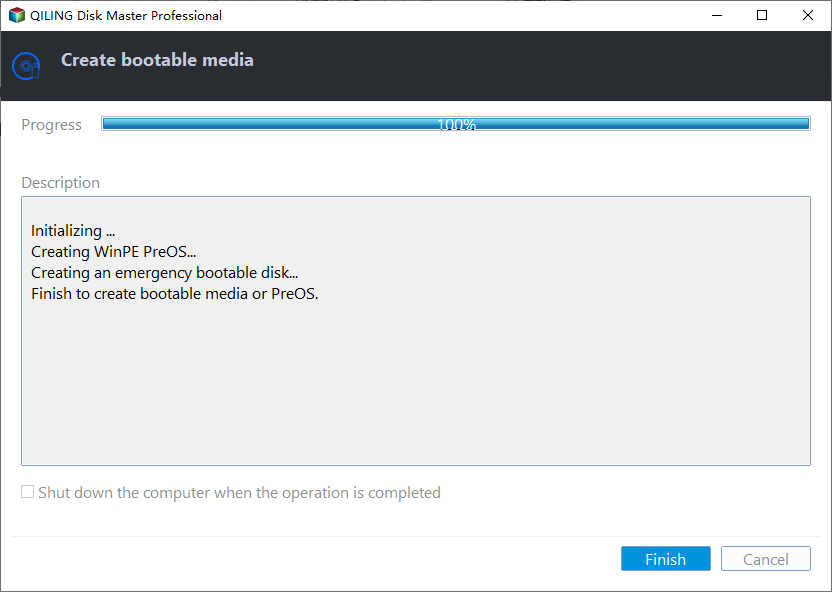
Step 3. Click Proceed and wait for the finish message. The progress window reports the Windows PE build and the write. When the bar reaches 100% and the Finish button appears, keep that stick with the image from Operation 1; the rescue device and the image belong together, and neither is useful alone.
Frequently Asked Questions
Is the target disk damaged by the failure?
Usually not. Setup stops when the source disappears and rolls back what it wrote. A partial copy can leave errors on a volume, which is why the check in Operation 2 comes before another attempt rather than after it.
Why does the error appear late in the copy?
Because the fault is thermal or electrical. A port or controller that works for a short read can drop the device once the transfer has run for several minutes and the current draw stays high.
Can I install from a USB 3 port?
Yes, when the setup image carries a driver for that controller. When it does not, the port falls back or drops the device, so a USB 2 port on the rear panel is the safer choice for the first attempt.
Related Articles
- Media Creation Tool Cannot Find a USB Flash Drive
- How to Create a UEFI Bootable USB Drive
- Burn an ISO to a USB Drive for Windows 11
- Create a Bootable USB Drive for Windows 10
- Hard Drive Not Detected During Windows Installation
Products
Articles & Tutorials
- Data Recovery
- Data Backup
- File Recovery
- File Backup
- System Backup and Restore
- Disk and Partition Clone
- Technical articles
- Mobile articles
- Disk Master Help
- Windows Data Recovery Tutorials
- Windows Secure Delete Tutorials
- Windows Partition Management Tutorials
- Windows File Backup and Restore Tutorials
- Windows System Backup and Restore Tutorials
- Windows Disk Backup and Restore Tutorials
- Windows Clone Tutorials