Can I Recover Files to the Same Drive? Use a Separate Disk
Quick Navigation:
- Understand the Problem
- Check Before Another Recovery Attempt
- Recover With Qiling Deep Data Recovery
- Verify the Recovered Files
- Frequently Asked Questions
Do not save recovered files back to the volume you are scanning. Those new writes can occupy space that still contains missing data. A separate physical disk is the clearest destination choice, especially when the original partition layout is uncertain.
Understand the Problem
A folder is not a separate device. Saving from one folder on C: into another folder on C: still writes to the same volume. A different drive letter can also be another partition on the same physical disk, so check disk identity rather than relying on letters alone.
A healthy independent destination also separates failure risks. If the source disk is deteriorating, recovered files stored on another partition of that disk would still depend on the same hardware.
Check Before Another Recovery Attempt
Check 1. Map letters to physical disks
Open Disk Management and note which volumes belong to each numbered disk. Match capacities and labels to your devices. Viewing the layout is enough; do not initialize, shrink or create partitions.
Check 2. Prepare a healthy independent destination
Use an external drive or another physical internal disk with sufficient space. Connect and verify it before scanning. Keep existing valuable destination files in mind and create a fresh output folder.
Check 3. Keep installation and output away from the source
Download and install the recovery software onto healthy storage. If the affected volume is the active system disk, background Windows activity can also write to it; consider a second computer or professional assistance for valuable data.
Check 4. Recheck the chosen path before confirming
In the recovery destination window, select the intended healthy disk and folder. Confirm its current letter and capacity. Do not choose the original location simply because it is familiar or easiest to browse.
Recover With Qiling Deep Data Recovery
Qiling Deep Data Recovery offers a visual mode chooser, a source-location screen, file results with supported previews and a separate recovery destination dialog. Use this workflow only when Windows can read the source reliably. It does not bypass encryption or guarantee recovery of overwritten data.
The screenshots are examples from the product interface. Their drive letters, file counts and sample selections are not instructions to choose the same disks on your computer. The download is not a promise of unlimited free recovery; check the current edition and license terms.
Step 1. Prepare the Source and a Separate Destination
Stop routine use of the affected device. Check independent backups first, then connect a healthy destination with adequate free space. Download and install Qiling on healthy storage, not the volume holding the missing files. If the system disk is affected, consider another suitable computer or specialist assistance to limit background writes.
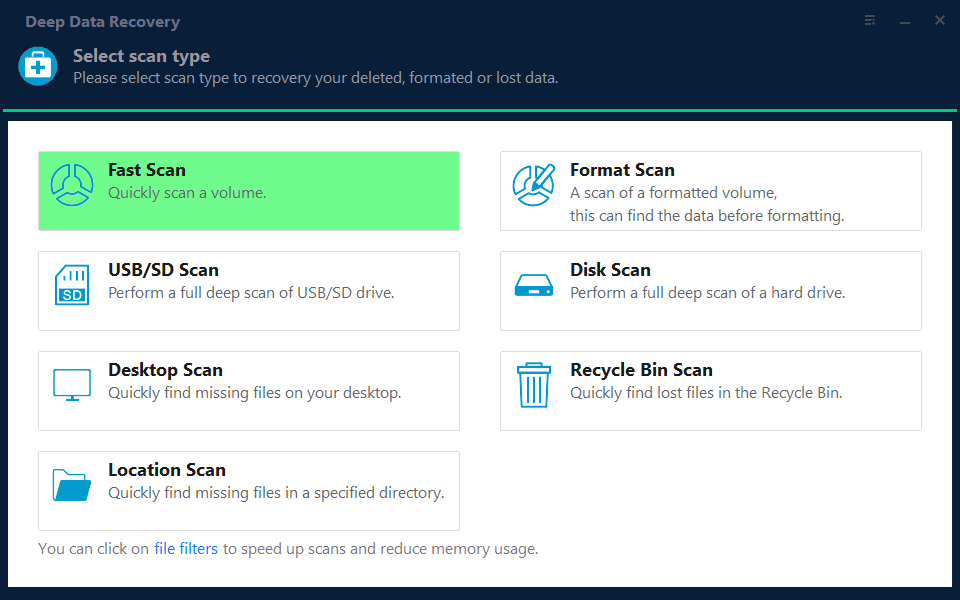
Step 2. Choose the Scan Mode for the Original Loss
Choose Fast Scan for recent deletion on a healthy volume, Format Scan after formatting, or USB/SD Scan for a removable source. None of these modes makes saving to the source safe.
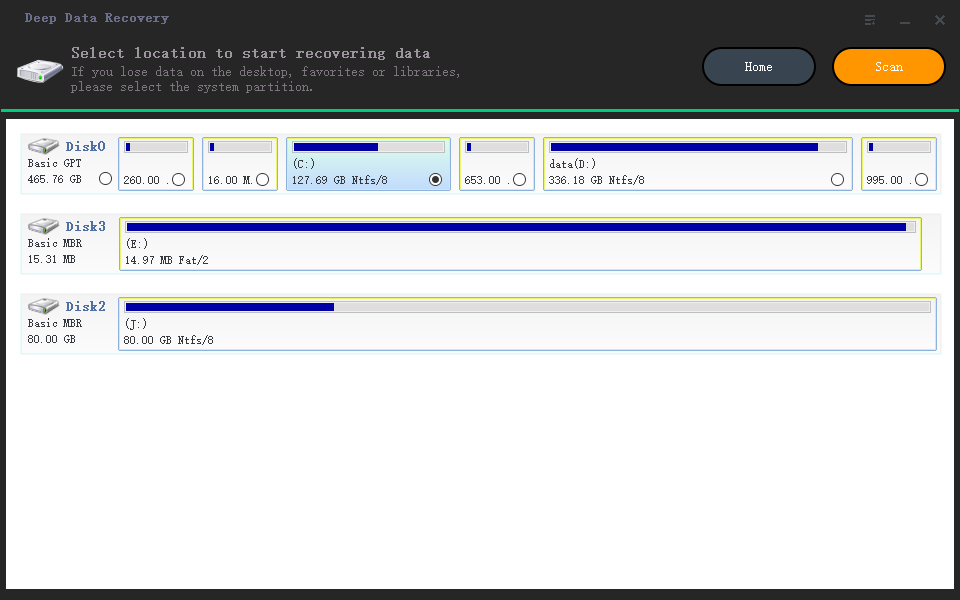
Step 3. Select the Original Source and Start the Scan
Select the device that originally held the missing files and click Scan. Leave the healthy output disk unselected as the scan source.
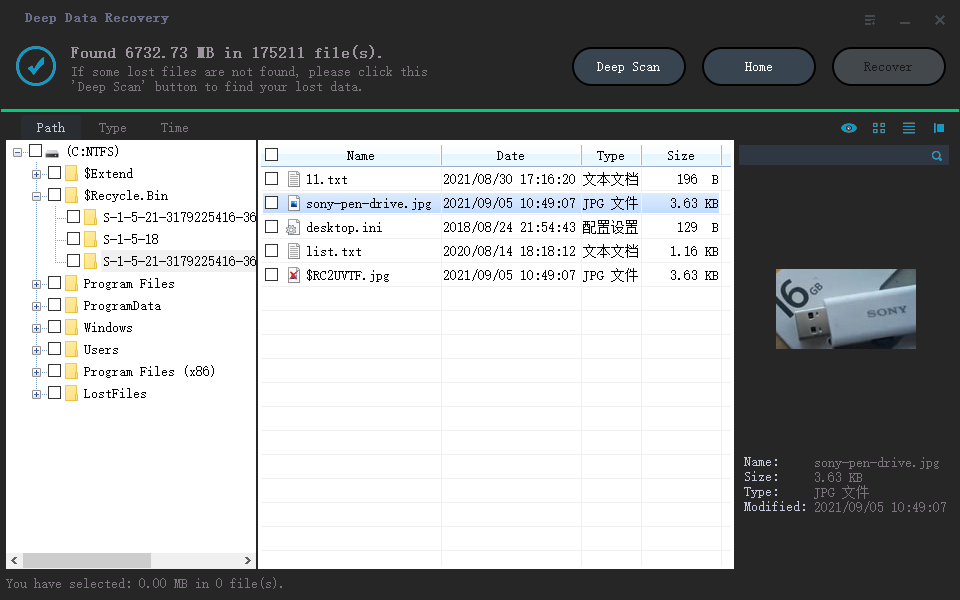
Step 4. Inspect Results and Preview Suitable Candidates
Preview supported candidates and select the important files. If more searching is justified on stable storage, use Deep Scan before committing to a large export.
Step 5. Recover to Healthy Independent Storage
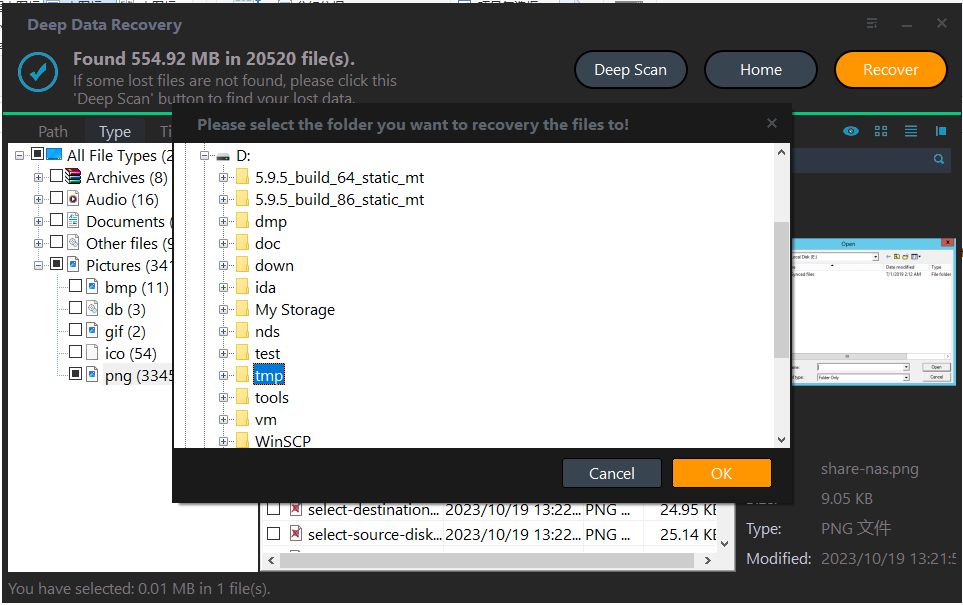
Click Recover, browse to the independent disk, select a new folder and click OK. Never choose another folder on the affected volume as a temporary shortcut.
In the destination dialog, choose the intended folder and confirm with OK. Wait for the selected export to finish without disconnecting either device. If an error occurs, record it and keep any incomplete output separate rather than assuming the batch succeeded.
Verify the Recovered Files
Open the recovered files from the destination and verify meaningful content. Keep the source unchanged until the collection has been checked and backed up.
Only after you have verified and backed up the recovered copies should you plan repairs or reuse of the source. Recovery and reuse are separate tasks.
Stop condition: Do not repartition the source to manufacture a destination. Creating new file-system structures can overwrite recoverable information.
Frequently Asked Questions
Is D: always separate from C:?
No. They may be partitions on the same physical disk. Check Disk Management before selecting a recovery destination.
Can I use a different USB stick as the destination?
Yes, if it is healthy, independent, large enough and suitable for the individual file sizes.
I already saved some recovered files to the source. What now?
Stop further writes. Preserve the device and verify existing copies elsewhere. Some original data may have been overwritten; another scan cannot reverse that.
Related Articles
- Data Recovery Destination Disk Full: Save Important Files First
Handle a full recovery destination without writing to the source. Plan capacity, recover in batches and verify saved files before continuing. - Recover Files Before CHKDSK: A Safer Order for a Damaged Drive
Decide when to recover files before CHKDSK changes a damaged file system. Preserve readable data first and avoid repair attempts on failing hardware. - NTFS Partition Recovery - How to Recover NTFS Partition
Products
Articles & Tutorials
- Data Recovery
- Data Backup
- File Recovery
- File Backup
- System Backup and Restore
- Disk and Partition Clone
- Technical articles
- Mobile articles
- Disk Master Help
- Windows Data Recovery Tutorials
- Windows Secure Delete Tutorials
- Windows Partition Management Tutorials
- Windows File Backup and Restore Tutorials
- Windows System Backup and Restore Tutorials
- Windows Disk Backup and Restore Tutorials
- Windows Clone Tutorials