Data Recovery Destination Disk Full: Save Important Files First
Quick Navigation:
- Understand the Problem
- Check Before Another Recovery Attempt
- Recover With Qiling Deep Data Recovery
- Verify the Recovered Files
- Frequently Asked Questions
When the recovery destination fills up, do not solve the problem by saving the remaining files back onto the damaged or deleted-file source. Stop additional output, secure the files already recovered and prepare another healthy destination.
Understand the Problem
The total shown by a scan can include alternate candidates, old versions and invalid size records. It is not always the space needed for one clean copy of the original collection. Selecting everything can fill a disk long before the most important files are saved.
Free space is also different from a file-system limit. A nearly empty FAT32 stick can still reject a single large video. If the destination has room but one file always fails, check its file system and the exact error rather than treating it as a full-disk problem.
Check Before Another Recovery Attempt
Check 1. Confirm which disk is full
Check Properties for the destination in File Explorer and compare it with the path used by the recovery program. Recheck disk identity after reconnecting devices; drive letters can change.
Check 2. Protect files already written
Open a few completed outputs on the destination. Mark incomplete batches separately. Do not assume a partly written file is valid because its name appears, and do not clear that destination until its usable files are backed up.
Check 3. Prepare sufficient separate storage
Connect another healthy physical disk with enough space for the priority selection. Choose an existing suitable volume. Do not repartition or format the source to create room, and do not format a destination containing files you still need.
Check 4. Recover in named batches
Prioritize irreplaceable documents, photos or project files. Use a fresh folder for each batch and record what has been verified. Stop and restart a recovery task through its interface as needed; do not assume every program can switch destinations mid-task.
Recover With Qiling Deep Data Recovery
Qiling Deep Data Recovery offers a visual mode chooser, a source-location screen, file results with supported previews and a separate recovery destination dialog. Use this workflow only when Windows can read the source reliably. It does not bypass encryption or guarantee recovery of overwritten data.
The screenshots are examples from the product interface. Their drive letters, file counts and sample selections are not instructions to choose the same disks on your computer. The download is not a promise of unlimited free recovery; check the current edition and license terms.
Step 1. Prepare the Source and a Separate Destination
Stop routine use of the affected device. Check independent backups first, then connect a healthy destination with adequate free space. Download and install Qiling on healthy storage, not the volume holding the missing files. If the system disk is affected, consider another suitable computer or specialist assistance to limit background writes.
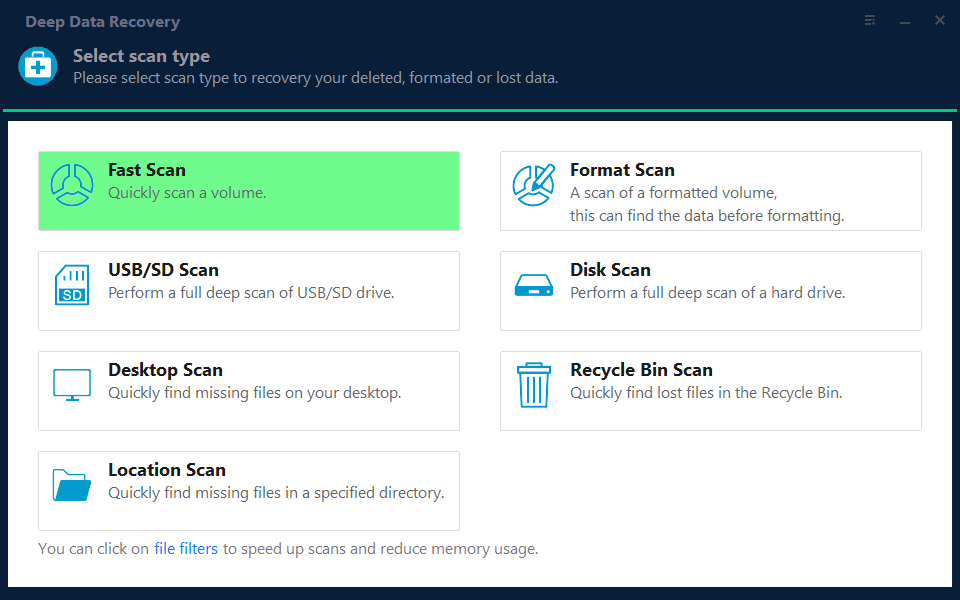
Step 2. Choose the Scan Mode for the Original Loss
Use the mode appropriate to the original loss. If you still have usable scan results open, select a smaller batch rather than immediately repeating the source scan.
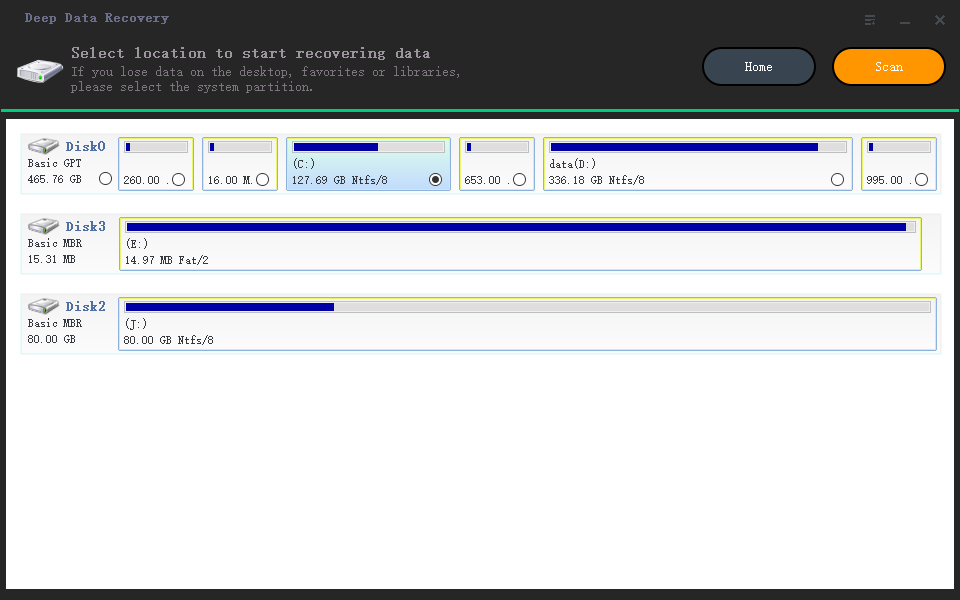
Step 3. Select the Original Source and Start the Scan
If a new scan is necessary, select the original source and click Scan. Keep its identity separate from both the old and new destinations.
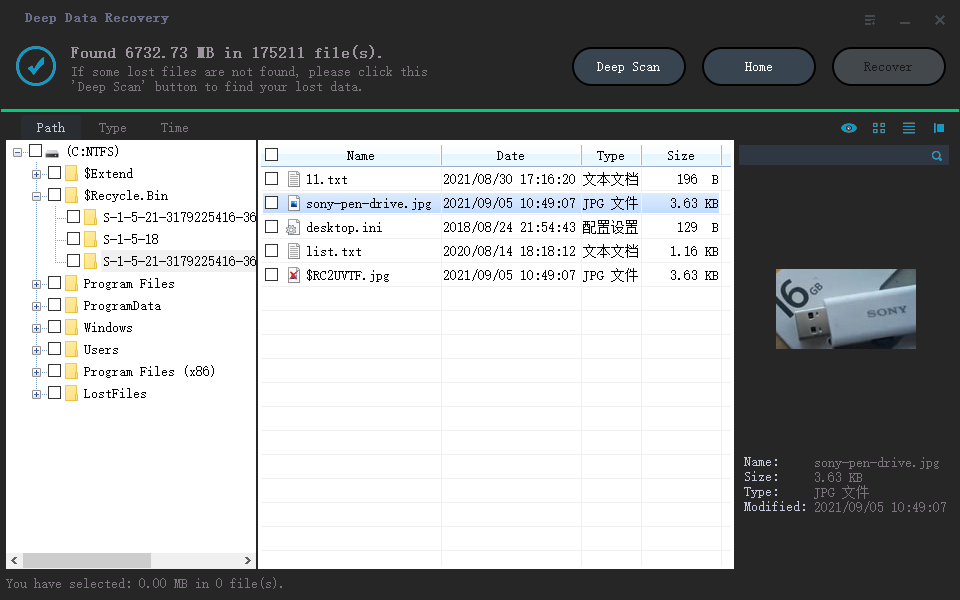
Step 4. Inspect Results and Preview Suitable Candidates
Select a manageable priority set and inspect plausible sizes. Do not include huge invalid candidates solely because they are checked by a broad selection.
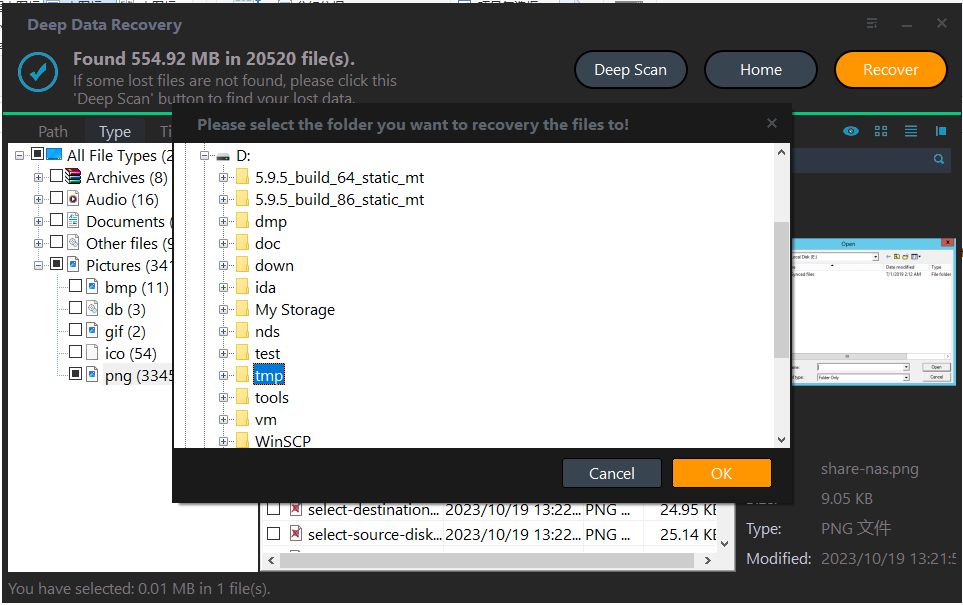
Step 5. Recover to Healthy Independent Storage
Click Recover, choose a new folder on the healthy destination and confirm with OK. Check free space before the next batch and avoid replacing previously verified files.
In the destination dialog, choose the intended folder and confirm with OK. Wait for the selected export to finish without disconnecting either device. If an error occurs, record it and keep any incomplete output separate rather than assuming the batch succeeded.
Verify the Recovered Files
Open representative files from every batch, including large files near the end of that batch. An out-of-space event can leave the last output incomplete.
Once verified, make another copy of the recovered data before cleaning up duplicate candidates or reusing the source.
Stop condition: Never delete source files, expand its partitions or save recovered output there to work around a full destination.
Frequently Asked Questions
Can I recover in several batches?
Yes, a smaller selection can reduce destination requirements. Keep records and do not assume a closed scan session will be available later.
Does the scan's total tell me exactly how large a disk to buy?
No. Candidate totals can include duplicates and invalid records. Plan around realistic priorities and allow extra space.
The disk has free space, so why does one video fail?
Check the destination file system and file size. FAT32's single-file limit is separate from available capacity.
Related Articles
- Cannot Save Recovered Files Larger Than 4 GB: Check FAT32
If large recovered videos fail despite free space, check the destination's FAT32 limit and save to a suitable separate NTFS or exFAT disk. - Can I Recover Files to the Same Drive? Use a Separate Disk
Saving recovered files to their source can overwrite missing data. Learn how to identify separate physical disks and choose a safe Qiling destination. - Fixes for 'File Is Too Large for Destination File System' on USB/External Hard Drive
Products
Articles & Tutorials
- Data Recovery
- Data Backup
- File Recovery
- File Backup
- System Backup and Restore
- Disk and Partition Clone
- Technical articles
- Mobile articles
- Disk Master Help
- Windows Data Recovery Tutorials
- Windows Secure Delete Tutorials
- Windows Partition Management Tutorials
- Windows File Backup and Restore Tutorials
- Windows System Backup and Restore Tutorials
- Windows Disk Backup and Restore Tutorials
- Windows Clone Tutorials