Recover Files From an SSD After TRIM: What Still Works
Quick Navigation:
- Why the Recovery Window Closes So Fast
- Stop Writing and Cut the Power
- Image the SSD Before You Scan It
- Scan and Recover What Remains
- Frequently Asked Questions
A deleted file on a hard drive can wait weeks for a rescue. On an SSD it may not wait an hour. TRIM tells the drive which blocks the file system no longer needs, and the controller may erase them in the background while the machine sits idle. That is why SSD recovery has a smaller window than most people expect. This guide covers what TRIM removes, what survives, and how to scan the drive.
Why the Recovery Window Closes So Fast
A normal delete removes a record, not the content. Windows marks the clusters as free, the bytes stay on the media, and an undelete tool can follow the old record back to them. TRIM breaks that chain. When a file is deleted on an SSD that supports the command, the file system also sends the drive a list of block addresses that are no longer in use, and the drive may erase them at any moment.
Erasing happens in blocks, not in single sectors, and on NAND flash it means removing the charge that held your data. The controller decides when: idle garbage collection, wear leveling, and the next write to the same block all consume trimmed addresses. A fast drive can finish within minutes, an older or busy one may take hours, and the file name and its content can disappear at different times.
The result is a range, not a promise. Drives that delay erasure, or keep recent blocks in a write cache, often return a usable share of the files, while drives with aggressive cleaning return very little. Model, firmware, and free space all change the outcome, so treat any rate quoted before a scan as a guess. TRIM also runs only while the drive has power, so unplugging it stops the clock.
Stop Writing and Cut the Power
Unplug the SSD as soon as you notice the loss. Every write gives the controller fresh work: log files, browser cache, updates, and the recovery tool's own installation all count. Do not defragment the drive or run the vendor's optimization pass, because the retrim that follows is the last thing your files need. Install nothing on the affected drive, and never boot from it while you plan.
If the SSD is a data drive in a desktop, power off and move it to a spare port or a USB enclosure, so the operating system cannot touch it in the background. Keep the drive unpowered until you have a plan. The interval between the delete and the scan is the only part you control, and every idle hour is a chance for the controller to clean up. Image it promptly.
Image the SSD Before You Scan It
Connect the drive to a working computer and take a sector-level image of the whole disk before any scan. The image gives you a copy you can read repeatedly and lets the original go back on the shelf, and it lets an unstable drive be powered down after one pass. Choose a destination with more free space than the SSD's full capacity, because an image copies every sector.
Disconnect the original once the image is written, then scan the image file rather than the drive, which also stops a controller from cleaning more blocks while the scan reads them. A file system check is a Microsoft Windows tool and is not part of Qiling Disk Master. It is not a recovery step, and on a failing SSD it adds writes and delays the scan. Record the model and firmware version instead; they explain what a scan is likely to find.
Scan and Recover What Remains
Qiling Disk Master includes a disk-level scan engine that reads file records below the file system, so a volume Windows no longer mounts can still be listed with its folder tree. Nothing is written to the drive until you start the recovery, and the files should go to a third disk. The three steps below use that engine, and none of them changes the SSD.
Step 1. Select the SSD and the Scan Level
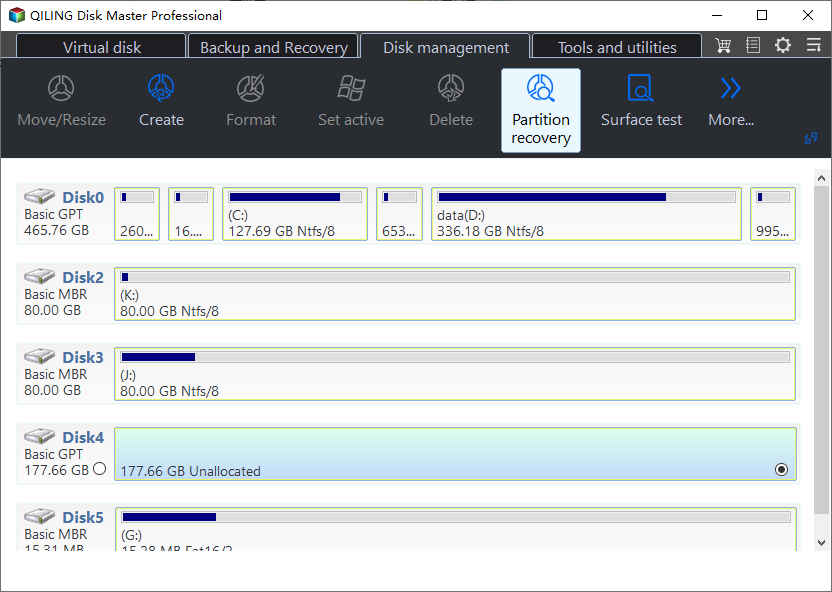
Start the recovery wizard and pick the physical SSD rather than a drive letter, because a disk moved between machines may have been reassigned. Match the model and capacity in the list, and compare the disk number when two drives look alike. If the volume no longer mounts, choose the disk-level scan so the unallocated space is covered too; the scan depth itself is set in the next step.
Step 2. Run a Deep Scan Across the Disk
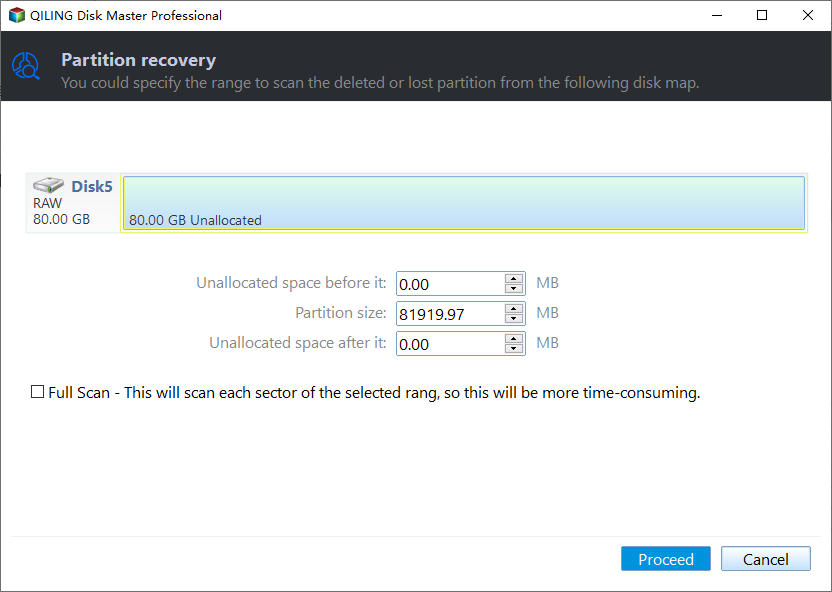
Set the range to the full unallocated area and enable the full scan option, which reads every sector instead of every file record. On an SSD that has already been trimmed, nothing else has a realistic chance of finding the content. Let the pass finish, because stopping early hides files at the end of the disk and skips slack space a quick pass never reads.
Step 3. Preview the Files and Recover Them
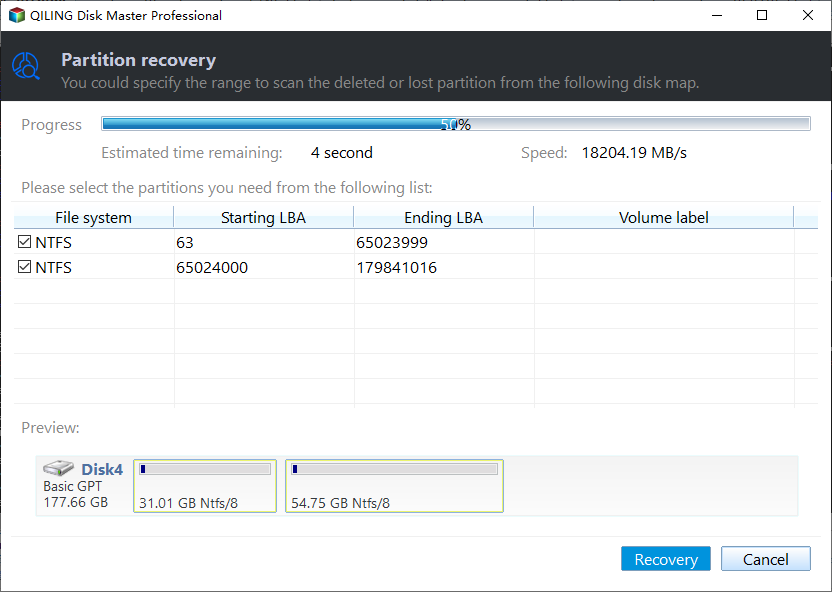
Filter the results by type and sort by date to isolate the batch you lost. Open a few documents, photos, and archives of different types first, because a preview that fails tells you those blocks were already erased. When the selection is right, recover to a separate disk, never back to the SSD, and keep the image until every file opens normally.
Frequently Asked Questions
Can anything be recovered from an SSD after TRIM runs?
Sometimes, and usually less than people hope. TRIM marks blocks as free, and the controller clears them on its own schedule. Files deleted minutes before the drive was unplugged may still sit in cache, while files deleted last week are usually gone. A scan of the image is the only way to know, and opening two or three recovered files settles it.
Should I disable TRIM to protect future deletions?
Turning it off keeps deleted blocks intact longer, at the cost of write performance and lifespan. That is a reasonable trade only on an archive drive that rarely changes. For a system disk, leave TRIM on and rely on backups, because a backup is cheaper than a recovery and it survives the controller failing as well as your own mistakes.
Why do some recovered files open as empty or damaged?
The name survived but the content did not. TRIM can remove the data before the record is reused, so a scan may rebuild a directory entry that points at nothing. Previewing each file type is how you separate entries that still have data from those that only have a name, and no tool can repair a file that no longer has content behind it.
Related Articles
- Recover Deleted Files From SSDs
- Recover Files From a Toshiba SSD
- SSD Firmware Update Failed and the Drive Is Not Detected
- USB4 SSD Enclosure Randomly Disconnects
- Recover Overwritten Files on Windows
Products
Articles & Tutorials
- Data Recovery
- Data Backup
- File Recovery
- File Backup
- System Backup and Restore
- Disk and Partition Clone
- Technical articles
- Mobile articles
- Disk Master Help
- Windows Data Recovery Tutorials
- Windows Secure Delete Tutorials
- Windows Partition Management Tutorials
- Windows File Backup and Restore Tutorials
- Windows System Backup and Restore Tutorials
- Windows Disk Backup and Restore Tutorials
- Windows Clone Tutorials