How-To | What to Do When My Mac Won't Boot Past Apple Logo
When updating or installing macOS, your Mac will start up from the startup disk, displaying a white Apple logo with a progress bar. If everything goes smoothly, the progress bar will finish, the screen will turn black, and your Mac will boot normally. However, in some rare cases, you might get stuck at the Apple logo screen indefinitely. If this happens, there is a solution. We'll outline several troubleshooting methods to help you resolve the issue and get your iMac or other Mac computer up and running again. So, let's dive in and try some self-troubleshooting.
Method 1. Quick Solutions to Fix iMac Won't Boot Past Apple Logo
Step 1. To force shut down your iMac, press and hold the power button for 10 seconds. Then, try restarting your Mac to see if it boots successfully. If not, proceed with the next steps.
Step 2. If Step 1 doesn't resolve your issue, try turning off your Mac, unplugging all peripherals (such as printers, drives, and USB hubs), and then restarting to see if the problem is resolved.
Method 2. Repair The Disk with Disk Utility
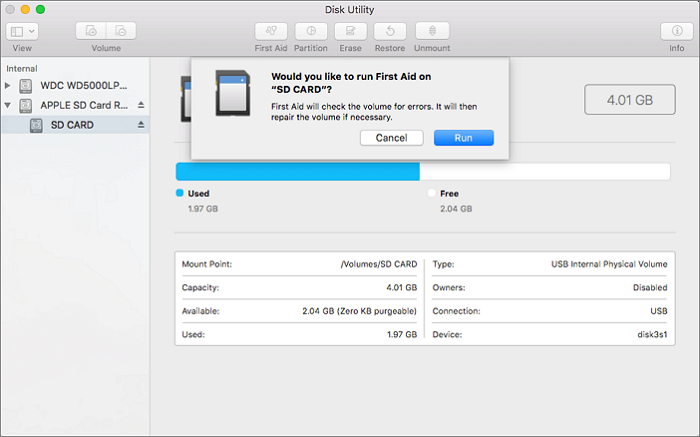
If quick solutions can't fix the problem, you can try macOS's built-in repair feature, Disk Utility, to find and repair errors related to the format and directory structure of Mac disks. To do this, open Disk Utility, select the disk you want to repair, and click the "First Aid" button to run the repair process. This may take a few minutes to complete. If the issue persists, you may need to seek further assistance from a professional.
Step 1. Go to Applications > Utilities > Disk Utility.
Step 2. Select the startup disk and click First Aid.
Step 3. Wait until the repairing process is finished.
Step 4. Restart your iMac and see if it can boot properly.
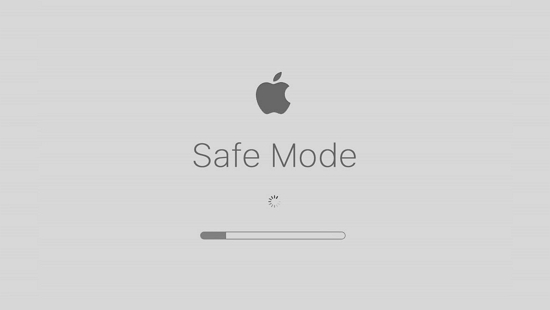
Method 3. Enter Safe Mode to Fix iMac Won't Boot Past Apple Logo
Starting your Mac in Safe Mode can help you determine if the issue is caused by software loaded during startup.
Step 1. Press and hold the power button to shut down the iMac.
Step 2. Press the power button to start your computer, and while it's booting, press and hold the Shift key on your keyboard.
Step 3. To boot into Safe Mode, release the Shift key when you see the login screen, and then follow the onscreen wizard.
Method 4. Reset NVRAM/PRAM
If you're experiencing issues with your Mac and Apple Support suggests trying to reset NVRAM or PRAM, this is the last resort you can try. This method is often used to solve unexplained problems on Macs, and it involves following a series of steps to reset the computer's NVRAM or PRAM.
Step 1. To reset your Mac, shut it down, then turn it back on and press and hold the Option, Command, P, and R keys simultaneously. This will initiate the process of resetting your Mac's System Management Controller (SMC) and Power Management Unit (PMU).

Step 2. Hold the power button for about 20 seconds, during which your Mac might appear to restart.
On a Mac computer that plays a startup sound, you can release the keys after hearing the second sound.
On Mac computers with the Apple T2 Security Chip, you can release the keys after the Apple logo appears and disappears for the second time.
Bonus Tip: What To Do When Mac Lost Data Unexpectedly
One common problem for users is their external hard drives suddenly failing to show up on Mac, and when they finally make it readable again, they find that all the data on the external hard drive is gone. To save users who have been stuck in this dilemma, we recommend an efficient Mac data recovery tool - Qiling Data Recovery for Mac - which can help recover lost data.
Key Features:
- Recover an unlimited amount of data from external devices, including external hard drives, solid state drives, SD cards, and USB flash drives, among others.
- Recover over 1000 types of files, such as photos, documents, emails, archives, and more, with this tool.
- To create a bootable USB drive and recover data from it when macOS is unable to boot up, you can use a tool like Disk Utility or a third-party software like DiskMaker X. First, download and install the desired software, then create a bootable USB drive by formatting the USB drive and copying the macOS installation files to it.
- Support recovering Time Machine backup and iTunes backup.
If you're interested in this tool, take advantage of the free trial by downloading it from the button below.
Step 1. Launch Deep Data Recovery, select file types, and click "Next" to initiate the recovery process.

Step 2. Select the disk location where you lost data and files, then click the "Scan" button.

Step 3. Deep Data Recovery for Mac scans the selected disk volume and displays the scanning results on the left pane.

Step 4. To recover the selected file(s), simply select them in the scan results and click the "Recover" button. This will restore the file(s) to their original state.
The Bottom Line
If your iMac won't boot past the Apple logo, there's no single reason for this issue. However, the self-troubleshooting methods mentioned earlier are worth trying and are 100% safe to apply. If you've experienced data loss, there is a solution. Use Qiling Data Recovery for Mac immediately to scan and recover your lost data.
Related Articles
- Will Formatting My Mac Make It Faster | Here is Answer
- How to Recover Data on macOS High Sierra (10.13)
- How to Format USB Flash Drive to FAT32 on Mac without Data Loss
- Mac TextEdit Recovery: Recover Deleted/Unsaved TextEdit Files
- How to Use DBCC CHECKDB Repair Options to Repair Database
DBCC CHECKDB repair options are often used in SQL Server to resolve database-related errors. CHECKDB repair can be used to fix issues reported by the database, and if an error is found, you can use Qiling MS SQL Recovery software to repair your database without losing any data. - Download Deep Scan Data Recovery Software
Download Qiling deep scan data recovery software to recover lost, deleted, hidden, formatted, and virus-infected documents, photos, videos, and emails from USB flash drives, memory cards, HDD, SSD, and other storage devices efficiently and completely.