Pictures Folder Missing After Moving It to an External Drive
When Pictures seems empty after moving it to an external drive, the files may still be on the old path, the new path, a OneDrive-managed folder, or a disk that received a different letter. Do not format the external drive or run recovery software until you have checked those locations.
Find the real folder location
Step 1. In File Explorer, right-click Pictures under This PC and open Properties > Location. Record the target path. Compare it with the address bar of the folder that appears empty.
Step 2. Open Disk Management and identify the external drive by model and capacity. Confirm its drive letter and whether its volume is healthy. If the letter changed, update the folder path only after confirming the correct device.
Step 3. Search the old user profile's Pictures folder, the external drive, and OneDrive Pictures. Check Recycle Bin and the cloud recycle bin before concluding files were deleted.
Fix a path mismatch without moving data blindly
If the files are visible on the external drive, copy a small sample to a safe location and open it. Then correct the Pictures location to the intended path, or move the files through Windows' Location dialog after making a backup. Do not point the Pictures known folder at a drive root; use a dedicated folder such as E:\MyPictures. An external drive must be connected before apps that save to Pictures run.
If OneDrive folder backup manages Pictures, review its settings before moving or deleting anything; sync can propagate unintended changes to other devices.
If the files were actually deleted
Use recovery software only after checking the old Pictures path, the new external-drive path, Recycle Bin, File History, and other backups. Stop writing to the disk that actually lost the photos; installing software or saving results there may overwrite them. On an SSD, TRIM may reduce the chance of recovery. If the external drive disconnects or makes unusual noises, resolve the hardware problem before scanning.
Step 1. Identify the disk that held the photos immediately before they disappeared. If a move from the internal disk to the external disk failed, check both locations and start with the disk from which the missing copies were deleted. Install Qiling Deep Data Recovery on another physical disk, not the affected one.
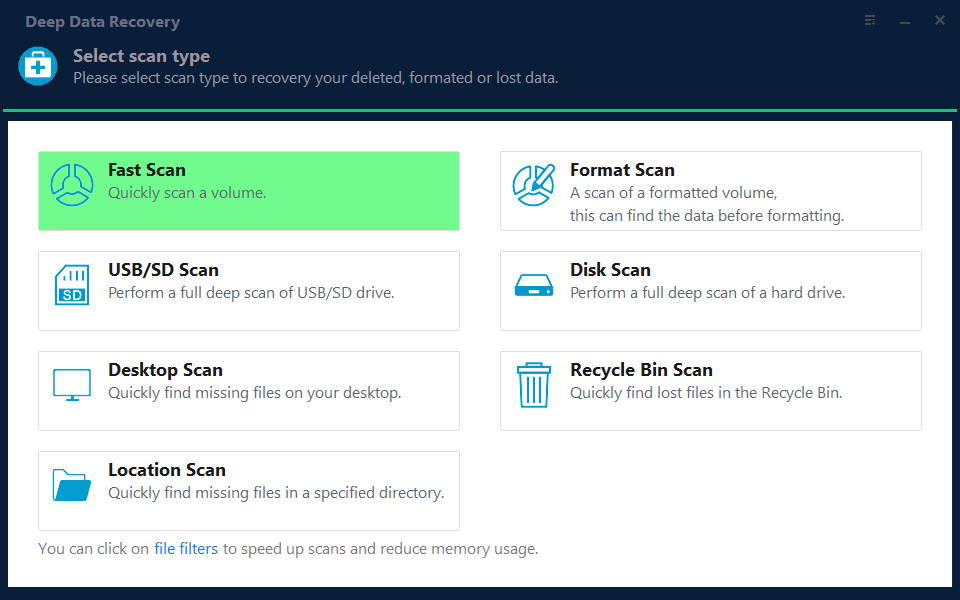
Step 2. Open the program and select USB/SD Scan if the lost files were on a USB-connected external drive, or Disk Scan if they were deleted from the internal drive. These modes scan the selected device; a changed drive letter alone does not require a recovery scan.
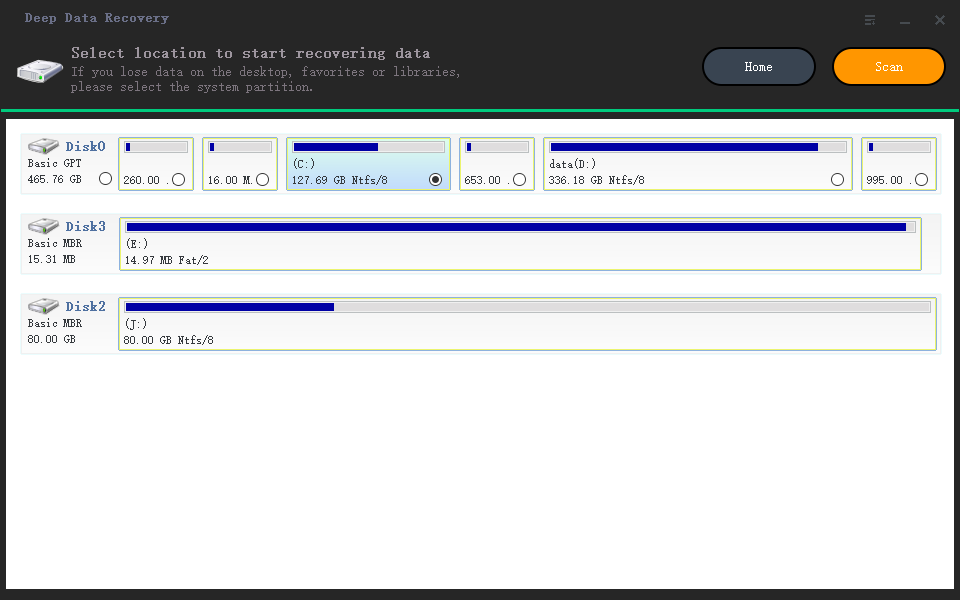
Step 3. On the location screen, identify the affected disk by capacity and partition layout rather than its current letter. Select the volume where the Pictures folder was stored, then click Scan. If the expected device is absent, cancel and fix its connection instead of scanning a different disk.
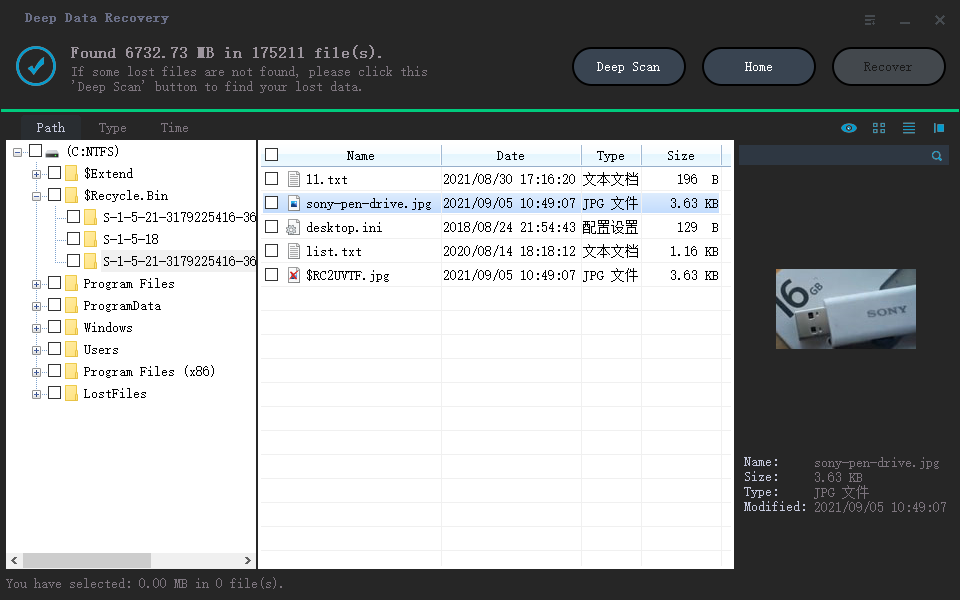
Step 4. Let the first scan finish. Browse the original folder path and the Pictures file-type group; search by a known filename if necessary. If the photos are not listed, click Deep Scan and review the additional results. Do not assume every image found belongs to the missing Pictures folder.
Step 5. Select several likely photos and use the preview pane to check their contents, names, sizes, and dates. Mark only the files or folders you need, then click Recover.
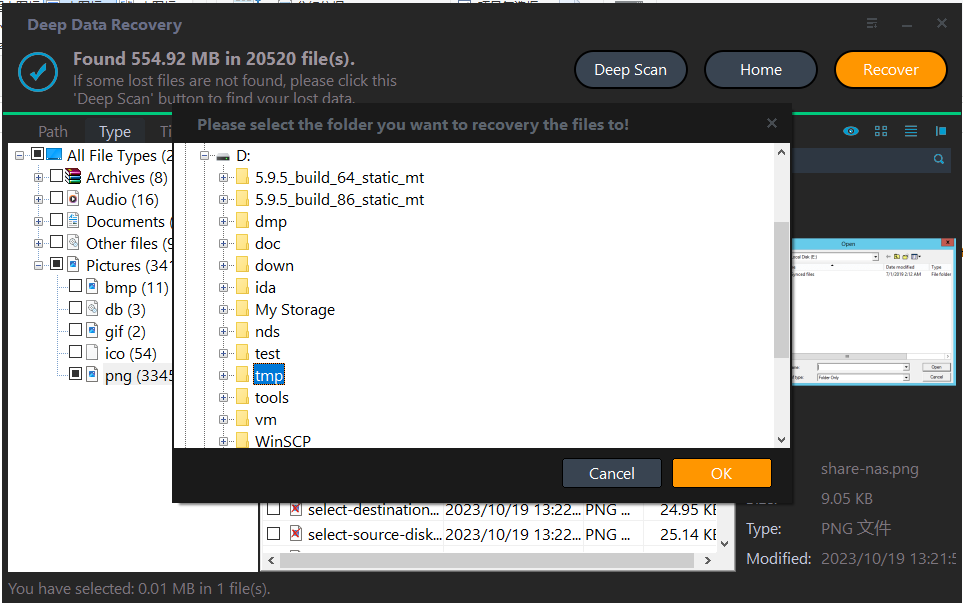
Step 6. In the destination dialog, choose a folder on a different physical disk with enough free space, then click OK. Do not select another partition on the same affected disk or the folder being scanned.
Step 7. Open several saved photos from the recovery destination to confirm that they are readable. Compare the recovered set with the original folder or a backup before copying anything back to Pictures. If neither the first scan nor Deep Scan finds valid files, avoid further writes and consider a specialist for valuable data.
Keep the folder accessible
Assign a stable drive letter if the external drive will remain the Pictures location, and keep a separate backup because one removable device is easy to lose or disconnect. Test the backup by opening a restored photo from time to time.
Related Articles
- Recover Deleted Photos
Scan a local disk only after confirming deletion. - Restore Pictures from Backup
Recover a selected folder without replacing current files.
Products
Articles & Tutorials
- Data Recovery
- Data Backup
- File Recovery
- File Backup
- System Backup and Restore
- Disk and Partition Clone
- Technical articles
- Mobile articles
- Disk Master Help
- Windows Data Recovery Tutorials
- Windows Secure Delete Tutorials
- Windows Partition Management Tutorials
- Windows File Backup and Restore Tutorials
- Windows System Backup and Restore Tutorials
- Windows Disk Backup and Restore Tutorials
- Windows Clone Tutorials