[Solved] The Program Can't Start Because MSVCR110.dll Is Missing from Your Computer
Error
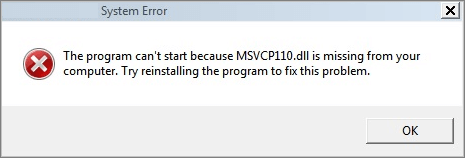
"The program can't start because it's missing a required file called MSVCP110.dll. You can fix this by reinstalling the program."
The code execution cannot proceed because the required msvcr110.dll file was not found. Reinstalling the program may resolve this issue.
The Msvcr110.dll error message may appear when trying to install, uninstall, or start certain programs on Windows 10/8/7, Windows Vista, Windows XP, or Windows 2000, causing issues with various programs.
Causes
The msvcr110.dll error message occurs when one of the Microsoft Visual C++ Redistributable packages is missing or not functioning properly, leading to a dll file not found or missing issue.
The msvcr110 dll file may be missing or corrupted due to a variety of reasons such as registry problems, virus or malware issues, hardware failures, or human errors.
Solutions
If you're experiencing the Msvcr110.dll not found or missing error, there are several methods you can try to resolve the issue. To start, ensure that the Microsoft Visual C++ Redistributable Package is installed on your system, as it includes the necessary DLL.
Method 1. Download the Missing MSVCR110.dll File to the Original Location
Many people wonder why not just copy the missing MSVCR110.dll file from the Microsoft website and paste it to the program's installation directory, but it's recommended to download the required dll file from the official Microsoft website rather than from a "DLL download" website.
To download the Visual C++ Redistributable for Visual Studio 2012 Update 4, click the link to the Microsoft official website, where you'll find detailed installation instructions. The page also provides information on the supported operating systems and hardware requirements.
Method 2. Use File Recovery Software to Recover Deleted MSVCR110.dll File
If you've accidentally deleted msvcr110.dll and it's no longer in the Recycle Bin, you can use a file recovery program like Deep Data Recovery to try and restore it. This tool can help recover deleted or corrupted files due to various reasons such as accidental deletion, formatting, or virus attacks.
Step 1. Select file types and click "Next" to start
Launch Deep Data Recovery. Select file types and click "Next" to initiate the recovery process.

Step 2. Select a location and start scanning
Hover on the partition/drive where the deleted files were stored. Click "Scan" to find lost files.

Step 3. Select the files you want to recover
Once the scanning process is complete, select the deleted files you wish to recover. You can filter the results by file type, or search for specific files using the "Search files or folders" box, which can be a quick way to locate the target file.

Step 4. Preview and recover deleted files
Preview the recoverable files, select the ones you want to restore, and click "Recover" to move them to a new storage location, bypassing the original disk where the data was lost.
Other Possible Fixes for Msvcr110.dll Not Found or Missing Error
- Run a virus/malware check to eliminate hostile programs that masquerade as DLL files. This will help ensure that any suspicious DLLs are removed and the system is secure.
- If you're experiencing a DLL error, you can try using System Restore to revert your system to a previous point in time when the issue wasn't present. This can help undo any recent changes to the Registry or system configuration that may be causing the problem.
- Reinstalling programs that utilize DLL files can resolve issues caused by corrupted or missing DLLs, as the program's installation often includes the necessary DLLs, thereby replacing any faulty ones. This method can be particularly effective when a specific program is causing the DLL error, as reinstalling the program may resolve the issue without affecting other system files. However, if the problem persists, further troubleshooting may be necessary to identify the root cause of the DLL error.
- Apply any available Windows Updates.
- To resolve the issue, you can perform a repair installation of Windows or run a clean installation of Windows. This will allow you to reinstall Windows while keeping your files and settings intact, or to completely reinstall Windows and start from scratch.
Related Articles
- Recover 0 Byte Files in Windows 10/8/7
- How to Convert a Shortcut File into Original File
- Recover Cropped Image| How to Revert Edited Photo to Original
- Restore Overwritten/Replaced/Saved-over XLS/CSV Files
- Free Download Deep Data Recovery Torrent, Serial Key
If you are looking for a reliable way to fully restore lost pictures, documents, videos, and any type of data on a PC or Mac, read this easy yet effective data recovery tutorial. Get professional Qiling data recovery software torrent with serial key, and follow this tutorial to perform a full recovery of all your lost files. - How to Fix Deep Data Recovery Crashes, Stuck, Hangs and Freezes Up Error
If Deep Data Recovery gets stuck on scanning or freezes up, try restarting the software or your computer, then scan the data again. If it still doesn't work, try using Qiling data recovery software to recover your lost data. It's a reliable and efficient solution to get back your lost files.