What Is RSAT? How to Install Remote Server Administration Tool on Windows? [All You Should Know]
What Is RSAT?
Windows offers dedicated servers to help users develop servers, providing various tools to enhance server operations. Among these tools, Remote Server Administration Tools (RSAT) stands out as an advanced set of tools for managing desktop servers remotely, guiding users in managing different server technologies with a client.
The major Windows servers have various roles and features that can be used to manage Windows 11, 10, 8.1, 8, 7, and Vista, including tools like Active Directory Users & Computer, DNS Manager, DHCP Manager, and more, making it a comprehensive package of management tools that promotes a robust security practice within server management systems. (Note: I removed the "shortly" at the end as it's not a valid sentence)
These free tools on Windows have been helpful for system servers, being competent across various server management tools. Server administrators recommend them across most platforms due to their effectiveness.
How to Install/Uninstall RSAT on Windows 10
To install and uninstall RSAT on Windows 10, follow these steps. First, ensure that your Windows 10 version is at least 1703 or later.
How to Install RSAT on Windows 10
Step 1: To access settings, click on the "Start" icon on the taskbar at the bottom of the screen, then select the "Settings" icon from the panel of options that appears.
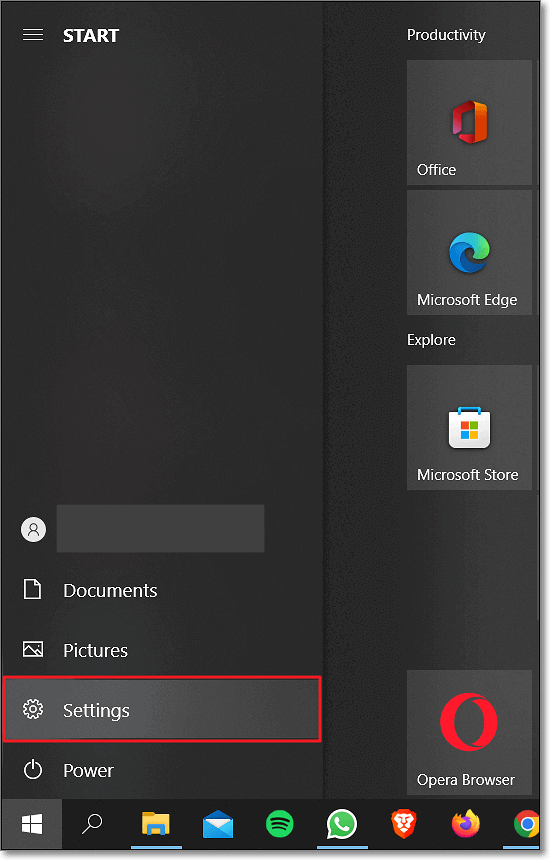
Step 2: To access the "Apps" settings, click on the Start menu and navigate to the "Settings" icon. From there, select the "Apps" option, which should be located in the list of available settings.

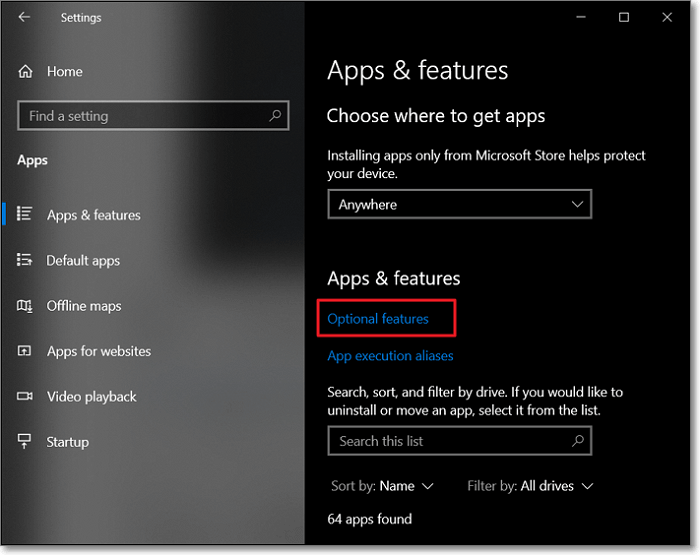
Step 3: To add an optional feature to your Windows 10 device, navigate to the "Apps & features" section, click on the "Optional features" option, and then select the "Add a feature" button.

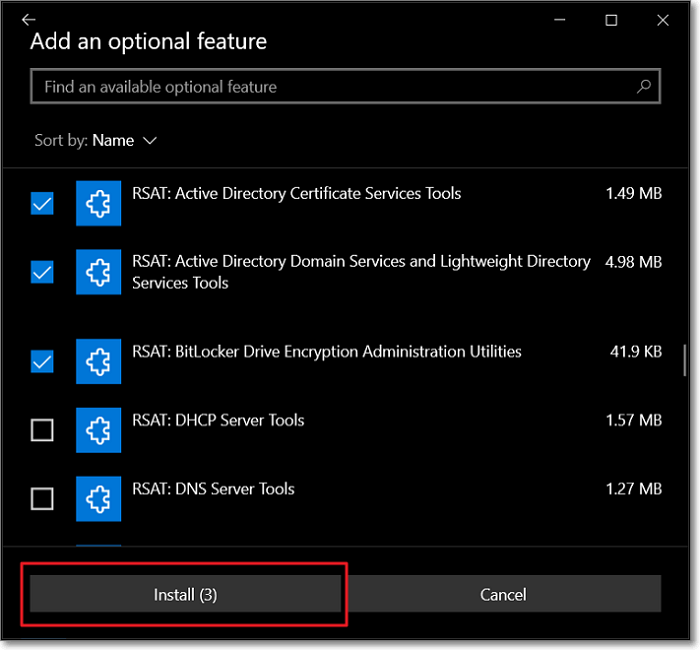
Step 4: On the window with a list of features, scroll down to locate the RSAT features, check mark all the tools of RSAT that you want to add, and click "Install" to successfully install all the tools across your Windows 10.
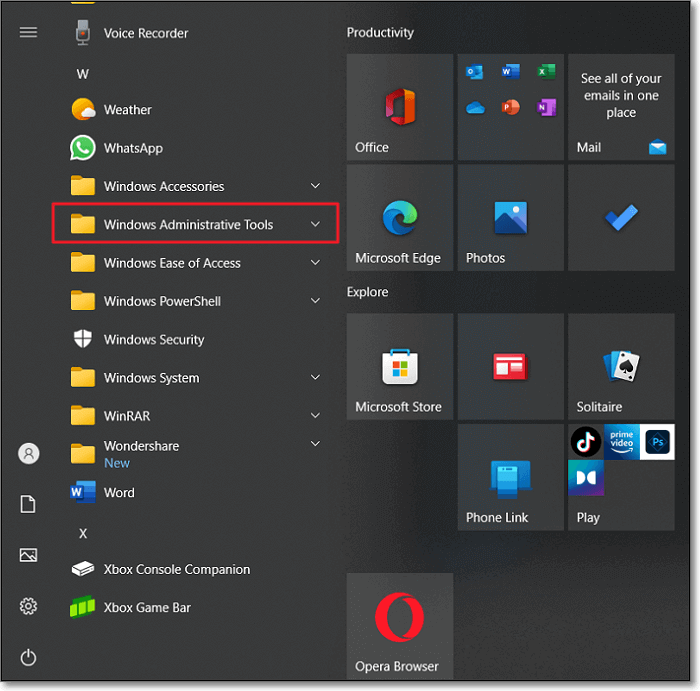
Step 5: You can access various tools from the Start menu, specifically from the "Windows Administrative Tools" folder, where they are all housed.
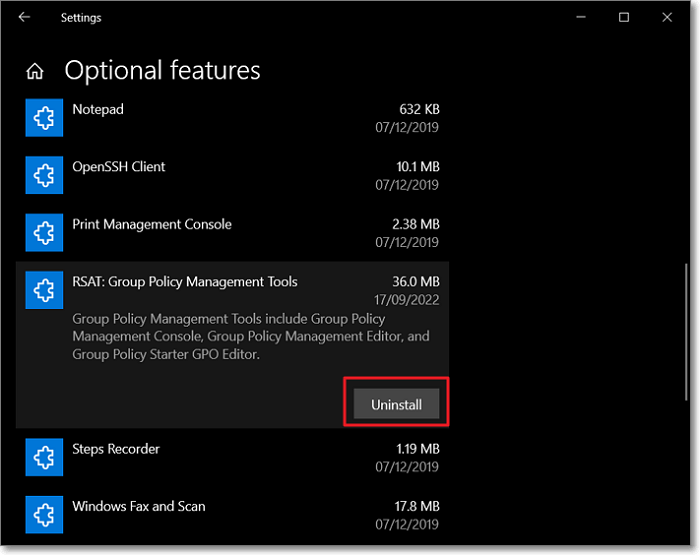
How to Uninstall RSAT on Windows 10
Step 1: To uninstall RSAT features across Windows 10, you need to navigate to the "Settings" of your computer and select "Apps" to proceed.

Step 2: To access the "Optional features" option, navigate to the "Apps & features" section, which can be found in the Settings menu.
Step 3: To uninstall RSAT tools, select any tool from the list, click on the "Uninstall" button, and follow the on-screen instructions.
How to Enable/Disable RSAT?
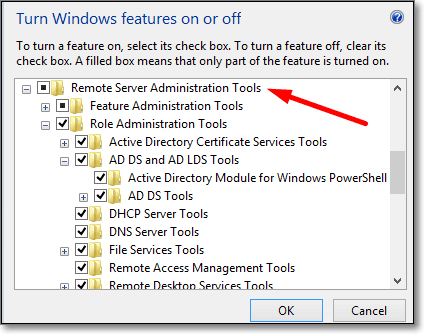
To enable or disable RSAT on Windows, go to Control Panel, click on "Programs and Features" (or "Programs" in Windows 10), click on "Turn Windows features on or off", scroll down and select "Remote Server Administration Tools" to enable or unselect it to disable, then click "OK" to apply the changes. Alternatively, you can also use PowerShell by running the command "Add-WindowsFeature RSAT" to enable and "Remove-WindowsFeature RSAT" to disable. Ensure you have administrative privileges to perform these actions.
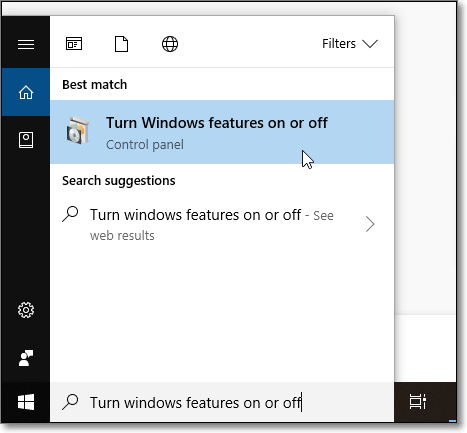
Step 1: To open the Search bar across your Windows computer, use the shortcut keys "Windows + S". Type "Turn Windows Features on or off" and search for the respective option.
Step 2: To enable Remote Server Administration Tools on Windows, search for "Remote Server Administration Tools" in the list of features, check mark all the tools as needed, and restart the computer for the changes to take effect.
Step 3: To enable Remote Server Administration Tools (RSAT) in Windows 10, checkmark all the features under the umbrella of RSAT, which will enable them. Then, click "OK" to save the changes. If you want to disable RSAT, follow the same steps in reverse.
Conclusion
This marks the end of the discussion for the RSAT tools in Windows, where an in-depth overview, installation, and uninstallation demonstration, and enabling and disabling features have been provided, making it easy to use RSAT Windows 10 features.
Related Articles
- What Is a Snapshot and How Is It Different from a Backup
- Laptop vs. Desktop: Which Is Better for You? [Comparative Analysis]
- What Is 8K Resolution? [All You Should Know 2022]
- Solved: How to Activate Protection System in Windows? - Qiling
- Full Backup Advantages and Disadvantages [2023 Review]
If you want to know about full backup advantages and disadvantages, you're in the right place. This post will show you the newest review of the advantages and disadvantages of the full backup. After reading this post, you will have a better understanding of this type of backup. - Great Discover Virus | Here Is Everything You Should Know
Have you heard of the Great Discover Virus? Do you know what Great Discover Virus is? Do not worry if you do not. This article will tell you everything about Great Discover Virus. After reading, you can have an overall understanding of this virus.