Complete Introduction to Searchindexer.exe
The searchindexer exe Windows service running in the background is responsible for quickly returning specific search results by performing tasks such as property caching, content indexing, and providing search results for email, files, and other contents.
The Windows Search service is a powerful technology that underlies the functionality of the Start Menu, File Explorer, and Cortana Box in Windows 7, 8, 10, and 11. This service is responsible for providing search results and indexing files on the system, and its impact on system performance can be significant. However, users may want to disable it when needed, and this article will provide information on why the service is running, its effects on system performance, and how to disable it.
What Is SearchIndexer.exe, And Why Is It Running?
The Microsoft Windows Search Indexer, also known as the searchindexer.exe, is a pre-installed executable file designed by Microsoft. It is a built-in service that is executable by the Microsoft Software Installer (MSI).
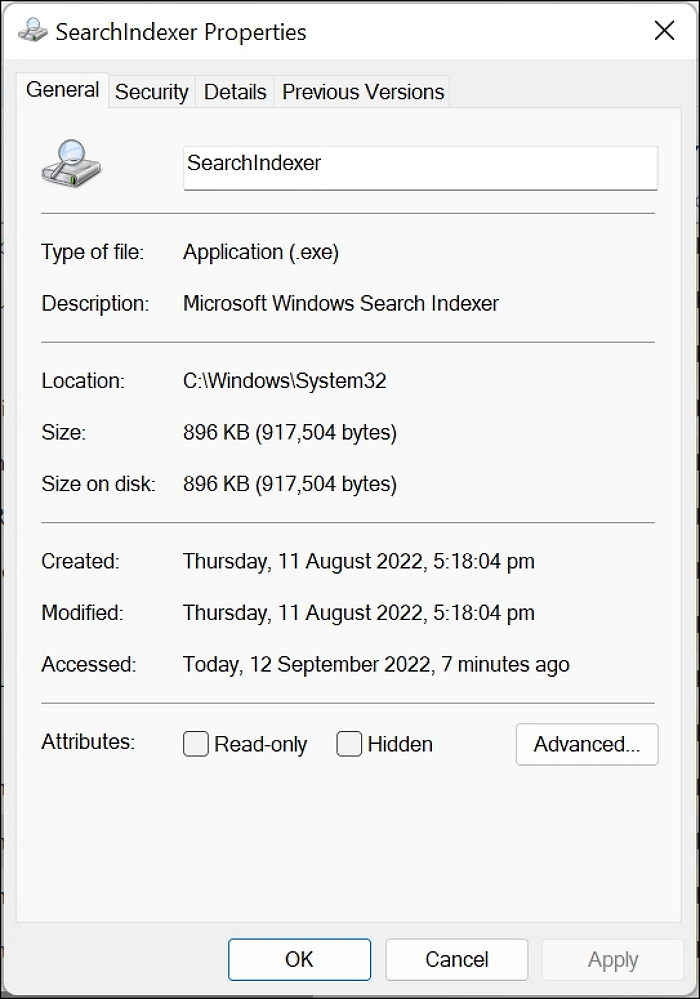
Step 1. The searchindexer exe file is located in the C:\Windows\System32 directory

SearchIndexer.exe, previously known as Windows Desktop Search (WDS), is a Windows service that prepares folders and files for search based on characters or phrases typed in the search bar.
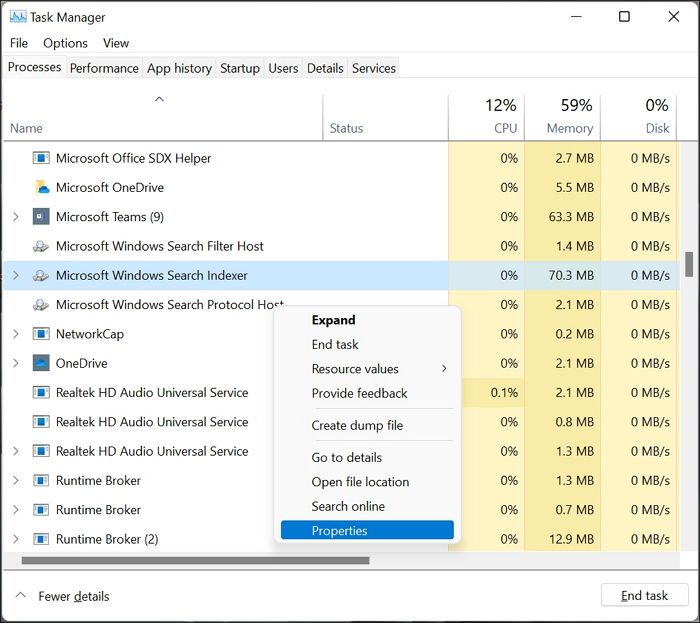
Step 2. You can view the searchindexer.exe process in the Task Manager and right-click on it to access its Properties.
Step 3. After clicking Properties, click the Details tab
Step 4. Then the Original filename SearchIndexer.exe is displayed
SearchIndexer, a Microsoft Windows Service, indexes user files for searches made in the Start Menu, File Explorer, and safe Libraries, as well as data in media files, contact lists, and email clients, and monitors changes made to these items on your computer.
How Does it Affect Your System's Performance?
The performance impact of SearchIndexer varies depending on the version of Windows being run. Starting with Windows XP, it placed a significant load on the system, negatively affecting its performance.
Microsoft improved the indexing service by reducing the load it places on the system, making it run smoothly in the background on Windows 7, 8, 10, and 11, even when the system is idle.
How Can I Make SearchIndexer Use Less RAM or CPU?
To reduce the RAM or CPU consumption of the SearchIndexer, you can limit the local content it indexes by following these steps. This will help prevent it from consuming too much RAM or CPU speed.
Step 1. To access the indexing options, go to your search bar, type "Indexing Options" and click on the best match result, which will display a screen similar to the one shown below.
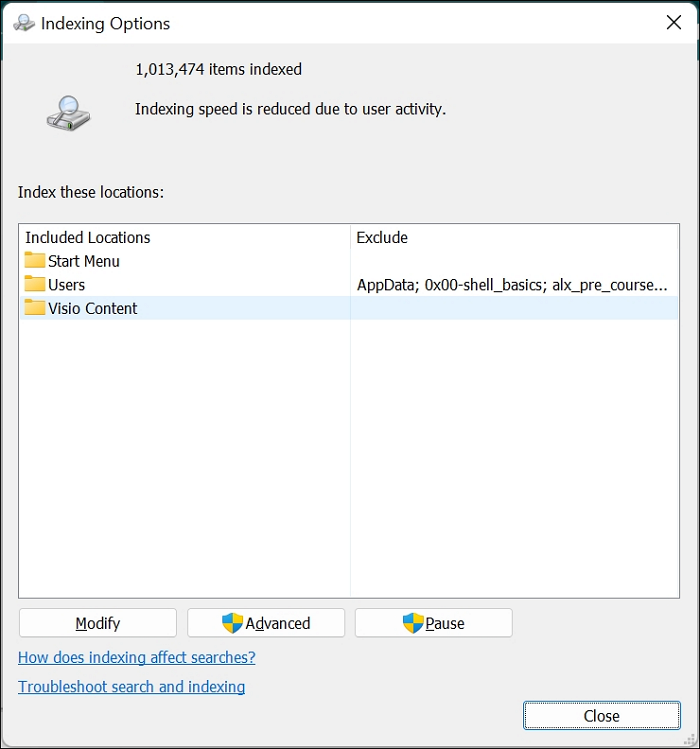
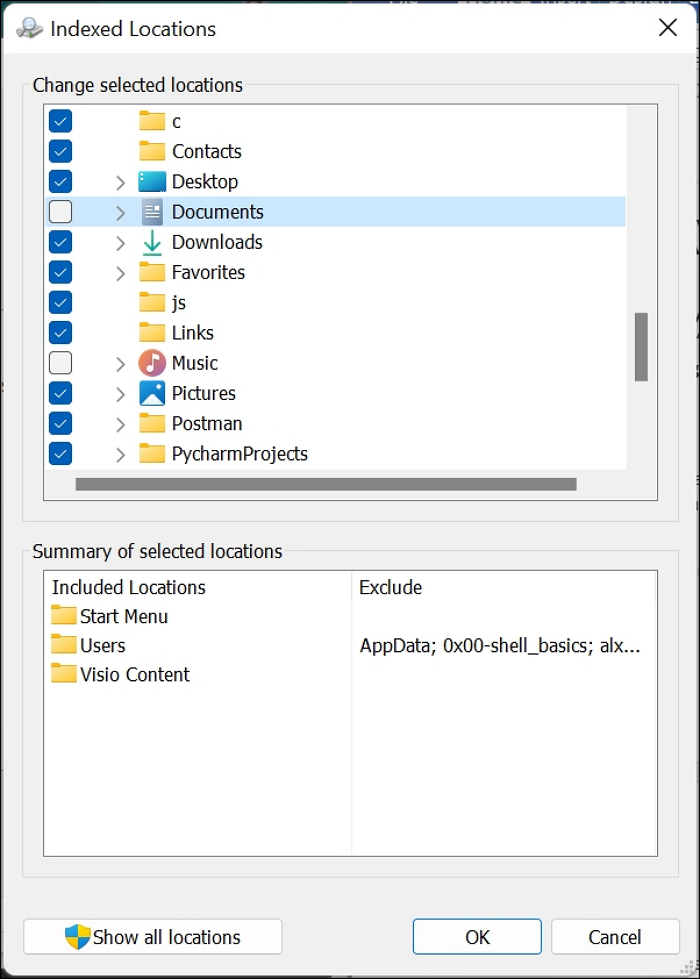
Step 2. To leave specific locations indexed, click on the "Modify" option and select the places you want to keep indexed. Once you've chosen them, click "OK" to apply the changes.
To limit the indexing to filenames only, you can use the `--index-filenames` option when running the command. This will prevent the indexing of file contents and only index the filenames.
Step 1. After selecting the Indexing Options from the Search bar, click on Advanced.
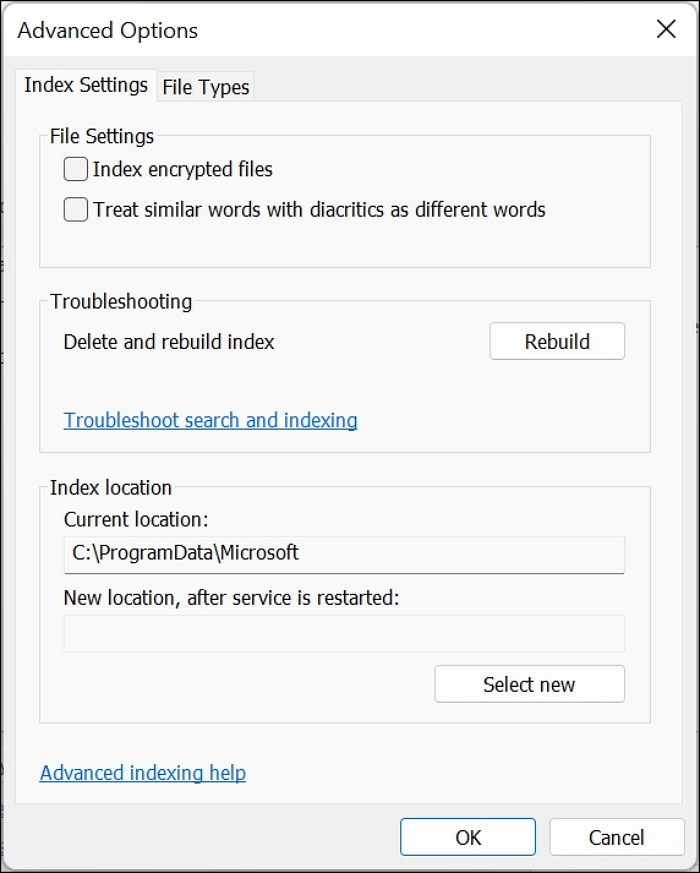
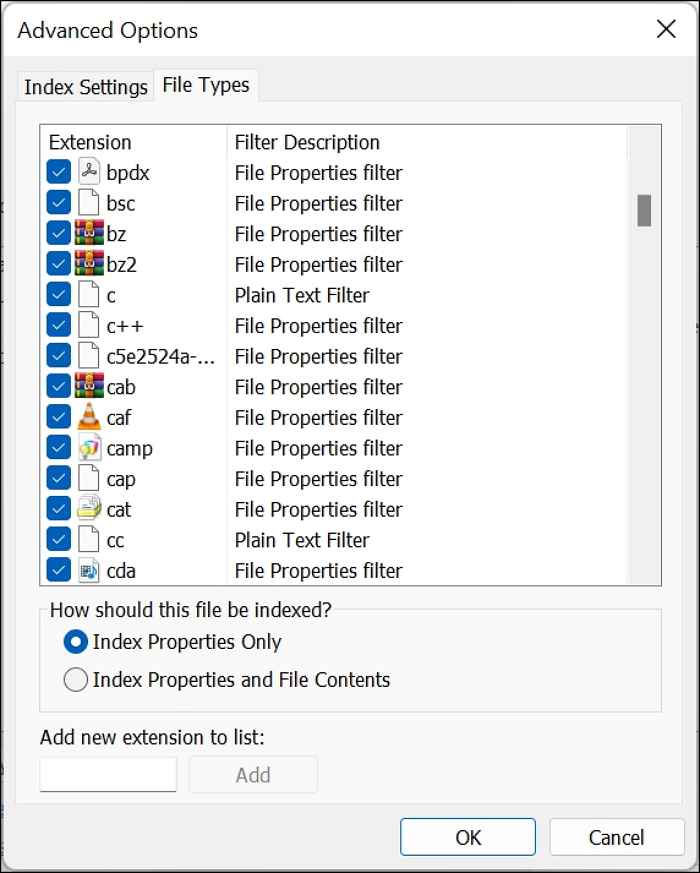
Step 2. Click on the File Types tab
Step 3. The configuration of common file types such as doc, docx, and others can be viewed by scrolling down, displaying either Index Properties and File Contents or Index Properties Only.
Step 4. Change the configuration settings of standard files to Index Properties Only if all you care about is the file name, then click OK to effect the changes.
How to Disable or Uninstall This Service?
As an in-built service, Microsoft Windows SearchIndexer is safe for your system. There is no need to disable or uninstall it. However, in the case of a system hog, you may need to disable it. The steps highlighted below will guide you into that.
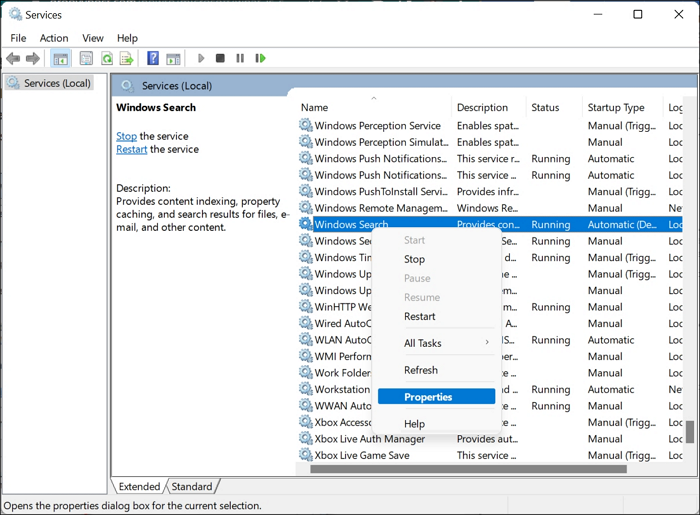
Step 1. To open the Services console, type "services.msc" in your Search bar and press Enter to open the best match. This will display a list of all the services running on your computer, including their status and any error messages.

Step 2. To quickly access the W-series list in Windows Search, right-click on it and select Properties. Press the "W" key to instantly navigate to the W-series list. This will allow you to access the list without having to manually scroll through the search results.
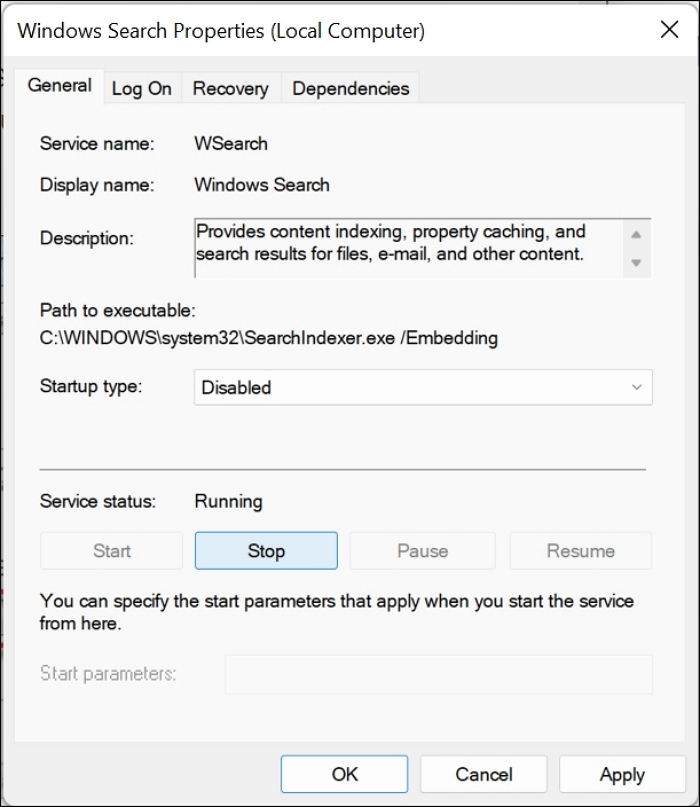
Step 3. The steps to disable the Windows Search service are as follows: A new screen appears, and the Startup type is set to Disabled under the General tab.
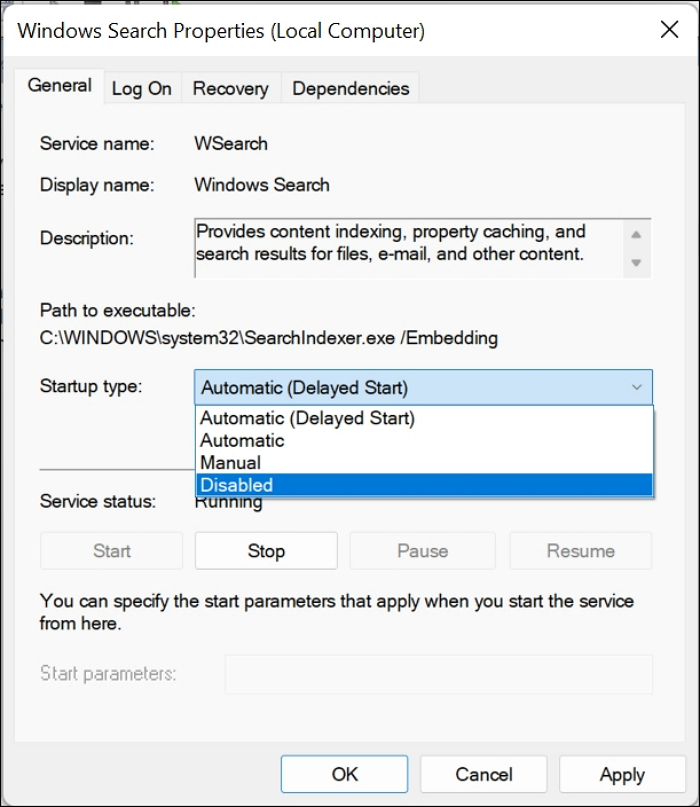
Step 4. To disable the service, click Stop, and then confirm the changes by clicking "OK".
To restart the service, navigate to the previous screen and set the Startup type to Automatic (Delayed Start).
Final Words
You don't have a reason to remove the searchindexer exe on your computer, but if you must, this post provides information on why it's running and how to trim it down if it's consuming too much RAM or CPU.
Related Articles
- What Is SACD? Super Audio Compact Disc Explained
- What Is CD-RW? Compact Disc Re-Writable Explained
- [Beginner Guide] What Is PCIe? What Is It Used for?
- What Is the Mac Terminal? Introduction to the Command Line Interface on macOS
- What Is Hard Reset & How to Hard Reset PC/iPhone/Android
A hard reset reinitializes a device's core hardware, forcing a complete system restart from firmware. Learn how to hard reset Windows PC, Mac, Chromebook, iPhone, and Android with step-by-step instructions, and understand the key differences between hard reset, soft reset, and factory reset. - What Is HFS+ | HFS+ vs. APFS, HFS+ vs. exFAT
HFS+ is a file system developed by Apple in 1998, also known as Mac OS Extended. It is natively supported on all Mac computers since macOS 8.1, but is not readable or writable on Windows, and only readable on Linux.