What Is VMM? Virtual Machine Manager Explained (All You Need to Know)
Virtual Machine Manager (VMM) is a hypervisor that enables running multiple operating systems on a single host computer, allowing for the creation of a virtual environment through a centralized interface where multiple virtual machines (VMs) can be installed and configured.
Microsoft's Virtual Machine Manager (VMM) provides a virtual operating platform and manages the execution of different operating systems primarily on server hardware, also supporting ESXi and vCenter.
What Is VMM?
Microsoft's Virtual Machine Manager (VMM) is a part of the System Center suite, used to deploy and manage traditional data centers. It provides a unified management and monitoring system, improving performance across service providers and the Azure cloud, making it easier to manage infrastructure and data centers.
How Does VMM Work?
A virtual machine manager (VMM) provides a centralized console to manage all virtual machines in a network, allowing for changes to the underlying network and storage and the execution of various commands.
These commands enable you to create new VMs, move them between servers, modify the network infrastructure, and scale up resources, all while ensuring the VMs operate smoothly and error-free.
What Is VMM Used for?
VMM can be used for the following:
1. Datacenter: In a virtualized data center managed by VMM, control, manage and configure all components as a single fabric. This includes virtualization servers, networking, and storage arrays, allowing for the creation and deployment of virtual machines to local cloud networks.
2. Virtualization hosts: A VMM can also help you create and manage VMware and Hyper-V virtualization hosts and machines, and provides a platform for virtualization, which allows multiple virtual machines to run on a single physical host, improving resource utilization and flexibility.
3. Networking: VMM helps create network virtualization, supporting network gateways to connect virtual networks to physical ones. It allows adding resources like IP subnets, virtual LANs, and static IP addresses.
4. Storage: A Virtual Machine Manager (VMM) can help assign, classify, and allocate remote and local storage servers, including block storage such as SAS and SANs.
5. Library resources: The VMM fabric has a library of file-based and non-file-based resources that are used to deploy and manage virtual machines (VMs) on virtualization host devices.
How to Install and Uninstall VMM on Windows?
To install VMM on Windows, download the latest version from the official website, then run the installer and follow the prompts. If you need to uninstall it, go to the Control Panel, click on Programs and Features, select Microsoft Visual Studio, and then click on the "Uninstall" button. You can also use the "Programs and Features" option in the Start menu. If you're having trouble, make sure you have the correct permissions and that the installation or uninstallation process is not interrupted.
Make sure you meet the system requirements and have local admin permissions on the computer, and also ensure the service account is an administrator on the VMM server before starting the installation process.
1. How to Install VMM?
Here's how you can install VMM on your Windows PC:
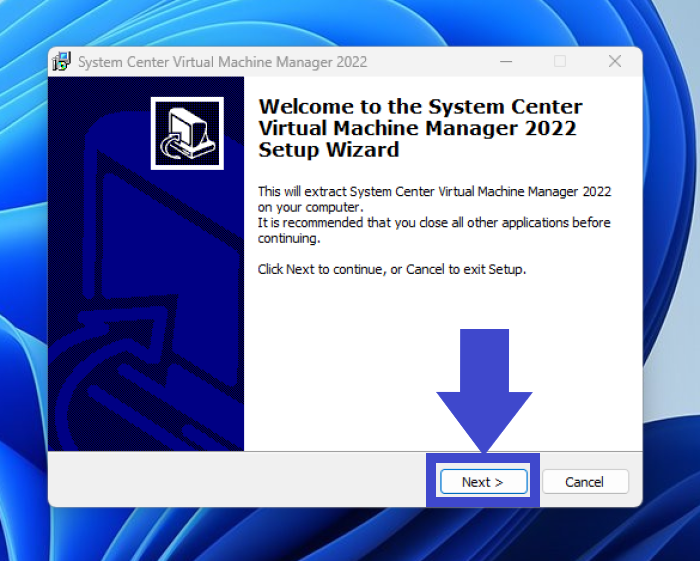
Step 1: Ensure your computer is free from unnecessary tasks running in the background and that it's updated with the latest software patches. This involves closing any open applications, stopping any background processes, and checking for available updates to ensure your system is running smoothly and securely.
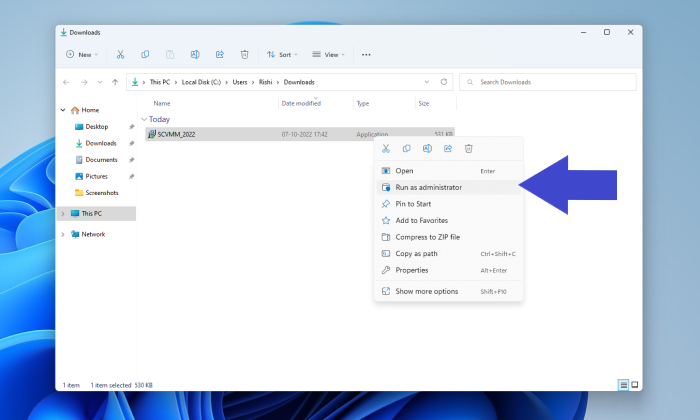
Step 2: Right-click the setup.exe file, then click "Run as administrator" to initiate the Virtual Machine Manager installation process.
Step 3: Select the VMM management server check box and click "Next" after clicking the "Install" button.
Step 4: The VMM console should be installed.
Note: If you're installing the Virtual Machine Manager (VMM) on a cluster node, you'll be given the option to make the management server highly available, allowing it to be installed on multiple nodes in the cluster. This can provide increased reliability and redundancy, as the management server can fail over to another node in the event of a failure.
Step 5: To register your product, go to the product registration website and fill out the required information, such as your name, email address, product details, and any other requested fields. This will help the manufacturer keep track of the product and provide any necessary updates or support.
Note: VMM will expire in 180 days if you don't enter a product key, making it unusable after that time period.
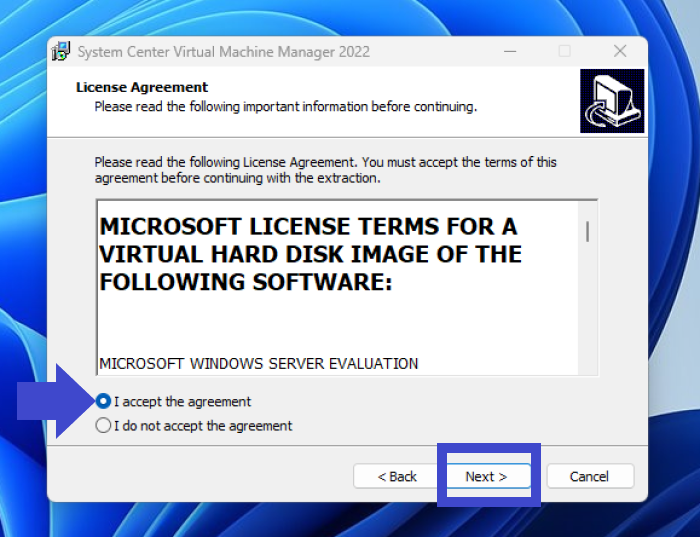
Step 6: Review the license agreement and select the checkboxes to agree, also review Microsoft's data collection policy.
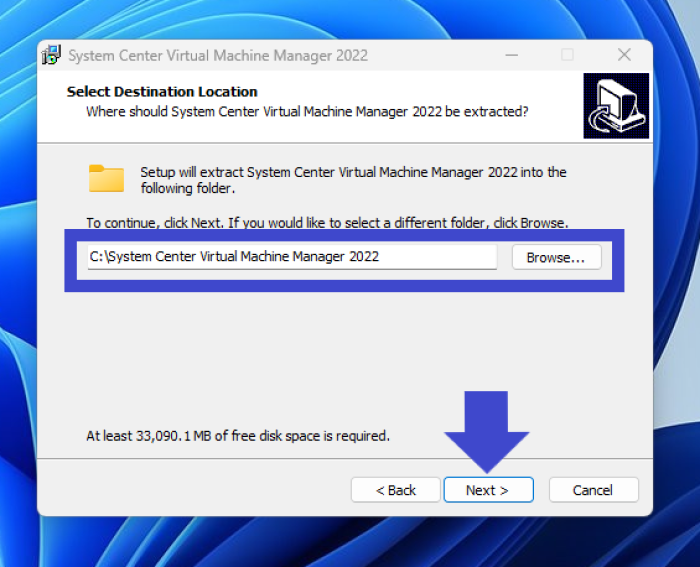
Step 7: Use the default path for the Virtual Machine Manager (VMM) program files, then click on the Next button.
Note: If your computer doesn't meet the installation requirements, a window with the necessary system specifications will appear.
Step 8: If you're installing the VMM server on a computer with a SQL Server, enter the name of the computer or localhost. For a clustered SQL Server, enter the cluster name.
Note: You don't need to specify a "Port value" if you don't have a SQL Server running on your PC.
Step 9: The account the Virtual Machine Manager (VMM) will use can be specified during installation, and it cannot be changed after the installation is complete.
Step 10: You have the option to store encryption keys in Active Directory, which can provide an additional layer of security and management for your encryption keys. However, this also means that the encryption keys will be stored in a centralized location, which could potentially be a single point of failure.
Step 11: The Port and Library configuration has been completed using the default values.
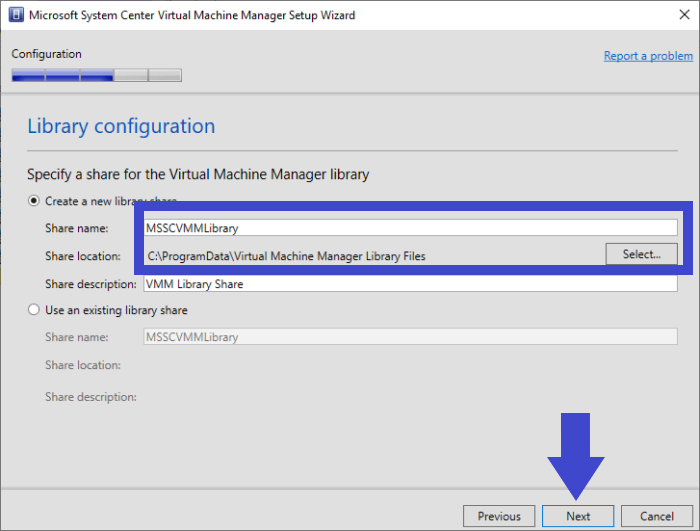
Note: After the installation is complete, you can add library shares and servers using the console or command shell.
Step 12: To install the software, select it from the list, then click Install and let the setup complete. After that, click Close to finish the installation.

2. How to Uninstall VMM?
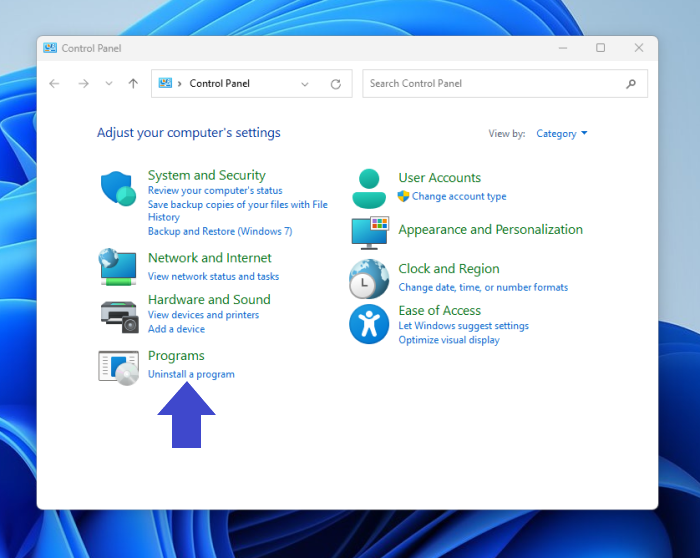
To uninstall Virtual Machine Manager (VMM) from your PC, you can follow these steps: go to the Control Panel, click on "Programs and Features" (or "Add/Remove Programs" in older Windows versions), scroll down and find Microsoft Virtual Machine Manager in the list, click on it and then click the "Uninstall" button. Alternatively, you can also use the Windows Search bar to search for "VMM" and select the uninstall option from the results.
Step 1: Close the VMM console and command shell.
Step 2: To uninstall a program, go to the Control Panel and select the "Uninstall a program" button.
Step 3: Double-click on the "Microsoft System Center Virtual Machine Manager" tab and click on "Remove Features" to proceed with the removal process.
Step 4: Select the "VMM management server and console" checkbox, and click Next.
Step 5: Now, remove the VMM database and the credentials for the database and click Uninstall.
Step 6: Finally, the VMM is uninstalled.
Note: The following will still remain after you uninstall VMM:
- File Server Remote Management
- Windows Standards-Based Storage Management firewall rules
Related Articles
- What Is Core Sync Mac? How To Use It? [Lately Explained in 2022]
- Ways to Delete Windows 7 Backup [Updated 2022]
- CMR vs. SMR Hard Drive: Which One is Better to be Choosen?
- What Is NVMe: One of the Fastest SSD Data Storage [2022 All You Need to Know]
- What Are the Benefits of Dynamic Disk [Detailed Elaboration]
The benefits of dynamic disks are numerous, but should you convert your basic disk to dynamic? In today's blog post, we'll explore the advantages of dynamic disks and provide a step-by-step guide on how to convert a basic disk to a dynamic one, as well as discuss the pros and cons of making the switch. - Guide on Best Allocation Unit Size for Gaming [2024 New]
The best allocation unit size for gaming is a matter of debate, with some arguing for 4K and others for 64K. However, most experts agree that a 64K allocation unit size is the best for gaming, as it provides a good balance between performance and storage space. A free online tool can be used to set the allocation unit size for gaming, and this article provides a step-by-step guide on how to do it.