Ways to Delete Windows 7 Backup [Updated 2023]
Backing up computer data regularly can prevent accidental data loss, but it can also lead to a slower computer over time. This is due to the accumulation of backup files, which can consume valuable space and resources, hindering your computer's performance. To maintain optimal speed and efficiency, it's essential to regularly delete unnecessary Windows 7 Registry backups, ensuring there's always enough space for your computer to operate smoothly.
To delete Windows 7 backups on your computer, go to the "Control Panel", select "System and Security", then "Backup and Restore". Click on "Manage backups" and select the backup you want to delete. Click on "Delete" and confirm the deletion.
Why Delete Windows 7 Backup
Deleting Windows 7 backups is necessary to free up space on your computer, as backup files and folders can take up too much storage space, causing your computer to run slower. By deleting these backups, you can avoid data loss and maintain your computer's performance. Additionally, you can set scheduled backup deletions to automatically remove old backups and keep your computer's storage space organized.
You may be interested in Solutions: Windows 7 Backup on Windows 10 Not Working
Delete Windows 7 Backup Manually
If you need to delete Windows 7 backup, there are two manual ways to help you do so. You can check whether you need to delete Windows 7 backup or not, and then proceed with the deletion process.
Method 1. Delete Windows 7 Backup with Control Panel
You can delete Windows 7 backup on your computer by using the control panel. To do this, follow these steps:
Step 1. To access the Control Panel, click on the "Start" button and type "Control Panel" in the search box that appears. Once you've done this, click on the "Control Panel" result that appears in the search results to open it.
Step 2. Go to "System and Security." Choose "Backup and restore."
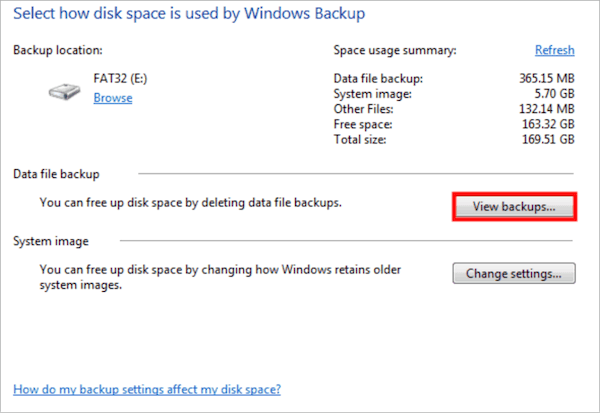
Step 3. To view backups, click "Manage Space" and then select "View backups." This will display the backup file on your computer in a window.
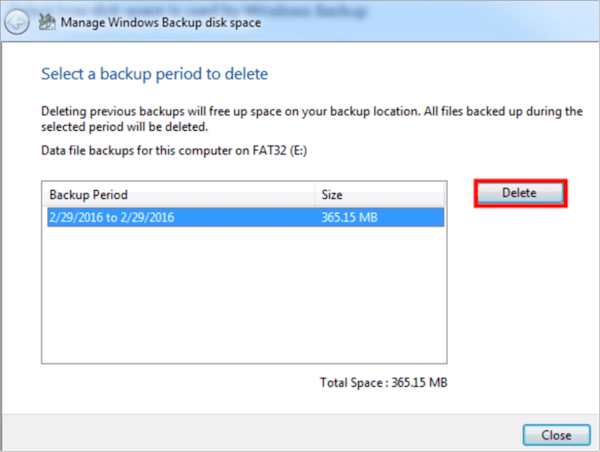
Step 4. To delete a Windows 7 backup file, select the specific backup file you want to delete and then click the "Delete" option. This will successfully remove the file from your system.
To delete Windows 7 backup automatically, you can change the backup settings instead of manually deleting the backup files. Simply follow the steps to adjust the backup settings, and the backup process will be stopped, effectively deleting the backup.
Step 1. To access the Control Panel, click on the "Start" button and type "Control Panel" in the search box, then open the Control Panel from the search results.
Step 2. Go to "System and Security." Choose "Backup and restore."
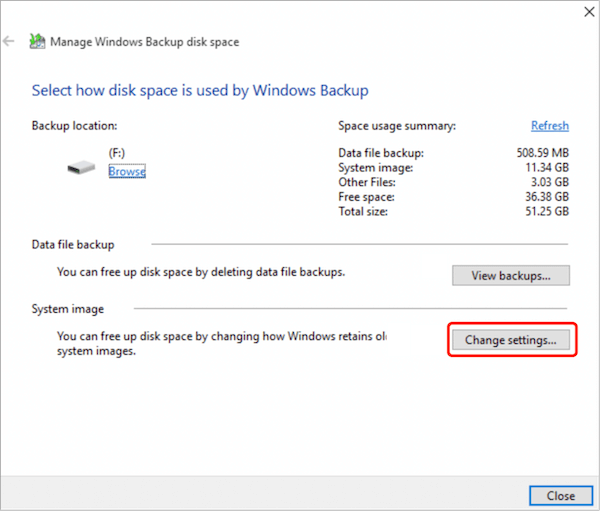
Step 3. Click "Change Settings" under "System image."
Step 4. Choose "Keep only the latest system image and minimize space used by backup."
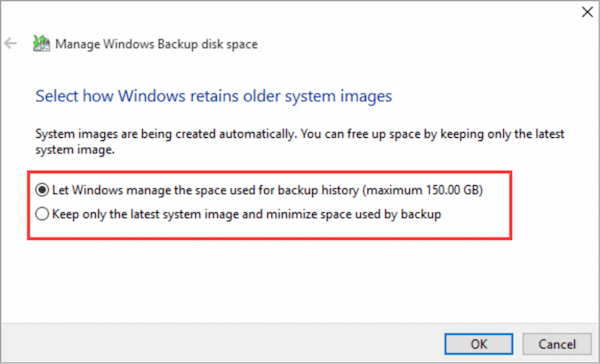
Step 5. Choose "OK." You have managed to change the system image settings.
Method 2. Delete Windows 7 Backup with File History
To delete Windows 7 backups manually using File History, follow these steps: go to Control Panel, then select System and Security, next click on File History, and finally click on Manage Space. From there, you can delete the backup files. Alternatively, you can go to the File History location, usually C:\ProgramData\Microsoft\Windows\FileHistory, and manually delete the backup files.
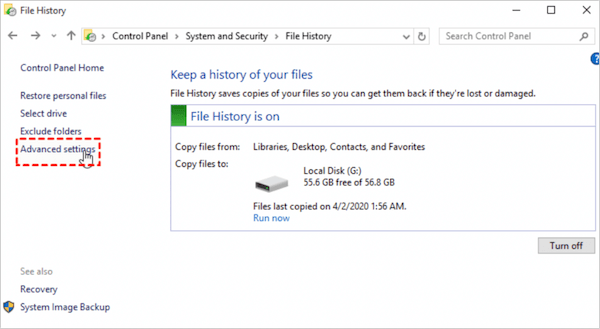
Step 1. To access File History, click "Start" and type "File History" in the search box, then open the "File History" window.
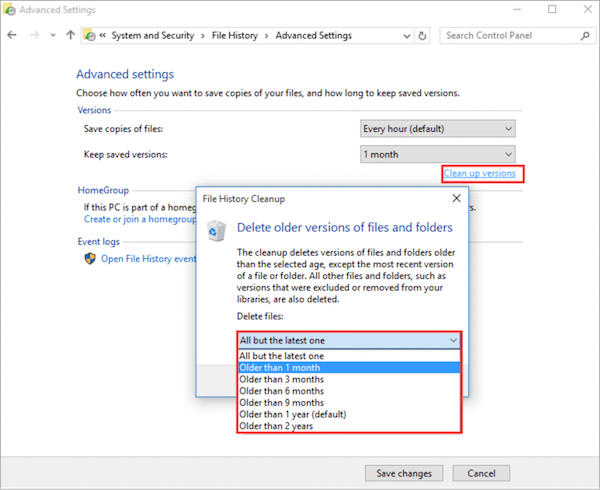
Step 2. Choose "Advanced settings" from the left bar.
Step 3. You deleted the Windows 7 backup files and folders on your computer.
FAQs about Delete Windows 7 Backup
Here we have collected several hot topics about deleting Windows 7 backup on the Internet. You can check the questions below and find the answers yourself.
1. Where are Windows 7 backups stored?
Windows 7 backup files and folders are stored in a locked folder called "System Volume Information" that requires administrator permission to access.
2. How do I erase all files on Windows 7?
- Step 1. To boot into WinPE, press the "Shift" button when powering on your computer. This will allow you to access the Windows Preinstallation Environment, which can be used for various tasks such as system recovery, disk cleanup, and more.
- Step 2. Select "Troubleshooting" and click on "Reset this PC."
- Step 3. You'll be prompted to choose what to do with your files, either keeping them or removing them, once the process is complete.
- Step 4. Click "Remove everything," and the computer will erase your files on Windows 7.
3. Should I delete Windows backup files?
Windows backup deletion is a necessary process to free up computer space by removing unnecessary backups, thus maintaining a clutter-free system.
Wrap Up
We discussed why deleting Windows 7 backups is necessary and provided a guide to help you manually and automatically delete them. This article aimed to assist you in the process. Thank you for reading!
Related Articles
- What Is Winver and How to Run Winver to Check Your Windows Version?
- What Is Malware & Tips to Avoid Malware on Your Computer
- What Is Verbose Mode Mac and How to Boot into It? [2023 Guide]
- What Is DRAM Memory? Dynamic Random-Access Memory Explained
- 2022 Quick Format Recovery: Recover Data/Files from Hard Drive after Quick Format
To recover files after a quick format, stop using the disk immediately and use a recovery tool like Qiling Data Recovery Wizard, which can recover data from quickly formatted disks, USB drives, SD cards, and memory cards in just 3 steps. - R-Studio Review (A Comprehensive Data Recovery Solution)
R-Studio is is a family of powerful, cost-effective disk recovery software, which delivers professional solutions for recovering deleted files. In order to help you solve data loss problems using R-Studio, this post will give an in-depth R-Studio review.