Solutions: Windows 7 Backup on Windows 10 Not Working
Many Windows 10 users are experiencing difficulties restoring Windows 7 backups using the Backup and Restore (Windows 7) feature, while others are encountering errors with the File History function. However, these issues can be resolved with some workarounds. This article provides tried and tested solutions to address the Windows 7 backup on Windows 10 not working issue, allowing users to successfully restore their previous backups and use the File History feature to save system files.
Why My Windows 7 Backup Can't Work on Windows 10
The Backup & Restore feature in Windows 7 may not work properly on Windows 11 due to various reasons such as incompatible system files, corrupted system registry, or outdated backup software. This can cause issues with the Windows 7 backup on Windows 11 not working.
- File History Service Not Working
- Issues With the Hard Drive
- Corrupted System Files
- Disk Errors
- Potential Virus or Malware Attack
- Issues With Old Backups
- Improper Functioning Of Volume Shadow Copy
How to Fix Windows 7 Backup on Windows 10 Not Working (14 Fixes)
Here in this section, we have mentioned over twelve workarounds to resolve the Windows 7 backup on Windows 10 not working issue.
- 1. Enable File History Service and Windows Search
- 2. Disable and Enable System Protection
- 3. Enable Volume Shadow Copy
- 4. Manually Remove Old Backups
- 5. Use Chkdsk Command
- 6. Enable Windows Backup Service
- 7. Make Sure 'Automatically back up my files' is Turned On
- 8. Run Virus Scan1
- 9. Keep Saved Versions to Forever
- 10. Adjust the Disk Space Usage
- 11. Turn Off & Reset File History
- 12. Format the Drive
- 13. Change the Drive
- 14. Use Third-Party Backup Software
1. Enable File History Service and Windows Search
The File History Service and Windows Search service are key components in the Backup and Restore feature, and their improper functioning can cause issues. If these services are not working correctly, it may lead to errors. To resolve this, you can enable the File History Service and Windows Search from the Service Manager by following the necessary steps.
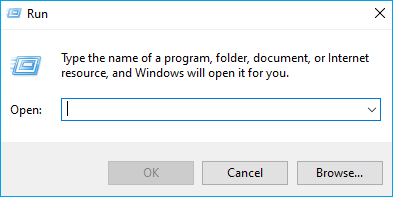
Step 1. Press Windows + R on your keyboard to open the Run program.
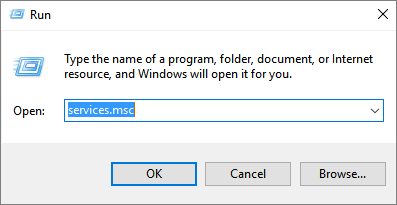
Step 2. Type Services.msc in the Search Bar.
Step 3. Search for File History Service and Windows Search in the Service section.

Step 4. Right-click on the File History Service and select Properties.
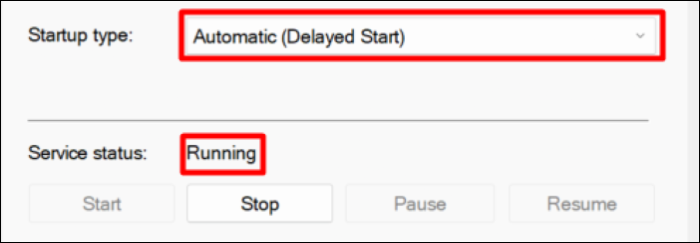
Step 5. Ensure the Service status is set to Running and Startup type is set to Automatic (Delayed Start).
Step 6. To do this, you need to follow the same process with Windows Search. This involves going to the Start menu, searching for Windows Search, right-clicking on it, and selecting "Open File Location." From there, you can delete the Windows Search cache.
Step 7. Reboot your Windows 10 PC The Restore & Backup feature is used to save and restore the current state of the system. This feature is useful for testing and debugging purposes, allowing developers to test code changes and restore the system to its previous state if needed.
2. Disable and Enable System Protection
To resolve the issue with System Protection, disable it temporarily, then re-enable it to ensure it's working correctly. This can be done by going to System Properties, selecting the System Protection tab, clicking on Configure, and unchecking the box next to "Protect my computer and update protection settings." Once done, re-enable System Protection by following the same steps and checking the box again. This should resolve any issues with the feature.
Step 1. Launch the Control Panel.
Step 2. To access the Control Panel, click on the Start menu and select "Control Panel". Once the Control Panel is open, click on the "System and Security" tab on the left-hand side of the window.

Step 3. Move to the System tab, then the System Protection section.

Step 4. Click on Configure button to change the settings.
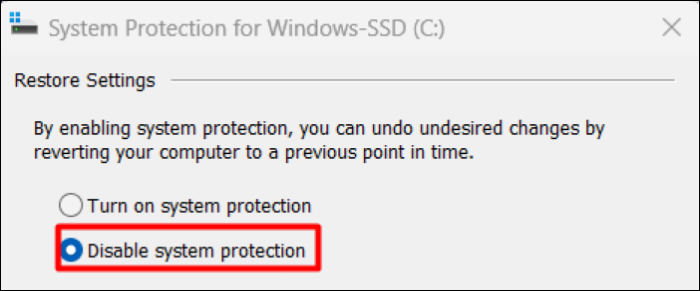
Step 5. Set Restore Settings to Disable system protection.
Step 6. Click on Apply.
Step 7. To enable System Protection, open the System Protection settings, then click on "Turn on system protection" in the "Restore settings" section.
Step 8. In the end, click on Apply and close the window.
Step 9. Restart the PC.
3. Enable Volume Shadow Copy
Volume Shadow Copy is an essential Windows service that helps the Backup and Restore feature work properly. It is found that sometimes this service stops working due to some reason. Hence, you must follow the steps mentioned to enable the Volume Shadow Copy service.
Step 1. Open the Services app.
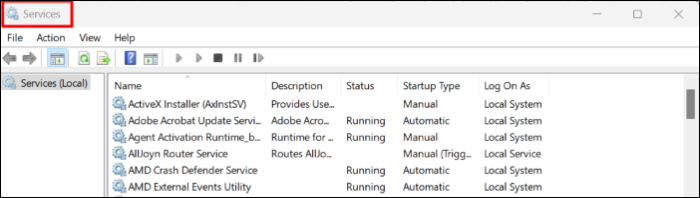
Step 2. In the Services tab, search for the Volume Shadow Copy service and select it from the list of services.

Step 3. Right-click on the Volume Shadow Copy service and click on Properties.
Step 4. Head to the Dependencies tab in the Properties section.
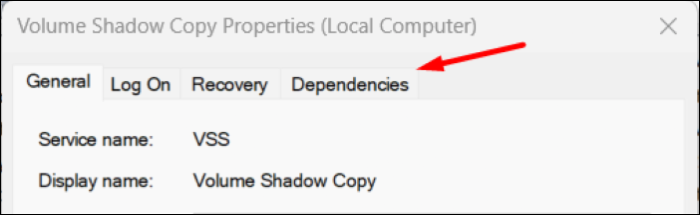
Step 5. Once landed in the Dependencies section, ensure that this service is running.
4. Manually Remove Old Backups
Your old backups and restore points may be preventing you from importing the Windows 7 data backup. In that case, we suggest removing all the old backups to ensure this will not cause any error. You can manually remove all the old backups from the System Protection settings. Follow the below-mentioned steps to remove the old backups.
Step 1. Open the Control Panel app from the Windows Search Bar.
Step 2. Move to the System and Security in the Control Panel.
Step 3. Open the System settings and then the System Protection tab.
Step 4. Click on "Configure" to delete the old backups and restore points.
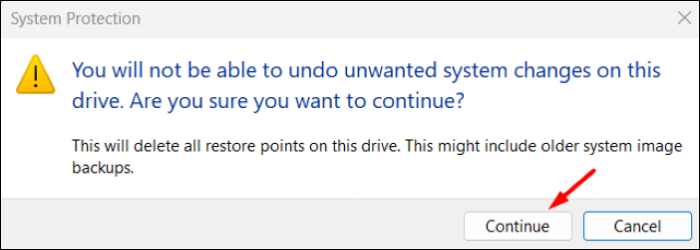
Step 5. Click on Delete to remove all the stored backups.

Step 6. On the next window, click on Continue to completely delete all the backups.
Step 7. Click on Apply and then OK to close the window.
5. Use Chkdsk Command
If the Backup and Restore function is not working due to disk errors, you can try running the Chkdsk command in Command Prompt to scan and repair disk errors. To do this, follow these steps: follow the steps below.
Step 1. Open Command Prompt as Administrator.
Step 2. To run the Chkdsk utility with the /r option on the X: drive, open the Command Prompt, type `chkdsk /r X:`, and press the Enter key. This will schedule the Chkdsk utility to run the next time the system boots up, and it will attempt to repair any issues it finds on the X: drive.
Note: To scan a hard disk for errors, open a Command Prompt window and type the following command: `chkdsk X:`, replacing `X` with the actual letter of the hard disk you want to scan. Press Enter to execute the command. The `chkdsk` command will scan the hard disk for errors and display the results.
Step 3. Once done, enter the Y in the Command Prompt to schedule the scan for the next time you start the PC.
Step 4. Reboot the PC, To put your system in scanning mode, press the Windows key + X and select Command Prompt (Admin). Then, type the command "chkdsk /f" and press Enter. This will automatically scan and fix disk errors.
Step 5. To restore a Windows 7 backup on a Windows 10 PC, you can use the built-in Backup and Restore feature. This feature allows you to restore system files, user profiles, and other data from a previous backup. To do this, go to the Control Panel, click on System and Security, and then click on Backup and Restore.
6. Enable Windows Backup Service
To enable the Windows Backup service, open the Services app, scroll down to Windows Backup, right-click on it, and select Properties. In the Properties window, click on the Start type dropdown menu and select Automatic, then click on the Start button to start the service. This will enable the Windows Backup service to generate and import Windows 7 and Windows Vista backups.
Step 1. Open the Services app.
Step 2. Look for the Windows Backup service in the Services tab.

Step 3. Right-click on the Windows Backup service and choose Properties.
Step 4. Set Service status to Start, and ensure Startup type is selected to Manual.
Step 5. Click on Apply and then OK.
Step 6. Once done, restart the PC and try generating a backup again.
7. Make Sure 'Automatically back up my files' is Turned On
If your Windows 10 system isn't generating backup automatically, it's possible you haven't enabled the automatic backup feature. To fix this, you can enable the Automatically back up my files option by following a few simple steps.
Step 1. Open the Settings app.
Step 2. To update and secure your device, go to the Update and security settings from the left-navigation menu.
Step 3. To enable automatic backups of your files, select the "Backup" option and toggle the switch next to "Automatically back up my files" to the "On" position.
8. Run Virus Scan
The issue may be caused by infected files and viruses. To resolve this, run a quick virus scan using the Virus & threat protection tool. This can be done by following the steps to check for any potential threats.
Step 1. Open the Virus & threat protection through Windows Search Bar.
Step 2. Click on the Quick Scan button to initiate a scan for virus and malware threats.

Step 3. Wait for the results of the virus scan, and if any viruses are detected, remove or quarantine them. Then, retry the backup generation process.
A computer virus is a type of malware that replicates itself by attaching to other programs or files on a computer. It can cause harm to the system, steal sensitive information, or disrupt normal functioning.
If your Windows PC is acting strangely or slowing down, and you notice unfamiliar pop-ups or programs that you didn't install, follow this easy guide to protect your computer. A computer virus is a type of malware that can harm your device, and there are various types, including Trojans, spyware, and ransomware. These viruses can pose significant risks, such as stealing your personal data, deleting files, or even taking control of your computer. To keep your computer safe, take protective measures like installing reputable antivirus software, regularly updating your operating system and software, and being cautious when opening emails or downloading files from unknown sources.

9. Keep Saved Versions to Forever
To resolve the issue with Google Keep, try modifying the saved versions setting. To do this, open Google Keep, tap the three horizontal lines on the top left, select Settings, and then toggle the switch next to "Saved versions" to turn it off. If that doesn't work, toggle it back on and try again.
Step 1. Go to the Control panel, then click on System and Security, and finally click on File History.
Step 2. Click on Advanced settings.
Step 3. Set Keep saved versions option to Forever (Default).
10. Adjust the Disk Space Usage
It's possible that you've used up all your disk space for programs and apps, leaving no room for backups. This might be why Windows 7 backup on Windows 11 isn't working. You'll need to free up some space to store and import your backups and other important tasks. To do this, follow the steps to adjust your disk space usage in Windows 10.
Step 1. To access the System and Security settings, open the Control Panel and click on the System and Security option. This will allow you to view and manage various system settings, including security options, device management, and system maintenance.
Step 2. Click on System Protection in the System settings.
Step 3. Click on the Change settings button.
Step 4. Select Configure to modify the disk space usage.
Step 5. To adjust the maximum disk space usage, navigate to the "Disk Space Usage" section and use the slider to set the desired limit. This will ensure that the disk space usage does not exceed the specified amount.
Step 6. Set the Disk Space Usage to 15% to ensure the system has enough space to create and store backups.
Step 7. Click on the Apply button and close the window.
11. Turn Off & Reset File History
Disabling and re-enabling File History can also fix the issue, try following the steps to disable the File History option.
Step 1. Open the Control Panel and then open the System and Security settings.
Step 2. To disable File History, open File History and click on the "Turn off" option. This will stop the feature from saving copies of your files.
12. Format the Drive
If the Windows 7 backup issue persists on Windows 10, try running the Chkdsk command to repair disk errors. If this doesn't resolve the issue, consider formatting your hard disk to its original state. To format your hard disk on Windows 10, follow the steps: follow the steps below.
Step 1. To open the Run program, press the Windows key + R key combination.
Step 2. Type diskmgmt.msc in the Search Bar.
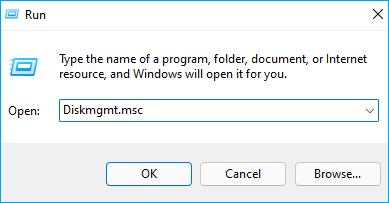
Step 3. You will now see all the drives connected to your PC.
Step 4. Right-click on aninternal and external hard drive you want to format.
Step 5. Select Format from the contextual menu.
Step 6. Enter the drive name in the Volume label text box.
Step 7. Select the preferred file type in the File system option.
Step 8. Lastly, click on the OK button.
13. Change the Drive
Despite trying various resolutions, the Windows 7 Backup on Windows 10 Not Working issue persists. To resolve this, consider saving the Windows 7 backup to another drive and then transferring it to your Windows 10 PC, which may resolve the problem.
14. Use Third-Party Backup Software
If you're unable to use Windows' built-in backup feature, you can consider using third-party backup software to take regular backups, which can be transferred with ease. This option is safer as you don't know when Windows' automated backups might stop working, but third-party tools can generate system backups without any issues. There are various third-party backup software available for Windows 10.
We recommend using Qiling Backup due to its exclusive features, such as 250GB of free cloud storage. This free tool allows you to easily perform all basic to advanced backup generation tasks, including taking unlimited backups and storing them in 250GB worth of free cloud storage. Additionally, Qiling Backup offers automatic backups, so you never need to worry about system backups.
Step 1. Launch Qiling Backup and choose "System Backup"on the home page.

Step 2. The system partition will be automatically selected, you only need to choose the installation location.

Step 3. You can save your backup file to a local drive, cloud storage, or network-attached storage (NAS) device, and even connect an external hard drive to store system backup files.

Step 4. You can customize the settings in "Options" at the bottom left, click "Proceed", and the process will start.
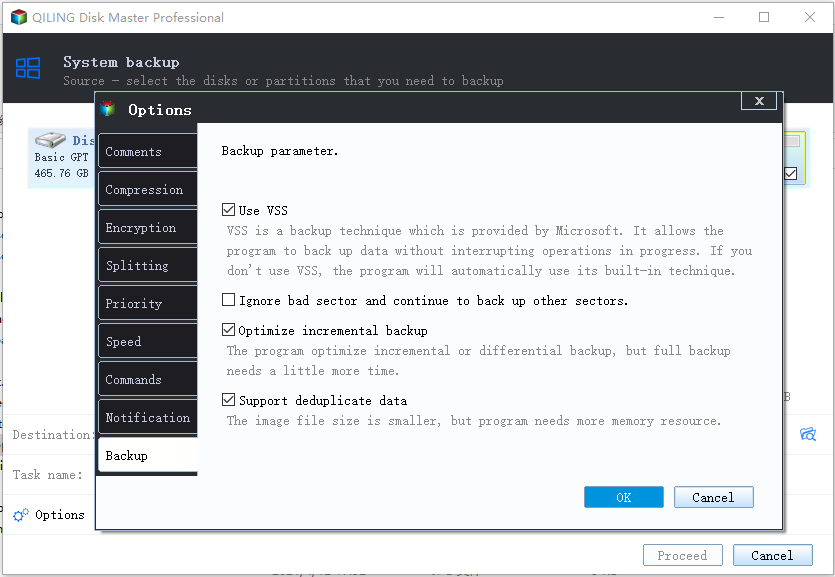
After the backup process is complete, you can check the backup status, recover, open, or delete the backup by clicking on the backup task on the left.*
Frequently Asked Questions
1. Does Windows 7 Backup Still Work With Windows 10?
You can still use your Windows 7 and Windows Vista backups on your Windows 10 system using the Windows 10 Backup & Restore feature.
2. Why Does My Windows 7 Backup Keep Failing?
It could be possible that there are some issues with your internal and external hard disk. You can try executing the disk error command. Another thing you can do is try formatting your internal and external hard disk.
Final Words
If you're experiencing frustrations while trying to restore your Windows 7 data on a Windows 10 system, don't worry - we've got you covered. There are several potential reasons behind this issue, but implementing the solutions we've shared can help you overcome the problem and successfully restore your Windows 7 data on your Windows 10 system.
Related Articles
- 9 Ways to Fix Google Drive Upload Stuck Problem
- Halo Inifinite Keeps Crashing on PC: Solved by Specialists' 10 Ideas
- How to Upgrade Windows 7 to Windows 11 with 2 Options
- Fix Windows Error Code 0x0 0x0 in Four Ways
- How to Set Up a Server to Server File Transfer Successfully
Copying files from one server to another is a fairly frequent task that system administrators face. Learn how to do it using Qiling Disk Master. - How to Set Up a Server to Server File Transfer Successfully
Copying files from one server to another is a fairly frequent task that system administrators face. Learn how to do it using Qiling Disk Master.