What Is Core Sync Mac? How To Use It? [Lately Explained in 2023]
Mac users enjoy exclusive advantages and advanced features, including high-end components and uniform designs that enhance the user experience. However, one of the core sync features that stands out as crucial is its integration with Adobe Creative Cloud, allowing for seamless Mac-to-Adobe synchronization.

This article covers the core sync feature on your Mac device. First, we'll define what core sync is, followed by a step-by-step guide on how to use it. We'll also address the common issue of core sync using high CPU and provide quick fixes to resolve this problem. Finally, we'll cover some frequently asked questions to help you handle core sync independently and efficiently.
What Is Core Sync Mac?
The core sync in Mac can be understood by first knowing its core functions and purposes. It is a feature that allows users to sync their data, such as contacts, calendars, and reminders, across all their Apple devices, including iPhones, iPads, and Macs. This syncing process enables users to access and share their data seamlessly across different devices, making it easier to stay organized and connected.
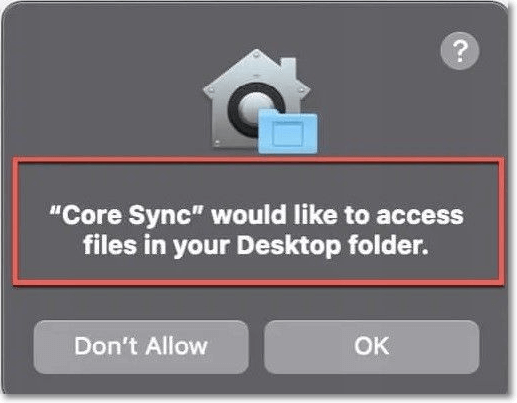
Core sync on Mac is a background program that enables seamless sharing of data between devices and Creative Cloud for users of Adobe services. It's essential for those who want to use Adobe Creative Cloud without any issues, as it ensures a smooth experience across all their devices.
The core sync plays a crucial role in Adobe Creative Cloud by ensuring uninterrupted data synchronization between devices and Adobe servers, as well as syncing cloud documents in Adobe Photoshop and Adobe XD. This makes core sync a necessary function to use Adobe Creative Cloud and other applications on the device.
The primary purpose of core sync is to enable seamless operation of Adobe applications on devices, ensuring that Creative Cloud files remain synced across devices and the cloud, while also providing access to features like Adobe fonts.

Sync Photos From iPhone to Mac Wirelessly
Syncing photos from iPhone to Mac can be easily done using the built-in features on the iOS device or a third-party program like Qiling MobiMover.

How To Use Core Sync On Mac?
Core sync is an internal part of Mac's smooth operability with Creative Cloud, and can be turned on/off or removed by following these quick steps. To turn it on/off, you can use the Quick Steps to access the Core Sync settings, or simply toggle the switch in the System Preferences. If you want to remove it, you can delete the Core Sync app from your Applications folder. Understanding these simple steps will help you effectively manage Core Sync and ensure your Mac runs smoothly with Creative Cloud.
How to Turn On/off Core Sync Mac?
On Mac devices, users are prompted with a pop-out requesting access to system files or folders, which automatically turns on core sync. However, once turned off, core sync may need to be re-enabled to ensure seamless synchronization between Adobe applications and Mac devices, and the steps to turn it back on are available.
Step 1. To access the Creative Cloud preferences, go to the "System Preferences" application on your computer, then click on the "Creative Cloud" option.
Step 2. To enable syncing, go to the Files section and turn on the SYNC ON/OFF option, which is currently set to "Off".
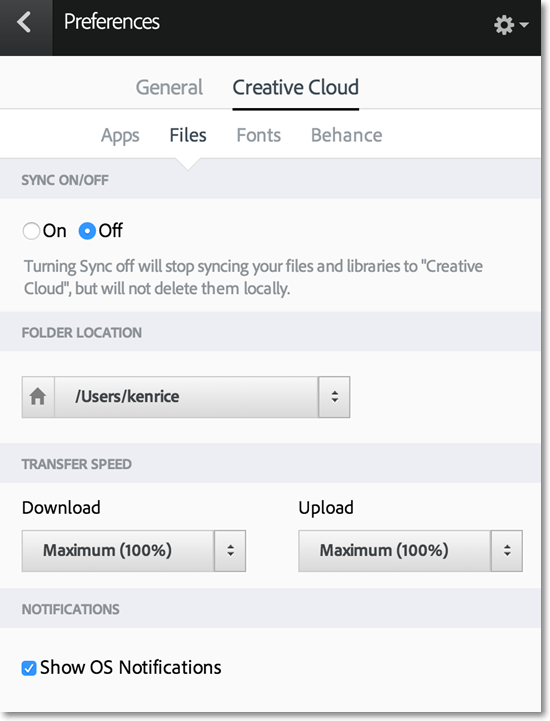
The steps to turn off core sync mac are:
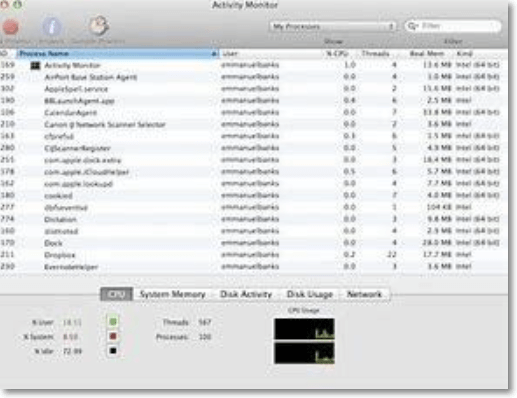
Step 1. Go to the Activities Monitor in the utility folder, then select All Processes from the drop-down menu.
Step 2. To stop the core sync process from running automatically on the device, find the "Core sync" process in the list and click on the "i" icon next to it. Then, select the "Prevent unloading" option, which will turn the core sync off and prevent it from running automatically.
How to Remove Core Sync Mac?
While core sync has different uses in Mac devices, sudden situations like virus threats may compromise the device's security, prompting the need to disable core sync to prevent malicious background programs from running. To do this, follow the steps to disable core sync on a Mac.
Step 1. To access iCloud preferences, go to System Preferences and click on the "iCloud" preference pane.
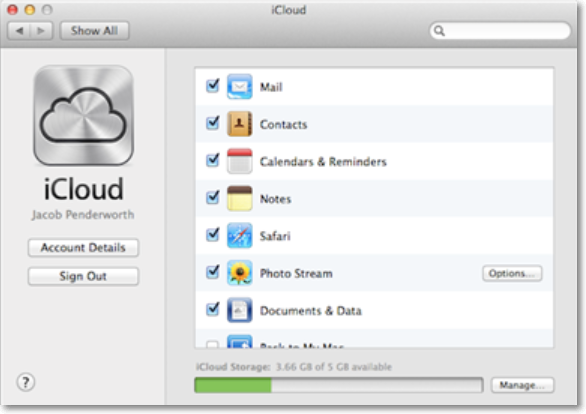
Step 2. Go to the "Documents and Desktop" menu and uncheck the box next to it. This will remove the "Documents and Desktop" section from the start menu.
Step 3. To save the changes and disable core sync on the device, click on the "Done" option.
Why Does Core Sync Mac Enjoy High CPU and How To Fix It?
Mac users can enable or disable core sync based on system needs, but if Adobe is asked, core sync shouldn't use high CPU usage. If it does, it may be due to an improper installation or malware threats.
Follow these steps to confirm whether Core Sync on your Mac is genuine:
Step 1. Go to the "Task Manager" and go to "Details."
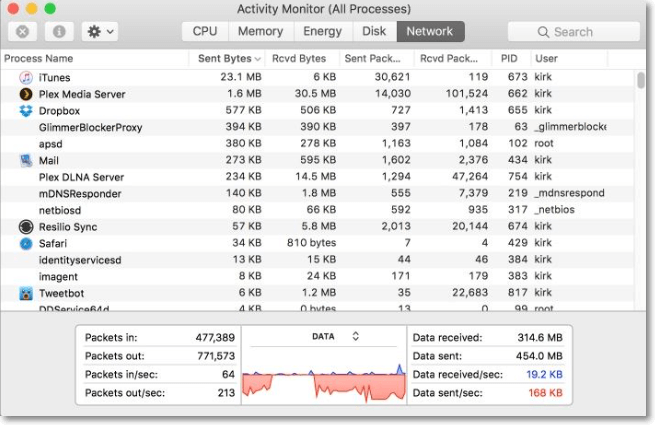
Step 2. Go to the details tab and open core sync.
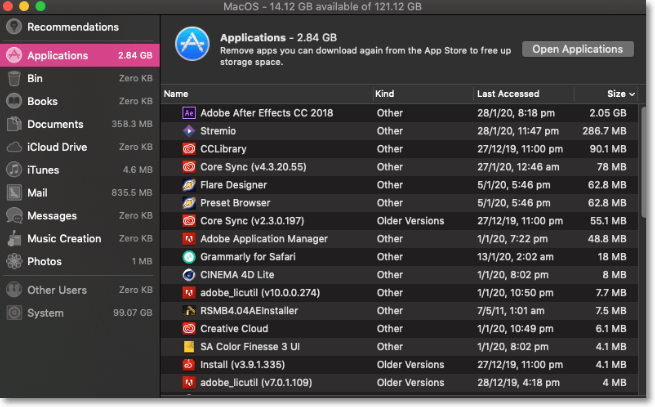
Step 3. Check the core sync file location.
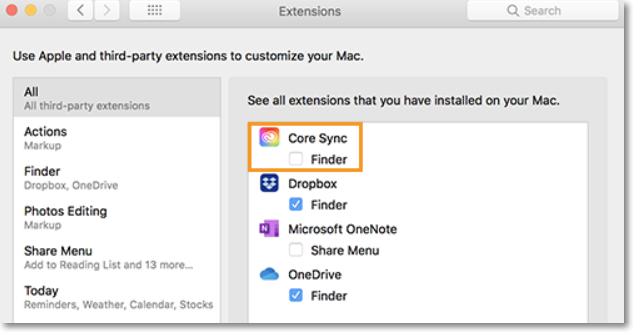
Here is why this matters:
The high CPU usage of core sync on Mac is a significant issue due to several reasons. Firstly, the process consumes a lot of system resources, which can lead to slowdowns and decreased overall performance.
- It starts applications to crash.
- It overheats the Mac system.
- It leads to decreased system performance.
To prevent Core Sync from malfunctioning and causing issues on your Mac, several top troubleshooting solutions are available. These fixes include addressing issues with the Core Sync app, removing and reinstalling the app, checking for software updates, and restarting your Mac. Additionally, users can try resetting the Core Sync app, checking for conflicts with other apps, and running a disk cleanup to resolve any issues.
- Update the Software and Restart Your Mac
- Identify the source of high CPU usage with activity monitor
Update the software and restart your mac
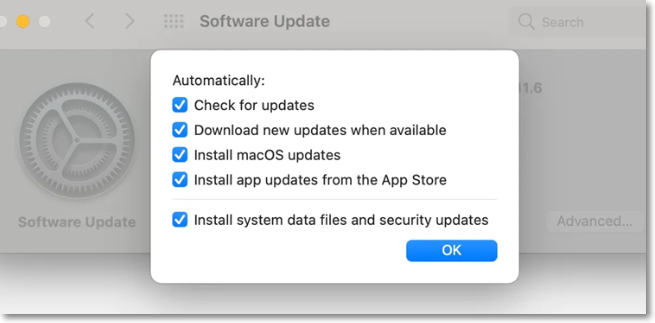
To resolve high CPU usage errors, update your software to the latest version by following these quick steps: First, check for any available updates by going to the software's settings or preferences section. If an update is available, download and install it to ensure you have the latest bug fixes and performance improvements.
Step 1. Go to "System Preferences" and go to "Software Update."
Step 2. To check for specific update settings, go to the "Advanced" settings in the app, and from there you can easily check for updates within the app itself.
More Information About Core Sync Mac
Knowing more about top functionalities like Core Sync Mac is always great. After going through the quick fixes for Core Sync Mac high CPU errors, it's clear that some popular questions come to mind. Users may be interested in learning more about the top searched questions related to this topic.
1. What is Windows core sync?
The Windows core sync is a part of the Creative Cloud installation and app, responsible for sharing data between devices and Creative Cloud. It synchronizes various documents created in top Adobe applications like Photoshop and XD, as well as all "Creative Cloud Files" folders on Windows devices to Adobe servers.
2. How do I turn off Adobe background processes on Mac?
Follow these steps to turn off multiple Adobe background processes on a Mac:
- To start, shut down all Adobe Creative Cloud applications running on the device. This will ensure a clean slate for the removal process.
- Go to the device's system preferences and disable core sync.
- Disable all the LaunchAgents and LaunchDaemons.
- Finally, turn off the running Adobe processes by quitting the Adobe option.
3. What happens if I uninstall the Core Sync on my Mac?
Deleting Core Sync on Mac devices will prevent Adobe Creative Cloud from functioning properly, as Core Sync is necessary for seamless synchronization between devices and the cloud.
Summary
Learning about the core sync app option on Mac devices is easy, eliminating confusion when it asks for different access or permissions, which is necessary to synchronize the device's data with Creative Cloud. The detailed functions and purpose of core sync ensure that users get the best out of it.
After understanding what Core Sync Mac is, users can easily turn it on and off according to their needs by following the quick steps. Additionally, they can learn about the high CPU Core Sync error, fix it quickly using detailed steps, and gain more information about Core Sync Mac by going through the top questions.
Related Articles
- What Is Direct Memory Access and How to Enable DMA On Your Own
- What Is Microsoft Defender Advanced Threat Protection and How to Use It
- What Is Netstat Command and How to Use It
- What Is Hyper-V P2V and How to Convert It? [Latest Tips]
- How to Fix Windows Startup Repair Infinite Loop
7 fixes for Windows startup repair infinite loop in Windows 7, 8, 8.1, and 10. Fix boot loops with Safe Mode, CHKDSK, Bootrec, System Restore, and more. - Stellar Data Recovery Review [2022 Update]
Stellar Data Recovery is a highly-reputed data recovery software available for both Windows and Mac, and we will be providing a comprehensive review of its features, including pricing, plans, and limitations.
Products
Articles & Tutorials
- Data Recovery
- Data Backup
- File Recovery
- File Backup
- System Backup and Restore
- Disk and Partition Clone
- Technical articles
- Mobile articles
- Disk Master Help
- Windows Data Recovery Tutorials
- Windows Secure Delete Tutorials
- Windows Partition Management Tutorials
- Windows File Backup and Restore Tutorials
- Windows System Backup and Restore Tutorials
- Windows Disk Backup and Restore Tutorials
- Windows Clone Tutorials