Partition Backup|How to Backup Partition with Windows Partition Backup Software
It's never too late to back up system and data on a whole disk partition
Creating Windows partition backup images is essential to prevent data loss due to careless operation, virus attacks, or other unforeseen reasons. Without a backup, important data on your computer or storage devices can be lost instantly. To avoid such embarrassing moments, it's highly recommended to use a fast and user-friendly disk imaging tool to create partition/hard drive backup images, ensuring your valuable data is safely protected.
Embarrassing moments with no backups available
- Accidentally formatted a hard disk when an unknown error occurs.
- I accidentally deleted or wiped a partition, resulting in the loss of one or more partitions. This careless action led to the unintended deletion of data.
- A sudden system crash occurred on the C drive while playing games or watching online TV programs, resulting in a loss of data and potentially causing damage to the system.
- The computer has crashed due to a severe malware infection, causing it to shut down completely.
Creating system partition backups on a regular basis can help eliminate troubles like anxiety when recalling terrifying moments that are around you. By having a plan B, you can prepare for unexpected situations and minimize the impact of troubles. Regular backups ensure that your system is secure and can be restored to a previous state if needed, reducing the stress and anxiety associated with system failures. This proactive approach can help you feel more in control and prepared for any situation that may arise.
Encouraging disk and partition backup software on the top list
QILING Disk Master, a Windows backup software, allows for easy backup of entire partition hard drives, systems, or whole computers with compressed backup images, and enables quick restoration of image files from backup locations, thereby safeguarding OS and data integrity on damaged hard drives.
Download this reliable, efficient, and all-around disk/partition backup software for trial on your Windows 10/8.1/8/7/XP/Vista computer and initiate a backup task with the following guide.
Follow the step-by-step user guide for creating a full disk and partition backup
Step 1. To back up an entire hard disk or its several partitions, choose the "Disk/Partition" backup mode and proceed.
Step 2. Click on the hard drive or partition(s) you want to back up, and a check symbol will appear next to it.
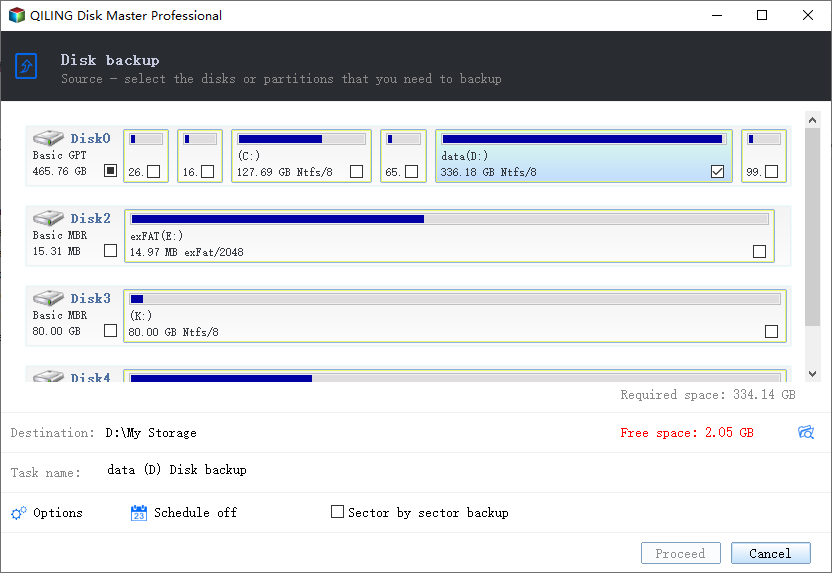
Step 3. To select a backup location, click the browse icon in the "Destination" area, then choose a location from your available options, such as your local hard drive, folders, network drive, NAS device, or cloud storage services like Google Drive, Dropbox, or OneDrive. You can explore connected drives by clicking the + icon in front of each directory.

Step 4. Now edit your disk backup image by adding a "Plan name" and "Description" to it.
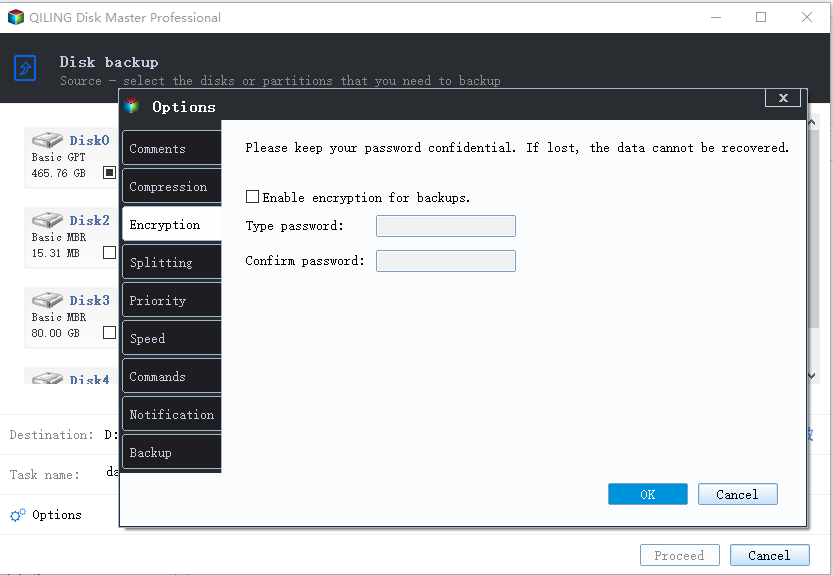
The software has advanced backup plans in the "Options" section, allowing users to compress the backup image, encrypt it for privacy protection, and even enable a sector-by-sector backup.
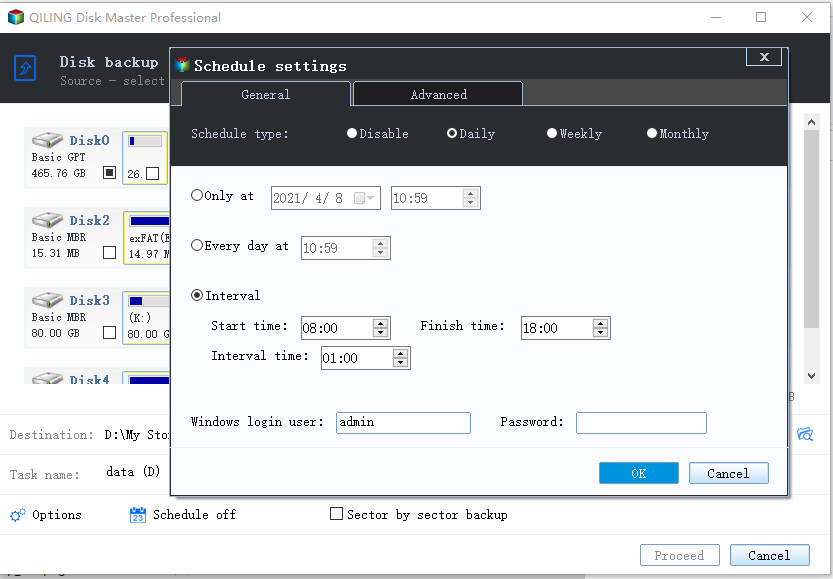
You can set a schedule to create a hard disk/partition backup at regular intervals, such as daily, weekly, or monthly, or even upon a specific event, allowing for automated and timely backups.
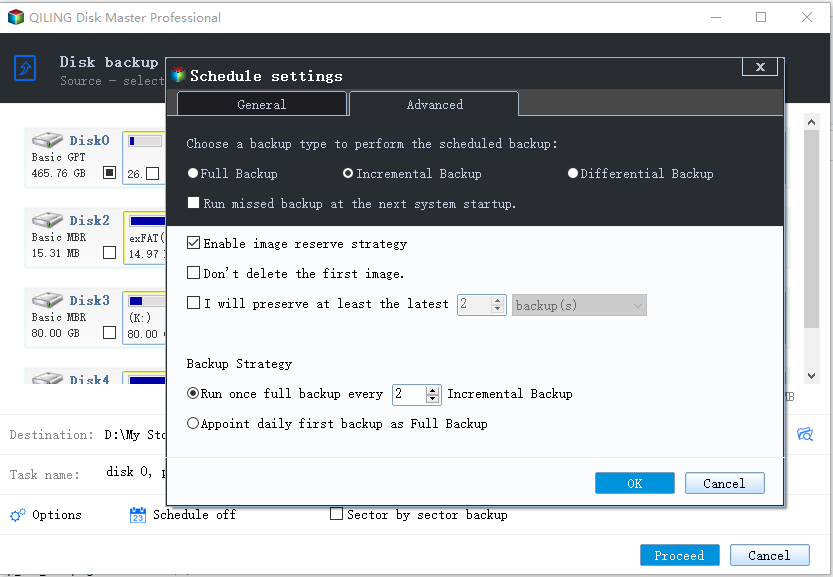
The "Advanced > Enable image reserve strategy" feature allows you to efficiently manage growing backup images by setting a time or quantity to preserve them.
Step 5. To make full use of the necessary customizable hard disk/partition backup solutions, it's not necessary to use all of them, but try to utilize the ones that are truly essential. Once you've selected the necessary ones, click "Proceed" to initiate the process.
After completing the backup process, safely disconnect the physical storage device used as a backup drive to prevent any potential data loss or corruption.
Related Articles
- How to Automatically Backup Files to An External Hard Drive in 3 Ways
- Windows recovery & backup software to recover your files or folders
- How to Clone Encrypted Hard Drive to SSD/HDD
- Download SanDisk Cloning Software to Migrate Data/OS (2021 Update)
- Download Free NAS Backup Software for Windows 10/8.1/8/7
- How to Replace or Upgrade System Drive in Windows 10
- How to Transfer Windows 10 OS to SSD Without Reinstalling Windows
Learn how to transfer Windows 10 or Windows 11 to an SSD without reinstalling Windows, apps, or personal files.