Can I Clone BitLocker Encrypted Drive Without Disabling It? Yes! [3 Minutes Guide]
While BitLocker provides robust encryption, it's not impossible to clone a device without disabling it. Some specialized software and hardware tools can bypass BitLocker and create a clone of the device, including its encrypted data. However, this typically requires advanced technical expertise and may not be feasible for most users.
BitLocker encryption, which has been around for over 16 years, has gained momentum in recent years due to its widespread use. This feature allows users to protect their data with a password or fingerprint, depending on the device, providing an added layer of security.
BitLocker, a full-disk encryption feature in Windows, protects data by encrypting the entire drive. However, this encryption also poses a risk of losing data if the user forgets their password. The question remains if it's possible to clone a BitLocker-encrypted drive without removing it, allowing users to back up their data without compromising security.
- What Do You Need in Cloning A BitLocker Encrypted Drive?
- How to Clone BitLocker Encrypted Drive?
- How Do I Disable BitLocker after Cloning?
Introduction
BitLocker is a drive encryption method introduced by Microsoft in Windows Vista service packs, but it has since become a crucial part of Windows operating systems' drive management and security features.
This technology allows users to protect their data with full-volume encryption using password protection, but with the advancement of biometric security features like fingerprints and facial recognition, users can also utilize these methods for encryption purposes.
Cloning a BitLocker encrypted drive might seem impossible, but it can be done. To achieve this, you'll need to follow a specific process that involves decrypting the drive, cloning it, and then re-encrypting it. This process ensures that the cloned drive is identical to the original, including the encryption.
Can You Clone a BitLocker Encrypted Drive? What Will You Need?
Cloning a BitLocker encrypted drive can be challenging due to its strong AES encryption, making it difficult to access the data without the decryption key.
However, it's possible, so what you'll need is:
- A new and empty hard drive with equal or more space than the encrypted drive.
- Reliable disk cloning program with thorough encryption incursion.
- Uninterrupted power supply—because power loss can cause data loss.
To start, you'll need to decide where you want to clone your hard disk - to another hard drive, a new SSD, extension, or USB. Once you've determined the destination, you'll need to select the proper software to facilitate the cloning process.
Preferably a professional tool like Qiling Backup; here's why:
- The tool is dependable and contains the necessary algorithms to crack BitLocker encryption.
- The software provides different backup options, including System Backup, Disk/partition backup, Files backup, and Cloud backup.
- It features high-quality backup and restores options.
- Most importantly, disk partition and cloning.
Qiling Backup allows for cloning BitLocker-encrypted devices to another partition, but it's unclear whether disabling BitLocker is necessary before the cloning process.
If you plan on using Qiling Backup, you can clone the partition to another storage device without needing BitLocker enabled.
Cloning a partition to another storage device is a process of creating an exact copy of a partition on one storage device to another storage device. This can be useful in various scenarios, such as upgrading to a larger storage device, replacing a failing storage device, or creating a backup of an important partition.
How to Clone BitLocker Encrypted Drive [Step-By-Step Instructions]
Now that we know what we need, let's discuss the cloning process. To clone an encrypted drive to another one using software, you'll need to follow a specific process. This involves using software to help you create an exact copy of the encrypted drive on another drive, ensuring that all data, including the encryption, is preserved.
- Process 1. Make Sure the Second/Target Drive Is Connected
- Process 2. Download the Disk Cloning Software: Qiling Backup
- Process 3. Cloning Procedure
Process 1. Make Sure the Second/Target Drive Is Connected
To ensure a smooth process, if you have a SATA or HDD device, connect it internally. While USB converters can be used, internal connection is recommended.
Once you're done connecting the partition, ensure its presence by running the command `sudo partprobe` in the terminal. This command tells the system to re-scan the partitions and update its knowledge about the existing partitions, including the newly created one.
Step 1. Press the "Windows" button on your keyboard.
Step 2. Type Disk Management and open the tool.
Step 3. Check if your disk is detected.
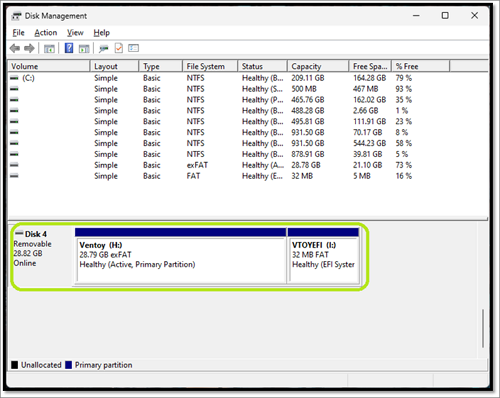
Step 4. Done.
The device is connected, so ensure your device is connected as well before proceeding with the next step.
Process 2. Download the Disk Cloning Software: Qiling Backup
To clone a device using Qiling Backup, you can download the software, which is a simple and easy-to-use tool. With it, you can clone devices such as hard drives and SSDs in various formats, including IDE, SATA, ESATA, M.2, and NVME. Once downloaded, you can proceed to the cloning procedure to learn how to use the app.
Process 3. Cloning Procedure
Ensure you've followed the steps mentioned in this article thoroughly to clone your BitLocker encrypted drive to another partition. This process will help you clone your BitLocker encrypted drive to another partition. Once everything is ready, you'll need to follow the steps to complete the cloning process.
Step 1. To clone or system clone your Open Qiling, go to Open Qiling Backup, click on "Tools", and then select either "Clone" or "System Clone" depending on your needs.

Step 2. Choose the source disk or partition as well as the target disk. (Make sure the space of the target disk is larger than that of the source disk or partition.)
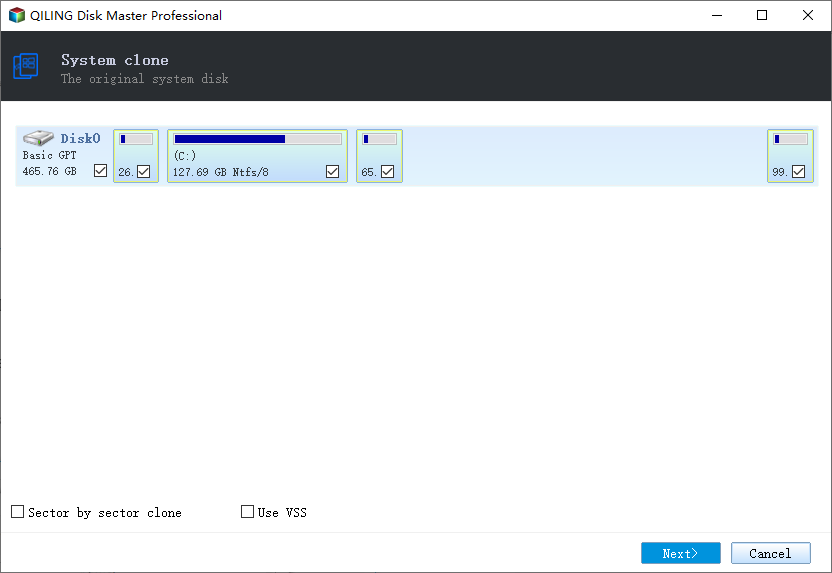
When you click "Next", you will see a warning message. Be aware of the risks of cloning a hard drive and click Continue.

Step 3. To clone a disk sector by sector, you should go to the advanced options and select the "Sector by sector" clone option. This will initiate a sector-level cloning process, resulting in the target disk having an identical layout to the source disk.

Step 4. Click "Proceed" to start cloning.
To clone your BitLocker encrypted drive to another partition, you'll need to use a tool like Qiling Backup, which can handle the encryption process. The cloning process will depend on the speed of your drive and computer, as well as the amount of data on the encrypted device. This can take some time, but the tool will handle the encryption and decryption processes automatically.
Once you've cloned your BitLocker drive data to another drive using Qiling Backup, you can also use Qiling Backup to perform other tasks on the BitLocker partition, such as.
- Backup the data in BitLocker encrypted HDD/SSD partition
- To securely back up BitLocker encrypted data, you can store it on removable devices like USB Flash Drives or External Hard Disk Drives (HDDs). This allows for easy data portability and access, while maintaining the encryption and security provided by BitLocker.
- Qiling Backup allows you to backup BitLocker encrypted data directly to the cloud, providing a secure and convenient way to protect your sensitive information.
- Backup or restore files from an unlocked BitLocker drive
Qiling Backup is a software that provides various operations and assistance with BitLocker encrypted devices, allowing users to try it for different tasks and support.
How Do I Disable BitLocker after Cloning? [Detailed Guide]
To disable BitLocker after cloning a BitLocker encrypted drive, you can follow these steps:
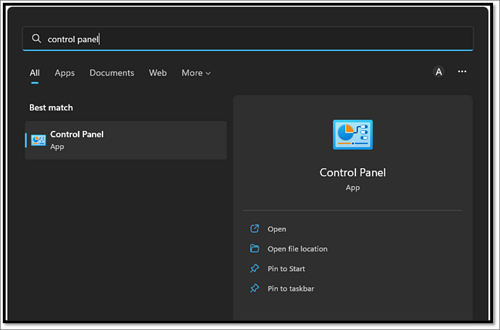
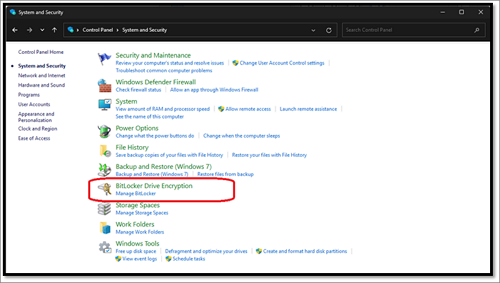
Step 1. Press the "Windows" button on your keyboard.
Step 2. Type "Control Panel" and open it.
Step 3. Head into System and Security.

Step 4. Find and click on "BitLocker Drive Encryption".
Step 5. Find and click on "Turn off BitLocker" and confirm when prompted.
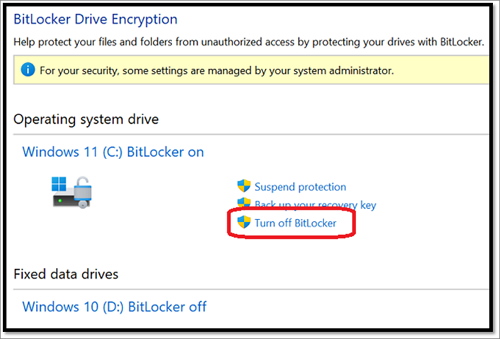
Step 6. Done.
You will need to enter your password to decrypt the drive, and your operating system will prompt you to do so. Once you've entered your password, your operating system will begin the decryption process, which may take some time depending on the size of your drive.
Conclusion
We hope this guide includes been helpful in addressing your BitLocker-related issues and making it easier to fix them. As computer users, we often encounter such problems daily, and our goal is to assist our readers in resolving issues like cloning a BitLocker encrypted device to another storage option.
Therefore, let us know what you think in the comments below, as it'll encourage us and also help us understand what you want to read next on our website. So, follow these methods, and use Qiling Backup to ensure moving BitLocker encrypted data to another drive smoothly.
FAQs About BitLocker Encrypted Drive
Here are the answers to your frequently asked questions in one paragraph:
1. Does BitLocker Encrypt the Entire Drive?
BitLocker is a full-disk encryption feature that encrypts an entire partition on any storage device, including data and system drives.
2. Can BitLocker Encrypt External Hard Drives?
To encrypt an external drive with BitLocker, insert the drive, follow the usual encryption procedure, and protect it with BitLocker. Alternatively, you can use Qiling Backup to clone an external drive.
3. How does BitLocker Encrypt and Protect a Hard Drive?
BitLocker protects data security by encrypting devices with password protection, rendering data useless if a device is decommissioned or recycled. This ensures the safety and security of hard disks and their contents with advanced encryption algorithms.
Related Articles
- Top 5 Best Free SSD Backup Software for Windows in 2022
- How to Save Outlook Emails When Leaving Job | 2 Available Options
- How to Set Up Windows Backup [You Must Know 2022]
- How to Backup BitLocker Encrypted Drive in Windows 2022
- (SOLVED)Lenovo Service Partition Has Been Destroyed
You may receive Lenovo service partition has been destroyed issue after a system operation failure. Want to get the way to fix Lenovo service partition has been destroyed? See this article. - How to Perform Lenovo System Recovery Easily
If you don't know how or have a problem factory resetting Lenovo, continue to read below and learn how to use Lenovo system recovery. You can also use the Reset this PC feature.