How to Clone Hard Drive Without Windows Operating System [Simple as a Few Clicks]
User scenario: how to clone an HDD without the OS?
You can clone your original HDD to the new drive without booting into Windows. You can use a tool like Qiling Backup to create an image of your original HDD and then restore it to the new HDD. These tools can run from a bootable USB drive or CD, allowing you to clone the drive without needing to boot into Windows. This way, you can preserve your original Windows installation and clone it to the new HDD, leaving your new copy of Windows untouched. You can also use a Linux-based live USB drive to clone the drive if you prefer. Just be sure to choose a tool that supports your specific hardware and operating system. Would you like me to provide more details on how to do this?
Windows can't boot problems are frustrating for users and can occur due to various reasons, including BCD errors, corrupted MBR, hardware damage, corrupted system files, and virus attacks.
To solve the Windows booting issue without losing important data, you can clone the hard drive without Windows OS. This process involves recovering your data first, then using a cloning software to create an exact copy of the hard drive, including the operating system, programs, and files. This way, you can restore your system to a previous working state or use the cloned drive as a backup.
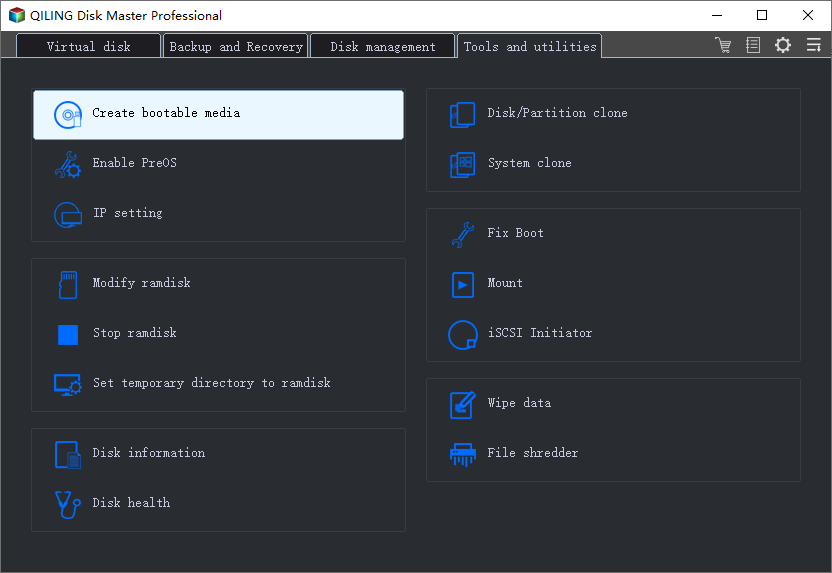
What's the Way to Clone Hard Drive Without OS
Use a USB bootable disk clone software to access an unbootable computer and clone the hard drive with a tool like Qiling Disk Copy, which has advanced disk copy features.
- Create a WinPE bootable disk to clone and rescue data in a Windows PE environment, ideal for situations where the OS cannot boot. This allows you to access and recover data when the operating system is unresponsive.
- Clone HDD to SSD to speed up your computer
- To enable sector level cloning when the hard drive has bad sectors, the system should be able to clone the good sectors and skip the bad ones, ensuring that the cloned drive is usable and functional. This feature would be particularly useful for users who want to preserve their data and have a backup of their drive, even if it has some failing sectors.
- Clone failing hard drive to new HDD/SSD
Free download Qiling Disk Copy and create a bootable USB to clone hard drive without OS. Here are the steps to make it.
Steps to Clone Hard Drive Without Windows OS
To clone a hard drive without booting into Windows, you need to create a Qiling Disk Copy bootable USB on a healthy computer, then connect the bootable USB to the unbootable computer and use it to copy files out.
To clone a hard drive in the WinPE environment, follow these steps: Boot from a WinPE media and select the language and keyboard layout. Connect the source and target hard drives, and select the source drive from the WinPE environment.
Step 1. Download, install, and run Qiling Disk Copy on a healthy Windows computer. Connect an external storage device like a USB flash drive or external hard drive to the PC, then click "Create bootable disk".
Step 2. Select USB and select your device, click "Proceed".
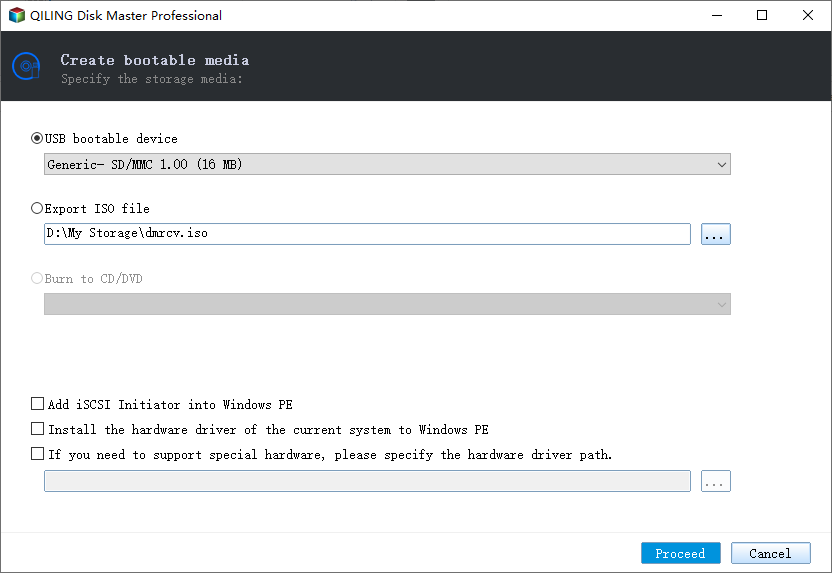
A bootable disk can be created by rewriting a USB drive with a bootable operating system, such as Windows or Linux. This process involves using specialized software to copy the operating system files onto the USB drive, making it possible to boot a computer from the drive.
Step 3. To clone a disk, connect a bootable USB drive and a new SSD/HDD to the computer. Set the computer to boot from the bootable USB drive by adjusting the boot order in the BIOS settings.
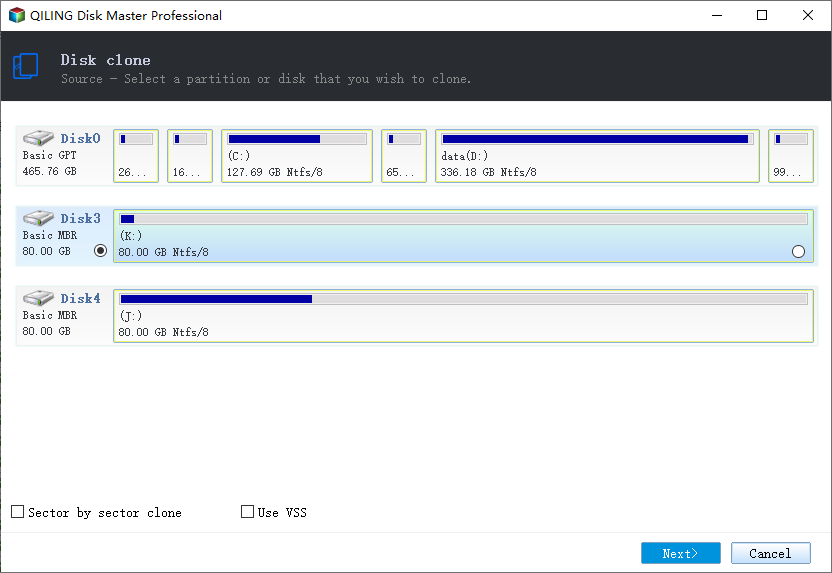
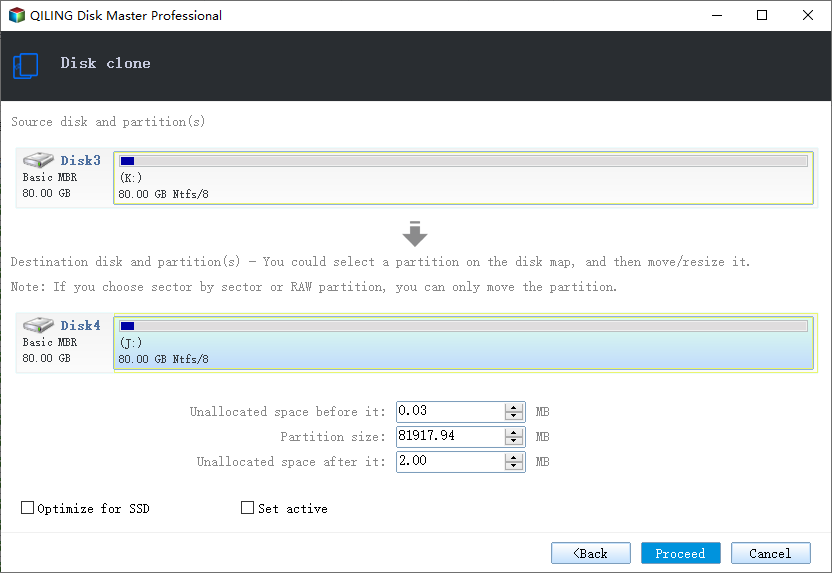
Step 4. To use Qiling Disk Copy, go to the Tools page and click on "Disk Clone". Select the source disk you want to copy or clone, then click "Next" to proceed.
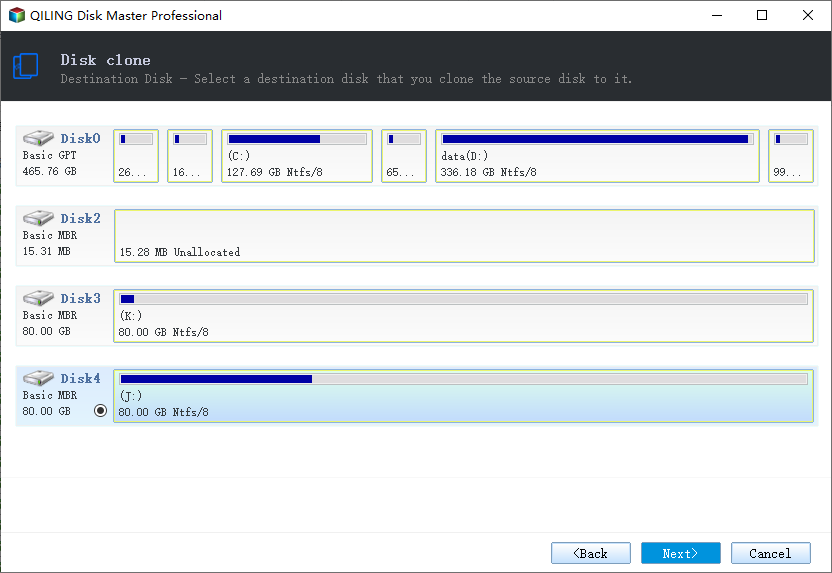
Step 5. Select the destination disk where you want to clone/copy the old disk and click Next to continue.
Step 6. To prepare the disk, check and edit the layout by selecting "Autofit the disk", "Copy as the source", or "Edit disk layout". Autofit the disk is the recommended option.
- The "Copy as source" option clones the same layout of partitions on your source disk to the destination disk.
- Edit disk layout allows you to manually resize or move the partition layout on the destination disk.
- If your destination disk is an SSD drive, make sure to select the "Check the option if the target is SSD" box.
Click "Proceed" to start the disk cloning or disk copying process, and confirm if the program asks to erase data on the destination disk by clicking "OK".
Further reading:
Conclusions
Qiling Disk Copy allows for easy hard drive cloning even when Windows is malfunctioning. By using a bootable USB, you can clone your hard drive in a WinPE environment, making it easy to recover data. This process requires no technical expertise, making it accessible to both beginners and experienced users alike.
If you encounter any issues while using Qiling Disk Copy, you can reach out to our technical customer service for assistance. You can email them at support@idiskhome.com for help in resolving the problem.
More Information: How to Fix Windows 10 Won't Boot Issue
Try solutions below to fix Windows 10 not booting issue. But remember to back up files beforehand.
- Run Windows automatic startup repair
- Perform a system restore
- Repair corrupted MBR
- Fix BCD errors
- Run SFC or DISM tools to fix damaged system files
- Repair bootrec
- Change SATA mode
- Add a disk drive
- Delete the file that caused the startup problem
- Remove the disk from the storage pool
- Modify disk signature
- Fix system file signatures
Related Articles
- [Tried and True] Ignore Bad Sectors During Copying
- Top 6 SD Card Cloning Software Easy to Get
- Free disk cloning software for Windows 10/8/7
- Clone OS from HDD to Smaller SSD Without Reinstallation
- Enable System Restore in Windows 10 for Quick Recovery
To protect your computer from stop responding due to Windows updates, driver issues, or other errors, you can enable system restore in Windows. This feature allows you to create a restore point at regular intervals or manually, which can then be used to revert your system to a previous state if it encounters any problems. - File Missing after Windows 10 Update (1809)? Let's Recover!
Losing important files can be a nightmare, but there are simple ways to recover them. One approach is to use file recovery software, which can scan your device for deleted files and restore them. Another option is to use cloud storage services, which automatically back up your files and allow you to access them from anywhere.