Clone Windows 11 26H2 to an SSD Without Reinstalling
If Windows 11 26H2 already runs on your PC, a system clone can move that installation, its boot partitions, applications, and settings to a replacement SSD. Cloning does not install 26H2 on a PC that lacks it; it copies the source system's current state. It also overwrites data on the target SSD, so identify both drives before starting.
Before connecting the SSD
Confirm that the SSD is healthy, connected, and large enough for the Windows partitions and used data being moved. Record the model and capacity of both source and target, not just their drive letters. If the SSD contains files you need, back them up elsewhere: the destination layout will be replaced.
Keep a separate system image or file backup as well. Cloning is a migration operation, not a versioned backup. Save the BitLocker recovery key before changing disks, and suspend device encryption when your organization's policy requires it. For an NVMe SSD in a USB enclosure, first confirm the enclosure and drive appear reliably in Windows.
Clone the installed Windows system with Qiling
Qiling Disk Master's System clone route is distinct from a whole-disk clone. It selects the Windows-related partitions for migration. Use a whole-disk clone only if you also intend to copy every data partition on the source disk.
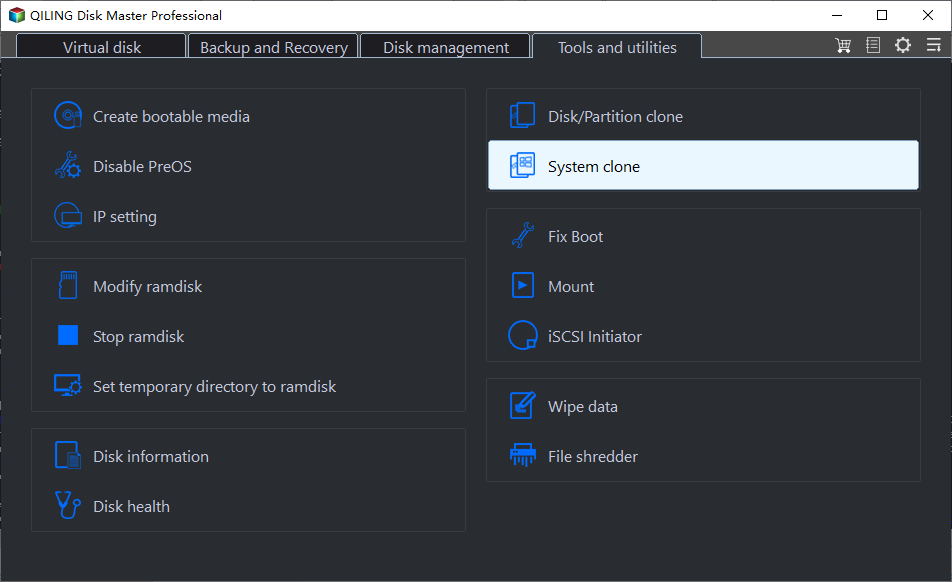
Step 1. Open Tools and utilities and choose System clone. Do not select Disk/Partition clone unless you need the entire disk or a particular data partition.
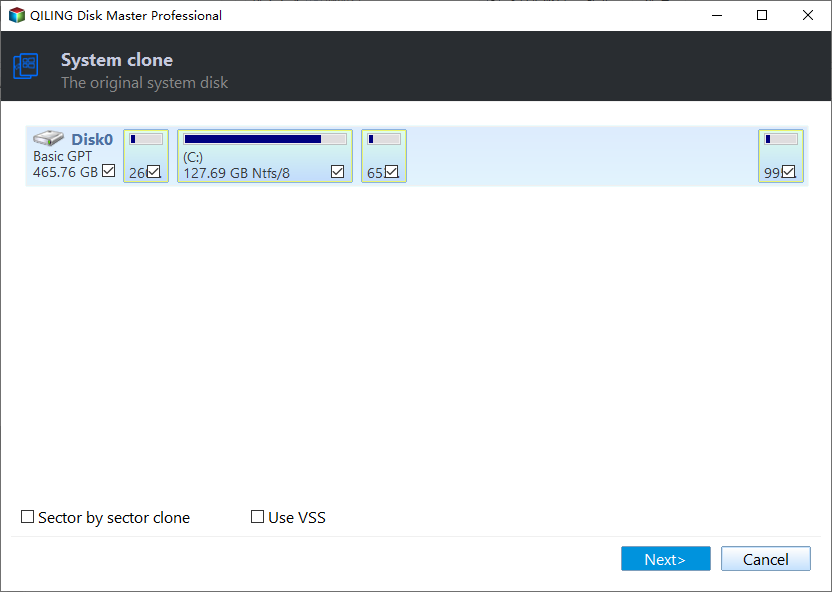
Step 2. On the source screen, confirm the selected disk contains the Windows 11 26H2 installation and its boot partitions. Compare its disk number and capacity with Windows Disk Management, then click Next.
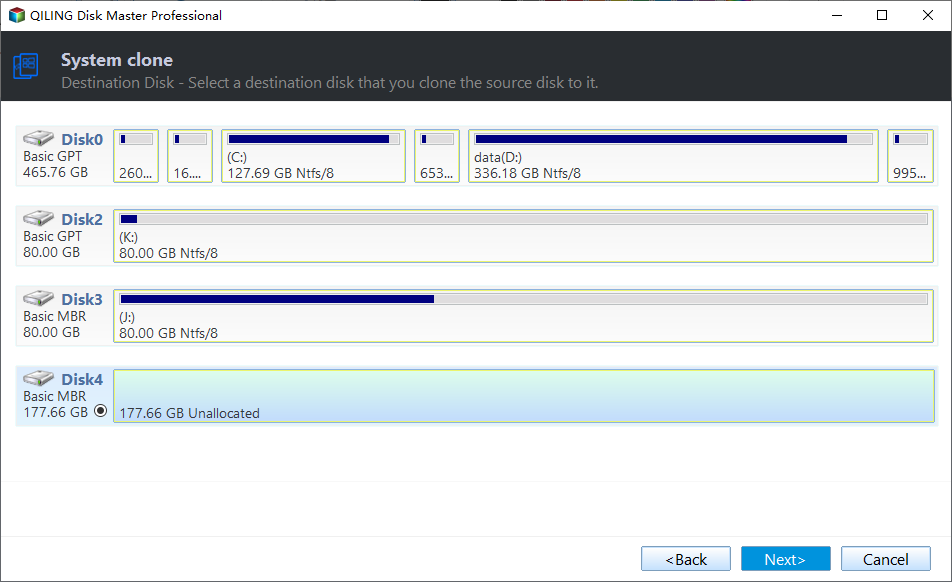
Step 3. Select the target SSD by its disk number, model, and capacity, then click Next. This disk's existing contents are at risk; stop if you cannot identify it unambiguously.
Step 4. Inspect the preview from source to destination. Check the copied system and boot partitions, the destination layout, and the Optimize for SSD option. If the layout is not what you expect, go back instead of proceeding.
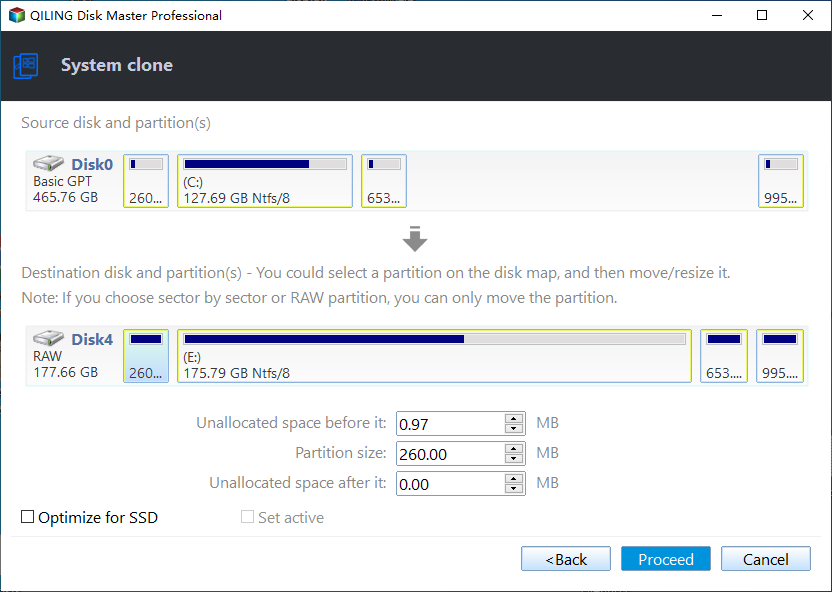
Step 5. Click Proceed only after checking the target again. The program warns that data on the destination disk will be lost. Confirm the warning only if the backup of that disk is complete and the target is correct.
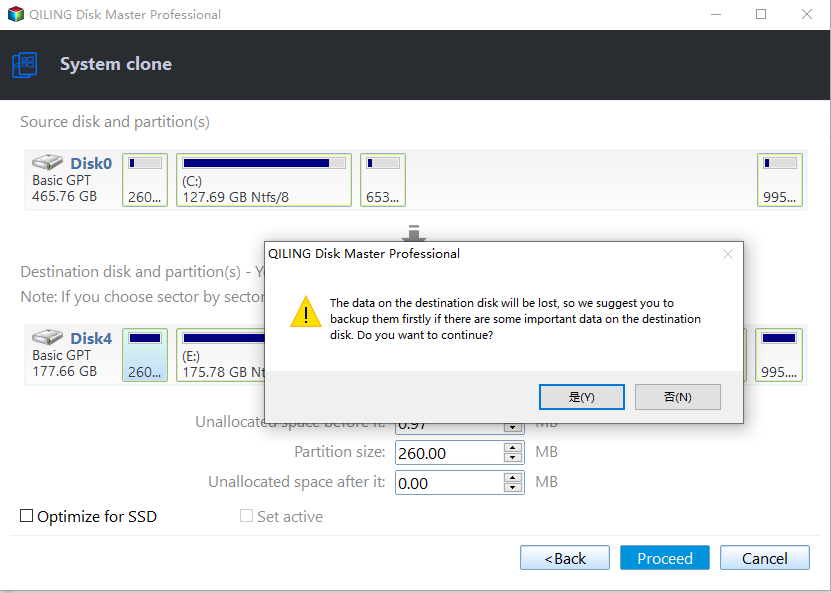
Step 6. Wait for the clone to finish without disconnecting either disk or powering off the PC. Do not erase or reuse the old drive yet.
Boot from the new SSD and verify the result
Shut down, install the SSD in its intended slot if needed, and use firmware boot settings to choose the new Windows Boot Manager. If both old and new drives remain attached, avoid guessing which one Windows used: inspect the boot disk after startup. Check sign-in, applications, personal files, and activation. Keep the old disk unchanged until these checks pass.
If the SSD is smaller than the old disk, the selected Windows partitions and used data must fit. If boot fails, check UEFI/Legacy mode, the SSD connection, and whether the boot partitions were included before trying a repair. See the general Windows 11-to-SSD guide for hardware preparation.
Common questions
Will the clone install 26H2 for me? No. It copies whatever Windows version is installed on the source. Update the source first if you want the new SSD to start with 26H2.
Can I use the clone as my only backup? No. The clone is a single current copy that may be changed after booting. Keep a separate image or file backup for rollback and accidental deletion.
Related Articles
- Back Up Before Windows 11 26H2
Create a separate image before a feature update or disk migration. - Clone Windows 11 25H2 to SSD
Compare the previous version's migration scenario.
Products
Articles & Tutorials
- Data Recovery
- Data Backup
- File Recovery
- File Backup
- System Backup and Restore
- Disk and Partition Clone
- Technical articles
- Mobile articles
- Disk Master Help
- Windows Data Recovery Tutorials
- Windows Secure Delete Tutorials
- Windows Partition Management Tutorials
- Windows File Backup and Restore Tutorials
- Windows System Backup and Restore Tutorials
- Windows Disk Backup and Restore Tutorials
- Windows Clone Tutorials