How to Fix Extend Volume Greyed Out in Windows 11?
If your Windows 11 PC or laptop is running low on disk space, you can extend the partition using the built-in "Extend Volume" feature in the Disk Management utility, which can help manage your data.
In Windows 11, you can use the Disk Management tool to enlarge a partition, but many users are often disappointed to find that the "Extend Volume" option is greyed out. This tool is widely used for managing disk partitions, but the greyed out option can be frustrating.
If you're experiencing issues with the Extend Volume option on your Windows 11 computer, you're not alone. Fortunately, there's a solution available. The Extend Volume option may go grey due to various reasons, but don't worry, we've got an alternative method to fix the issue. Let's dive in and explore the solution together.
Why Extend Volume Greyed Out
When your Windows 11 system drive is completely full, you can free up some disk space by shifting or transferring your files and programs. However, the "Extend Volume" option under the Disk Management tool is only active when there is adjacent unallocated space available on the hard drive, which is why it might be greyed out. This means you can't extend your volume if there's no unallocated space next to it.
- When no unallocated space is available on dynamic disks
- There is no contiguous unallocated space behind the primary partition to extend it. This means that the partition cannot be extended further in that direction.
- The partition you want to enlarge is not an NTFS file system, which is why you can't use the Extend Volume feature in the Disk Management Utility. This is because Microsoft only enables this feature for RAW or NTFS partitions.
How to Fix Extend Volume Greyed Out
To fix the issue of "extend volume" being greyed out in Windows 11, you can try two methods. Firstly, you can use the built-in Disk Management tool to extend the volume. Alternatively, you can use a third-party partition manager to resize the partition and make the "extend volume" option available.
Option 1: Free Up Space Next to Drive
If the "Extend Volume" option is greyed out in Windows 11, you can try using the "Shrink Volume" option instead. To do this, go to Disk Management (Press Windows + R, type "diskmgmt.
To resolve the issue of "Extend Volume" being greyed out in Windows 11 with no adjacent unallocated space, you can try the following steps. First, ensure that the disk where the volume is located is not in use by any other process.
Option 1: Free Up Space Next to Drive
If you're trying to extend the C drive volume in Windows 11 but the "extend volume" option is greyed out, it's likely because there's no free or unallocated space after the drive C partition. To resolve this, you'll need to delete a blank or useless partition, which will leave free space next to the primary volume, allowing you to extend the C drive volume. To do this, follow these steps using the Disk Management Utility.
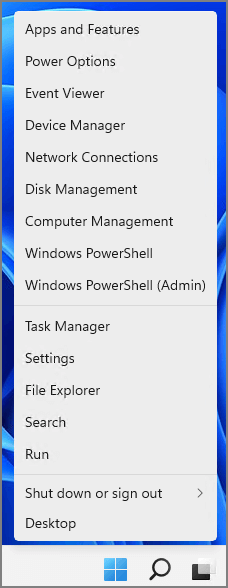
Step 1: Press the combination of "Windows + X" keys and click on the "Disk Management" option.
Step 2: Right-click on the empty or useless partition next to the primary volume. Click on the "Delete Volume" option.

Note: If the partition doesn't have any important data, you can delete it. However, if it contains crucial information, consider moving the files to another partition first and then deleting the original one.
Step 3: Click on the "Yes" option on the warning message. You'll see that the partition has free space.
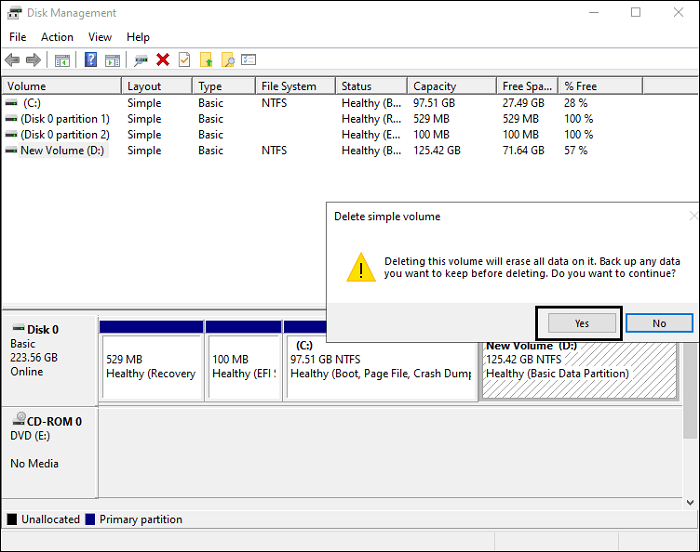
Step 4: Click on the "Delete Partition" option once more.
To resolve the issue of extend volume greyed out Windows 11, you can extend the volume of the primary partition, which will prevent the greyed-out option from appearing. This can be achieved by using the Disk Management tool in the Windows 11 operating system. By following the steps outlined, users can successfully extend the volume of the primary partition, thus resolving the issue of the "extend volume" option being greyed out.
Option 2: Fix Extend Volume Greyed Out Windows 11 with "Shrink Volume"
If you're experiencing the issue of "extend volume greyed out" in Windows 11, you can try shrinking the volume of the partition instead of using the "Delete Volume" option. This will allow you to free up or allocate space, effectively resolving your issue. To do this, follow these steps:
Step 1: With the "Windows + X" keys, click on the "Disk Management" option.
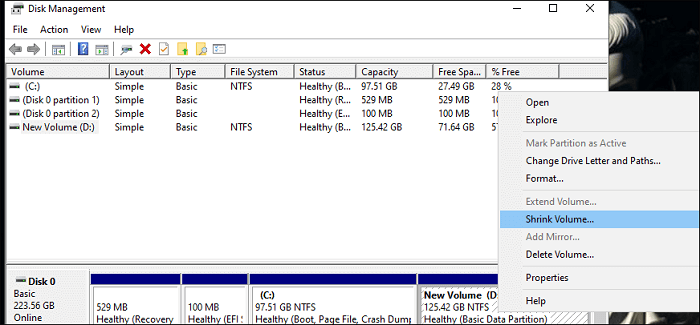
Step 2: Right-click on the neighboring partition that has sufficient space and click on the "Shrink Volume" option.
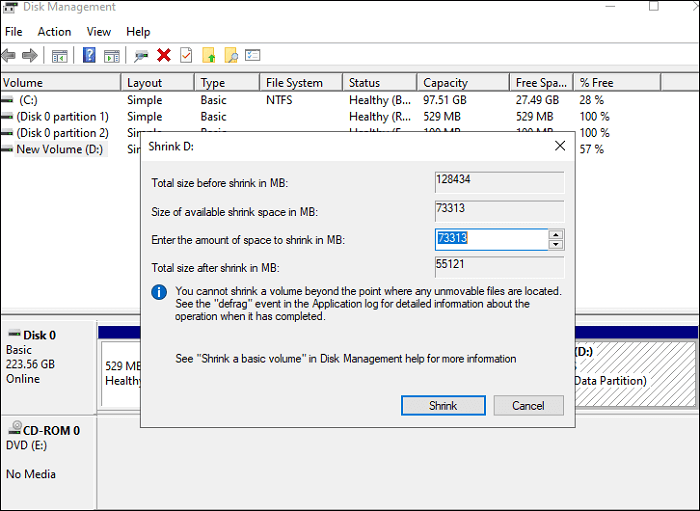
Step 3: Write the amount of space that you want to shrink. Click on the "Shrink" option and hit "Ok" to confirm.
To resolve the issue of the "extend volume" option being greyed out in Windows 11, you can extend the volume of the target partition without encountering the error.
Option 3: Fix Extend Volume Greyed Out Windows 11 with No Adjacent Unallocated Space
If you don't have unallocated space next to your primary volume, you can use Qiling Partition Master to solve the issue of extend volume being greyed out in Windows 11. This professional tool allows you to add free or unallocated space using the "Resize/Move" feature, making it a reliable and fast way to extend partition. With easy-to-follow instructions, you can use Qiling Partition Master without requiring any skilled knowledge.
Allocate Space of the E drive for C drive
To merge C drive and the free space of E drive, you can follow these steps. First, open the Disk Management console by typing "diskmgmt.

Step 1. shrink E drive
To adjust the size of the E drive, select the E drive in the Disk Management page, and then click on "Resize/Move" to make the necessary changes.

To shrink the E drive, drag one of its heads to free up unallocated space and click "Proceed" to start resizing the partition.

Step 2. Extend C drive
To extend the C drive, select C drive in the Disk Management page and choose "Resize/Move" to adjust its size.
To extend the C drive, click on the unallocated space, then drag your mouse to the right to extend the C drive into the unallocated space, and click "Proceed" to start resizing the partition.
Conclusion
The "Extend Volume" option is greyed out in Windows 11, but there are several solutions to fix this issue. You can try checking if there is enough free space on the system drive, disable the fast startup feature, and check for disk errors. Additionally, you can use the built-in Disk Management tool to extend the volume. However, if you're looking for a more reliable and effective solution, consider using a partition manager tool like Qiling Partition Master, which allows you to extend the volume without deleting any partitions and ensures data safety.
To merge non-adjacent partitions, download the software and follow the guide below. The guide will walk you through the steps to merge the partitions, ensuring a seamless and efficient process.
Related Articles
- How to Clone IDE to SATA HDD/SSD (2 Ways)
- How to Partition Hard Drive Disk without Formatting
- How to Extend or Increase C Drive in Windows 8/8.1
- Best Diskpart Alternatives for Windows 11, 10, 8, 7 (New Guide 2022)
- How Do I Format External Hard Drive for Xbox One Successfully? Here Is the Guide
- How to Set SSD as Boot Drive [2022 Updated]
- File History vs. Backup and Restore | Which Is Better?
Windows has two inbuilt backup and recovery utilities: File History and Backup. Both tools offer benefits and drawbacks, and a comparison between them is warranted.