How to Schedule A Weekly Backup to Microsoft OneDrive[3 Tips]
OneDrive is a cloud service provided by Microsoft, offering features like file syncing, sharing, and storage, allowing users to access their files from anywhere with an internet connection and keeping them private until shared.
Why Perform A Weekly Schedule Backup to Microsoft OneDrive
Users often store important data in OneDrive, but as the amount of data grows, storage space becomes insufficient, and manually uploading files is a time-consuming process.

To effectively address the issue, schedule a weekly backup to Microsoft OneDrive, which will automatically save copies of selected files at a specified time.
3 Tips to Schedule A Weekly Backup to Microsoft OneDrive
To schedule a weekly backup to Microsoft OneDrive, you can use various tools, including third-party software like Qiling Backup, or built-in Windows features such as Task Scheduler and File History. With these tools, you can set up a weekly backup schedule, following step-by-step guides to ensure your important files are safely backed up to OneDrive.
- Tip 1: Use A Flexible Backup Utility(for Windows 11/10/8/7)
- Tip 2: Use Windows Task Scheduler(for Windows 10/8/7)
- Tip 3: Use Windows File History(for Windows 11/10/8)
- Editor's Recommendation:
- Qiling Backup Home is a reliable and flexible backup solution that allows for scheduled backups, running automatically at specific times or events like system startup/shutdown.
- Qiling Backup offers incremental and differential backup options, which only save time and storage space by backing up changed or new files.
Tip 1: Use A Flexible Backup Utility(for Windows 11/10/8/7)
Qiling Backup is a useful tool for schedule backup compatible with Windows 11/10/8/7, allowing you to set automatic backups daily, weekly, monthly, yearly, or upon specific events with ease.
The product also includes additional features that make it a top choice, such as:
- Multiple backup sources: Apart from files and folders, Qiling Backup also allows backing up systems, disks, partitions, and emails, and creating a system image.
- Multiple backup destinations: Qiling Backup allows you to back up data to internal and external hard drives, as well as cloud services like Qiling Cloud, OneDrive, Google Drive, and Dropbox.
- 250 GB of free Cloud Storage: 250 GB of free storage space is available for users to use without worrying about running out of storage space.
- Compress backup: You can compress backup images to save more storage space.
- Incremental and differential backup: To optimize your backup process, focus on saving only the files that have been modified or newly created. This approach helps conserve time and storage space.
To schedule backups in Windows 11/8/7, you can follow the tutorial below.
Step 1. To initiate a backup, click the File backup button option.

Step 3. On the top tree view, both local and network files are displayed, and you can navigate through the directory to select the desired backup files.

Step 4. The user should follow the on-screen instructions and select a location to store the backup.

Step 4. Click Options to encrypt the backup with a password in Backup Options, where you can also find other additional choices to customize the backup process to your needs.

To specify the backup schedule, click on "Backup Scheme" and select the desired backup frequency and start the backup at a specific event.

Step 5. The backup can be stored on a local disk, Qiling's online service, or a network-attached storage (NAS) device.

Step 6. Qiling Backup allows customers to back up data to both a third-party cloud drive and its own cloud drive, providing flexibility and redundancy in data storage.
To back up data to a cloud drive, select Local Drive, scroll down to add Cloud Device, and add and log in to your account provided by a third party.
Step 7. Click Proceed to start the backup process. After completion, the backup job will be displayed as a card on the left side of the panel. You can further manage the backup job by right-clicking on it.

Tip 2: Use Windows Task Scheduler(for Windows 10/8/7)
The Task Scheduler is a Windows utility that allows you to schedule tasks to run automatically at a specific time or event, making it useful for setting a weekly schedule to back up files to OneDrive.
Follow the guide below to:
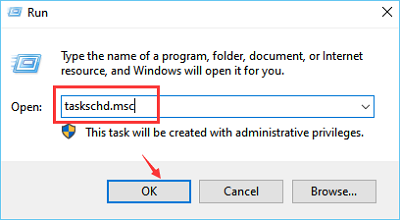
Step1. Press the "Windows+R" keys together to open Run, and type taskschd.msc in the box and click OK to open the Task Scheduler.
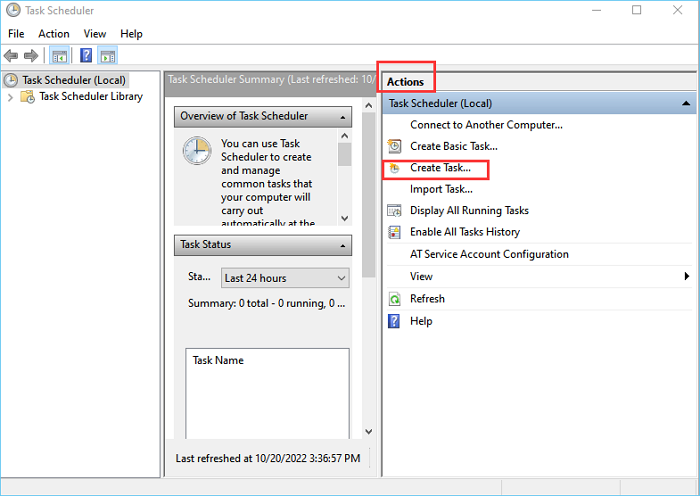
Step2. In the Task Scheduler window, click on the "Create Task" option under the "Task Scheduler (Local)" in the "Actions" tab.
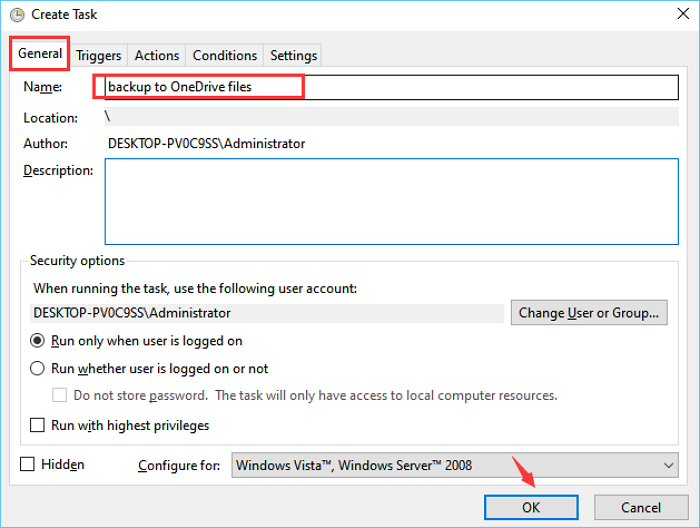
Step3. Under the General tab, give a name to the task.
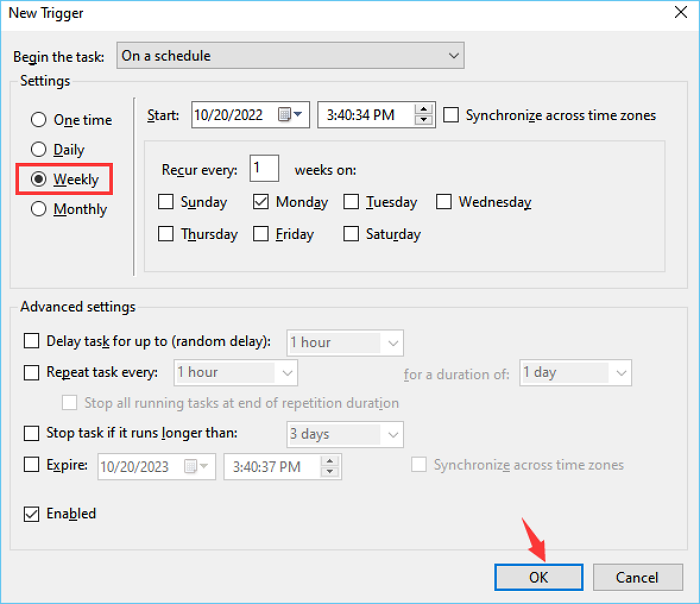
Step4. Go to the Triggers tab, click New, and set the scheduled backup.
Step5. To schedule a task to create a backup, check the "Weekly" option, select the desired day of the week for the backup, and click "OK" to return to the Create Task window, where you can view the detailed backup action.
Step6. Finally, click OK to start the weekly backup to OneDrive.
Tip 3: Use Windows File History(for Windows 11/10/8)
File History is a built-in Windows solution that allows you to schedule automatic file backups, making it a convenient option for Windows 11, 10, and 8 users.
You can't use OneDrive to directly back up the OneDrive app, but you can set a schedule to back up the folder OneDrive creates after installation, located at C:/user/your username, every week.
To back up your data, first, create a new folder under the OneDrive folder. This will allow you to store your backups securely and access them from anywhere.
Here's how:
Step 1. Set the properties by right-clicking the newly created folder.
Step 2. To complete the sharing process, click on the "Sharing" tab and select the "Sharing…" button.
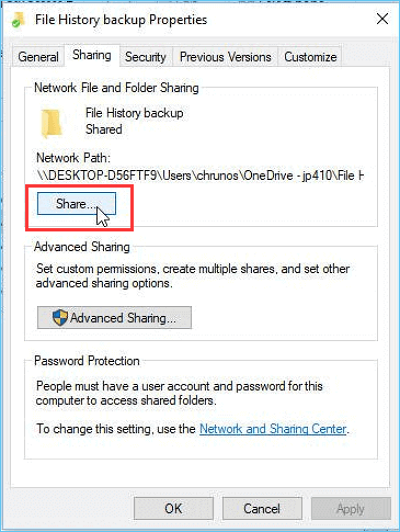
Step 3. To share a folder, first locate the folder you want to share and right-click on it to select the "Share" option. Then, locate the shared folder's network location, and remember it for later use.
To set a weekly schedule to backup your folder via File History, follow these steps:
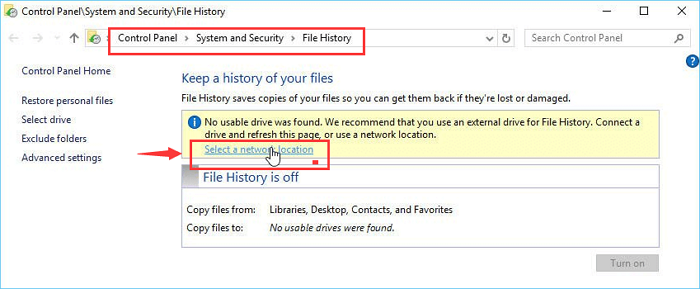
Step 1. Open File History by following the path: Control Panel - System and Security - File History.
Step 2. To add a network location, tap the "Select a network location" option, then tap "Add network location".
Step 3. The network location of your shared folder is the path to the folder on your network, such as \\ComputerName\SharedFolder or \\192.168.
Step 4. To schedule a backup frequency for the specified folder, select the desired interval (Daily, Weekly, or Monthly) from the "Run backup on" dropdown menu under the "Advanced settings" section. This will determine how often the backup will run.
Sum Up: A Thorough Comparison
To schedule a weekly backup to Microsoft OneDrive, you can use Task Schedule and File History, or opt for a simpler solution like Qiling Backup, which offers an intuitive interface and additional features like system/disk/partition backup and system image creation.
FAQ on Schedule A Weekly Backup to Microsoft OneDrive
1. Can I schedule backups to OneDrive?
You can schedule backups to OneDrive using one of three methods, and with Qiling Backup, it's even easier to do so, allowing you to automate the process with ease.
2. How do I create a backup schedule?
With Qiling Backup, you can schedule backups by clicking the Schedule button on the main interface, allowing you to choose from daily, weekly, monthly, yearly, or event-based options like system startup or shutdown.
3. How do I get my computer to automatically save to OneDrive?
OneDrive automatically saves files to OneDrive when you put data in its sync folder. You can also schedule backups for this folder using File History or Qiling Backup.
Related Articles
- 8 Best Portable Backup Software Examples in 2022
- Backup Data to Tape with Tape Backup Software
- Lenovo Backup Software Download for Windows 10 [2022 Overall]
- How to Backup a File with 3 Free Ways in Windows 11/10/8/7
- Transfer Windows 7, 8, 10, 11 to New Hard Drive without CD [3 FREE Ways]
Want to transfer Windows 7 to new hard drive without CD instead of re-purchasing license? In this post I'll introduce the best ways to clone OS to new drive (HDD/SSD), most of them are completely free. - How to Turn on System Restore in Windows 7
To protect your computer well, you can turn on System Restore in Windows 7. Besides, you can create an image backup to get supplementary protection for your computer.