Windows 11 Ruined My Computer! Slows Down and Crashes a Lot
Quick Navigation:
| Workable Solutions | Step-by-step Troubleshooting |
|---|---|
| Problems After Upgrading | Computer starts slowly; unresponsive hard drive; application crashes; memory consumption...Full steps |
| Issues Can Be Fixed | Disk and memory consumption; incompatible software; update video, audio and network drivers...Full steps |
| Roll Back to Windows 10 |
1. Roll Back From Windows 11 to 10 2. A Clean Install of Windows 10...Full steps |
Problems after upgrading to Windows 11
Here are some common issues users experience after upgrading to Windows 11 from Windows 10:
- Windows 11's new features can cause a computer to start slower if the system requirements aren't met.
- Windows 11 users have experienced issues with their screen getting stuck when switching between hard drives, which is largely attributed to the operating system's lack of support for certain types of memory.
- After upgrading to Windows 11, some applications may become unresponsive, likely due to incompatibility with the new operating system.
- The Black/Blue Screen of Death is a legacy bug in the Windows operating system that still exists in Windows 11.
- The Windows 11 runtime requires sufficient main memory to run smoothly, and low memory can lead to high disk usage.
- Users who upgraded to Windows 11 have reported issues with overheating, which can occur when the computer is used for an extended period.
Upgrading to Windows 11 can cause several issues, including problems with Wi-Fi connectivity, Bluetooth connectivity, and Windows Update, as well as issues with the Start menu, taskbar, and File Explorer. Additionally, some users may experience problems with their computer's performance, such as slow startup times and freezing or crashing. These issues can potentially damage your computer if not addressed promptly.
What Windows 11 issues can be fixed?
The last section helps you understand Windows 11 upgrade issues that can break your computer. Now, let's address common problems, such as how to solve them.
- If you're upgrading to Windows 11, make sure you have enough free disk space and memory, so consider upgrading your storage and memory to a sufficient amount.
- Updating stuck or crashed software can resolve issues, as users have successfully done by upgrading to the latest version.
- If you're experiencing audio, video, or internet issues after upgrading to Windows 11, the solution is to update your video, audio, and network drivers. This is because driver updates are necessary after upgrading to Windows 11.
If your computer is experiencing issues after upgrading to Windows 11, try troubleshooting solutions such as running the System File Checker, checking for corrupted system files, and updating drivers to resolve the problems. Additionally, running the DISM tool, checking for malware, and resetting Windows 11 to its default settings can also help resolve issues.
Have you considered rolling back Windows 11 to Windows 10?
If Windows 11 is running slowly or experiencing issues, the first step should be to resolve these problems to ensure smooth operation. If these solutions do not work, it may still be possible to repair the computer.
To resolve the issue, you can roll back your Windows 11 installation to Windows 10. This will restore your computer's functionality and allow you to use Windows 11 without any problems.
Full steps to roll back Windows 11 to Windows 10:
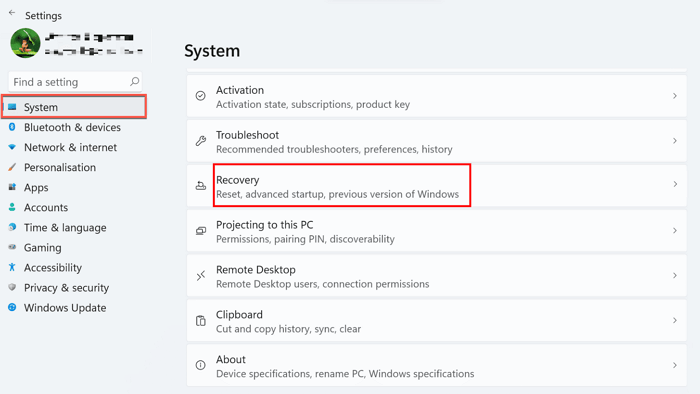
Step 1: In Windows 11, go to Settings > System > Recovery.
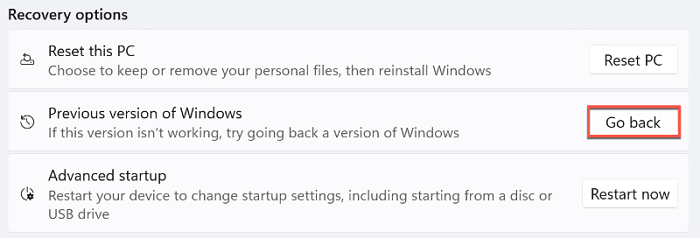
Step 2: To return to the previous version of Windows settings, select the "Return" option.
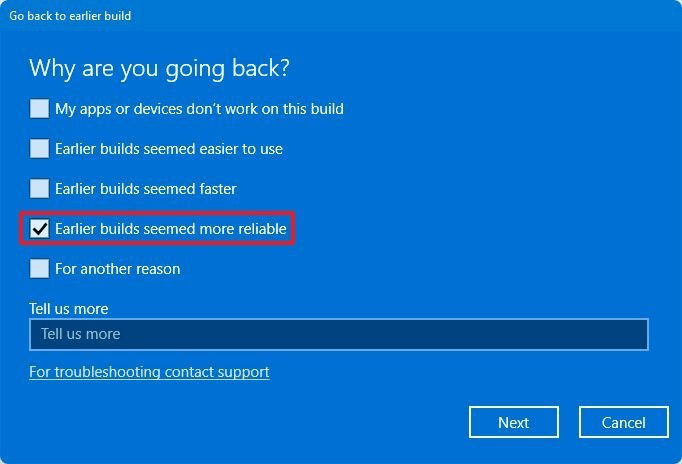
Step 3: Select the reason for returning to Windows 10 and click the Next button.
After selecting a reason, proceed with the default options, and your system will reboot, rolling back from Windows 11 to Windows 10.
Ultimate Guide: Clean Install Windows 10 to Remove Windows 11 from Your Computer
If none of the solutions worked for you and your system is still broken by the Windows 11 upgrade, it's time to do a clean install of Windows 10.
A clean install of Windows 10 will erase all data on your system drive and install a fresh copy, resulting in a smooth-running system free from issues.
*Required backup before a clean install of Windows 10 to remove Windows 11
Since a fresh install of Windows 10 will delete all system data, it's always a good idea to create a backup of your data before doing so. This ensures that your important files and settings are safe.
Qiling Backup is the best free backup software to create system drive backups, allowing you to back up all system drive data during a clean install of Windows 10.
Step 1.Launch Qiling Backup and choose "System Backup" on the Backup and recovery page.

Step 2. The system partition will be automatically selected, leaving you to choose the location.

Step 3.3 options are available for saving backup files: Local Drive, Cloud, and NAS, with the option to connect an external hard drive for added security.

Step 4.You can customize the settings in "Options" at the left bottom, click "Proceed", and the process will begin.
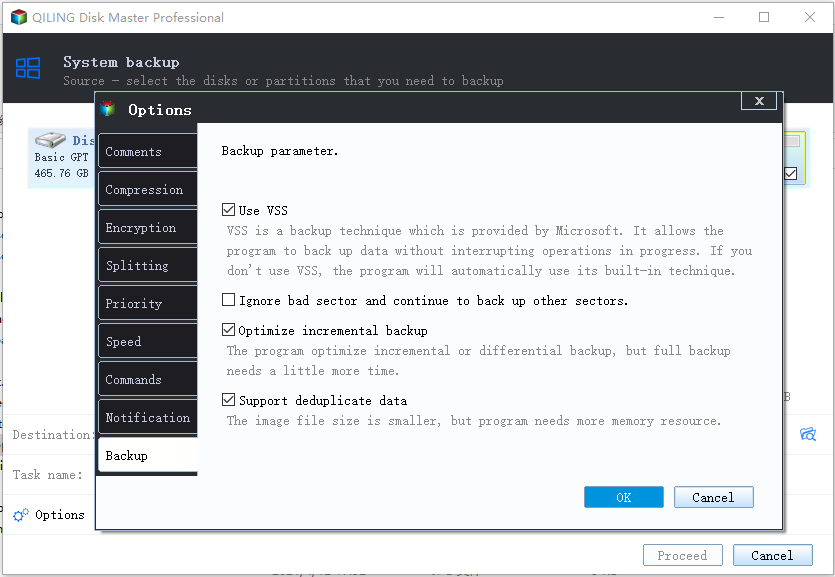
After finishing the backup process, you can view the backup status, restore, access, or remove the backup by right-clicking on the backup task on the left.
Steps for a clean install of Windows 10
Step 1: To ensure your computer and system drives are backed up, use the Qiling Backup software to create a backup of your computer and system drives.
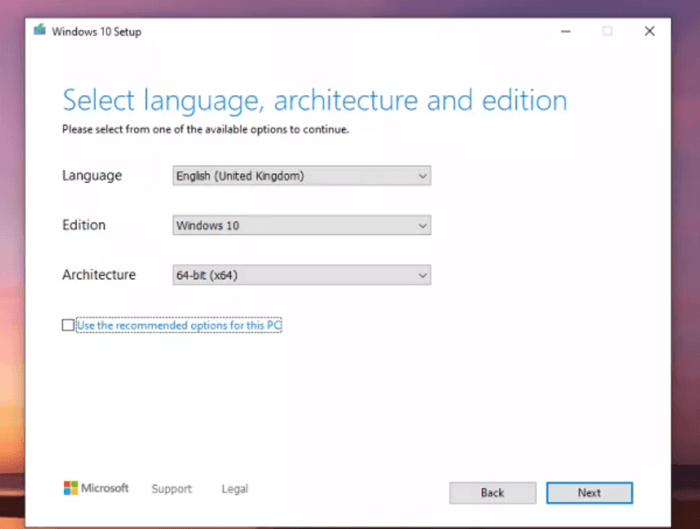
Step 2: Download the Windows 10 image from the official Microsoft website.
To create a bootable USB for Windows 10, download the official Windows 10 Media Creation Tool provided by Microsoft, which helps you create bootable media with the Windows 10 setup.

Step 3: To create a bootable flash drive to help you do a clean install of Windows 10, you can use the Microsoft Media Creation Tool. This tool allows you to create a bootable USB drive that can be used to install Windows 10 on a PC.
You can do this with the help of media creation tools. After launching the Media Creation Tool, select Create installation media for another PC.
Step 4: Connect a bootable USB drive to your computer and begin the Windows 10 installation process from it.
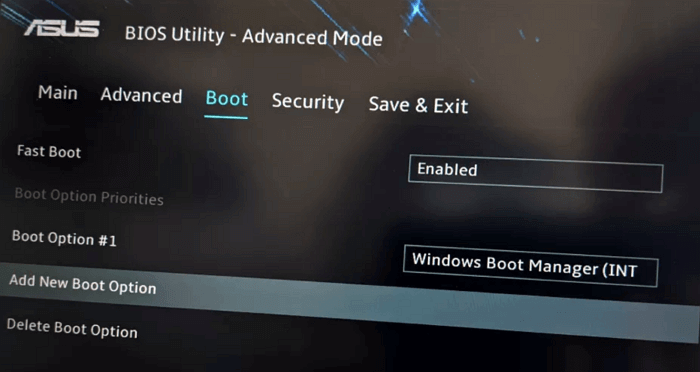
To start using Windows, ensure the USB device is set as the bootable media in the BIOS setup. Once done, your computer will display the Windows setup screen at startup.
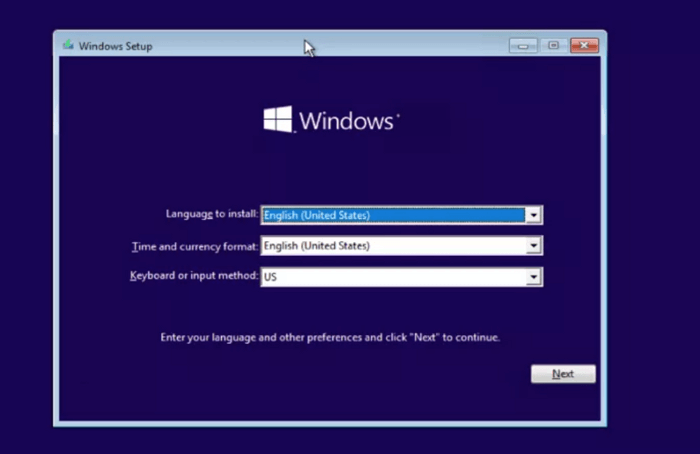
After that, proceed with default settings, and it will take some time to install Windows 10. Once the setup is complete, you will have a clean copy of your Windows 10 on your computer.
Do Right Things if Windows 11 Ruined Your Computer
Windows 11 offers improved UI and features over Windows 10, but it requires specific hardware to run smoothly.
Users who have upgraded to Windows 11 have encountered issues with their computers. These problems can be resolved by upgrading the hardware requirements of the computer to meet the minimum specifications for Windows 11. This includes increasing the RAM, processor speed, and storage capacity to ensure a smooth and stable operating system.
If your computer is no longer working properly, you can either roll back to Windows 10 or do a clean install of Windows 10, but keep in mind that a clean install will erase all data on your system drives.
To avoid losing data on your system drive, create a backup using the Qiling Backup software, which is the most recommended method for backing up system drive data.
Related Articles
- Expert Picks: Best Virus Protection for PC 2022 (Free & Paid)
- Bootable USB Drive Not Showing Up or Recognized in Windows 11/10/8/7
- How to Open Outlook Backup Files in PST Format: Step-by-Step Guide
- Top 7 Free Cloud Storage Service for Backup
- What Is the Easiest Way to Save Backup Files to Two or More External Hard Drives at the Same Time
To ensure the security of important data, it is a good way to save its backup to multiple hard disks. So what is the easiest way to save backup files to two or more external hard drives at the same time? You can find the answer in this short post. - What Is the Recovery Key for Lenovo Laptop?
What Is the Recovery Key for Lenovo Laptop? What can it do for a Lenovo laptop? Can it solve the system problem easily? This short post is going to tell you all these answers.