How to Back Up Windows Server 2019 Files in 2 Ways [Proven Solutions]
What Is the Best Way to Back Up Windows Server 2019
Backing up Windows Server 2019 is essential for protecting your business data against unexpected failures, accidental deletions, and system crashes. A reliable backup strategy ensures that you can quickly restore your files and minimize downtime when issues arise.
Windows Server 2019 is a powerful Microsoft operating system designed for enterprise environments, with features that differ from consumer versions. It includes advanced capabilities such as Active Directory, DHCP, and Print Services, making it a critical component of many business infrastructures.
What Is the Best Way to Backup Windows Server 2019
To prevent unexpected data losses or accidents, it's a good idea to back up important files and folders. Windows Server is designed for businesses and has some key differences from consumer versions.
Windows Server is a Microsoft operating system primarily designed for server use, with various versions available, each with a corresponding consumer version.
While Windows and Windows Server share the same code base, they perform similar functions, but with some notable differences. Specifically, Windows Server offers additional features such as Active Directory, DHCP, and Print Services, which are not available in standard Windows.
Windows Server Backup is a built-in feature that allows users to back up and recover files and folders on a Windows Server system. It can back up to external devices or even a complete server. This feature offers various backup options, including backing up specific files and folders, and backing up the entire server.
Back-Up Windows Server 2019 via Data Backup Software
To back up Windows Server 2019, consider using reliable server backup software, such as Qiling Backup Enterprise, which is an excellent solution for servers and businesses, offering a simple and powerful tool that can be used for both servers and desktops.
Choosing Qiling Backup Enterprise for business-level protection is a smart decision, as it offers access to offsite and local backups, as well as automatic backup scheduling for Windows Servers.
You can try the product for free before buying it to avoid any financial risk.
Highlights:
- Qiling Backup Enterprise is a tool designed to protect enterprises of any environment and size, providing security for servers, PCs, and SQL databases alike.
- It offers fast and easy-to-use steps for data recovery from various issues.
- Restoring backups is a relatively easy process, and if any issues arise, the tech support team is available to help.
- Worried about restoring your system if the operating system is no longer viable? Qiling Backup Enterprise's bare-metal recovery mode is here to help, allowing for a system restore with a significantly reduced application environment and redeployment process.
- With Qiling Backup Advanced Server, you can create effective backup strategies for different database environments to protect data.
- The solution is offered at a competitive price without sacrificing quality.
- It has multiple packages which businesses can choose from.
Follow the steps below to back up your Windows Server 2019 files using Qiling Backup Enterprise:
Step 1. Open Qiling Backup Enterprise, click on "Backup and recovery", and set a new backup.
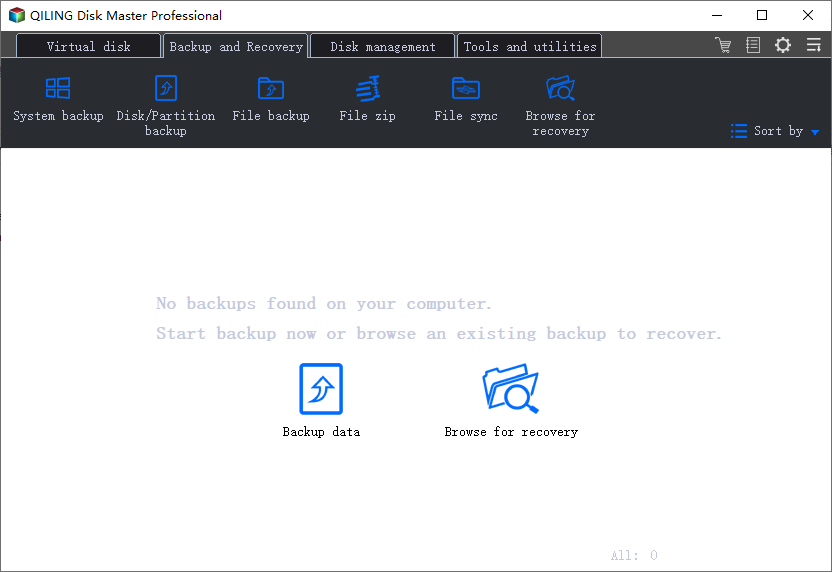
Step 2. To back up specific files, choose "File backup" as the target among the options at the top, and then select the files you want to back up.
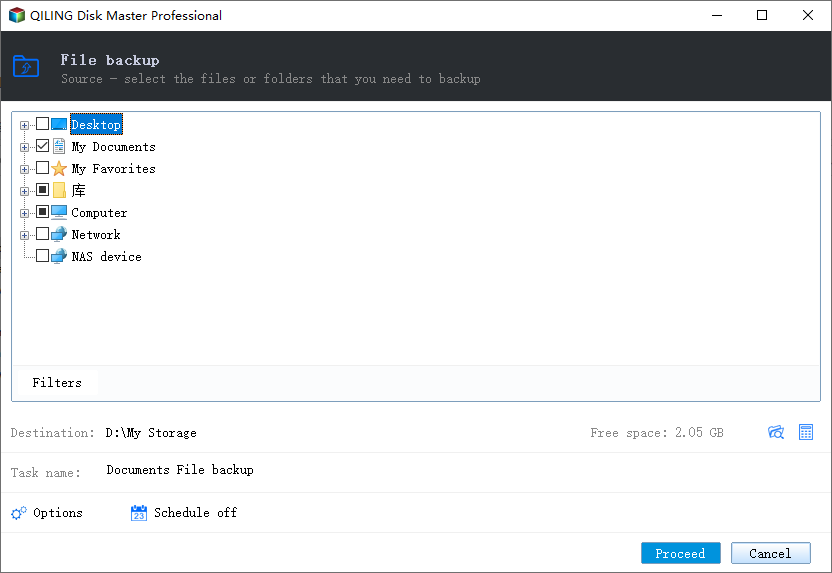
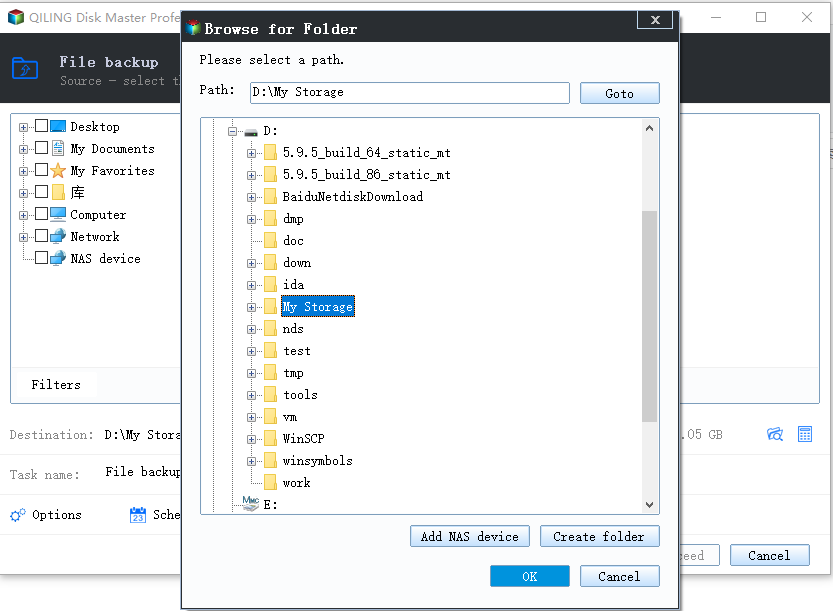
Step 3. Select the desired destination to store the backup. This could be a local drive, network location, or cloud storage service.
Step 4. To customize your backup scheme, click on "Schedule: Off" and select "New" under the "Schedule" catalog. This will allow you to set up a new backup schedule. You can also access "Backup cleanup" and "Advanced Settings" from this menu.
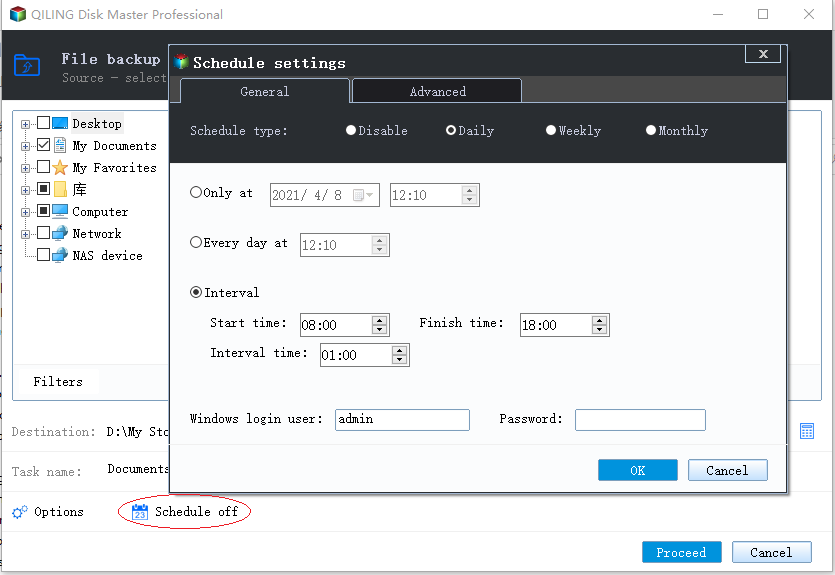
Then set the backup frequency based on your needs.
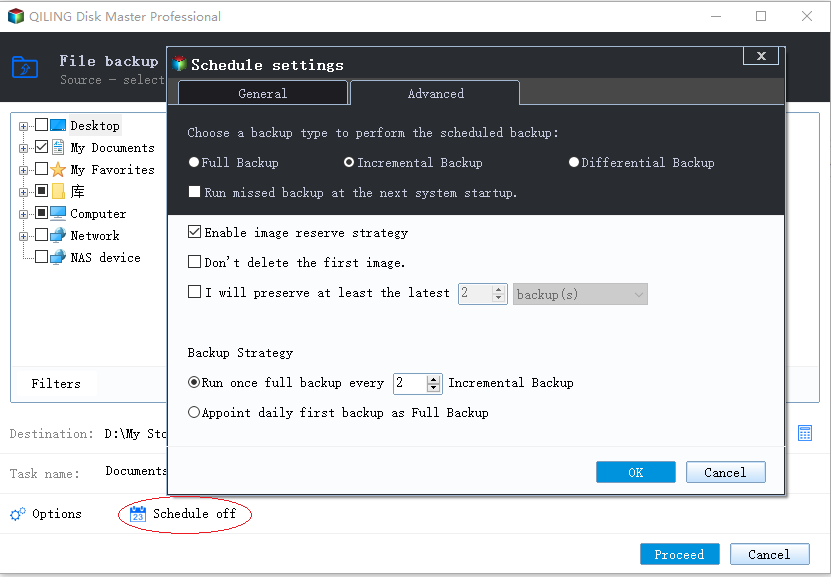
Step 5. Click "Backup options" on the bottom-left corner of the interface.
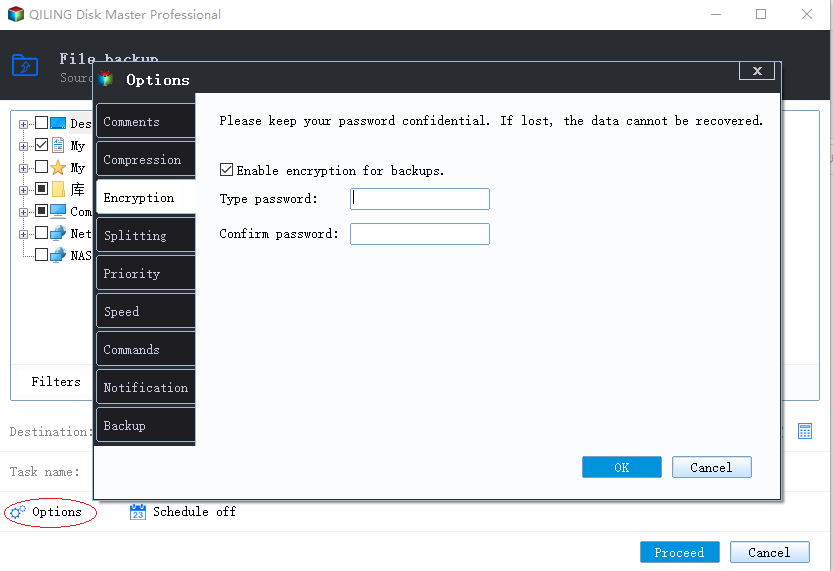
Here, you can customize various settings such as performance, encryption, and email notifications to suit your needs. Once you're done, click OK to return to the main interface.
Step 6. After completing all settings, click the "Proceed" button to initiate the file backup process.
Back-Up Files with Windows Server Backup 2019
To back up files, you can use Windows Server Backup 2019, but it requires installation. This can be done using PowerShell or Server Manager, where you need to install it as a Windows Feature.
Follow the steps below to back up files using Windows Server Backup 2019:
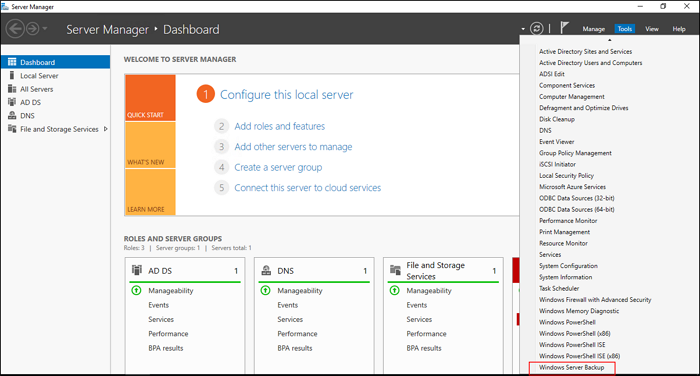
Step 1. To access Windows Server Backup, go to Server Manager, click on the "Tools" option on the upper-right, and then select "Windows Server Backup".
Step 2. To back up your data, select the "Local Backup" option and click on "Backup Once" under the "Action" tab on the right side, which will direct you to the Backup options page.
Step 3. To continue, select "Different" options, then press Next. Next, choose "Backup Configuration Page" and press "Custom", followed by selecting "Next".
Step 4. To start the backup process, go to the Select Items for Backup page and press the "Add" items option to select the volume you want to back up, then tap "Next".
Step 5. Afterward, you will go to the Specify destination type page. Here, select the "Remote" shared folder or Local drives and press the "Next" option.
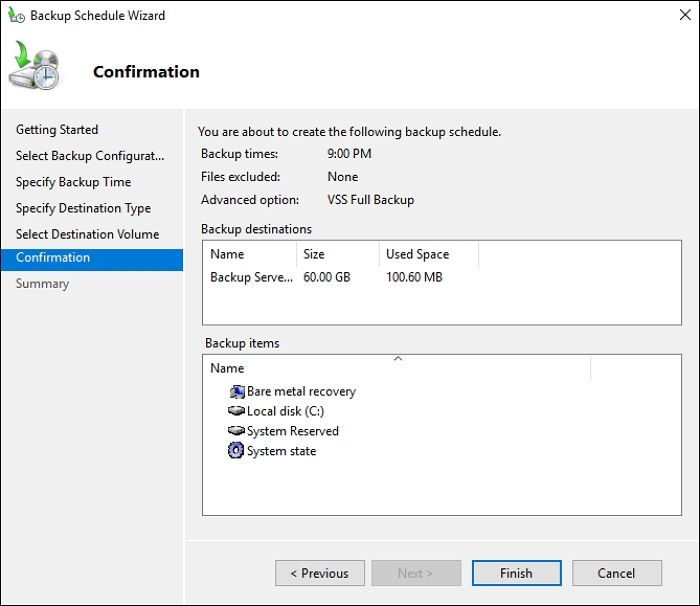
Step 6. After that, you'll see the Confirmation screen. Press "Confirmation" and then click "Backup" to proceed.
Step 7. To exit the Backup Once Wizard, tap on Close and then exit the Windows Server Backup.
Conclusion
Windows Server is the business edition that offers many beneficial features for enterprises. However, backing up the server is crucial to prevent data loss. In that case, there are two different methods you can do so.
To recover Windows Server data, you can either use the built-in Windows Server Backup or opt for reliable data recovery software. A recommended option is the Qiling Backup Enterprise, which allows users to back up Windows Server files and OS. Don't wait – get Qiling Backup Enterprise today!
Windows Server 2019 Backup FAQs
Below are some frequently asked questions about Windows Server 2019 backup to help you get more information.
1. How to clean old backups in windows server 2019?
To clean old backups in Windows Server 2019, open Command Prompt as an administrator, type "wbadmin delete systemstatebackup -keepVersions:x" (replacing x with the desired number of backups to keep), and press Enter. This will delete the old backups. Then, type "exit" and press Enter to exit Command Prompt.
2. Does Windows Server 2019 have backup software?
Windows Server 2019 uses Windows Server Backup as its built-in backup software, requiring users to install it to perform scheduled and ad-hoc backups.
3. How do I schedule automatic backups in Windows Server 2019?
To schedule automatic backups in Windows Server 2019, go to Windows Server Backup, select Backup Schedule, and choose Full server or Custom. Press Next, then in the Specify Backup Time section, select More than once a day and set the time and frequency.
4. What is the optimal Windows Server 2019 online backup solution?
There are several optimal Windows Server 2019 online backup solutions, with choices depending on additional software integration and network setup. If you need online storage, you can consider OneDrive or other paid backup tools, but the Windows backup feature is also a viable option.
Related Articles
- Restore System from Bootable CD/Pre-OS Under Windows
- Windows Server 2012 Backup to NAS: A Simple and Efficient Way
- How to Create Backup Schedule in SQL Server 2008 [Ultimate Guide 2022]
- Open Source Backup Software for Windows Server 2003(2022 New List)
- [Full Guide] How to Back Up Programs for Windows 11
Don't let computer viruses or corrupted Windows files ruin your important data. Start your backup program for Windows 11 today to ensure your files are safe and secure. - Backup Solutions for Small and Mid-sized Companies of 2022
This blog provides top-notch backup solutions tailored for small and mid-sized businesses, ensuring their business data is safeguarded with effective backup strategies.
Products
Articles & Tutorials
- Data Recovery
- Data Backup
- File Recovery
- File Backup
- System Backup and Restore
- Disk and Partition Clone
- Technical articles
- Mobile articles
- Disk Master Help
- Windows Data Recovery Tutorials
- Windows Secure Delete Tutorials
- Windows Partition Management Tutorials
- Windows File Backup and Restore Tutorials
- Windows System Backup and Restore Tutorials
- Windows Disk Backup and Restore Tutorials
- Windows Clone Tutorials