PC Turns On, but No Display or Power to Keyword [Fixed]
The PC turning on but having no display or power to the keyboard is a common issue affecting many Windows users, with numerous reports and complaints on tech forums. It's time to address this issue.
A user wants to find the average rating of a product on a website. They input the product ID into a search bar, and the website returns a list of ratings for that product.
"Hi Everyone
I've recently upgraded my PC for better efficiency, I've changed everything except the PSU, SSD, and Hard drive. During the last upgrade, a friend was there to guide me, but this time I decided to do it on my own.
Your system is turning on, but there's no display, LED lights, or keyboard/mouse functionality. This suggests a potential issue with the power supply or a short circuit in the system. Have you tried checking the power supply, CPU, and motherboard for any signs of damage or loose connections? Additionally, have you tried booting with a minimal configuration (e.g., just the CPU, motherboard, and power supply) to isolate the problem?
Please tell me how to resolve this issue. As I feel stuck and frustrated. "
There can be several reasons why your display goes blank, including frayed or damaged wiring, wrongly configured display and BIOS settings, dysfunctional RAM, or a flaw in the power supply unit.
📖You may also like:
A common issue where the computer screen freezes while the PC continues to run in the background, often accompanied by a black screen or no signal to the monitor. This can be caused by various factors such as driver conflicts, overheating, or software glitches.
Fix the PC Turns On, but No Display or Power to the Keyboard
Whenever you experience a "PC turning but no display" issue, you can try any of these 8 fixes: checking for loose connections, updating graphics drivers, running a System File Checker, running a DISM scan, checking for malware, running a System Restore, checking for loose or damaged display cables, and resetting the display settings.
- Fix 1: Force Restart your computer
- Fix 2: Check your LCD/Monitor Screen
- Fix 3: Reconnect LCD/Monitor to PC
- Fix 4: Disconnect Your Peripherals
- Fix 5: Reinstall your RAM (Random Access Memory)
- Fix 6: Reset BIOS Settings to Default
- Fix 7: Check and Repair Corrupt Files
- Fix 8: Update your Display Adapter Driver
Fix 1: Force Restart your computer
If your PC turns black while gaming or doing other activities, force a restart to reset program files and remove minor errors.
Step 1: Press and Hold the Power Button for 10 seconds. Your System will shut down.
Step 2: Now turn on your PC and do it 3-4 times.
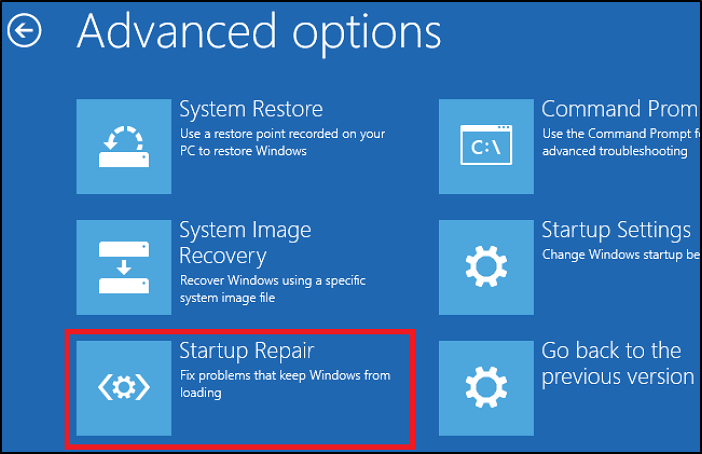
Step 3: The "Windows startup Repair" will automatically run, allowing it to resolve the issue.
Fix 2: Check your LCD/Monitor Screen
The Windows Screen can go black due to a variety of reasons, including software issues, hardware problems, or LCD/Monitor screen issues. It's worth checking the monitor to ensure it's functioning properly as it could be the cause of the problem.
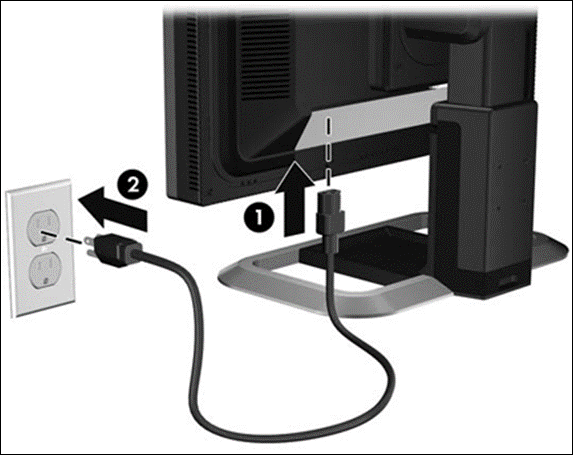
Step 1: The first step is to check if the monitor's power light is turned on. This is a simple yet crucial check to ensure the monitor is receiving power. If the power light is off, it could indicate a power issue, and troubleshooting should begin with the power source.
Step 2: Unplug the monitor's adapter, wait for a few seconds, and then plug it back in to restart it.
Step 3: If the monitor doesn't start, you need to repair it, and if it starts normally, the monitor is clear.
Also Read: Computer Won't Boot? Causes and Fixes
Fix 3: Reconnect LCD/Monitor to PC
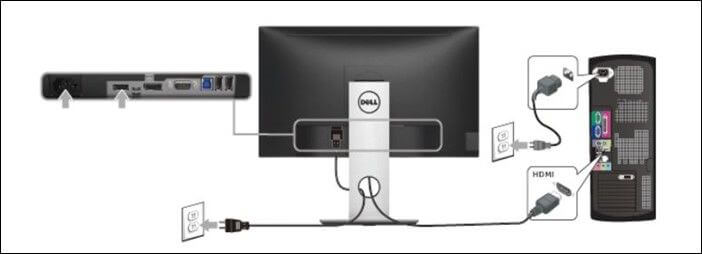
A poor connection between your monitor and PC can cause display issues, possibly due to a faulty or damaged cable. Try reattaching the monitor to your PC to troubleshoot the problem.
Step 1: Press and hold the power button until your system shuts down.
Step 2: Disconnect the graphic card, connect your display to the main computer, and check its condition.
Step 3: Inspect all monitor and main system ports for any signs of physical damage, corrosion, or wear and tear. Check for loose connections, bent pins, or any other issues that could be affecting system performance or data integrity. Ensure all ports are securely connected and functioning correctly to prevent any potential hardware or software issues.
Step 4: Reconnect all these accessories to see their functioning.
Step 5: If all connections are normal, boot the system to see if it works normally.
Fix 4: Disconnect Your Peripherals
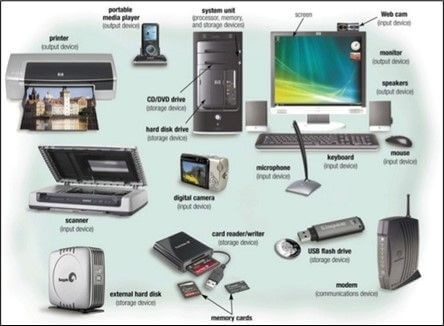
If you're experiencing issues with your system's display, try removing peripherals like a mouse, keyboard, or printer, and see if the problem persists. These peripherals can sometimes interfere with the display mechanism, so disconnecting them may resolve the issue.
Step 1: Press and hold the power button until the system shuts down.
Step 2: Detach all the peripherals.
Step 3: If the system restarts properly, it means the problem is resolved, but if it doesn't, you should proceed to the next troubleshooting step.
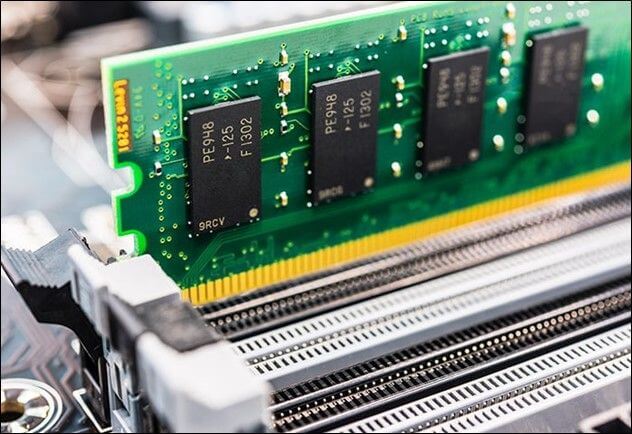
Fix 5: Reinstall your RAM (Random Access Memory)
A poor connection between the RAM and the motherboard can cause the display to sleep, and reinstalling the RAM can resolve the issue.
Step 1: Press and hold the power button to turn off your PC.
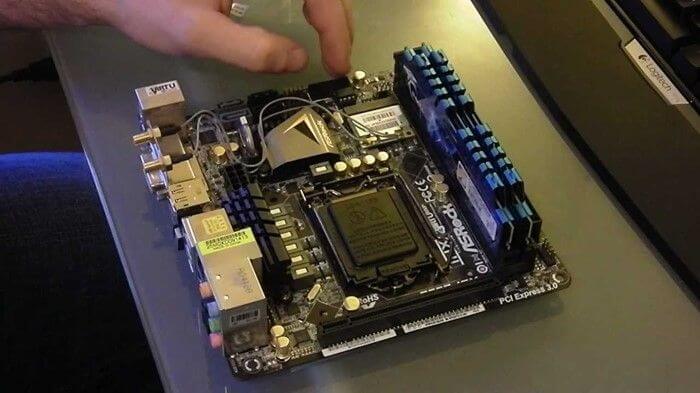
Step 2: Detach the power cable from the PC, then open the PC casing.
Step 3: To remove the RAM from the memory slot of the main motherboard, you would typically need to locate the RAM slots on the motherboard, which are usually found near the CPU. You would then need to gently push the clips on the sides of the RAM module to release it from its slot, and carefully pull the RAM out of the slot. Be sure to handle the RAM by the edges to avoid touching the gold contacts, which can be prone to static electricity.
Step 4: Check the condition of the item. If it's normal, put it back in the same slot.
Step 5: To troubleshoot the issue, try restarting your system. This will help determine if the problem is hardware or software related.
Fix 6: Reset BIOS Settings to Default
The BIOS program is responsible for starting the system when it's powered on, but any defects or damage to its files can disrupt the computer's start and display features. To prevent this issue, it's recommended to reset the BIOS program to its default settings.
Step 1: To shut down your system, press and hold the power button. This will initiate the shutdown process.
Step 2: To safely shut down a PC, unplug the main power cable and then open the main casing.
Step 3: Remove the CMOS battery from your motherboard using a screwdriver or your nails.
Step 4: Wait for 5 minutes. Then reinstall the battery in the motherboard slot.
Step 5: Connect the power cable and turn on the system to see if the problem persists.
Fix 7: Check and Repair Corrupt Files
Windows has a built-in procedure to detect and repair corrupt files that can cause the display to stop working.
Step 1: Go to the search bar and type "CMD"
Step 2: Now right-click CMD.exe and choose "Run as Administrator."
Step 3: Go to UAC Prompt, select "Yes."
Step 4: Write "SFC /scannow" in the command prompt window and press Enter.
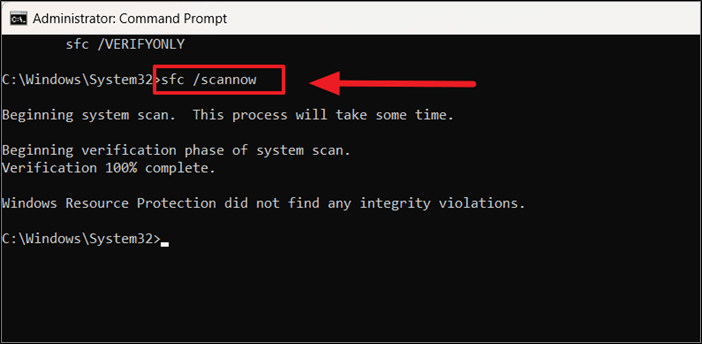
Step 5: The system file checker utility checks all files and also repairs corrupted files that hinder the computer's startup operations.
Fix 8: Update your Display Adapter Driver
A display driver is a software component that controls the display of visual graphics on a computer system. An outdated or corrupted display driver can cause display issues, and updating or rolling back the driver can resolve the problem.
Step 1: Write "Device Manager" in the search box and launch it.
Step 2: In the device manager, select "Display adapters."
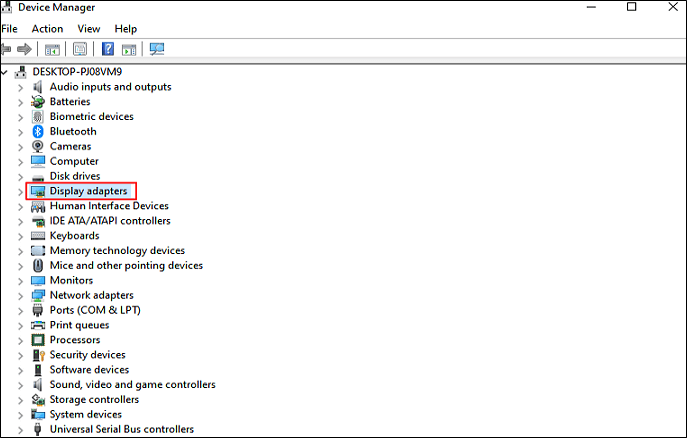
Step 3: Right-click on the given adapter to see options.
Step 4: Choose "Update Driver."
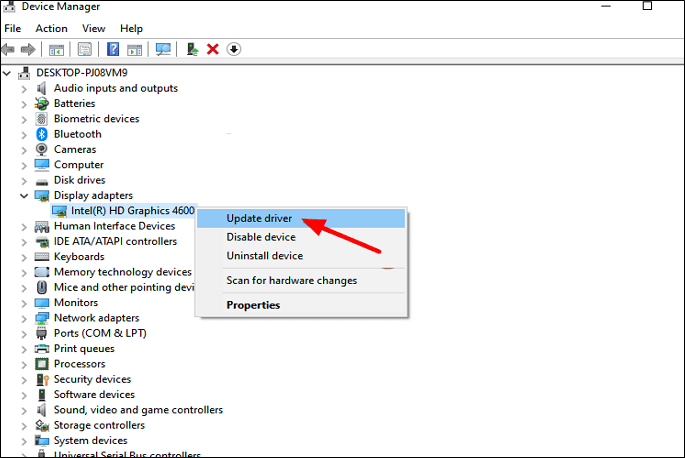
Step 5: Windows will automatically search for and update the display adapter for you.
Important! Backup Your PC Regularly to Prevent Data Loss
We store our professional and personal data on our PCs, making them vulnerable to software and hardware issues that put our data at risk. A case in point is when a PC turns on but has no display or power to the keyboard, highlighting the potential for data loss. This is a concern for anyone who has invested years of hard work into their digital files, and losing them would be a devastating blow.
To avoid data loss, back up your PC regularly using the Qiling Disk Master tool, which allows for efficient and quick data storage by creating backups for disk/partition, files, and the entire operating system image. Additionally, Ease US offers cloud backup to access data from anywhere and provides disk imaging and instant recovery options.
The software serves over 20 million users globally, a result of its high-quality and excellent user experience. It offers three versions: Free, Home, and Technician, which can be accessed through the official Qiling website.
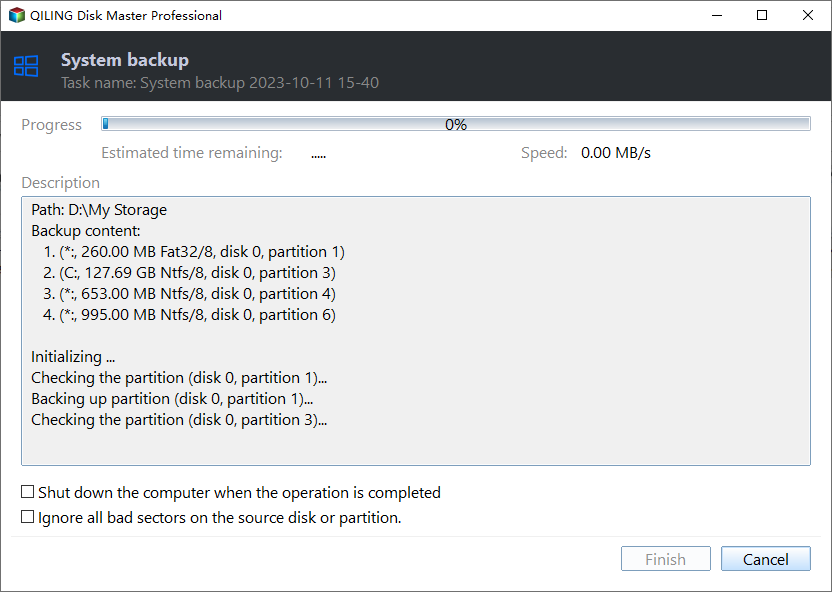
Use this powerful tool to build a system image so that you can recover your operating system if something goes wrong. This will help you restore your system to a previous state in case of a hardware failure or software corruption, ensuring minimal downtime and data loss.
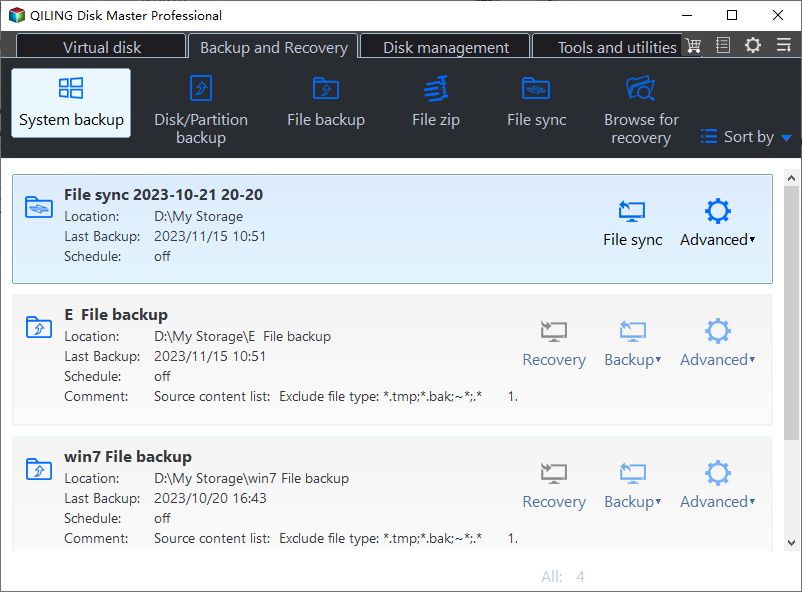
Step 1. On the main page, click "Backup and recovery" page.

Step 2. Among the four available categories, click System backup.
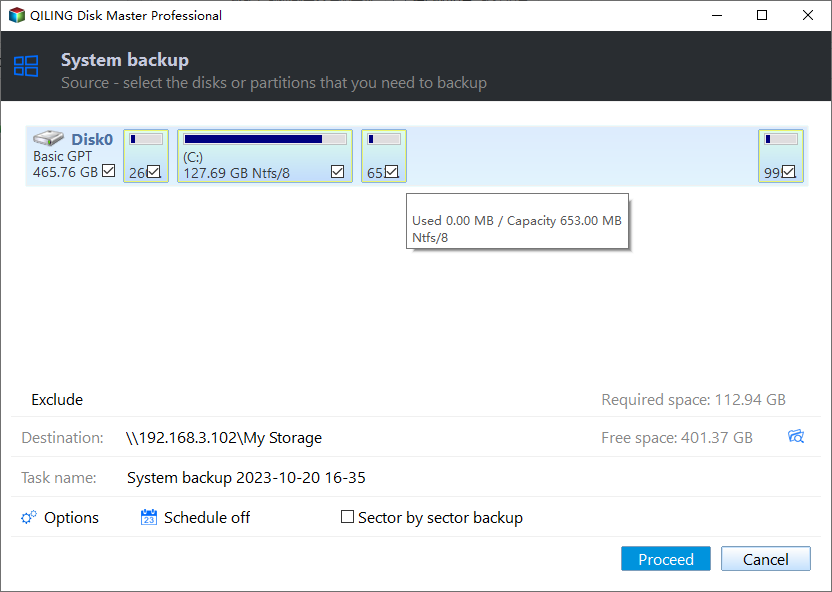
Step 3. Qiling Disk Master will automatically select your system partition, so you only need to choose a backup destination.

Step 4. You can save the backup file to either your local drive or a network-attached storage (NAS) device, offering flexibility in storage options.
Step 5. After completing the backup process, you can check the backup status, recover, open, or delete the backup by right-clicking the backup task on the left.
The Final Words
If your PC turns on with no display or power to keyboard, it could be due to a faulty power supply, a malfunctioning graphics card, or a problem with the motherboard. In such cases, the system might not be able to provide a stable power supply to the components, leading to the observed behavior. To resolve this issue, you may need to troubleshoot the system, check for loose connections, and consider replacing the faulty component if necessary. It's also a good idea to run a system diagnostic test to identify any hardware issues.
To resolve the issue, we recommend using the Qiling Disk Master tool for efficient and secure data backup and recovery, which can prevent potential data loss. If you're experiencing issues, consider the following 8 fixes, each highlighted step-by-step, to help you resolve the problem and get rid of data loss issues once and for all.
FAQs
1. Why won't my monitor turn on but has power?
If your TV's screen is not working properly, there are two possible reasons: damaged cables or an internal problem with the display screen. Check the condition of the cables and connectors, and replace them if they're damaged. If the issue persists, take your TV to a repair shop.
2. Why does my PC do nothing when I press the power button?
The PC may not turn on due to insufficient power supply or damaged system files. To troubleshoot, check the main adapter, connection ports, and power cables for any issues. If it's a software problem, you can try resetting BIOS settings or performing system repairs.
3. How can I check if my PSU is faulty?
To determine if your PSU (power supply unit) is faulty, follow this simple procedure: First, unplug the power cord from the PSU and check if the issue persists. If it does, try swapping the PSU with another one to see if the problem goes away.
- Turn off your PC
- Detach all wires from the power supply unit (PSU) except for the main AC cable and the 24-pin cable, which are typically used for power and communication with the motherboard.
- Look for pin 16 and pin 17
- To fix the broken USB ports, you can try using a paper clip to create a makeshift connector. Bend the paper clip into a shape that allows the ends to be inserted into the broken USB ports and the other end of the cable.
- Turn on PSU and see its functioning.
- If the fan on your computer's power supply unit (PSU) is working normally, it's a good sign that the PSU is functioning properly. However, if the fan is not spinning or is making unusual noises, it could indicate a problem with the PSU, suggesting that it may be faulty and in need of replacement.
4. How to force restart the PC?
To restart your PC, simply press Ctrl + Alt + Delete on your keyboard, which will display multiple screen options. From there, choose the power icon and select "restart" to force the PC to restart. This is the easiest way to restart your PC.
Related Articles
- Fixed: Copy/Cut/Paste Not Working in Windows 10/8/7
- PowerShell Get Disk Space on Windows 10/11 [Full Tutorial]
- How to Turn Off Xbox Controller on PC
- Boot From USB HP Laptop | Everything You Need to Know
- Blackmagic Disk Speed Test Alternative for Windows [Top 5]
If you're looking for alternatives to Blackmagic disk speed test, this blog post explores the top 5 options, allowing you to try new speed testing software for more reliable and accurate results. - Boot From USB HP Laptop | Everything You Need to Know
To boot from a USB on an HP laptop, follow these steps. First, ensure the USB drive is bootable and contains the operating system you want to install. Next, create a bootable USB drive using a tool like Rufus or the HP USB Recovery Creator.