Time Machine Not Working on Mac: Possible Causes and Proven Solutions
- How to Recover Data When Time Machine Not Working
- 3 Quick Solutions to Fix Time Machine Not Working
- Fix Time Machine Not Working on Preparing Backup [2 Fixes]
- Fix Time Machine Not Working in Backing Up [2 Fixes]
- 2 Advanced Solutions to Fix Time Machine Not Working
- Time Machine Not Working: Possible Issues
Mac Time Machine is a dependable backup system that provides automatic backups and simple data recovery for Mac users. However, there are several situations in which Time Machine fails to work as expected, leading to user frustration and potentially lost data.

This article will discuss the most frequent issues with the Time Machine and provide tried and true techniques for fixing the common problem of Time Machine not working.
How to Recover Data When Time Machine Not Working
If Time Machine fails to create a backup of your critical files, you can use Deep Data Recovery for Mac to recover your lost data. This is particularly important because losing Time Machine backups can result in permanent data loss.
This robust and trustworthy data recovery program can recover lost data from any storage medium, including Time Machine backups, and even recover Time Machine backups themselves. It uses advanced scanning techniques to successfully find and recover your lost data.
To restore your Mac from Time Machine, follow these steps: Connect your Mac to the Time Machine backup drive, then restart your Mac and immediately hold down the power button until it shuts off. Next, press the power button again to turn it back on and hold down the 'r' key until the Apple logo appears.
Step 1. Select the drive to be scanned
In the main Deep Data Recovery window, select the drive you need to recover lost/deleted files from, and click the "Search for lost files" button.
Note: Before attempting data recovery, it's recommended to create a backup of your Mac using the "Disk Backup" feature to prevent further data loss. Once the backup is created, the software can then recover data from the backup, allowing your computer to be used for new data again.

Step 2. Select your lost data/files
Deep Data Recovery for Mac scans the selected disk volume and displays the scanning results, allowing users to sort and find specific files.

Step 3. Recover lost/deleted data
After finding the desired files, preview them and then click "Recover" to initiate the process of recovering your deleted or lost Mac files.

If you've lost information, you can use Deep Data Recovery for Mac to recover it. Save the restored files in a secure location to avoid further data loss.
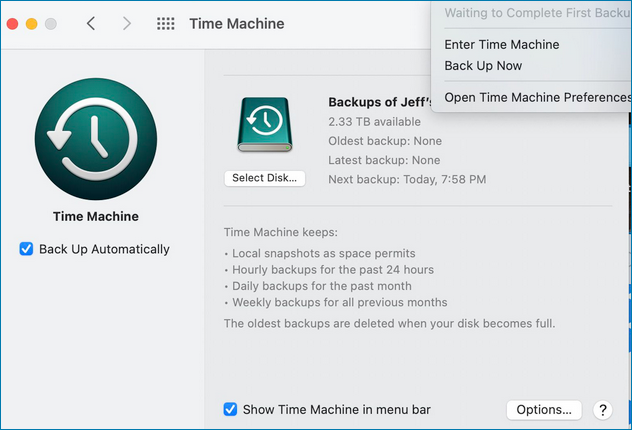
If your Mac's Time Machine backup is not working, don't worry, it's an easy problem to fix. First, check if the Time Machine is turned on in System Preferences.
3 Quick Solutions to Fix Time Machine Not Working
When Time Machine has problems, it can be quite frustrating, especially when essential data is at risk. Fortunately, a few simple fixes can help resolve common issues. Recommended solutions include addressing typical problems that may arise with Time Machine.
Quick Fix 1. Restart Your Mac and Retry
Restarting or hard restarting MacBook Pro may correct inconsistencies, and after restarting, launch Time Machine again to reset the system and potentially fix short-term problems.
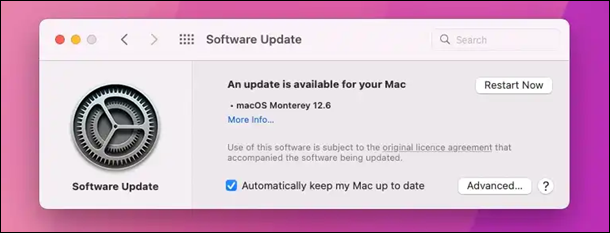
Quick Fix 2. Update macOS Version
To keep your macOS up to date, go to System Preferences from the Apple menu, then choose Software Update, which will check for and install available updates, typically including bug fixes and enhancements to features like Time Machine.
Quick Fix 3. Check the Compatible Backup Disk File System
Your backup drive must be formatted in a way that's compatible with Time Machine, specifically Mac OS Extended Journaled. If it's not, you'll need to reformat it to meet the requirements.
If you're looking to format a Mac disk to make it compatible with macOS but are unsure which format to choose between APFS and Mac OS Extended, this article will be helpful.
APFS vs Mac OS Extended [Beginner's Guide]
If you're confused about APFS and Mac OS Extended file formats by Apple, this guide is here to help. It will explain the difference between the two, making it easy to understand.
If you're experiencing issues with Time Machine, such as being stuck in the prepping stage, not responding, backup issues, or your disk not being recognized, you can resolve these problems to ensure reliable operation and protect your data.
Fix Time Machine Not Working on Preparing Backup [2 Fixes]
Time Machine may get stuck in the "Preparing Backup" phase due to various reasons, such as disk errors, corrupted backup data, or software conflicts. To resolve the issue, users can try restarting their Mac, checking the backup disk for errors, resetting the Time Machine cache, or reinstalling the Time Machine software. If these steps don't work, users can also try resetting the System Management Controller (SMC) or the Power Management Unit (PMU) to resolve any underlying hardware issues. In some cases, users may need to seek further assistance from Apple Support or a professional repair service.
Fix 1. Ensure Antivirus Software Scanning Excludes Backup Disk
Installing antivirus or malware-scanning software on your Mac may cause the Time Machine setup procedure to fail, as these applications may mistakenly identify Time Machine files as malicious, halting the backup process. To resolve this, you can exclude your backup drive from being scanned by the antivirus software, as per the software's manual instructions. This will allow the Time Machine setup to proceed without interruption.
Time Machine Won't Complete First Backup
This article will provide a solution to the issue of Time Machine getting stuck waiting to complete the first backup. If you're experiencing this problem, follow the steps outlined in this article to resolve the issue and get your backups running smoothly again.
Fix 2. Delete In-progress Files
If the preparation step for Time Machine gets stuck, try erasing the "inProgress" file connected to the Time Machine backup instead. The preparation step can get stuck if the backup file is corrupted during the backup procedure. To get rid of the "inProgress" file, delete the file located at /Library/Preferences/com.apple.
Step 1. Navigate to your backup drive in Finder.
Step 2. Open the "Backups.backupdb" folder.
Step 3. Find your Mac's folder within this folder.
Step 4. Find a current date/time folder, and open it.
Step 5. In this folder, find the ".inProgress" file.
Step 6. Delete or move this file to the Trash.
Step 7. Reboot your Mac and try Time Machine again.
If Time Machine becomes stuck in the prepping stage, you may fix the problem by following these instructions. If you're still having trouble or have encountered additional Time Machine-specific challenges, keep reading this article for more targeted advice.
Fix Time Machine Not Working in Backing Up [2 Fixes]
If Time Machine is unable to complete a backup procedure successfully, it can cause aggravation and put your data at risk. Two potential solutions to this problem are:
Fix 1. Cancel the Current Backup and Retry
The first fix is to cancel the current backup and try backing up again; follow the steps below:
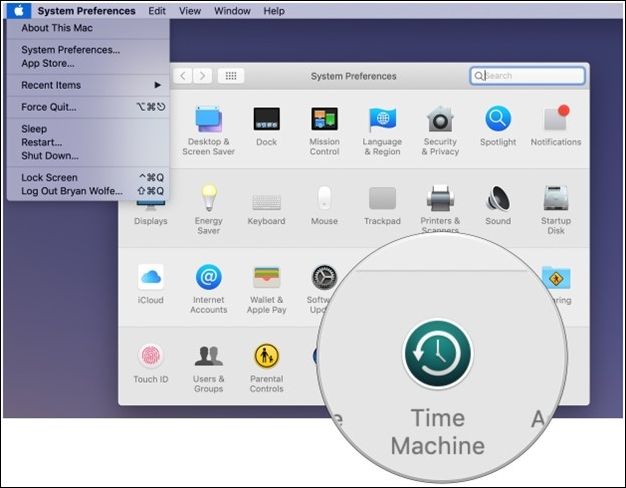
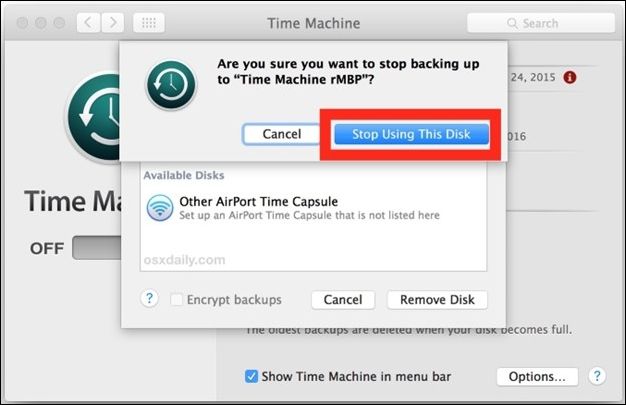
Step 1. To open Time Machine options, click on the Apple menu and select "System Preferences".
Step 2. Click "Time Machine" to view Time Machine options.
Step 3. Click "X" next to the backup progress in Time Machine.
Step 4. A prompt will occur if you wish to stop the backup. Click "Stop using this disk" to cancel the backup process.
Step 5. Disconnect your Mac's backup drive after canceling.
Step 6. Restart your Mac.
Step 7. Reconnect the backup disk and let Time Machine identify it.
Step 8. To start a fresh backup, reopen Time Machine settings and select "Back Up Now".
Fix 2. Exclude Spotlight from Indexing Time Machine Backup
To exclude Spotlight from indexing Time Machine Backup, follow these steps:
Step 1. Open Time Machine preferences and click on "Options".
Step 2. Click "+" in Exclude these items from backups.
Step 3. Go to Applications, then Utilities, and pick "Spotlight".

Step 4. Add Spotlight to the exclusion list by clicking "Exclude".
Step 5. Close Time Machine preferences.
If the Time Machine is not functioning during the backup process, you can either cancel the current backup and try again or prevent Spotlight from indexing the Time Machine backup.
2 Advanced Solutions to Fix Time Machine Not Working
If Time Machine still doesn't work, we suggest using the more advanced methods below, including using Mac Terminal and repairing a backup disk.
Advanced Fix 1. Use Mac Terminal
To resolve Time Machine issues, you can try deleting local snapshots using Terminal commands. Be cautious as Terminal commands can have significant consequences. Follow these steps to remove local snapshots: First, open Terminal on your Mac. Next, type in `tmutil listlocaltime machine` and press Enter. Then, type in `tmutil deletelocalsnapshots` and press Enter.
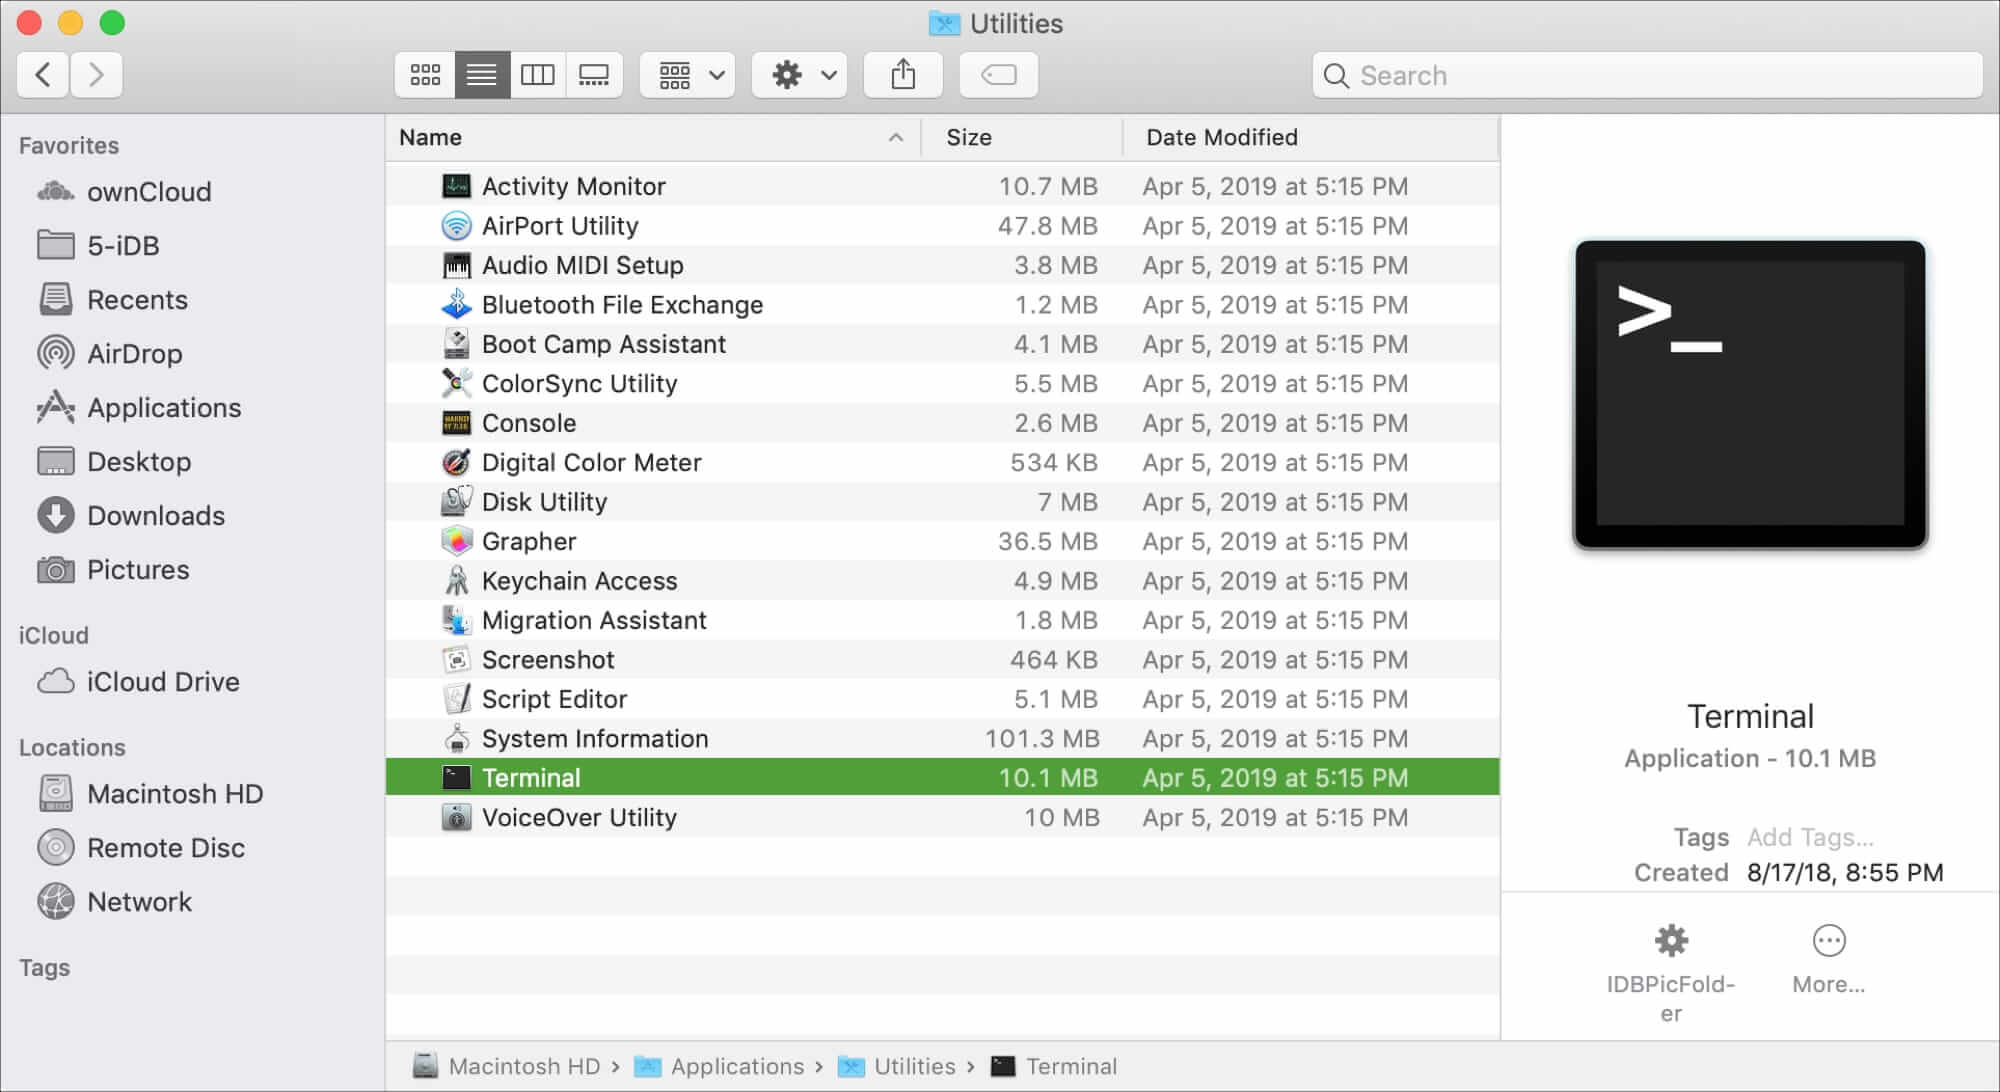
Step 1. To open Terminal, you can either navigate to the Applications folder and select Terminal from within it, or use Spotlight to quickly find and launch the Terminal application.
Step 2. To see a list of local snapshots, open a Terminal window and enter tmutil listlocalsnapshots / followed by pressing "Enter".
Step 3. Identify the picture you wish to remove and write its name.
Step 4. To delete a local snapshot, type "sudo tmutil delete local snapshots [snapshot name]" and press "Enter". You will be prompted to enter your administrator password.
Step 5. Close the Terminal after removing the snapshot.
If you're unsure what you're doing while entering commands into the Terminal, it's best to follow the directions precisely or seek help from someone who is more familiar with the Terminal. This will help prevent mistakes and ensure that your system remains secure.
Advanced Fix 2. Repair Backup Disk
If Time Machine isn't working, you may need to repair the Mac disk with Disk Utility to restore data from a backup drive. Ensure the backup drive is readable by Time Machine and use an appropriate file system before proceeding. To do this, try using Disk Utility to repair the disk, and if that doesn't work, try restoring data from a backup drive by following the steps in the Time Machine guide. If you're still having trouble, you may need to seek further assistance.
Step 1. Launch Disk Utility in the Applications > Utilities folder.

Step 2. The backup disk should be selected from the list of available drives.
Step 3. Select "First Aid" from the menu bar.
Step 4. Select "Run" to begin repairing the disk immediately.
If you're experiencing issues with your backup disk, you can use First Aid in Disk Utility to scan and repair any problems. Even after fixes, Time Machine can be used to verify the issue persists. If the problem continues, you may need to reformat the backup disk or contact Apple Support for further assistance.
If you've discovered corruption in a first aid situation, it's essential to prioritize the person's safety and well-being. If the corruption is related to a medical treatment or medication, you should seek immediate medical attention from a qualified healthcare professional.
This article discusses how to fix 'First Aid found corruption that needs to be repaired'. Read more >>
Time Machine Not Working: Possible Issues
Time Machine, a robust backup mechanism built into Mac, allows you to back up your Mac and recover valuable data effortlessly. However, there are situations in which Time Machine may not perform as advertised, including the situations below.
⚠️Time Machine is stuck in the preparing stage: You're referring to the frustrating experience of using Time Machine to back up your data, only to get stuck in the "preparing" phase. This can be a real pain, especially if you've been waiting for a while.
⛔Time Machine not responding: Time Machine may become sluggish and fail to execute backup jobs or back up data due to various reasons, leading to user frustration and potential data loss.
❌Time Machine results in errors: Errors in the backup process may compromise the security of your data and prevent backups from being completed.
😫Time Machine fails to detect backups: If Time Machine fails to recognize previously created backups, users may struggle with restoring data or keeping up with scheduled backups.
😭Time Machine not recognizing backup disk: The Time Machine may fail to identify the backup drive, leading to its inability to create or view new backups.
Time Machine Restore Button Greyed Out
If your Time Machine backup is greyed out, don't worry, there are two possible solutions to resolve the issue. Firstly, check if the Time Machine backup disk is properly connected and selected in System Preferences. If it's not, go to System Preferences > Time Machine, click on "Select Backup Disk" and choose the correct drive.
Conclusion
Mac users should back up their data using Time Machine, but obstacles exist, and this article addresses frequent Time Machine issues with proven remedies, helping users overcome problems like backup failures and identifying backup disk difficulties.
If your Time Machine backup fails, you can recover your important information with Deep Data Recovery for Mac. To avoid data loss, regularly check on your Time Machine backups and keep your system up to date, following the correct procedures and using the right tools. This will ensure your Time Machine backups run smoothly.
Time Machine Not Working FAQs
Here are some common questions people also ask when they search for "Time Machine not working":
1. Why is Time Machine not working on my Mac?
If Time Machine is malfunctioning due to system or program errors, you can try troubleshooting the issue by referring to the preceding chapters for assistance.
2. How do I reset Time Machine on Mac?
To reset Time Machine, go to System Preferences, select Time Machine, choose the disk you want to use for backup, click "Select Disk", and then "Remove Disk". This will allow you to start a new backup session on the same disk. Simply reselect the disk in Time Machine to begin the new session.
3. How do I force Time Machine to back up?
To initiate an immediate Time Machine backup, select "Back Up Now" from the Time Machine menu in the menu bar or type "tmutil" into Terminal.
Related Articles
- How to Change Boot Drive Windows 10? [Updated 2024]
- Solved: Taskbar/Start Button Not Working Windows 10
- An Error Occurred While Processing Your Request [How to Fix]
- What to Do If Computer Restarts After Shutdown (for Windows 11/10/8/7)
Fix a computer that restarts after shutdown. Learn common causes, including Fast Startup, power settings, drivers, BIOS, and hardware issues. - How to Fix Samsung SSD Clone Failed [2023 Full Guide]
Do you know why Samsung SSD Clone Failed? this guide will help you figure out the reasons and give you full guide to fix this error. - All About Samsung SSD Reset Tool | Full Guide
Learn what Samsung SSD reset tools do, when to reset an SSD, and how to prepare data before restoring drive settings.