What Is Wuauserv and How to Fix Wuauserv High CPU Usage? [Updated 2023]
Windows computers have various services to enhance user experience and system stability. The Wuauserv utility is a crucial service that provides several important functions, but it can sometimes cause high CPU usage, leading to system performance issues. This article will explore the Wuauserv service and provide fixes for high CPU usage.
What Is Wuauserv?
Wuauserv, The Windows Update Service, also known as Wuauserv, is responsible for accessing, downloading, and installing Windows operating system updates. It handles tasks from detection to installation, providing direct access to updates and ensuring the computer remains up-to-date and free from outdated errors.
How to Disable Wuauserv?
Disabling the Wuauserv service can prevent high CPU usage caused by Windows Update searching for updates and executing tasks, which can slow down the computer. To do this, follow the steps to disable the service.
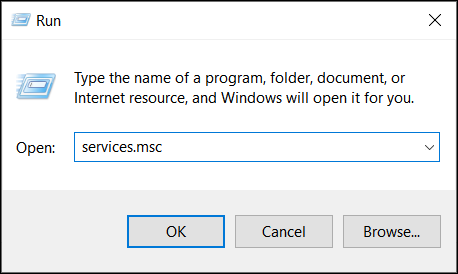
Step 1. To launch the Services window on your Windows computer, you can use the "Windows + R" shortcut to open the Run program and then type "services.msc" in the text box. This will open the Services window where you can view and manage the services running on your computer.
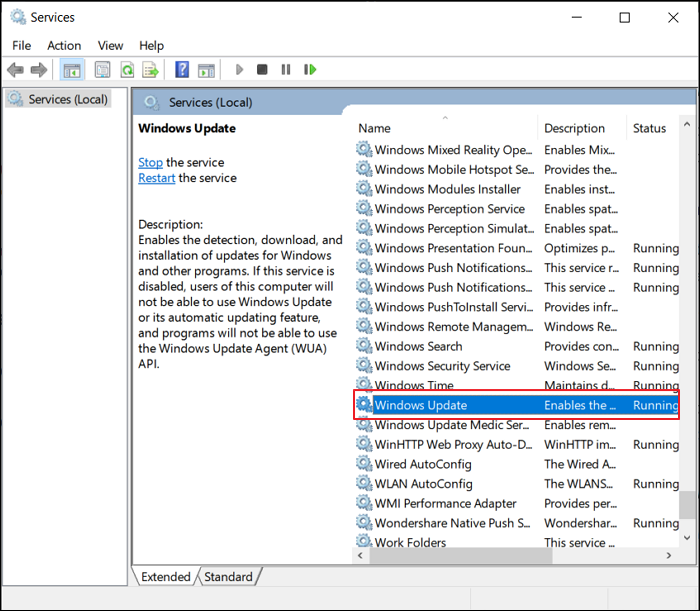
Step 2. Look for the "Windows Update" option and double-click to expand the options.
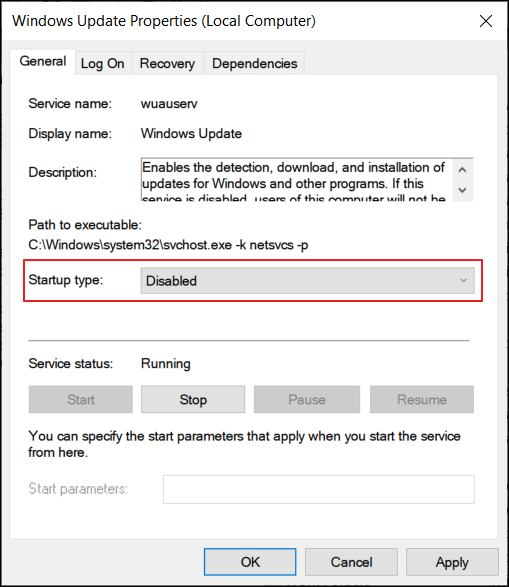
Step 3. To disable the Wuauserv service, navigate to the Startup Type option, select Disabled from the drop-down menu, and then click Stop. Apply the changes and restart your computer. This will properly disable the service.
How to Fix Wuauserv High CPU Usage?
If your Windows computer is experiencing high CPU usage, disabling the Wuauserv service might seem like a solution, but it's not the best approach as it can have unintended consequences. Instead, consider other fixes that can help resolve the issue and allow you to enable the Wuauserv service again.
- Method 1. Uninstall the Latest Updates from the Computer
- Method 2. Wait for Windows Update to Complete
- Method 3. Delete the SoftwareDistribution Folder on Windows
- Method 4. Try SFC Scan
Method 1. Uninstall the Latest Updates from the Computer
To fix the issue where Windows 10 is stuck on the login screen, consider uninstalling the latest updates installed on your Windows computer. This may resolve the problem, as the installed updates might be causing issues in the device. To do this, follow these steps:
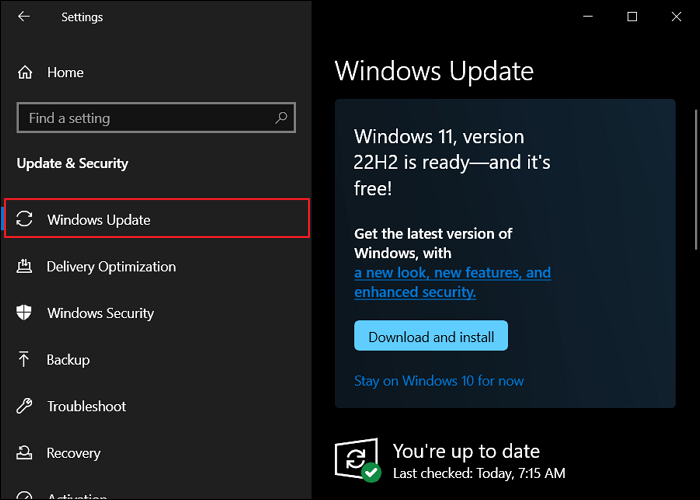
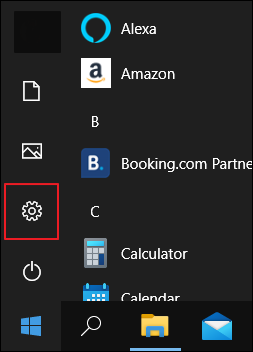
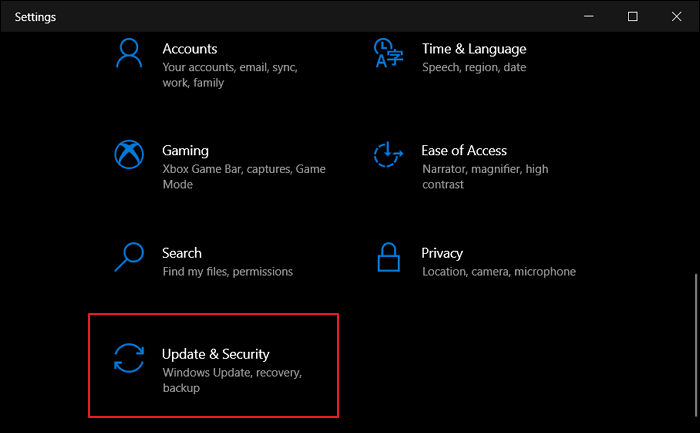
Step 1. To update Windows, start by launching the "Settings" from the search bar. From there, navigate to the "Update & Security" tab on the left side. Next, look for "Windows Update" in the list of options provided on the adjacent screen.
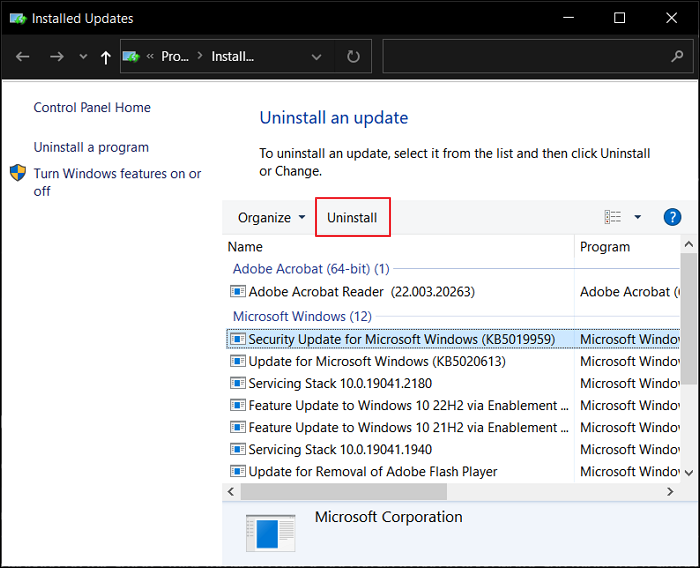
Step 2. To view and uninstall installed updates, look for the option of "View update history" in the right panel and select "Uninstall updates" to proceed.
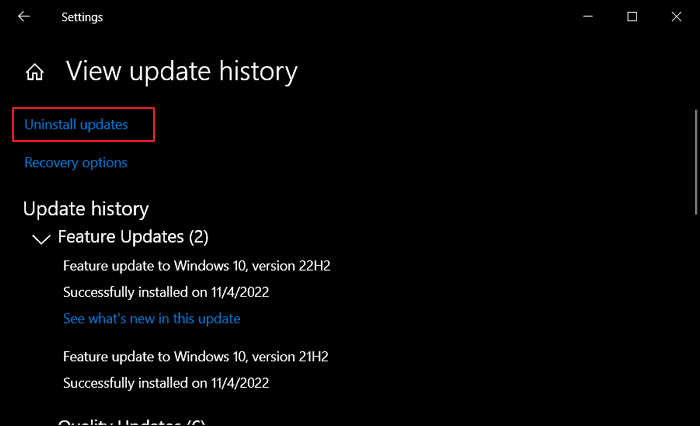
Step 3. Uninstall the update that might be causing the issue and restart your computer to resolve the Wuauserv problem.
Method 2. Wait for Windows Update to Complete
If your Windows computer is experiencing high CPU usage, it's possible that it's due to previous updates being processed. In this case, it's best to wait for the update process to complete. Alternatively, you can check the updates to assess the situation. To do this, follow these steps below.
Step 1. To open the settings menu, tap on the "Start" menu and select the "Settings" option from the left panel. This will open a new window.
Step 2. To update Windows, look for the "Updates & Security" tab in the left panel, click on it to lead to the specific settings, then use the "Check for updates" button to search for any prevailing updates, and let Windows conclude any updates that are currently undergoing.
Step 3. After the updates are installed, try restarting your device and then use the computer.
Method 3. Delete the SoftwareDistribution Folder on Windows
To resolve the issue of temporary files in the SoftwareDistribution folder on Windows, follow these steps: delete the SoftwareDistribution folder from your Windows using the proper methods, which includes booting in safe mode, disabling the Windows Update service, and then deleting the folder. This should resolve any issues caused by faulty files in the folder.
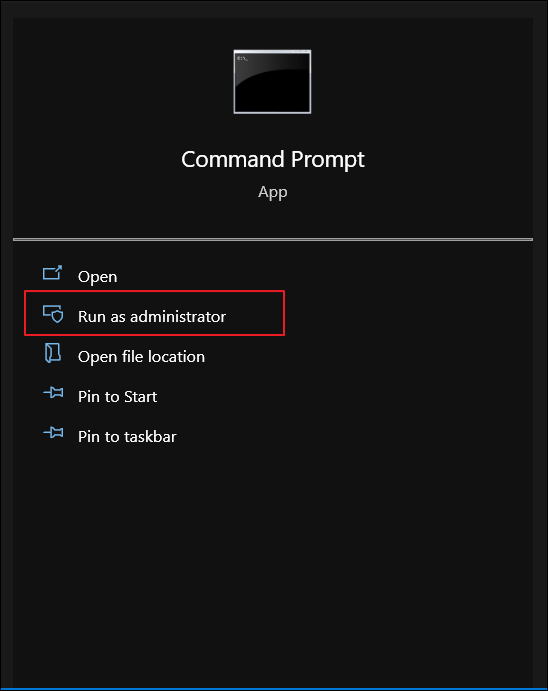
Step 1. To open the Command Prompt, click on the "Search" icon on the taskbar, type "cmd" and select "Run as administrator" from the right panel.
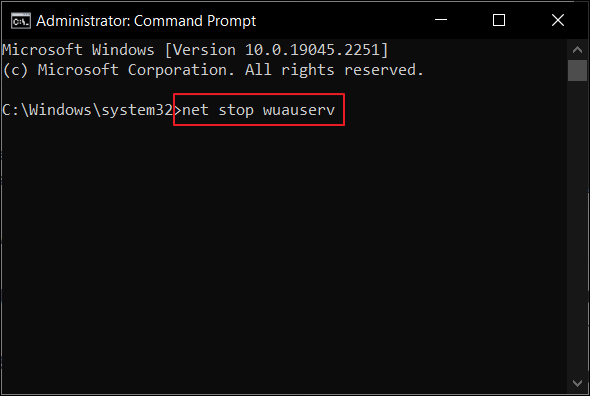
Step 2. To temporarily disable Windows Update services, you can use the Windows Command Prompt to stop the services. First, type "net stop wuauserv" to stop the Windows Update service, and then type "net stop bits" to stop the Background Intelligent Transfer Service, which is used by Windows Update. This will temporarily disable all services involving Wuauserv.
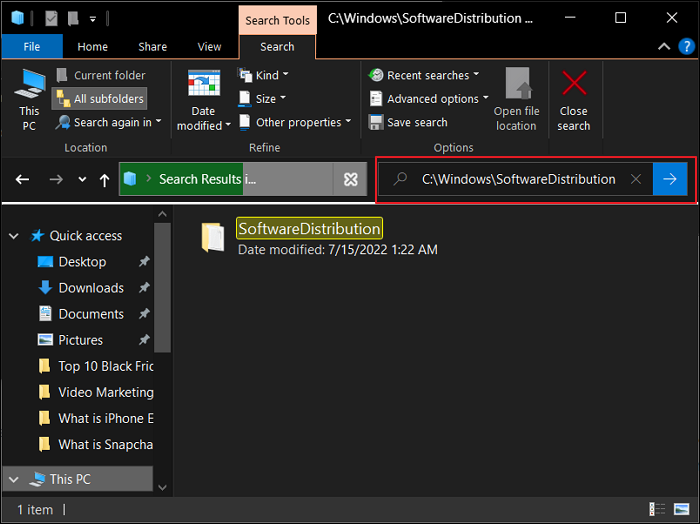
Step 3. To access the "File Explorer" from the taskbar, click on the File Explorer icon. Then, navigate to the following location on your computer: C:\Users\[YourUsername]\AppData\Roaming\Microsoft\Windows\Start Menu\Programs\Startup.
C:\Windows\SoftwareDistribution
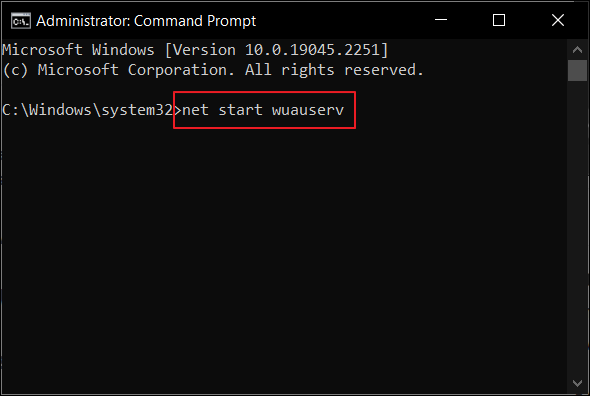
Step 4. To resume Windows Update Services, delete all content within a folder, then re-open Command Prompt that was minimized. Once open, use the commands "net start wuauserv" and "net start bits" to start the Windows Update Services and Background Intelligent Transfer Service, respectively.
Method 4. Try SFC Scan
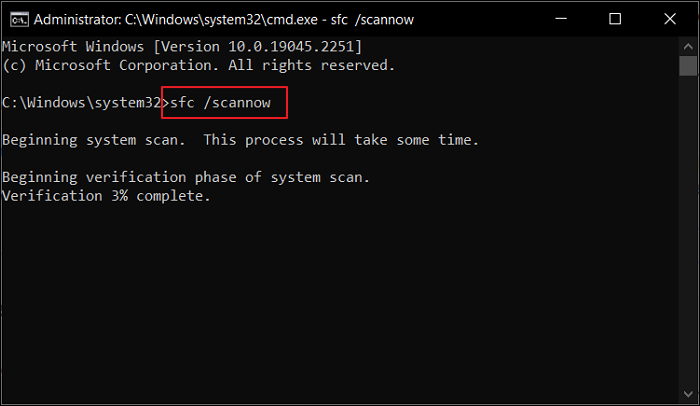
If the problem persists, you can try using the System File Checker (SFC) scan feature to resolve the issue on your Windows computer. To do this, open the Command Prompt as an administrator, type "sfc /scannow", and press Enter to initiate the scan. The SFC scan will scan and replace any corrupted system files with a cached copy, which may resolve the issue.
Step 1. To open the Command Prompt as an administrator, launch the Run program, type "cmd" within it, and press "CTRL + SHIFT" and click on "OK" simultaneously. This will execute the command and open the Command Prompt with administrative privileges.
Step 2. To initiate a System File Checker (SFC) scan, open Command Prompt as an administrator and type "sfc /scannow" followed by the Enter key. This command will automatically search for and resolve any corrupted system files, ensuring the integrity and stability of your Windows system.
Bottom Line
The Wuauserv error can cause high CPU usage, but various fixes are available to resolve the issue. By implementing these solutions, you can identify a proper resolution to the CPU problems and ensure that the Update Services are not disabled on your device.
Related Articles
- Google Chrome Sync Keeps Pausing? Find Fixes Here
- How to Recover Overwritten Word Document No Previous Version [Full Ways]
- HP USB Disk Storage Format Tool Free Download [New]
- Internet Browsers Not Working after Windows Upgrade? Fix It Now!
- How to Fix User Profile Cannot Be Loaded in Windows?
When starting up your Windows computer, you may encounter the 'User profile cannot be loaded' error message. Fortunately, there are proven solutions to fix the problem, which we will outline in this article. - How to Fix Virtual Disk Service Error: The Disk Is Not Empty [Full Guide]
Fix Virtual Disk Service errors in Windows DiskPart or Disk Management. Learn causes and safe ways to repair disk operations.