How to Download and Install macOS 13 Ventura [Step by Step Navigation]
An Overview of macOS 13 Ventura
Apple published the beta version of macOS 13 Ventura on June 6, 2022, and it is the latest macOS version, featuring a new multitasking model and additional updates.
Main New Features of macOS 13Ventura
- macOS Ventura will allow users to set a scheduled email or undo an email, and improve mail app search suggestions and corrections.
- Mac users can use their iPhone as a webcam by placing it on a stand on top of the Mac, at which point the devices will automatically connect.
- Hand-In FaceTime, you can seamlessly transfer calls between your Mac and Apple mobile devices. When you answer a call on one device, your Bluetooth headset will automatically connect to it, allowing for a smooth transition between devices. This feature enables you to pick up where you left off, regardless of whether you're using your Mac or mobile device.
- Safari has been developed to support web page image translation and adds language support for Turkish, Thai, Vietnamese, Polish, Indonesian, and Dutch.
View the completely new features on Apple's official website.
macOS Ventura Update Requirements
Not all Mac devices can update to macOS Ventura. Check the list to ensure your Mac can run the latest operating system.
- MacBook (2017 and newer)
- MacBook Air (2018 and newer)
- MacBook Pro (2017 and newer)
- Mac mini (2018 and newer)
- Mac Studio (2022)
- iMac (2017 and newer)
- iMac Pro (2017)
- Mac Pro (2019 and newer)
macOS Ventura supports Macs with Intel's 7th generation Kaby Lake chips or newer and Apple Silicon, but non-M1 or M2 devices will miss out on features like voice-controlled emoji insertion and live captions in FaceTime.
We'll guide you through the process of downloading and cleanly installing macOS Ventura in the next part, so be sure to follow along.
How to Download and Install macOS Ventura Step by Step
To start, ensure your device can run macOS Ventura. Check if your Mac is compatible by looking under the About this Mac tab. We've previously listed the available Mac devices, so you can recheck that list if needed.
Steps to Download and Install macOS Ventura
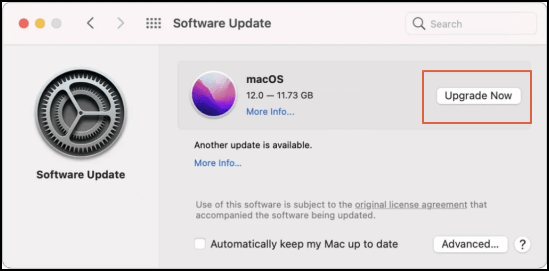
To download macOS 13 Ventura, go to the App Store, click on Updates, and then click on the "Upgrade Now" button next to the macOS 13 Ventura update. Follow the prompts to download and install the update.
Step 1. To access the old version of an app in the App Store, start the App Store on your device, type in "macOS Ventura" in the search bar, and you can find the older version of the app.
Step 2. Click "Get" to download.
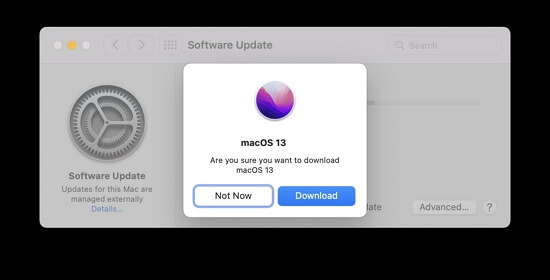
Step 3. Click "Download" to confirm, then download will begin.
Step 4. When the download process is complete, the installation will start automatically, so wait and don't shut down your Mac device.
How to Install macOS Ventura from USB
To download macOS Ventura on a USB flash drive and install it on different Mac devices, you'll need to prepare a USB flash drive bigger than 16 GB, format it, and back up important data with Time Machine or third-party software. Then, you can apply the 'createinstallmedia' command to create a bootable installer.
Step 1. Open the Terminal application, which can be found in the Applications/Utilities folder in the Finder.
Step 2. 1. `diskutil list` to list all available disks and their identifiers. 2. `diskutil unmountDisk /dev/disk2s1` to unmount the USB drive.
Sudo/Applications/Install/macOS/Ventura.app/Contents/Resources/createinstallmedia --volume /Volumes/MyVolume
Step 3. Press the Return to confirm the command.
Step 4. "Please enter your password to confirm the deletion of the USB drive data. Confirming will erase all data on the drive.
Step 5. Now you can boot your Mac from the bootable installer.
How to Upgrade to macOS 13 (Ventura)
When upgrading to macOS Ventura using the Software Update option, you won't have to worry about formatting your hard drive. Instead, the new operating system will automatically replace the old one, allowing you to keep your files and programs intact, unlike a clean installation which requires formatting the hard drive.
Follow the tutorial to upgrade to macOS 13 Ventura and ensure your Mac always connects to the internet.
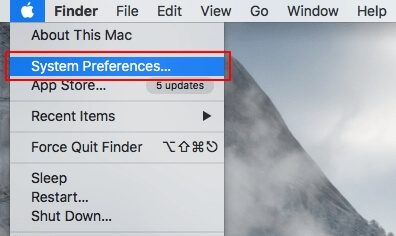
Step 1. Find System Preferences from the Apple menu.
Step 2. Click "Software Update".
Step 3. The macOS Ventura installation process will begin, and you will be prompted to enter your administrator password. Once you have entered the password, the installation will continue, and you will see the progress bar.
Step 4. Click "Upgrade Now" to start upgrading.
Recover Lost Data When macOS 13 Ventura Installation Stuck/Failed
The installation of macOS Ventura may get stuck or fail due to insufficient space or internet disconnection, resulting in lost data. However, you can recover these lost files and folders using Mac data recovery software, such as Deep Data Recovery for Mac.
This reliable recovery tool can help you quickly recover deleted files, including those on macOS Ventura, even if the installation is stuck.
If you delete files and folders and empty the Mac Trash accidentally, Deep Data Recovery can also help you with Mac trash recovery.
If you've finished downloading Deep Data Recovery for Mac, you're ready to proceed with the tutorial.
How to Recover Lost Data After macOS 13 Ventura Installation Stuck with Qiling Data Recovery Tool
To recover lost data after macOS Ventura with Deep Data Recovery, it only takes three steps.
Step 1. Select file types and click "Next" to start
Launch Deep Data Recovery on your Windows computer, select the desired file types, and click "Next" to initiate the recovery process.

Step 2. Select the drive to be scanned
In the main Deep Data Recovery window, select the drive you need to recover lost/deleted files from and click the "Search for lost files" button.

Step 3. Select your lost data/files
Deep Data Recovery for Mac will immediately scan your selected disk volume and display the scanning results on the left pane, allowing you to sort the results to find specific files if needed.

Step 4. Recover lost/deleted data
Once you have found the desired files, preview them and click "Recover" to begin the recovery of your deleted/lost Mac files.
Download macOS 13 Ventura FAQs
We list five additional questions and answers to help you know more about downloading and installing macOS Ventura.
Which Macs will get macOS 13?
Here is the list to help you check if your Mac can run macOS 13 or not. The list includes the following Mac models: MacBook (2015), MacBook Air (2012), MacBook Air (2015), MacBook Pro (2012), MacBook Pro (2015), MacBook Pro (2017), MacBook Pro (2018), iMac (2014), iMac (2015), iMac (2017), iMac Pro (2017), iMac Pro (2019), Mac mini (2014), Mac mini (2018), Mac Pro (2013), Mac Pro (2019), and Mac Studio (2022).
- MacBook (2017 and newer)
- MacBook Air (2018 and newer)
- MacBook Pro (2017 and newer)
- Mac mini (2018 and newer)
- Mac Studio (2022)
- iMac (2017 and newer)
- iMac Pro (2017)
- Mac Pro (2019 and newer)
How do I install macOS 13 Ventura beta on Mac?
You can download the macOS 13 Ventura beta from developer.apple.com and follow the instructions to install it.
- 1. After downloading, you can open the macOSDeveloperBetaAccessUtility.dmg file.
- 2. Double-click macOSDeveloperBetaAccessUtility.pkg to run the installer.
- 3. When the installer finishes downloading, it will automatically open Software Update and prompt the user to install the macOS 13 beta.
- 4. Click "Update Now" to install macOS 13Ventura beta.
Why can't I install macOS Ventura on my Mac?
Unfortunately, your Mac is not compatible with macOS Ventura. However, the following Mac devices can run the latest operating system:
- MacBook (2017 and newer)
- MacBook Air (2018 and newer)
- MacBook Pro (2017 and newer)
- Mac mini (2018 and newer)
- Mac Studio (2022)
- iMac (2017 and newer)
- iMac Pro (2017)
- Mac Pro (2019 and newer)
How do I manually download a Mac Ventura update?
You can download all the macOS versions from the Apple App Store. Type in macOS Ventura and click "Get" to download and update.
How do I set up Time Machine on my Mac?
To start backing up with Time Machine, go to System Preferences, then select Time Machine, choose the name of your disk, and click "Select Backup Disk" to start backing up.
Related Articles
- How to Solve Samsung Smart TV USB Not Working [Updated 2023]
- Fix Windows 10 Computer Keeps Freezing Randomly
- Service Host: Local System High Disk, CPU and Memory Usage [100% Solved]
- How to Use the Apple Menu on Mac? [New Information]
- MP4 File Format | What Is MP4 Video Format
MP4 (MPEG-4) is a digital container format that stores video, audio, subtitles, and images, commonly used for sharing and streaming video content online. - PDF Files Full Information | How to Open PDF Files
Learn what a PDF file is, why Portable Document Format is widely used, and how to open, view, print, and share PDF documents on different devices.