How To Enable/Disable Reserved Storage Windows 10? [Step By Step]- Qiling
Windows is a renowned operating system with features that enhance user experience, making it easy to execute various tasks and improve usability.
Windows 10 features a feature called "Reserved Storage" that allows users to enable and disable it across their devices. This feature is a great addition to the OS, providing users with a guide on how to manage their storage space. Users can enable and disable Reserved Storage on their devices by following a simple guide.
An Overview of Reserved Storage Windows 10
Windows 10 introduced the Reserved Storage feature in version 1903, which changed how disk space was handled. This feature was designed to address issues with managing disk space, and it allocated a portion of the disk space to system tasks, freeing up some space from the HDD.
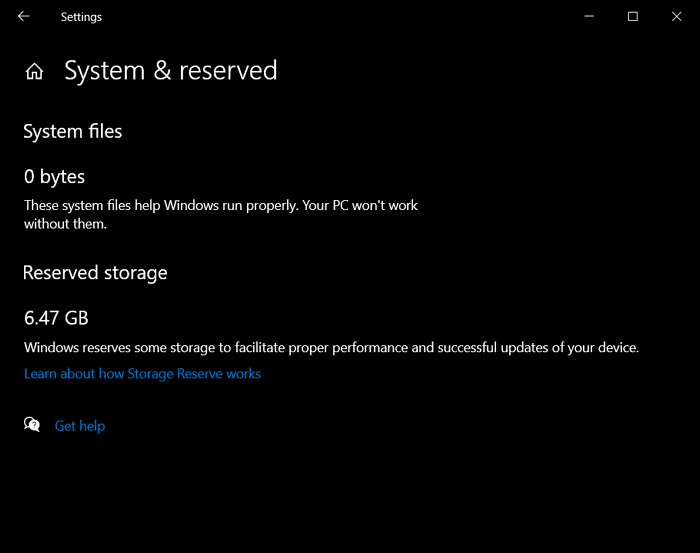
The Reserved Storage feature in Windows 10 allocates almost 7GB of disk space for the operating system, allowing it to store updates, temporary files, applications, and system cache, including the Windows SSD cache. This helps ensure a smoother flow of operations, making the system more adaptable and accessible in various environments. The size of the reserved storage may vary over time, depending on the system's utility and workflow.
Having the Reserved Storage feature across your Windows 10 computer is lucrative in many ways, but ultimately gives users control to enable or disable it as they see fit.
How to Enable Reserved Storage Windows 10?
Reserved Storage on Windows 10 is a feature that allows users to control the use of disk space by reserving a portion of it for system files and updates. This feature can be enabled in two ways: by using the Settings app or by using the Command Prompt. To enable it using the Settings app, go to Settings > System > Storage > Reserved Storage and toggle the switch to On. Alternatively, you can use the Command Prompt to enable it by running the command "wmic computersystem where name="%computername%" call setwindowsreservedstorage 1". This feature can be useful for users who want to ensure that their system files and updates have a dedicated space on their disk, but it may not be necessary for users with plenty of disk space available.
Method 1: Through the Registry Editor
Method 2: Through Command Prompt
Method 1: Through the Registry Editor
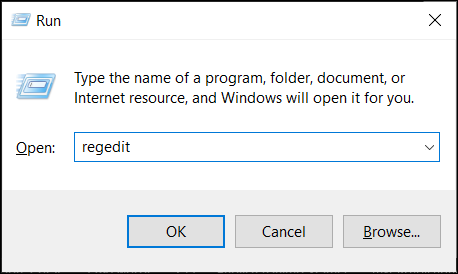
Step 1: To access the Registry Editor, start by launching the Run program on your computer using the shortcut keys "Windows + R". Once the window appears, type in "regedit" and press enter, which will open up the Registry Editor in front of you.
Step 2: You need to navigate the following path across the Registry Editor. For that, you can easily copy and paste this across your address bar:
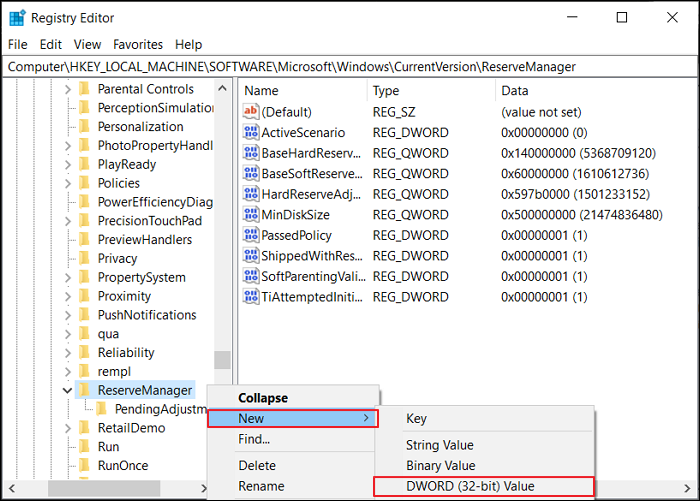
Computer\HKEY_LOCAL_MACHINE\SOFTWARE\Microsoft\Windows\CurrentVersion\ReserveManager
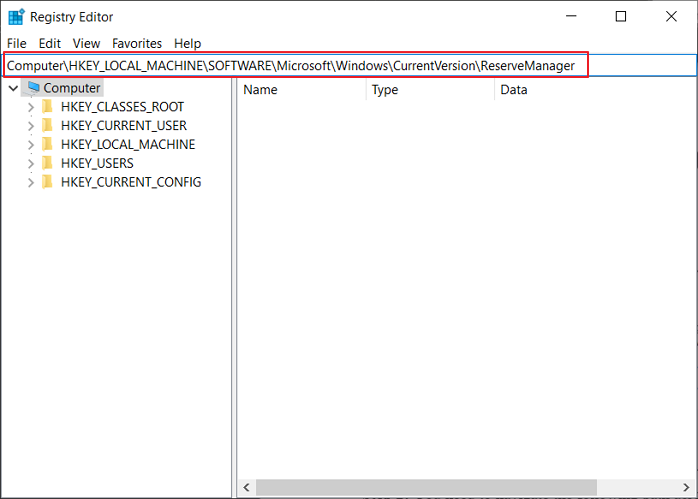
Step 3: As you search through this address, make sure the "ReserveManager" folder is included in the list.
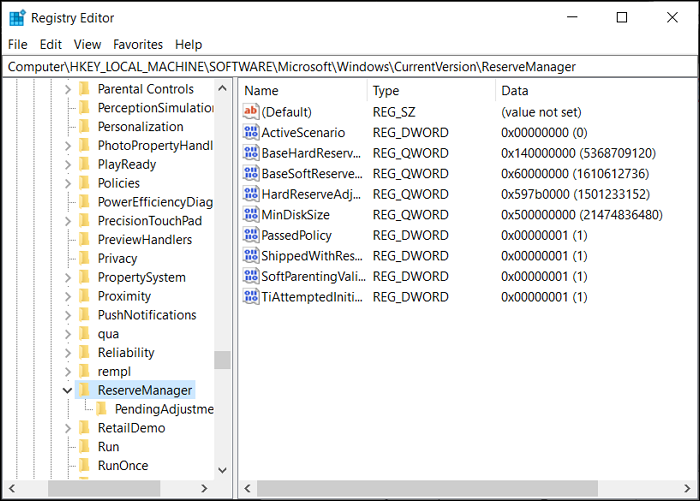
Step 4: To add a new DWORD (32-bit) Value to the right-sided panel, right-click on the vacant area and select "New," then create a DWORD (32-bit) Value named "ShippedWithReserves".
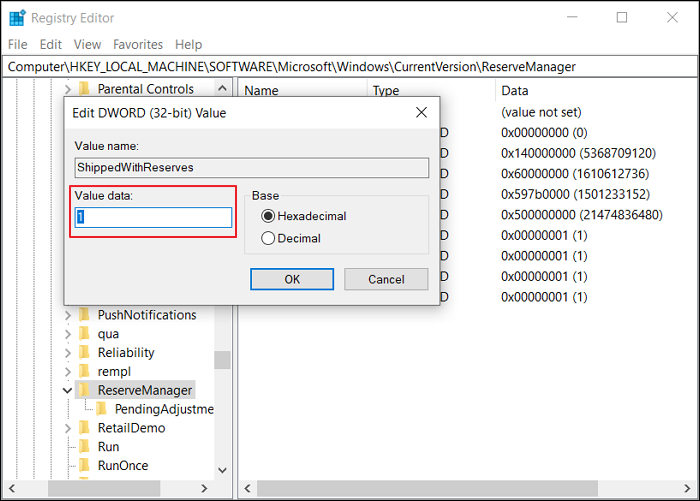
Step 5: To enable the Windows 10 Game Bar, you need to open the registry key by double-clicking it, then type the value of "1" across the "Value data:" space and click "OK." Finally, restart your computer to make the changes.
Method 2: Through Command Prompt
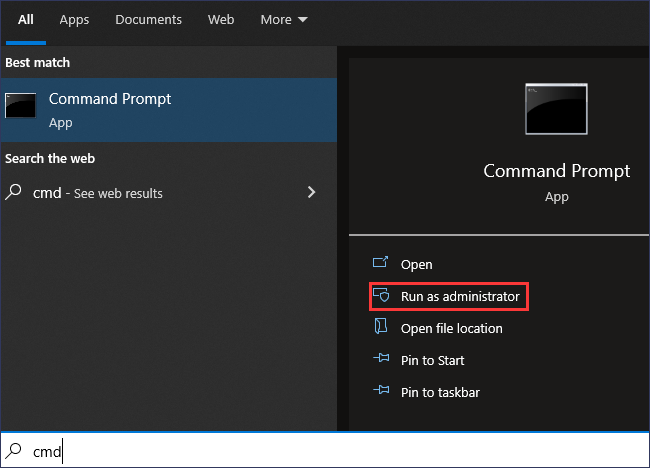
Step 1: To start the Command Prompt, go across the "Search" icon on the taskbar, type "cmd," and right-click on the "Command Prompt" option that appears, selecting the option to "Run as administrator."
Step 2: To turn on the Reserved Storage feature, open the Command Prompt and type the command: `fsutil behavior set StorageCacheDeletion 0` and press Enter. This will enable the Reserved Storage feature. Then, restart your computer to apply the changes. After restarting, you can check if the Reserved Storage feature is working by looking for the "Reserved Storage" option in the Windows Settings.
DISM /Online /Get-ReservedStorageState
Step 3: To enable the Reserved Storage feature in Windows 10, run the command "dism /online /enable-feature /featurename:ReserveStorage /all /norestart" in the Command Prompt as an administrator. This command is case-sensitive and must be entered exactly as shown.
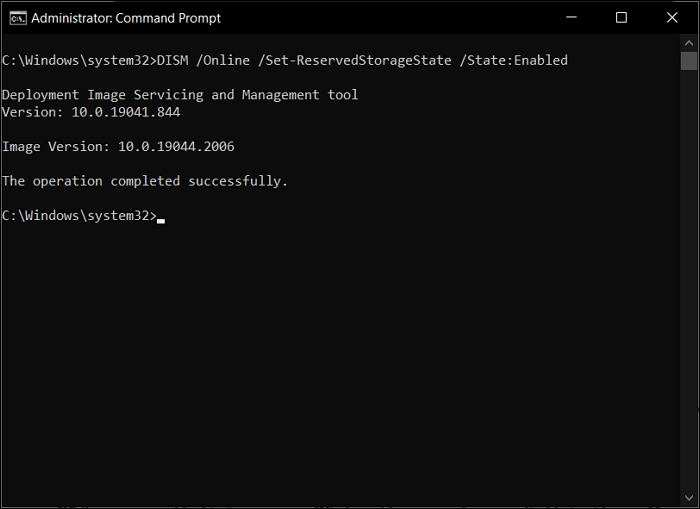
DISM /Online /Set-ReservedStorageState /State:Enabled
How to Disable Reserved Storage Windows 10?
To disable the feature across Windows 10, you can try two methods. Alternatively, you can also enable this feature across Windows 10, but disabling it is also an option. You can work through the methods to know more about the process in detail.
Method 1: Through the Registry Editor
Method 2: Through Command Prompt
Method 1: Through the Registry Editor
Step 1: To open the Registry Editor, click on the "Search" icon on the taskbar, type "Run", and then type "regedit" in the Run program.
Step 2: Add in the following path navigation across the address bar on the top:
Computer\HKEY_LOCAL_MACHINE\SOFTWARE\Microsoft\Windows\CurrentVersion\ReserveManager
The first step in this process is to navigate to the "ReserveManager" folder, which can be located in the left-sided panel.
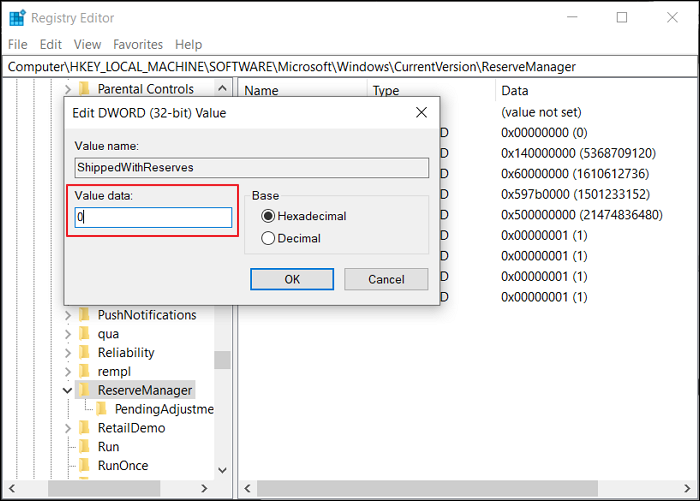
Step 3: To resolve the issue with your Windows 10 computer, you can modify the "ShippedWithReserves" value in the registry. On the right-handed panel, search for "ShippedWithReserves", double-click it to open, insert the value of 0 across the "Value data:" section, and click "OK". Then, restart your Windows 10 computer to apply the changes. This should resolve the problem.
Method 2: Through Command Prompt
Step 1: To start Command Prompt as an administrator on Windows 10, type "cmd" in the Search tab and select the "Run as administrator" option from the results.
Step 2: You can check the status of your command prompt by typing "status" or "status" in the command prompt window. This will display the current status of the system, including the current date and time, the number of users logged in, and the total number of processes running.
DISM /Online /Get-ReservedStorageState
To disable the feature across your Windows 10, you can use the command: `reg add "HKEY_LOCAL_MACHINE\SOFTWARE\Policies\Microsoft\Windows\Windows Features" /v "State" /t REG_DWORD /d 0`
DISM /Online /Set-ReservedStorageState /State:Disabled

Final Words
This article has provided an overview and assessment of the Reserved Storage feature in Windows 10, giving users an insight into how to utilize this function. With methods available for enabling and disabling this feature, users can now understand how to use it across their Windows device.
Reserved Storage FAQs
As you learn more about the Reserved Storage feature across Windows 10, you may have questions. To address these, we've outlined some important ones, including:
1. Can I remove reserved storage for Windows 10?
You can remove or disable reserved storage across your Windows device and decrease the required space by uninstalling optional features.
2. Do I need reserved storage in Windows 10?
To avoid complications and ensure smooth Windows operation, a reserve of storage space is provided to manage updates, system caches, applications, and temporary files, preventing abnormal operations on the device.
3. What is using all my storage Windows 10?
To check where storage is being consumed on Windows 10, go to the "Settings" and click on "System", then select "Storage" and look at the C: drive section to see what's using up the hard drive space. You can also view other file types by clicking on "Show more categories" and see the storage usage on other drives by clicking on "View storage usage on other drives".
Related Articles
- How to Fix Corrupted Recycle Bin in Windows 10 and Restore Lost Data
- [Step-by-step Guide] How to Reset Only C Drive in Windows 10 Safely
- How to Open Google Drive on My Computer [Updated 2022]
- Fix boot sector of FAT16/FAT32/NTFS partitions
- Genshin Impact File Location| Where's the Game Data?
Find the Genshin Impact file location on PC and learn how to change the game directory, move files, or locate screenshots and installation data. - Quick Fix: How to Restart Windows 10 with Keyboard
How to restart Windows 10? If you're thinking about this, consider this guide to restart Windows 10 with a keyboard with the top 8 ways. Here, we will walk you through the different ways how to restart Windows in a safe mode and more.