How to Fix Integrated Webcam Not Working on Windows 10 [Full Guide]
Windows 10 users who have recently updated their OS are experiencing issues with their integrated webcam. This problem is often caused by faulty or incompatible drivers, and can be resolved with a few simple methods. By following these steps, users can troubleshoot and fix the driver issues that are preventing their webcam from working properly, and get back to using it as usual.
Modern laptops often come with an inbuilt webcam, eliminating the need to purchase separate devices. In the past, people would buy external webcams to connect to their laptops for video conferencing, work calls, and online gatherings.
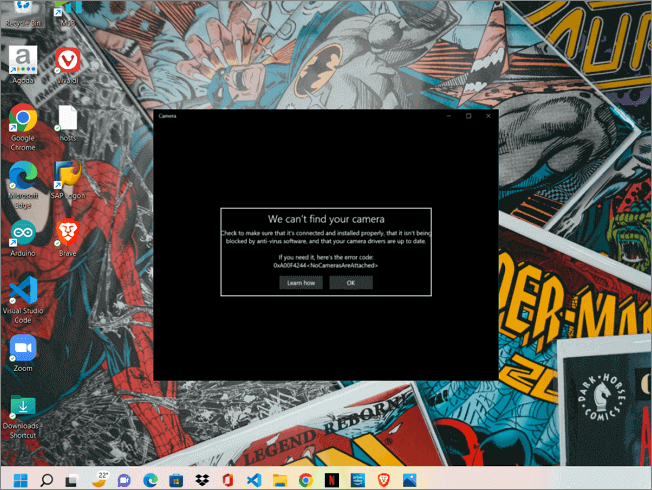
In the latest version of Windows 10, the operating system is unable to detect and coordinate the webcams on laptops, leading to errors such as "Your camera not found" or "We can't find your camera" when users try to use the webcam for any purpose.
There could be multiple reasons for this OS failure, but the leading cause could be the software's outdated or faulty camera drivers. Solutions include checking and updating drivers, re-enabling the webcam if it was disabled, and checking PC webcam settings.
How to check your Webcam's Configuration
To resolve the "Camera not found" error, check your laptop's settings app to see if your integrated webcam is enabled. Ensure that the device, Microsoft app, and other apps have necessary permissions. If any of these are disabled, enabling them may resolve the issue.
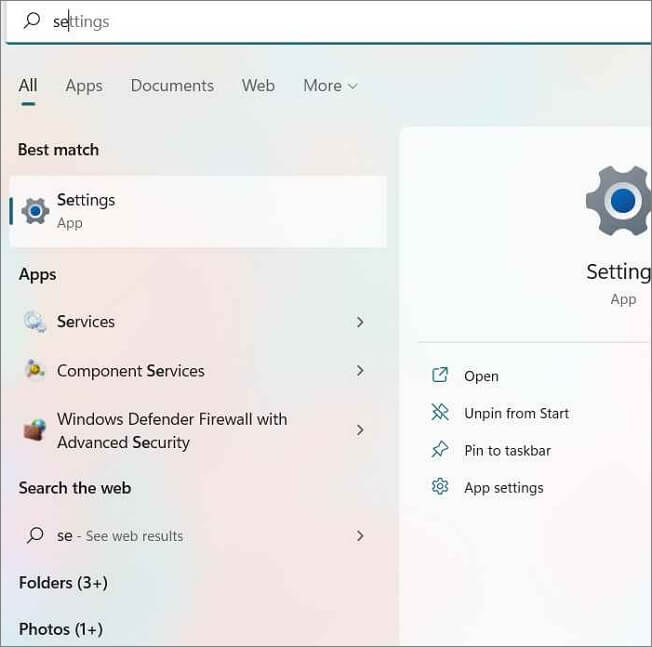
Step 1. To open the Settings app on a Windows PC, you can use the shortcut keys Windows + I, which will directly open the Settings app. Alternatively, you can also search for "Settings" in the search bar, which can be found in the taskbar or by pressing the Windows key.
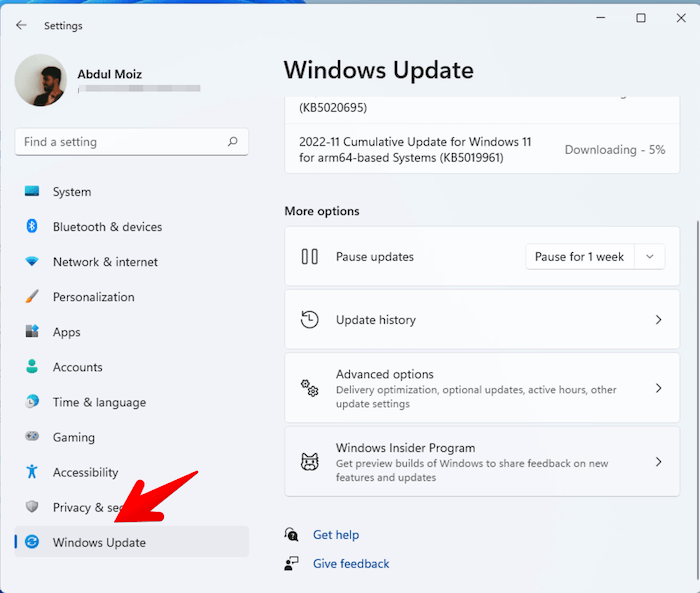
Step 2. Navigate to the Privacy and Security section in settings.
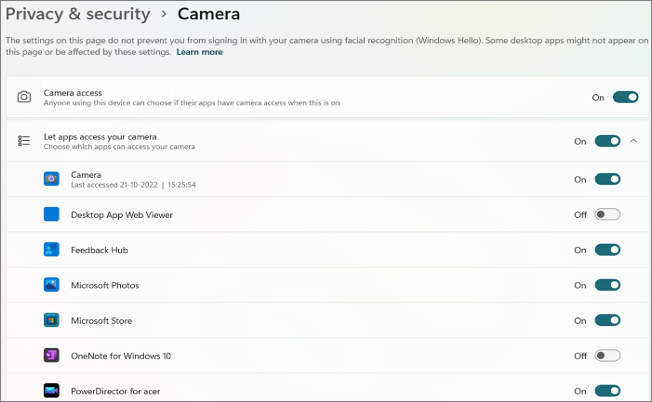
Step 3. In this section, under app permissions, you can see various features like a microphone, camera, etc. Go to the Camera Permissions. Under this tab, you can see multiple options like
- Allow access to the camera on this device: This feature allows the webcam to be enabled for the entire device. If turned off, the device will be unable to perform any operations that require the webcam.
- Choose which apps can access your camera: This section allows you to manually enable or disable webcam access for various apps, including Microsoft apps, and manage their settings.
Now that you know how to configure and manage the webcam settings through the settings, check out the article by Windows Report to personalize your Webcam settings, and let's learn the solutions to fix the integrated webcam not working on Windows 10.
Solutions to Integrated Webcam Not Working on Windows 10
- 1. Update the "Integrated Camera" Driver
- 2. Check for Windows Updates
- 3. Disable and Enable the Camera Driver
- 4. Reinstall the Driver
- 5. Troubleshoot Hardware and Devices
Update the "Integrated Camera" Driver
Drivers play a crucial role in ensuring the smooth functioning of a device by acting as a communication medium between the system OS and hardware. Faulty or outdated drivers can cause hardware components to malfunction, making it essential to perform either automatic or manual updates to prevent issues.
Steps to Update the Webcam driver:
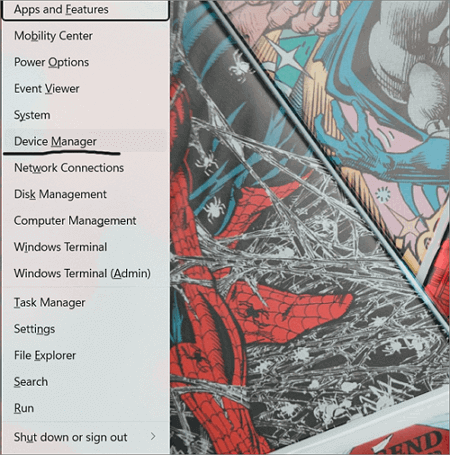
Step 1. To access the Device Manager settings, press the Windows key + X on your keyboard, and then navigate to the Device Manager option.
Step 2. You can find the Camera drivers under the "Camera" icon.
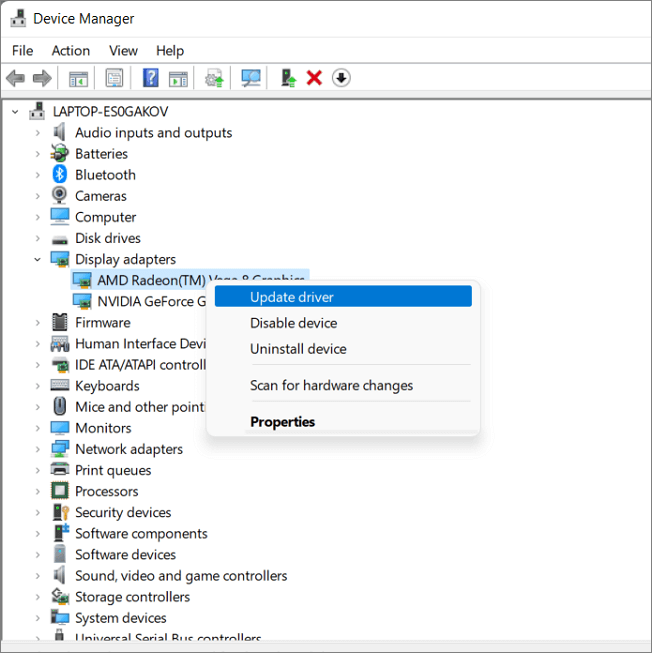
Step 3. Right-click on it and Select Update.
Check for Windows Update
To ensure your OS runs smoothly, regularly check for updates and install the latest versions. This will help your system run software and hardware efficiently.
Step 1. Press Windows + I to open the settings.
Step 2. Navigate to "Update and Security" on Windows 10.
Step 3. Check for the Updates and download the available updates.
Step 4. Restart the device to see the changes.
Disable and Enable the Camera Driver
Disabling and enabling the camera driver has worked for some users as a solution to the issue, allowing them to check if the camera was enabled all along.
Steps to get these things done:
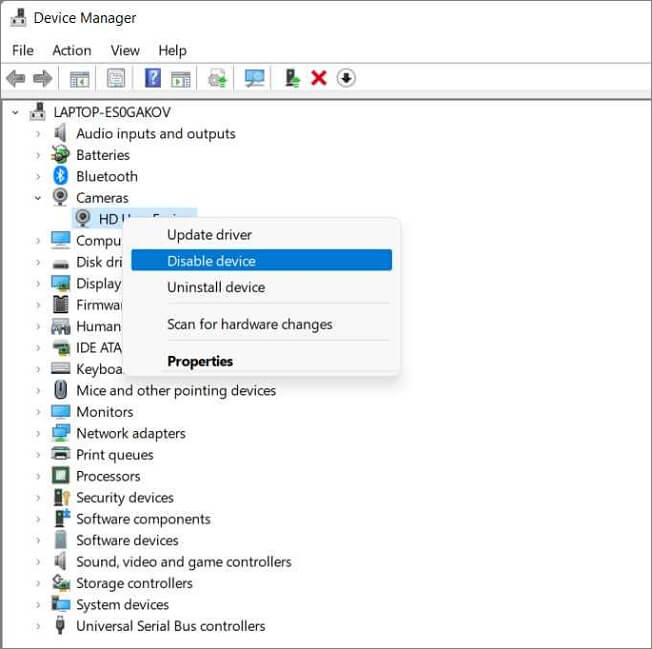
Step 1. Open the "Device manager" using Windows + X keys.
Step 2. Expand the Camera driver and right-click on it.
Step 3. To resolve the issue, click on the "Disable" button first, and then revisit the "Enable" option. This will likely resolve the problem.
Step 4. Restart the computer to see the changes.
Reinstall the Camera Driver
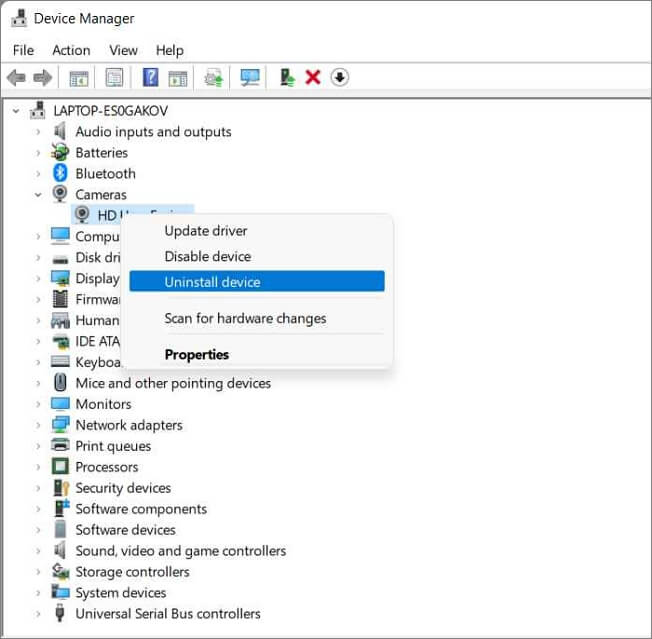
To remove any abnormal files or operations from the driver, you can uninstall it, and the system will automatically reinstall it after rebooting. This process helps to remove any unwanted or corrupted files.
Go to the Device Manager-> Camera-> Right-click on it-> Uninstall.
Check the webcam access now.
Troubleshoot Hardware and Devices
Troubleshooting activities help diagnose errors in computer issues, resolving internal or external software mistakes, and also addressing hardware and device problems.
Steps to run troubleshooting for Hardware and Devices:
Step 1. Open the settings app using Windows + I keys.
Step 2. Navigate to the "Update and Security" section.
Step 3. Run the Windows Troubleshooter for "Hardware and Devices" or "Camera" to resolve the issue with your system's camera not working or showing up.
If the problem persists, refer to Microsoft support for solutions.
Final Verdict
In Windows 10, the integrated camera is often not working due to driver issues. To resolve this, check the webcam settings first, and then update or reinstall the drivers to get the camera working again. This should fix the issue in most cases.
If you're looking for a way to make your home more comfortable and cozy, consider using a space heater. Space heaters are electric appliances that produce heat and can be used to warm up a single room or a small area. They come in a variety of styles, including wall-mounted, floor-standing, and portable models, and can be powered by electricity or other fuels.
Related Articles
- 5 Ways | How to Increase Phone Memory to Fix Insufficient Storage Error
- [Fixed] Right Click Not Responding or Working on Windows 10
- How to Fix Error Code 2003F When Entering Recovery Mode on macOS 13/12/11
- Adobe Illustrator AutoSave, Backup and Protect Illustrator from Crash Error
- 2022 TOP| Corrupt File Repair Software Free Download & Online Free
If you have corrupted files such as JPEG/JPG photos, images, videos, Excel files, Word documents, or zip files, you can use a corrupt file repair software to fix them. You can download a free corrupt file repair tool online or use a software specifically designed for file repair. These tools can help you recover damaged files in both Windows and Mac operating systems. Understanding what causes file corruption and why some files can be recovered can also be helpful. - CPU Comparison Guide: Compare and Choose the Best CPU in 2023
Are you planning to purchase a new CPU? As we all know, the better your CPU is, the faster your computer will run, so how to choose the best and appropriate CPU for yourself? Follow this CPU Comparison Guide, where we compare and choose the best CPU in 2023.