How to Fix Mac Stuck on Checking for Updates [macOS Ventura/Monterey/Big Sur]
Is your Mac stuck on checking for updates when you are trying to update it? Many users, just like you, have reported they cannot update their macOS and only see checking for updates. Here are 7 ways to solve it.
| Workable Solutions | Step-by-step Troubleshooting |
|---|---|
| Fix 1. Restart Your Mac | If your Macbook is performing poorly or suffering from a problem, you should first restart your Mac...Full steps |
| Fix 2. Check Internet Connection | If your internet connection is slow or weak, your Mac will struggle to connect to Apple's server...Full steps |
| Fix 3. Clear the Cache | This solution is also helpful in solving issues such as this. Sometimes these caches...Full steps |
| Fix 4. Boot in Safe Mode | To diagnose and fix a problem with your Mac, use Safe Mode, a simplified version...Full steps |
| Fix 5. Reset NVRAM and SMC | You might be able to fix your Mac that cannot check for updates by resetting NVRAM...Full steps |
| Fix 6. Update macOS with Terminal | If you can't check for updates or your Mac is getting stuck when checking for updates...Full steps |
| Fix 7. Reinstall macOS | If nothing seems to help, reinstall macOS. By reinstalling macOS, you remove...Full steps |
If your Mac gets stuck checking for updates, don't worry - there are ways to resolve the issue. To start, try restarting your Mac in Safe Mode, which can help resolve any software conflicts that may be causing the problem. If that doesn't work, you can try deleting the software update cache, which can help clear out any issues with the update process.
Causes of Mac Being Unable to Check for Updates
Here are three reasons why your Mac might be stuck on the "checking for updates" message:
- Poor internet connection
- Insufficient storage
- NVRAM or the SMC is faulty
Here's more about it:
Reason 1. Problems with the Internet Connection
The macOS update cannot be installed without a poor internet connection.
Ensure you're connected to a fast internet connection and check for updates, which should prompt your Mac to update to the latest macOS version.
Reason 2. Insufficient Storage
If your Mac is running low on storage, you won't be able to install new updates. To resolve this, free up some space on your drive and then try checking for updates again.
Reason 3. NVRAM or the SMC Is Faulty
The NVRAM and SMC on your Mac may be experiencing issues, which could be preventing it from checking for updates.
7 Solutions to Fix Mac Stuck on Checking for Updates
If your Mac is stuck checking for updates, there are seven methods you can try to resolve the issue. These methods include.
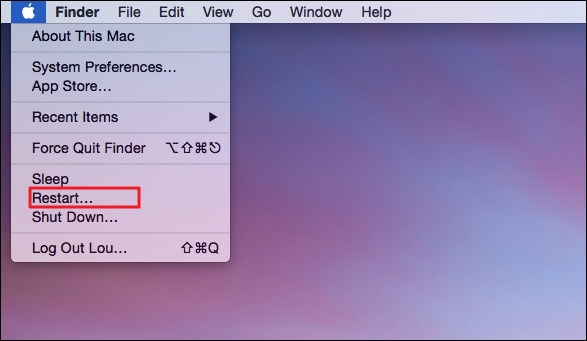
Fix 1. Restart Your Mac
If your MacBook is performing poorly or experiencing issues, start by restarting your Mac, as this can resolve problems by eliminating any software glitches.
If your Mac can't check for updates, try restarting it and then attempt to check for the latest updates again.
Fix 2. Check the Internet Connection
If your Mac's internet connection is slow or weak, it may struggle to connect to Apple's server to check for available updates.
Ensure a stable internet connection by using a LAN instead of Wi-Fi, which can be unreliable.
Fix 3. Clear the App Store Cache and Check the Storage on Mac
Clearing caches can help resolve issues where your Mac is unable to update the operating system or other apps. This can be due to caches preventing the update process. Try clearing caches and see if your Mac can check for updates.
Here's how to clear the cache:
Step 1. Open "Finder."
Step 2. To access the "Go to Folder" option, click on the "Go" button in the menu bar and select "Go to Folder" from the drop-down list.

Step 3. Copy-paste this location "~/Library/Caches/com.apple.appstore" in the search bar.
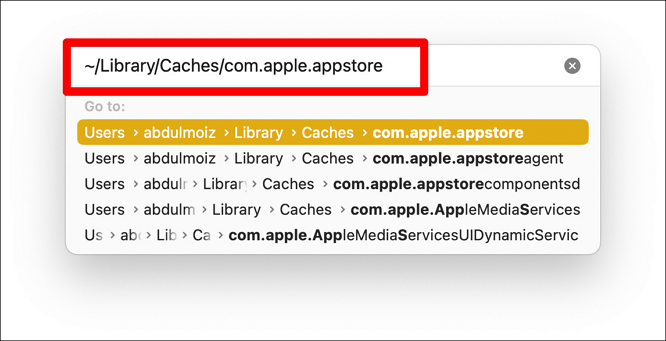
Step 4. Now, select the cache folder and delete it.

Step 5. After deleting the cache folder, restart your Mac and check for updates.
Fix 4. Boot macOS in Safe Mode
To diagnose and fix a problem with your Mac, start it in Mac Safe Mode, a simplified version of the Mac operating system, which loads only essential system software and processes, allowing you to troubleshoot and isolate issues more effectively.
To boot your Mac in safe mode, note that the process differs between Intel-based Macs and Apple silicon-based Macs. On Intel-based Macs, you can boot in safe mode by restarting your Mac, immediately holding the Shift key, and releasing it when you see the login screen. For Apple silicon-based Macs, the process is slightly different: you'll need to restart your Mac, then hold the power button until you see the startup options screen, select your Mac from the list, and click "Continue in Safe Mode" to boot in safe mode.
- Boot macOS in a secure way in the Intel version:
Step 1. Turn off your Mac.
Step 2. Press the power button on your Mac, and while it's booting up, press and hold the "Shift" key on your keyboard. This will boot your Mac in safe mode.
Step 3. 1. Shut down your Mac completely.
- Boot macOS in safe mode in Apple Silicon version:
Step 1. Turn off your Mac and wait for 10–15 seconds.
Step 2. Now, press the power button until you see "Startup Volumes and Options."
Step 3. Select "Startup volume.
Step 4. Press and hold the "Shift" key, and then select "Continue in Safe Mode" while booting up your computer.
Step 5. To update your Mac in safe mode, you can follow these steps: Log in to your Mac as you normally would, then shut it down completely. Next, restart your Mac and immediately hold down the Shift key.
Step 6. Now, exit safe mode and boot your Mac normally.
5. Reset NVRAM and SMC
You might be able to fix your Mac that cannot check for updates by resetting NVRAM and SMC. This process involves resetting the System Management Controller (SMC) and Non-Volatile RAM (NVRAM), which can sometimes resolve issues with the update process.
Here's how to reset the NVRAM:
Step 1. Turn off your Mac.
Step 2. To reset your Mac, turn it on and immediately press and hold the CMD+Option+P+R keys on your keyboard. This will boot your Mac into the Diagnostic mode, where you can run tests and potentially resolve issues.
Step 3. Keep holding the keys until you see the Apple logo.
Step 4. To reset the NVRAM on your Mac, you can simply shut down your computer, then press the power button while holding down the Command (⌘) + Option (⌥) + P + R keys. Hold these keys for 20 seconds, then release them.

Here's how to reset the SMC:
Step 1. Turn off your Mac.
Step 2. To restart your Mac, press the Shift+Option+Control+R keys on your keyboard. This will immediately restart your computer.
Step 3. Keep holding until your Mac turns on and the Apple logo appears.
Step 4. To reset the System Management Controller (SMC) on your Mac, you can follow these steps: Press the power button to turn on your Mac, then immediately hold down the power button until the machine turns off. Next, locate the following keys on your keyboard: the power button, the Command (⌘) key, and the Option (⌥) key.
6. Update macOS with Terminal
To update your Mac using Terminal, first, open Terminal on your Mac. Then, type the command `softwareupdate -all` and press Enter. This will check for and install any available updates.
Step 1. Click on the "Spotlight" button and search for "Terminal."

Step 2. Check for software updates using the command "software update -i."

Step 3. You will see a list of available updates. Write down the names of those updates.
Step 4. To install a software update, enter the command "sudo software update -i " followed by the name of the update you want to install. For example, if you want to install a software update named "update1", you would enter the command "sudo software update -i update1".
7. Reinstall macOS
If nothing seems to help, reinstall macOS. This process removes all software issues, including bugs and other problems, allowing you to start fresh with a clean system.
Reinstalling macOS differs between Intel-based Macs and Apple silicon-based Macs. The process will be demonstrated for both types of devices.
- Here's how to reinstall macOS on an Apple silicon Mac:
Step 1. Turn off your Mac.
Step 2. Press and hold the power button.
Step 3. You will now see a "Startup Options" window. Select "Options."
Step 4. Select "Reinstall macOS" and click on "Continue."
Step 5. Follow the prompts to reinstall macOS.
- Here's how to reinstall macOS on an Intel-based Mac:
Step 1. Turn off your Mac.
Step 2. Immediately after turning on your Mac, press and hold CMD+R until the Apple logo appears on your screen. This will boot your Mac in Recovery Mode, allowing you to access various utilities and options.
Step 3. Select "Options" under the "Startup Options" window.
Step 4. Select the "Reinstall macOS" option and click on "Continue."
Step 5. Follow the prompts and reinstall macOS.
Further Solution: Recover Data When macOS Update Failed
If your Mac doesn't update properly, there's a risk of data loss. Thankfully, with a specialized tool like Deep Data Recovery for Mac, you can recover lost files, giving you a second chance at preserving your data.
If you lost data due to a macOS Ventura upgrade failure, accidental file deletion, or system crashes, you can use Deep Data Recovery for Mac to recover your files.
- This software can recover deleted or missing photos due to various reasons such as a macOS Ventura update, unexpected shutdown, hardware failure, system crashes, virus attacks, or even formatting the macOS.
- It can recover deleted iMessages on Mac on macOS Ventura, Big Sur, Monterey, Catalina, and more.
- The software can create a WinPE bootable CD/DVD to recover a corrupted Mac hard drive.
- It can save recovered data to various storage devices, including HDDs, USB flash drives, and cloud storage services like OneDrive, Google Drive, and Dropbox.
To recover Mac data after an update, follow these steps. First, restart your Mac in safe mode to ensure it boots up properly.
Step 1. Select file types and click "Next" to start
Launch Deep Data Recovery on your Windows computer. Select the file types you want to recover and click "Next" to start the recovery process.

Step 2. Select the location
Select the disk where you lost data after updating to macOS Ventura/Monterey/Big Sur/Catalina. Then, click "Search for lost files" to initiate the recovery process.

Step 3. Find lost data after the scan
Deep Data Recovery for Mac scans the selected disk volume, displaying the scanning results on the left pane, allowing users to find wanted data using file type and file path.

Step 4. Recover data after macOS update
Select the target files that were unknowingly lost during or after the update and click the "Recover" button to retrieve them all.
Final Thoughts
Apple's Mac is a powerhouse of a computer, boasting impressive performance capabilities. Yet, despite its robustness, it's not immune to issues or bugs, just like other operating systems.
If your Mac is stuck on checking for updates, it might be due to a software problem, which can be resolved by restarting or using the methods outlined above.
Mac Is Stuck on Checking for Updates on FAQs
The issue with your Mac getting stuck on the update check is likely due to a problem with your internet connection, a software issue, or a hardware problem. Try restarting your Mac, checking your internet connection, or running a System Report to identify any hardware issues.
1. How do I fix my Mac update taking forever?
If the update is taking longer to download than expected, it's likely that your internet speeds are slow. Try switching to a faster internet connection to get the update downloaded more quickly.
If the update is taking longer than usual to install, it's likely a significant update that requires more time to complete. Be patient and allow it to finish installing.
2. How to fix the macOS upgrade that failed?
If you're unable to upgrade your macOS, ensure you have enough space on your hard drive. If you still encounter issues, refer to the previous solution for a fix.
3. Why does my Mac get stuck on checking for updates?
If your Mac is stuck on checking for updates, it's likely due to a slow internet connection, but if you're connected to a fast internet connection, it could be an underlying issue. To fix this, follow the solutions provided above.
4. How do I force an unresponsive Mac to restart?
Press and hold the power button on your Mac until the display goes black.
Related Articles
- A Beginner's Guide | How to Install Hard Drive in PC?
- How to Fix It: Your Hard Drive Is Full Battle Net
- How to Format a Disk on Mac? 2023 Step-By-Step Guide
- Fixed: CHKDSK Failed to Transfer Logged Messages to the Event Log with Status 50
- How to Recover Deleted Files/Photos on Phone from Hide it Pro
If you've lost photos, pictures, or files from Hide it Pro, this page can help you recover them. Using powerful recovery software, you can easily retrieve deleted files and photos from Hide it Pro on your mobile phone in just 3 simple steps. - Best Guide to Recover Forgotten Blizzard Password
Forgot your Blizzard password? No need to worry. In this article,we will give you methods of how to recover forgotten Blizzard password. Choose the way that fits you best.