4 Proven Ways to Fix Zsh Permission Denied in Terminal on macOS Ventura/Monterey
About Zsh Permission Denied Error
You would use Z shell (Zsh) scripting due to its comprehensive and reliable features, apart from a decent customized. Undoubtedly, Zsh has always been greater than Bash. Hence, as a Mac user, you would prefer it. While opening a file, you often encounter the Zsh permission denied in the macOS Ventura/Monterey Terminal. We have covered you all with it.
The Zsh Permission Denied error on the Terminal on your Mac is not a significant issue, but it can occur due to configuration problems or errors while opening it.
Here are the causes leading to the Zsh permission denied error:
- File is Locked. When trying to open a file, you may encounter permission issues if the file owner has locked it using the chmod command. This can prevent you from accessing the file, leading to potential problems.
- Incorrect Commands. It might also be that you have used incorrect commands to open it, or made an error while using chmod x, which could be causing the issue.
How to Fix Zsh Permission Denied in Terminal
To fix the Zsh permission denied error, you can try running the command with elevated privileges using `sudo` or `su`, or you can change the permissions of the file or directory using `chmod`, or you can use `chown` to change the ownership of the file or directory to your user. If none of these solutions work, you may need to investigate further to determine the root cause of the error.
| Workable Solutions | Step-by-step Troubleshooting |
|---|---|
| Fix 1. Check the File Permissions | Go to Terminal and type in ls -l command. Make sure to add a space...Full steps |
| Fix 2. Give Full Access to the Disk | Press on the Apple logo at the top-left corner and select System Preferences...Full steps |
| Fix 3. Change Directory's Ownership | You can change the directory's ownership, which would help you fix the...Full steps |
| Fix 4. Use a SUDO Command | There is a superfix that's legitimately a rescue to fix permission...Full steps |
Fix 1. Check the File Permissions Using Terminal on Mac
To check disk permissions via Mac Terminal, open Terminal and type the command "ls -l" followed by the path to the directory you want to check. For example, if you want to check the permissions of the user directory, you would type "ls -l /Users/your_username". This will display the permissions for the directory and its contents.
Follow the steps given below to check disk permissions.
Step 1. To list the contents of the current directory in a long format, type the command `ls -l` in Terminal, add a space after it, but do not press Enter yet.
Step 2. To open a file using Terminal, drag the file you want to open into the Terminal window and press the Return key.
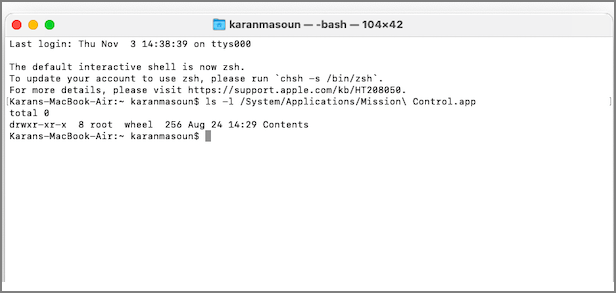
To check the file permissions, look for your username on the results screen. If RWXR is beside it, you have the required file permissions. If you see R, you have read-only permissions.
Fix 2. Give Full Access to the Disk to Fix Zsh Permission Denied
If you're encountering the Zsh permission denied in terminal error while trying to open a file, it's likely because the file hasn't shared full access with the disk. This means the file's permissions are restricting your access to it.
Here's how you can do so:
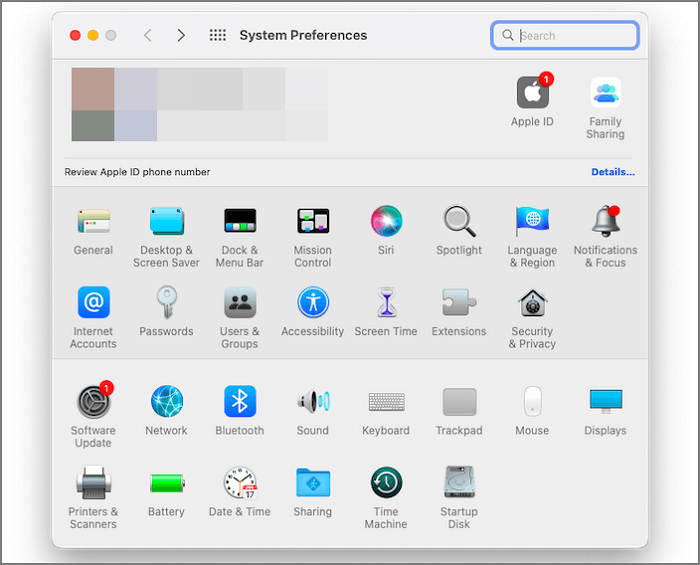
Step 1. To access System Preferences on a Mac, click on the Apple logo at the top-left corner of the screen and select System Preferences from the resulting drop-down menu.
Step 2. Go to Privacy and Security and navigate to Privacy.
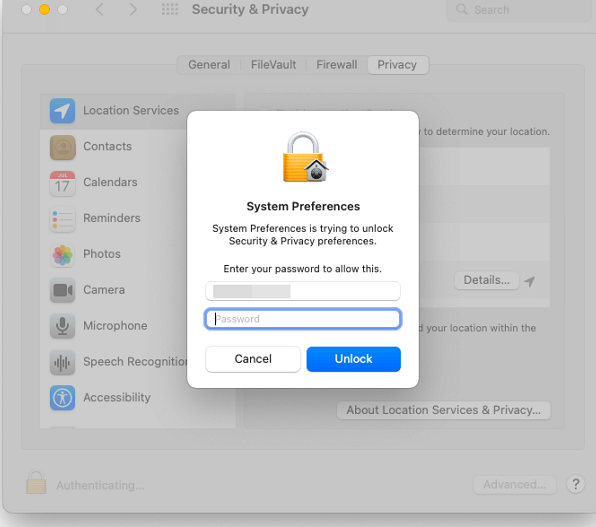
Step 3. To access your computer, click on the padlock icon located at the bottom left side of the window, and then enter your user password.
Step 4. After entering your admin credentials, a list appears checkbox Terminal.
To give your disk full access, you can follow these steps: If Terminal is not in the list, click on the plus-shaped icon and search for Terminal. Then, type the following command in Terminal: `sudo chmod 755 /` and press Enter. This will give the disk full access. After making this change, close the Terminal window to reflect the changes.
Fix 3. Change the Ownership of the Directory on Mac/MacBook
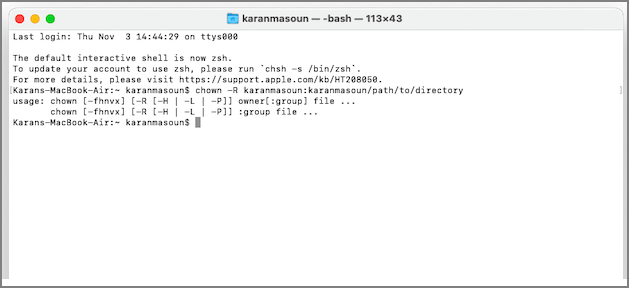
To resolve the Zsh terminal issue without encountering errors, you can change the directory's ownership. This involves running the command `chown -R [username]:[username] /path/to/directory`, replacing `[username]` with your actual username and `/path/to/directory` with the actual path to the directory in question.
To change the ownership of a directory to the current user, open the Terminal and run the command `chown -R $
Fix 4. Use a SUDO Command to Fix Zsh Permission Denied
If none of the above solutions work, you can rely on Sudo commands to fix permission denied on Mac. Sudo is an acronym for Superuser do, which grants superuser rights to the allowed user. However, you'll need to know the password of the user you're currently logged in as, as this is the first time you've used the command. If you've forgotten the password, you can reset it first.
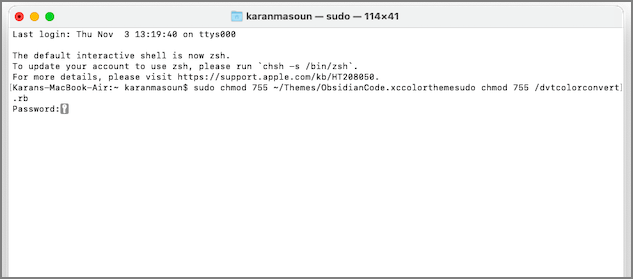
Below is an example of a SUDO command you can use in Terminal:
sudo chmod 755 ~/Themes/ObsidianCode.xccolorthemesudo chmod 755 /dvtcolorconvert.rb
To prevent the Zsh permission denied error from occurring in the future, you can use the `sudo` command to run the `chsh` command with elevated privileges. This will allow you to change the shell without encountering the permission denied error. For example, you can run `sudo chsh -s /bin/zsh` to change the default shell to Zsh.
How to Avoid Zsh Permission Denied Error on Mac
You can avoid the Zsh permission denied error in three practical ways. Firstly, always run the command with sudo to gain administrative privileges.
- Grant Access Privileges to Users and Groups
- Change the Owner of the File
- Add or Remove a User or Group.
To avoid errors, each of the following techniques can be implemented: using a consistent naming convention, using a consistent indentation scheme, using a consistent spacing scheme, using a consistent line length, using a consistent number of blank lines, using a consistent placement of comments, using a consistent placement of whitespace, using a consistent placement of punctuation, using a consistent placement of keywords, using a consistent placement of operators, using a consistent placement of parentheses, and using a consistent placement of brackets.
Fix 1. Grant Access Privileges to Users and Groups
The Zsh terminal error can be caused by access privileges, and granting review access to multiple users and groups can resolve this issue. This means that even if you have given review access, you can still avoid the error if it's due to user access.
To grant access privileges to users and groups, follow these steps:
Step 1. To get the file info, open the file, click on the file label, and select Get Info from the drop-down menu.
Step 2. Press the lock icon to unlock it.
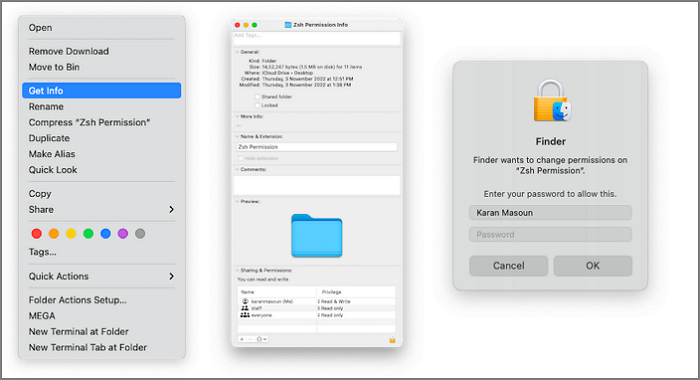
Step 3. The system will prompt you to enter your admin name and password.
Step 4. In the Name section, click on user or group, choose Privilege settings and select one.
Each privilege has a specific meaning. Selecting "read" gives the user/group the right to read but not modify. Choosing "write only" allows moving/copying the file but not viewing it. Therefore, selecting "read and write" allows both reading and editing.
Fix 2. Change the Owner of the File
If someone else owns the file, that can reset the error, and changing the owner can avoid it.
Follow the steps given below to change the owner of an item:
Step 1. To open the file, click on the File label located at the top-left corner of the file.
Step 2. Select Get Info from the drop-down menu.
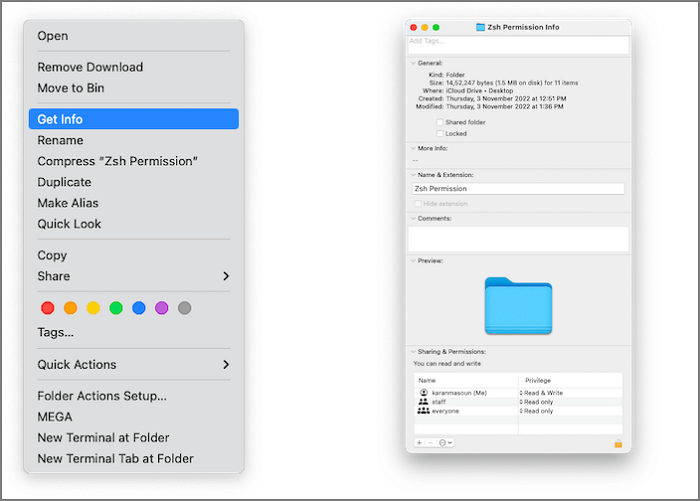
Step 3. To add an owner to the list, click on the + icon located in the submenu and enter the owner's name in the field that appears.
Step 4. Click on Make as the owner and press the Save button.
Fix 3. Add or Remove a User or Group
To resolve the Zsh permission error, you can remove any unnecessary users or groups with File permission access. This can be done to prevent the issue from occurring. Alternatively, adding a user or group to check if it resolves the problem can also help avoid file access-related issues. By controlling file access, you can prevent permission errors from happening in the first place.
Step 1. To get the file info, open the item, click on File and select Get Info from the drop-down menu.
Step 2. Now, navigate to Sharing and Permissions.
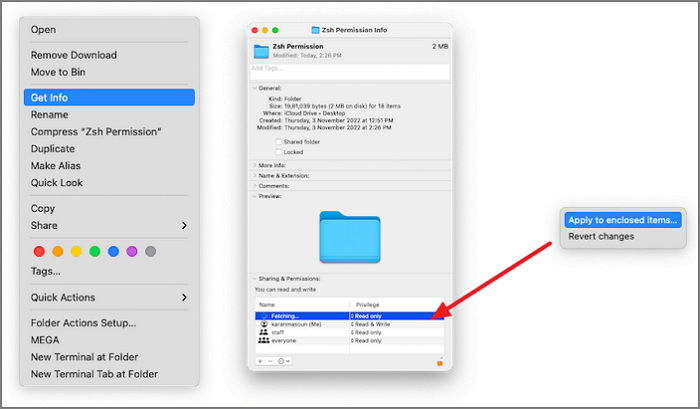
Step 3. Click on the - icon to remove a user, or click on the + icon and add one.
Step 4. Press the Apply Changes button.
Bonus Tip: Recover Lost Data Because of Mac Errors
You may encounter various Mac errors such as no startup disk, inability to open or delete files, and risk losing data in the process. These issues often stem from system malfunctions, including Zsh permission denied errors or file-related problems, making your system more susceptible to them. However, the good news is that you can recover your lost data.
The Mac Data Recovery Software, Deep Data Recovery for Mac, allows you to recover lost data. It's a reliable, efficient, and user-friendly solution.
- Recover deleted pictures, documents, videos, audio, music, and emails effectively.
- Need to recover data from a Mac hard drive, SD card, NAS, camera, or other device? Our service can help with that.
- Support data recovery for sudden deletion, formatting, hard drive corruption, virus attack, etc.
You can recover lost data due to Mac errors with Deep Data Recovery for Mac.
If you've lost data on your Mac, don't worry! Our step-by-step guide will help you recover lost data with just one click.
Step 1. Select file types
Launch Deep Data Recovery software, select the desired file types, and click "Next" to initiate the recovery process.

Step 2. Select the drive to be scanned
Select the drive you need to recover lost/deleted files from, and click the "Scan" button in the main Deep Data Recovery window where a list of the drives connected to your Mac is displayed.

Step 3. Select your lost data/files
Deep Data Recovery for Mac will immediately scan your selected disk volume and display the scanning results on the left pane, allowing you to sort and find specific files if needed.

Step 4. Recover lost/deleted data
Once you have found the desired files, preview them and then click "Recover" to initiate the recovery of your deleted/lost Mac files.
Summary
If you're experiencing Zsh Permission Denied issues in Terminal on macOS Ventura/Monterey, you can resolve the problem by checking the disk permissions and modifying them if necessary, changing the directory ownership, or using Sudo commands to gain the required permissions.
Qiling Mac Deep Data Recovery is a tool that can be used to recover deleted files on a Mac, helping to rescue data in scenarios where errors like this occur and data might be lost.
Zsh Permission Denied FAQs
The Zsh permission denied error is a common issue that occurs when you try to execute a command or access a file in Zsh, but you don't have the necessary permissions. To fix this error, you can try running the command with sudo, or changing the ownership of the file to your user. You can also check the permissions of the file and directory using the ls command.
What is Zsh Shell on Mac?
Zsh shell is a type of Unix shell in Mac that incorporates features from tcsh, ksh, and Bash, known as the extended Bourne shell with more advancements. It's recommended to install another API to deal with its comprehensive setup.
How Do I Fix Zsh Command Not Found on Mac?
When you encounter the Zsh command not found on Mac, it's likely due to entering a wrong command. Double-check the command. If it's correct, try setting the path as default macOS. If that doesn't work, consider backing up your Mac and reinstalling it.
How Do You Fix Zsh Permissions Denied on Mac?
To resolve Zsh permissions denied on a Mac, check the disk permissions and grant full access if needed. If that doesn't work, try changing the ownership of the directory or using Sudo commands, following each method sequentially.
How Do I Fix Zsh Permission Denied in Terminal Linux?
To resolve the Zsh permission denied error in Terminal Linux, you can modify the file's permissions using the chmod command with sudo access, or use the Sudo command to make changes as the root user. This allows you to add full access to the file or program, resolving the permission issue.
Related Articles
- Disk2vhd: Detailed Introduction to Convert Physical to Virtual Machine
- How to Solve Hard Disk Error 303 and 305
- What Is CDR File and How to Open & Convert It? [Full Description]
- How Do I Format USB Drive on Linux? Linux Beginners in 2023
- Disk Utility First Aid Process Has Failed [with 5 Proven Ways to Fix It]
Fix First Aid process has failed in Mac Disk Utility. Learn causes, repair options, backup steps, and when data recovery is needed. - How to Fix D3dcompiler_43.dll Not Found [Updated 2024]
Are you facing d3dcompiler_43.dll not found issue on your PC? Then follow this easy guide on how to Fix D3dcompiler_43.dll Not Found